
Now that your school is set up and your website is looking polished, it’s time to create your very first course. This guide will walk you through using the Course Creation Wizard, adding learning activities, setting up course access, and managing your course from the Course Manager.
Step 1: Use the course creation wizard
The Course Creation Wizard helps you set up the basics of your course in just a few clicks.
Go to Courses & Programs → Courses → Create Course.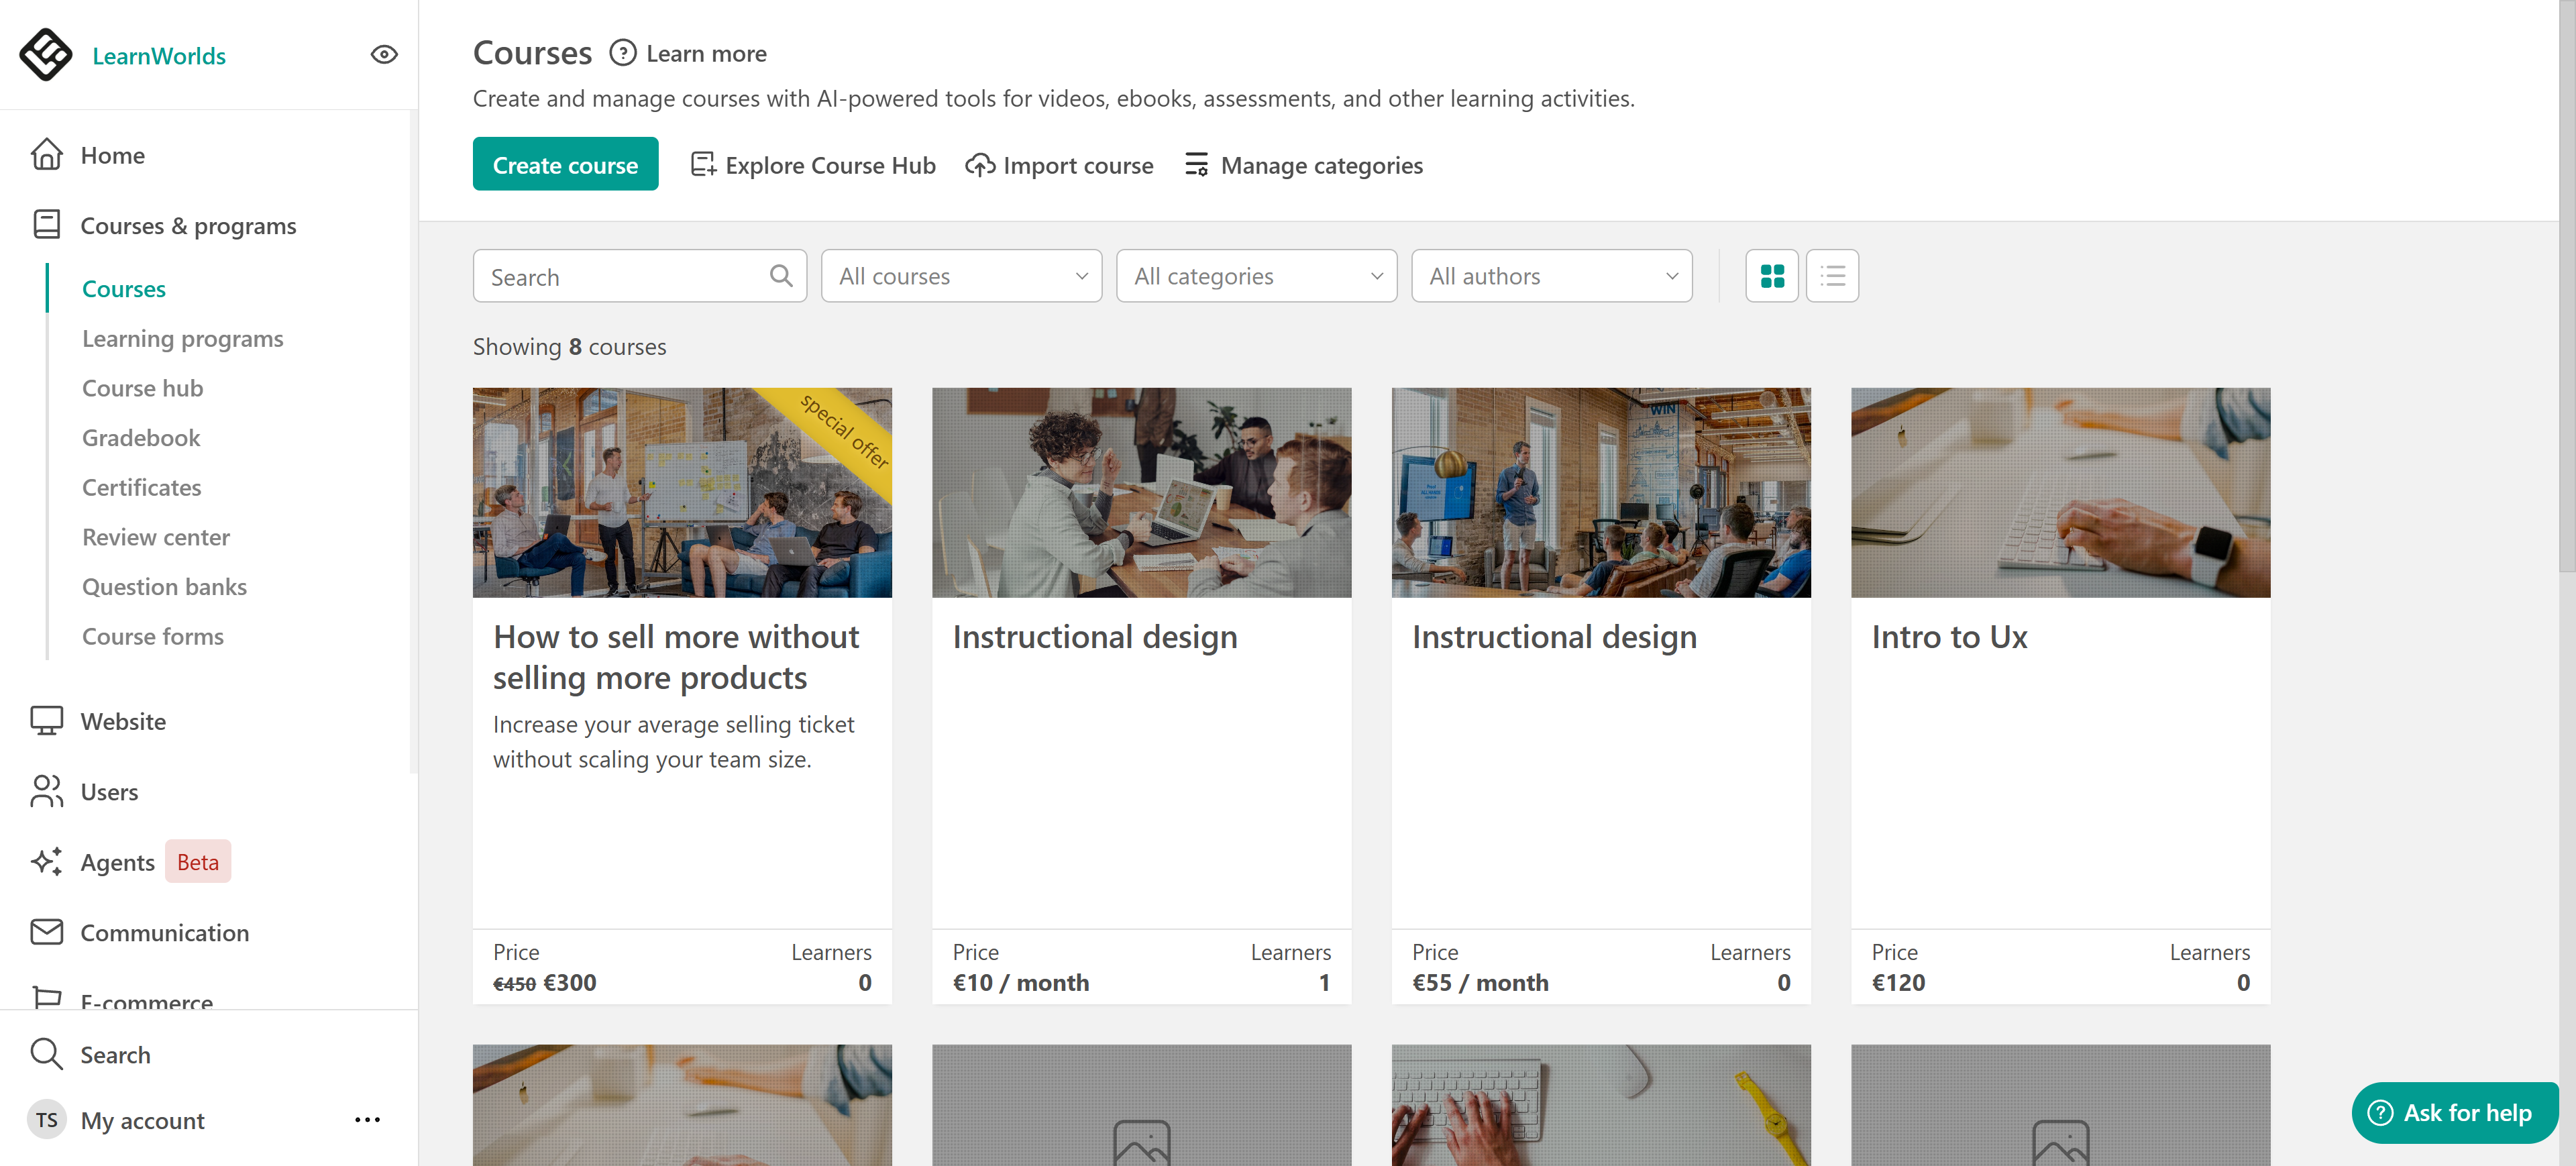
Choose how you want to create your course:
- Create course: Set up your course manually, including its basic information, pricing, and access settings.
- Create course with AI: Describe what you want to teach and let AI help you generate a course outline and learning activities.
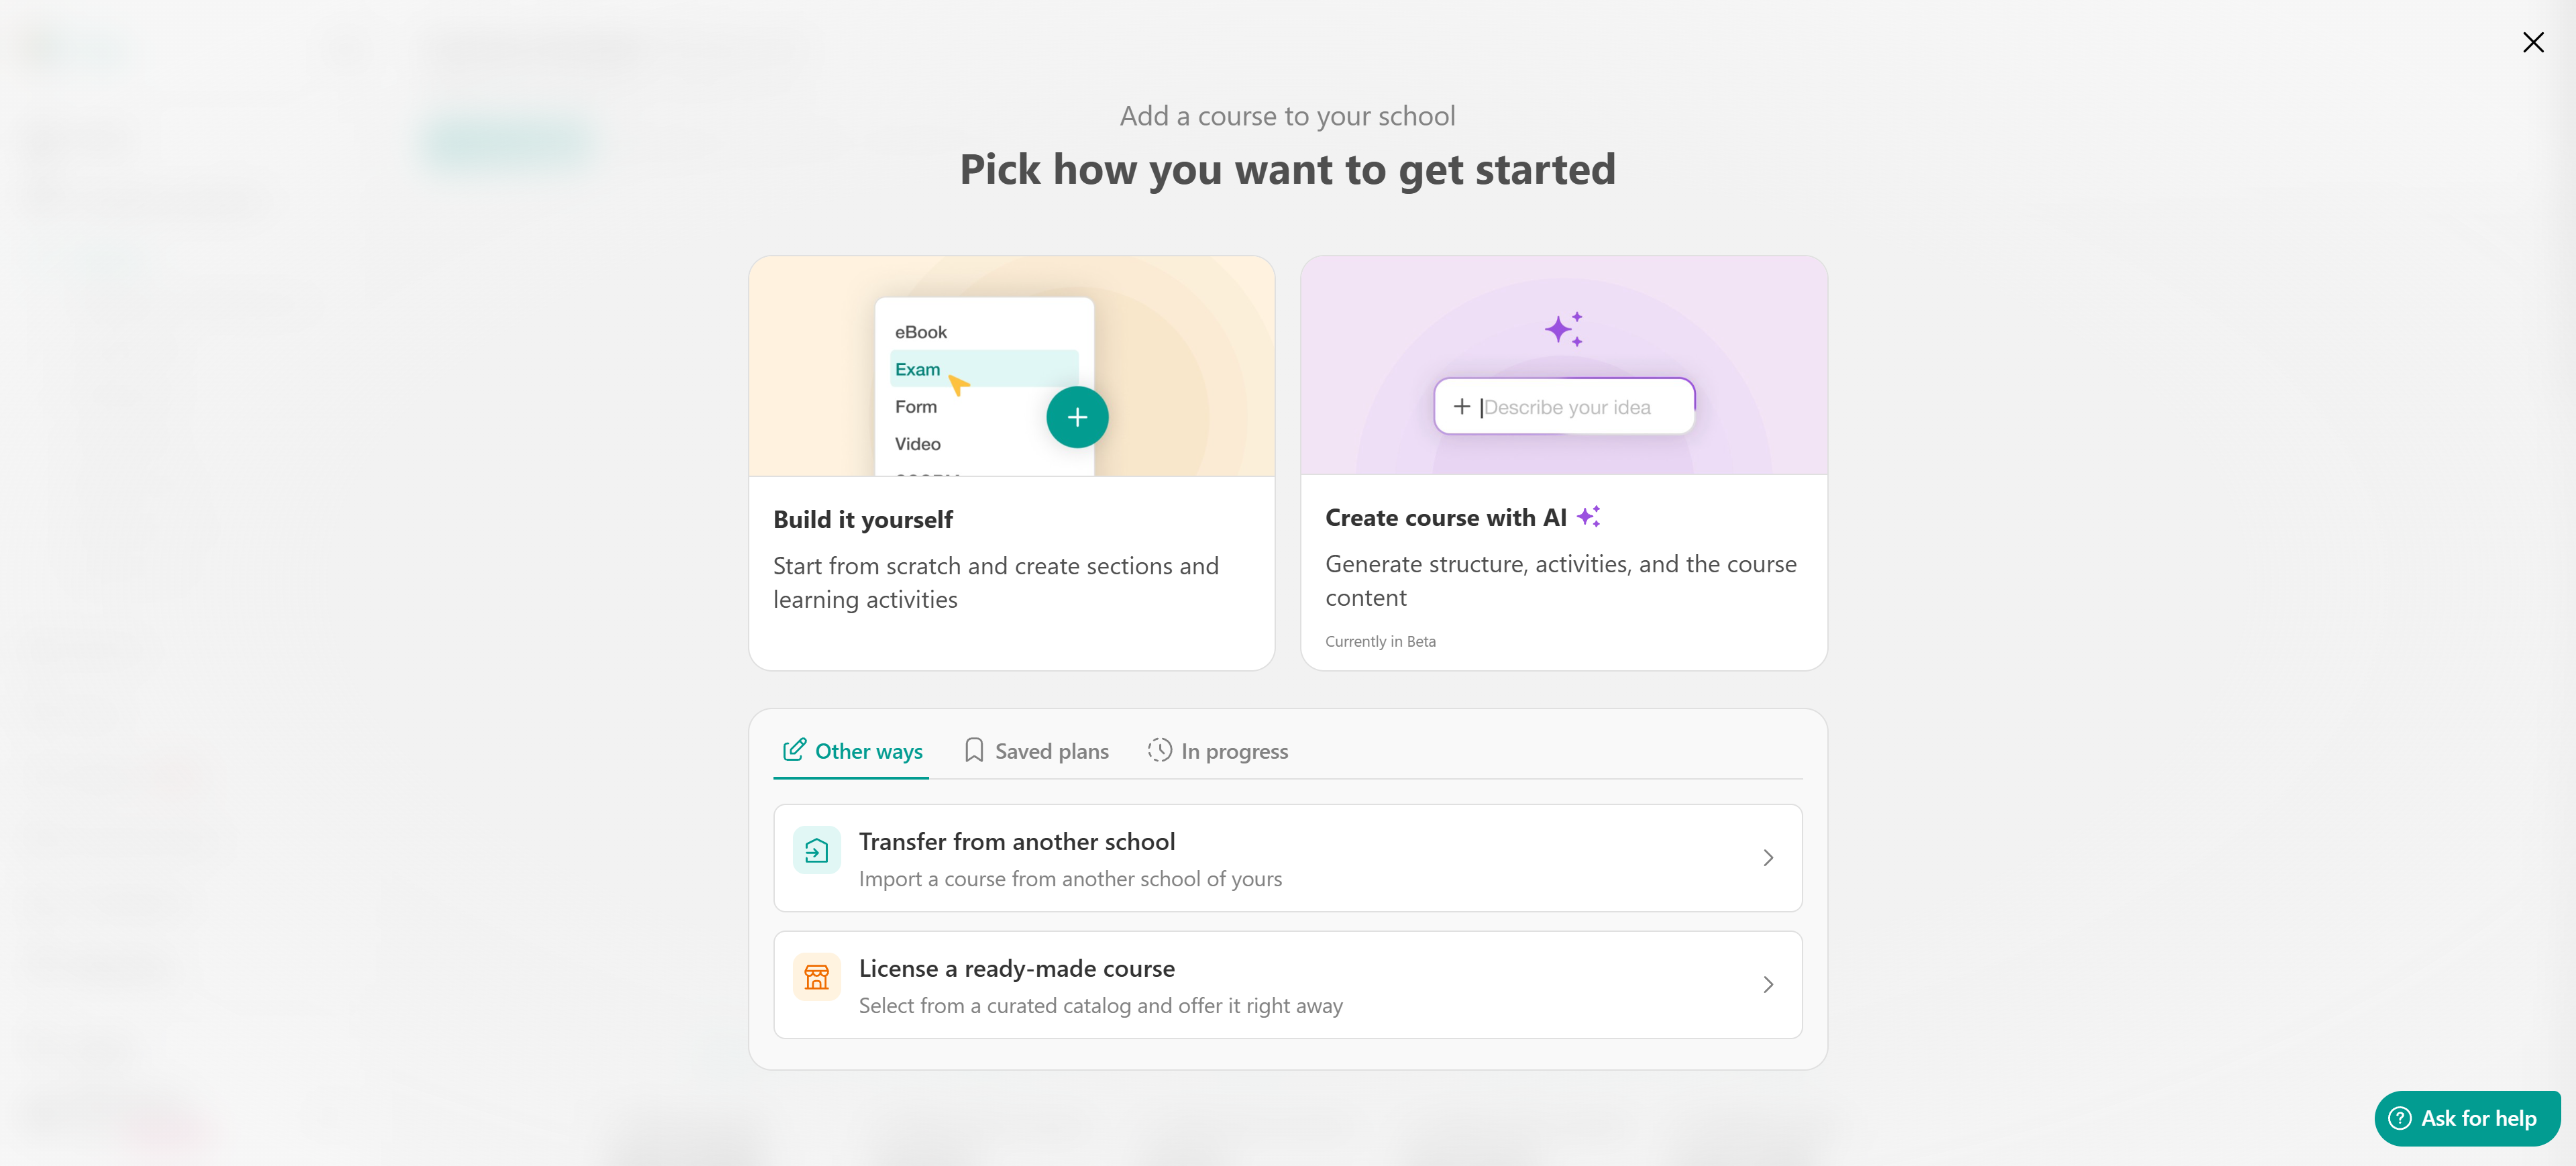
If you choose to create your course manually, the Course Creation Wizard guides you through the initial setup. What to do:
Enter a Course title (e.g., “Introduction to Digital Marketing”).
Write a short Course description to let learners know what they’ll gain.
Add a Course card image (this will appear on your school’s catalog and homepage).
Create the Course URL (a unique link for your course).
Select your Course Access between Draft, Public, Private, and Coming Soon (you can change this later).
Choose a pricing option and set its price.
Choose a page layout template (either the default or one from an existing course).
Once you hit Finish, the course shell is ready for you to add learning activities.

Advanced Tip:
If you want to better organize your courses and elevate your school, Learning Programs are the way to go. With Learning Programs, you can bundle multiple courses into either a structured learning path or a simple course collection. This is perfect for guiding learners through progressive skills, certifications, or role-based training.
You can even use them to suggest the right course sequences to your users or sell multiple courses in a single package. Learning Programs are available on the Pro Trainer plan and above.
How to create a course with AI in LearnWorld »
How to create Learning Programs in LearnWorlds »
Step 2: Add and organize learning activities
Learning activities are the building blocks of your course. They allow you to deliver content, assess knowledge, and engage learners through different learning experiences.
In LearnWorlds, courses are organized into sections, which contain individual learning activities.
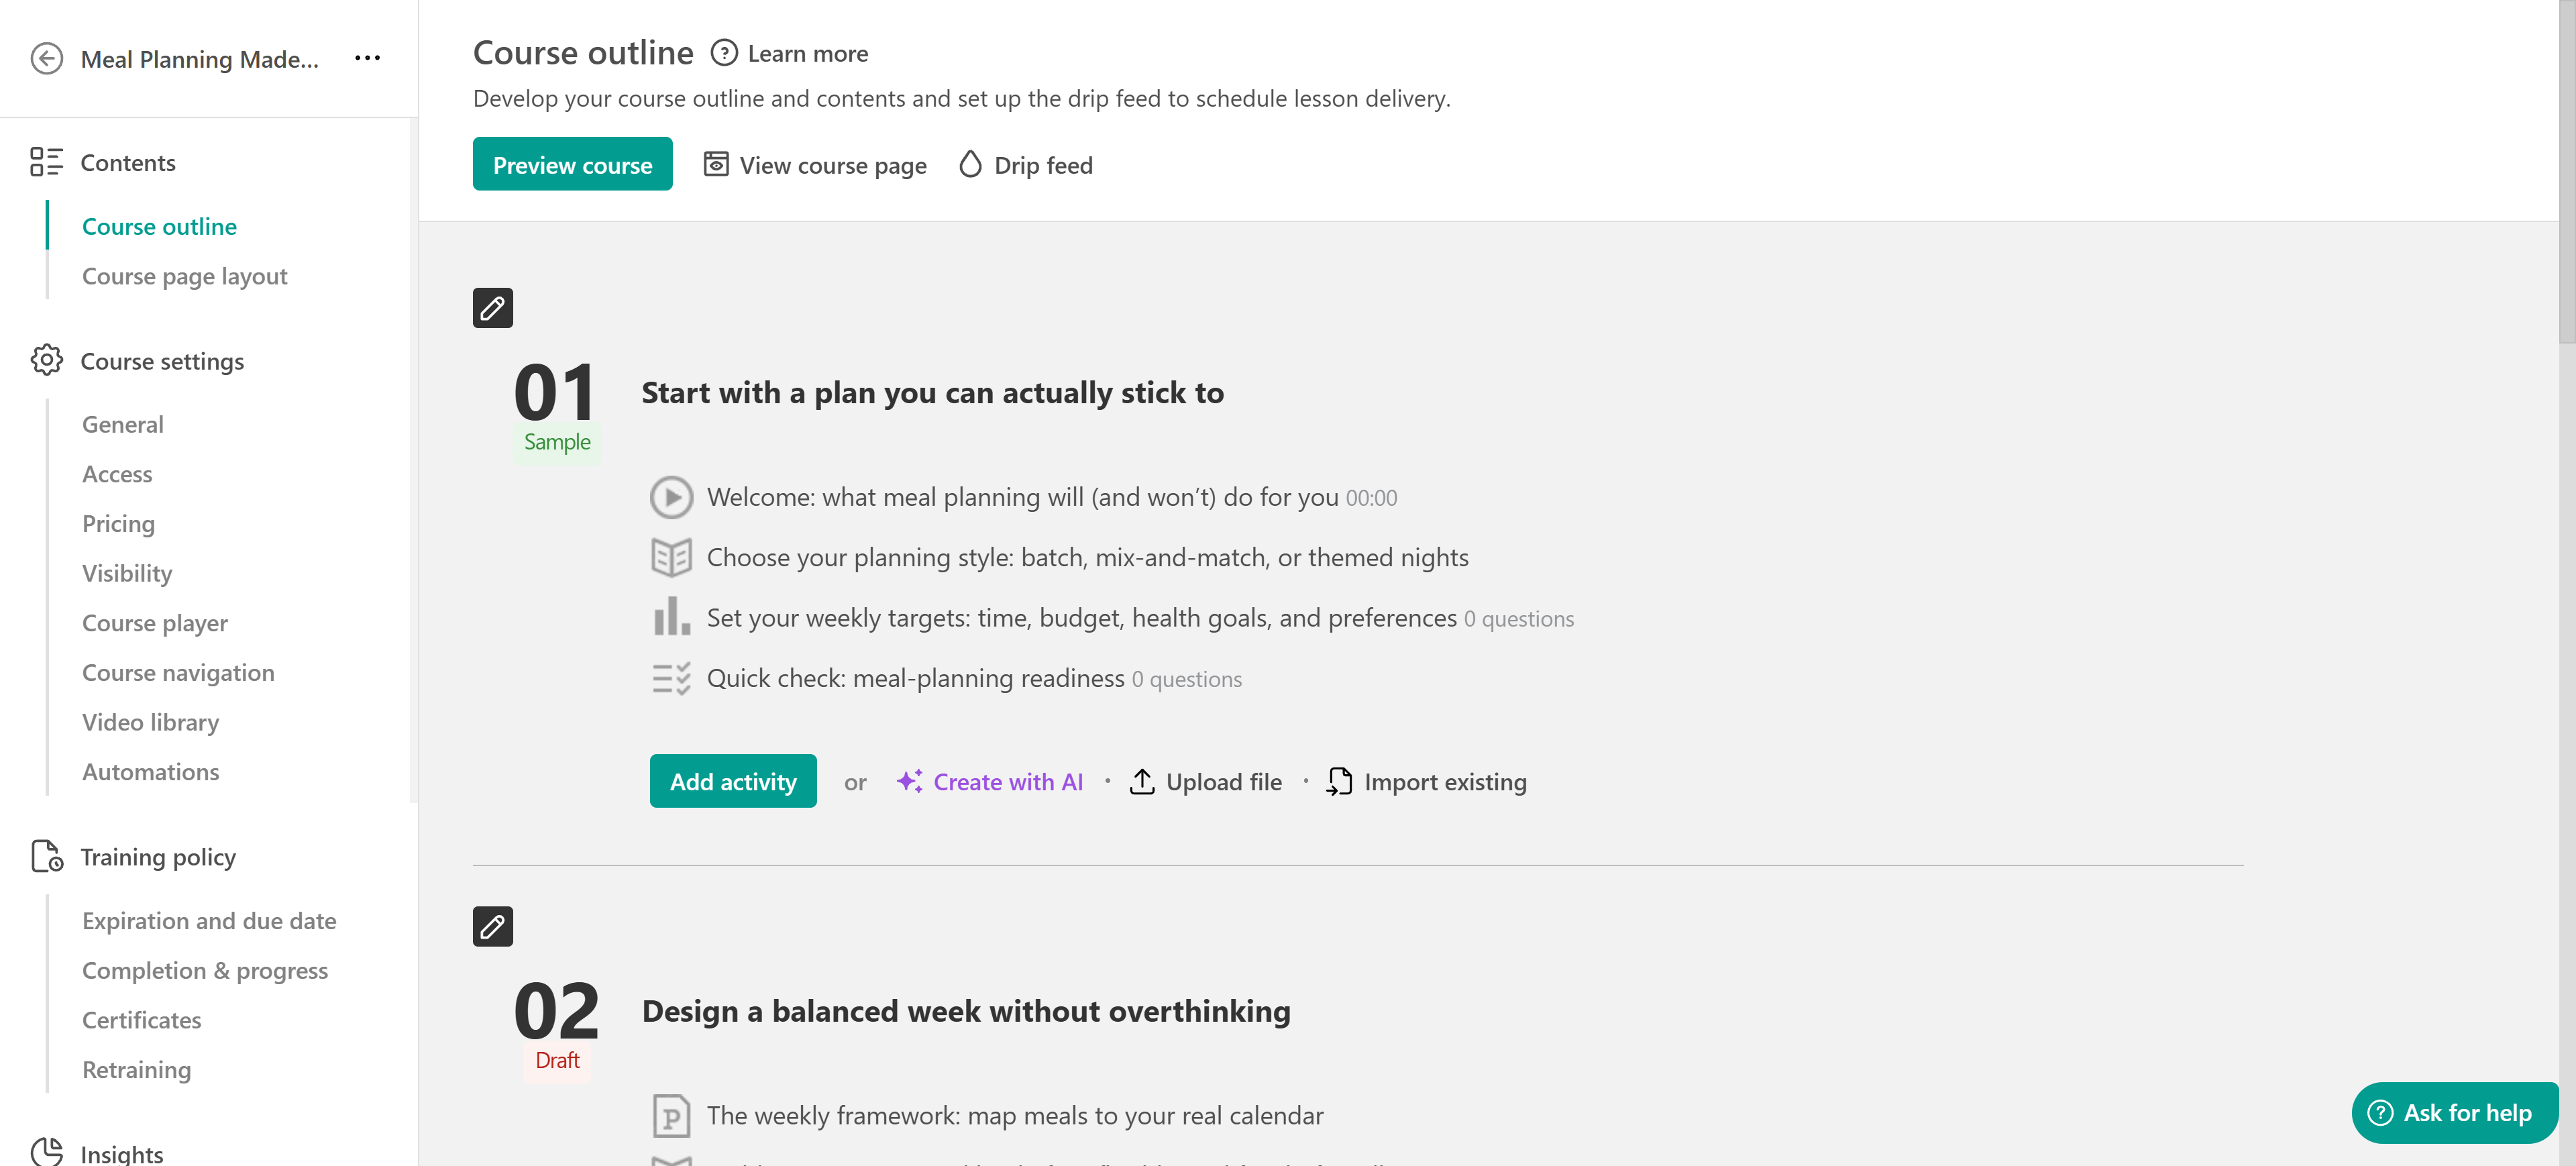
Go to Courses & Programs → Courses → [Your Course] and click on Course outline under Contents.
Examples of activities you can add:
Videos – Upload your own or embed from YouTube/Vimeo.
Ebooks & PDFs – Add text-based learning material.
Assessments – Create exams, quizzes, or self-assessments.
SCORM/HTML5 – Import interactive learning packages.
Live Sessions – Host webinars or 1:1 coaching via Zoom, Webex, Microsoft Teams, and Google Meet.
If no sections exist, add one first. Then click Add, Import, or Upload Activity.

Beginner tip: Start simple, add one or two activities (e.g., a video and a short quiz) before building more.
Advanced Tip: Use interactive video (add questions, buttons, or feedback inside videos) to increase learner engagement.
How to use sections to organize your course content »
Learning activities supported by LearnWorlds »
Step 3: Configure course pricing and access
Before going live, you’ll need to decide who can access your course and when.
Go to Courses & Programs → Courses → [Your Course] and click on Access under Course settings.
Key course access statuses
Draft – Keep your course unpublished and invisible while you build and refine it.
Public –
Private – Restrict access so only manually enrolled users can view the course, keeping it hidden from catalogs.
Coming Soon – Display your course in your school to build anticipation, but keep enrollment closed until launch.
Enrollment Closed – Prevent new enrollments while still allowing existing learners to access the course.
You can also configure additional settings, such as course expiration and due date, under the Expiration and due date tab.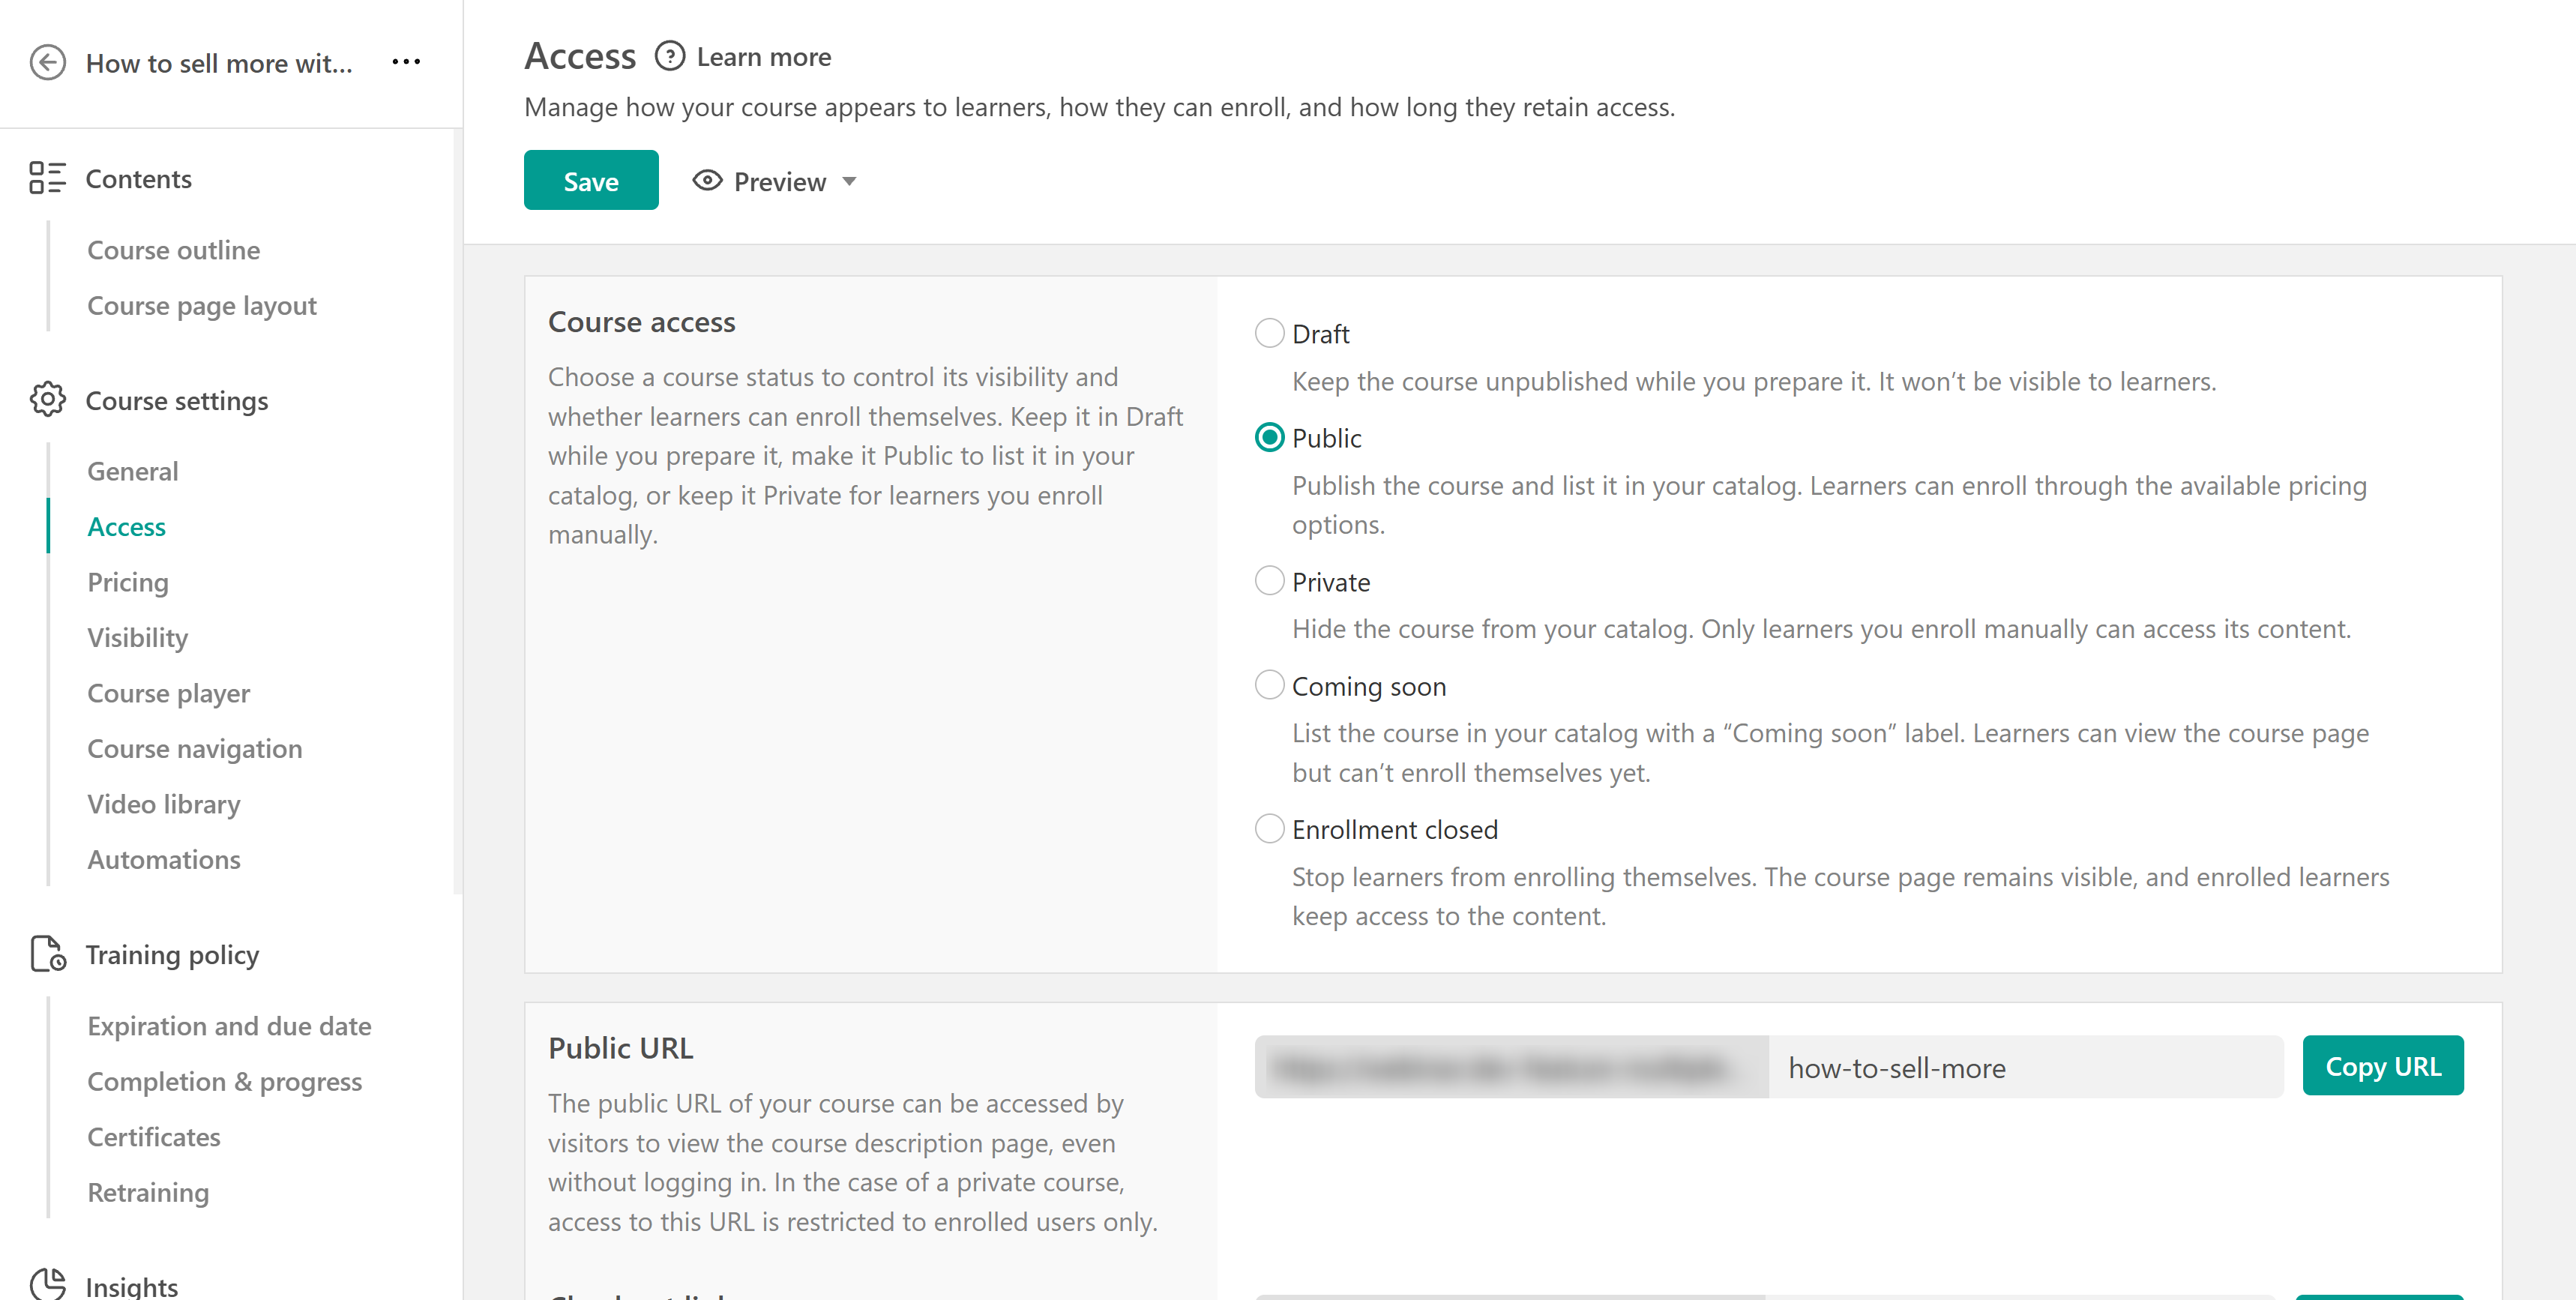
Advanced Tip: Use drip-feeding to release course content gradually (e.g., one module per week). Perfect for cohort-based learning or training programs.
Different course statuses in LearnWorlds »
How to set a product expiration date »
How to drip feed your courses »
How to set and manage course due dates »
Step 4: Manage and preview your course
Once your course is created, you can manage everything from the Course Manager.
Go to Courses & Programs → Courses.
Here you can:
See all courses in one view.
Select a course to edit the course details (title, description, SEO settings).
Manage course order and categories.
Check learner enrollments.
By opening a course, you can manage its settings and content, including:
Adding course material to expand or update your content.
Editing general settings such as the course title, description, and SEO.
Setting up pricing options if the course is paid.
Set completion rules to define when a learner has finished the course.
Customize course navigation and the course player to customize the learning experience.
Reviewing insights and user progress to track performance and engagement.
Advanced Tip: Use the SEO settings for your course to optimize its visibility on Google and attract more learners.
How to Manage Courses with Course Manager »
How to Configure Course SEO »
How to Change the Order of your Courses »
How to Organize your Courses by Categories »
How to Customize your Course Player and Course Navigation »
Quick recap checklist
| Setup Tasks | |
|---|---|
| Create your first course manually or with AI | ✔️ |
| Organize your course into sections | ✔️ |
| Add learning activities | ✔️ |
| Configure course pricing and access | ✔️ |
| Review your course settings | ✔️ |
| Preview your course in the Course Player | ✔️ |
Beginner essentials: Your first course
If this is your very first time creating a course, you don’t need to set up every option right away. Focus on these basics to launch quickly:
Create your course – Use the Course Creation Wizard to add a title, a course card image, and a short description.
Add a video – Upload or embed one video lesson (this is the easiest way to get started).
Add a quiz or exam – Create one simple assessment so learners can test their knowledge.
Set course access to Paid, Free, or Private depending on your plan.
Preview your course in the course player to ensure that everything is working as expected.
With just a title, one video, one quiz, and the published status, you have a functional course ready to share.
When you’re ready to expand, you can:
Add more activities like ebooks, live sessions, or SCORMs.
Configure expiration dates.
Use drip-feeding to release lessons gradually.
Improve your SEO settings so learners can find your course on Google.
You can group your courses into learning programs! A learning program allows you to group multiple courses and offer them as a single product. It’s ideal for creating structured learning paths, packaging related courses into one offer, or simplifying the enrollment process for learners. Instead of enrolling in each course individually, learners can access all content in one place, often at a bundled price.
This setup is especially useful for:
-Schools and businesses delivering organized training tracks.
-Educators and creators packaging themed course bundles.
-Teams and organizations monitoring progress across multiple courses.
What’s next?
Well done! You’ve created your first course in LearnWorlds.
Up next: Quick Start Guide 5: Set Up Payments
You’ll learn how to configure pricing, choose your preferred payment methods, and test your first sale so you can start earning from your courses.