Google Developer Account Settings
In order to set up your Developer Account settings, you need to follow the steps below:
1. Login with your Google Account in the Google Cloud Platform and choose your project. You can either choose an already existing organization or create a new project. To create a new project, you can read the relevant instructions in the Google article here.
2. Click APIs & Services.
3. Navigate to the Branding tab and fill in needed details like App information, App logo, Domain, and Authorized domains.
Once ready, click Save.
4. Next is the Audience tab. There make sure to choose the User type and choose external.
5. Click Data Access and hit Add or remove scopes. Select the auth/userinfo.email and /auth/userinfo.profile (which are the first two options) → Update.

- The Support email is related to the email that users can contact if they have questions about their consent.
- In the Authorized domains option, you need to add an authorized domain. If your app needs to go through verification, please go to the Google Search Console to check if your domains are authorized. For more info, you can read our relevant article here.
- You cannot authorize subdomains. If you go to add a subdomain in the Authorized domains field, you may get an error message.
- The Developer account email has to be filled out in case Google needs to notify you about any changes to your project.

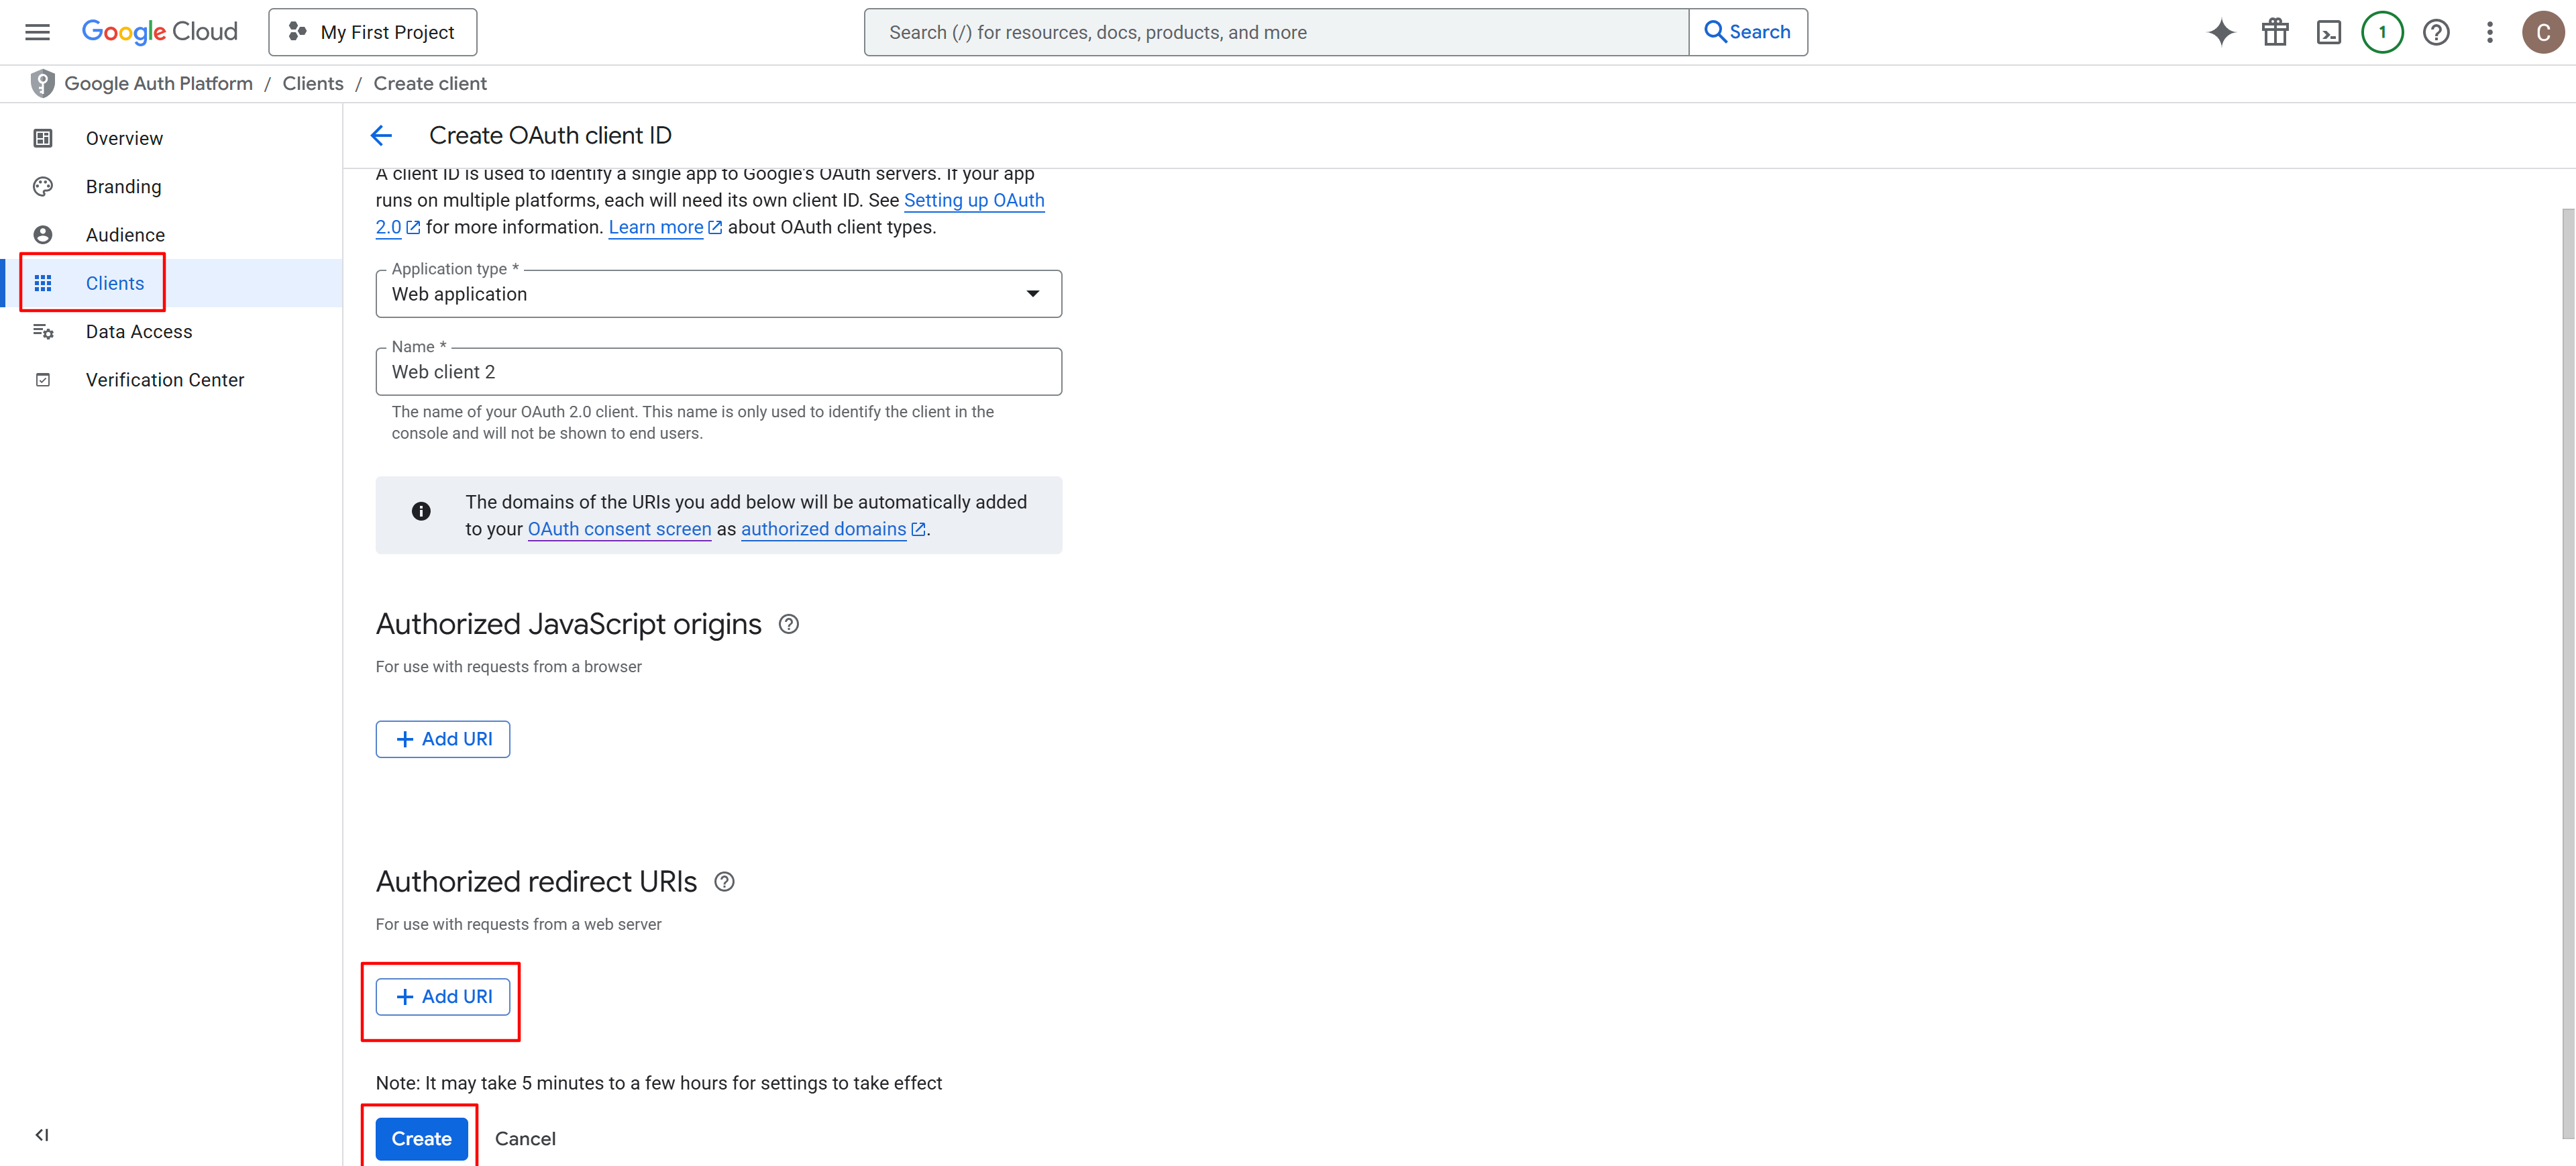
Copy the created Client ID and the Client Secret to finalize the white labeling process in your LearnWorlds school.
Finalize the Whitelabeling Configuration in LearnWorlds
1. Navigate to your LearnWorlds school and click on Website → Website Settings → Authentication → Social under Website.
2. Add the Client ID (Key) and Secret under Whitelabel Social Logins and click Save.