Payment Sections in LearnWorlds allow you to embed direct checkout functionality anywhere on your site, whether or not the Shopping Cart is enabled. They are ideal for simplifying the purchasing experience and increasing conversions, especially in landing pages and targeted campaigns.
This guide covers how to add, customize, and strategically use Payment Sections to best fit your sales model.
What is a payment section?
A Payment Section allows learners to purchase a specific product directly from a page without having to navigate through menus or multiple steps.
You can:
- Set up 1-click sales funnels
- Allow direct checkout from any page
- Customize layout, tags, coupons, and display options
- Use it independently of the shopping cart, even when the cart is enabled
 Subscriptions are not compatible with the shopping cart. They must always be purchased through a Payment Section or the default Payment Page, even if the cart is enabled.
How to add a payment section
- Go to Website → Design → Edit Website.
- Use the Pages Manager to select the desired page.
- Click +Add Section, then choose a Payment Section.
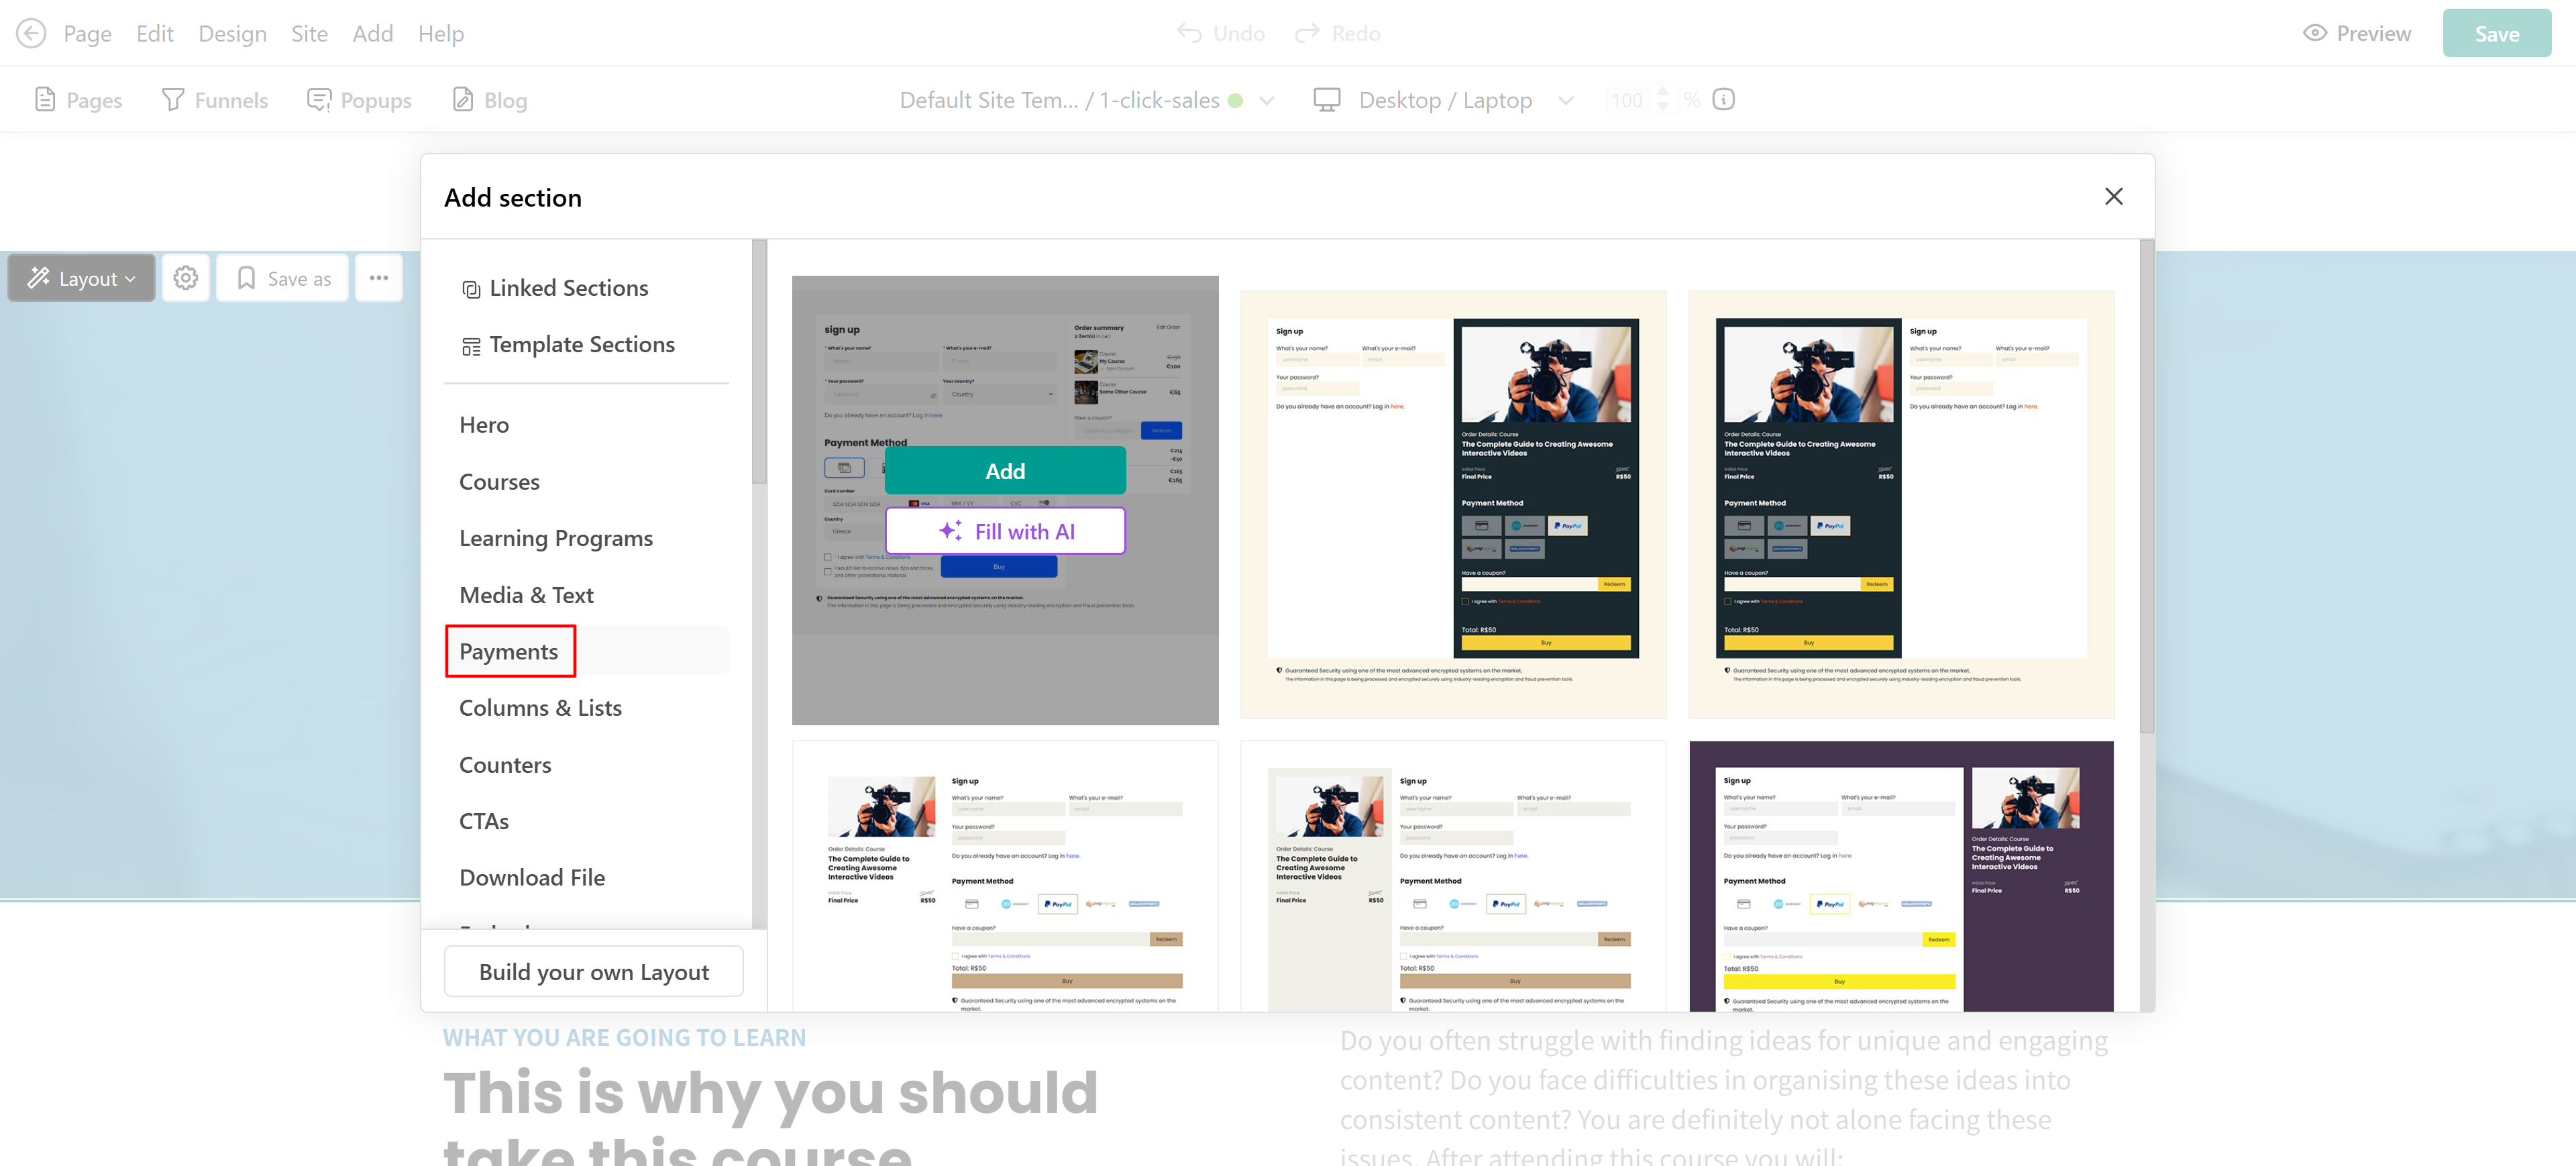
- You can either choose a ready-made template or use the Fill with AI button to automatically customize the section.
- Click Save.
How to customize a payment section
Click Edit Payment Section to configure the following:
1. Select a Product
- Choose between Course, Bundle offer, or Subscription.
- You can assign multiple products to a single Payment Section by selecting the type of product you want, clicking Custom, and then choosing which courses to include.
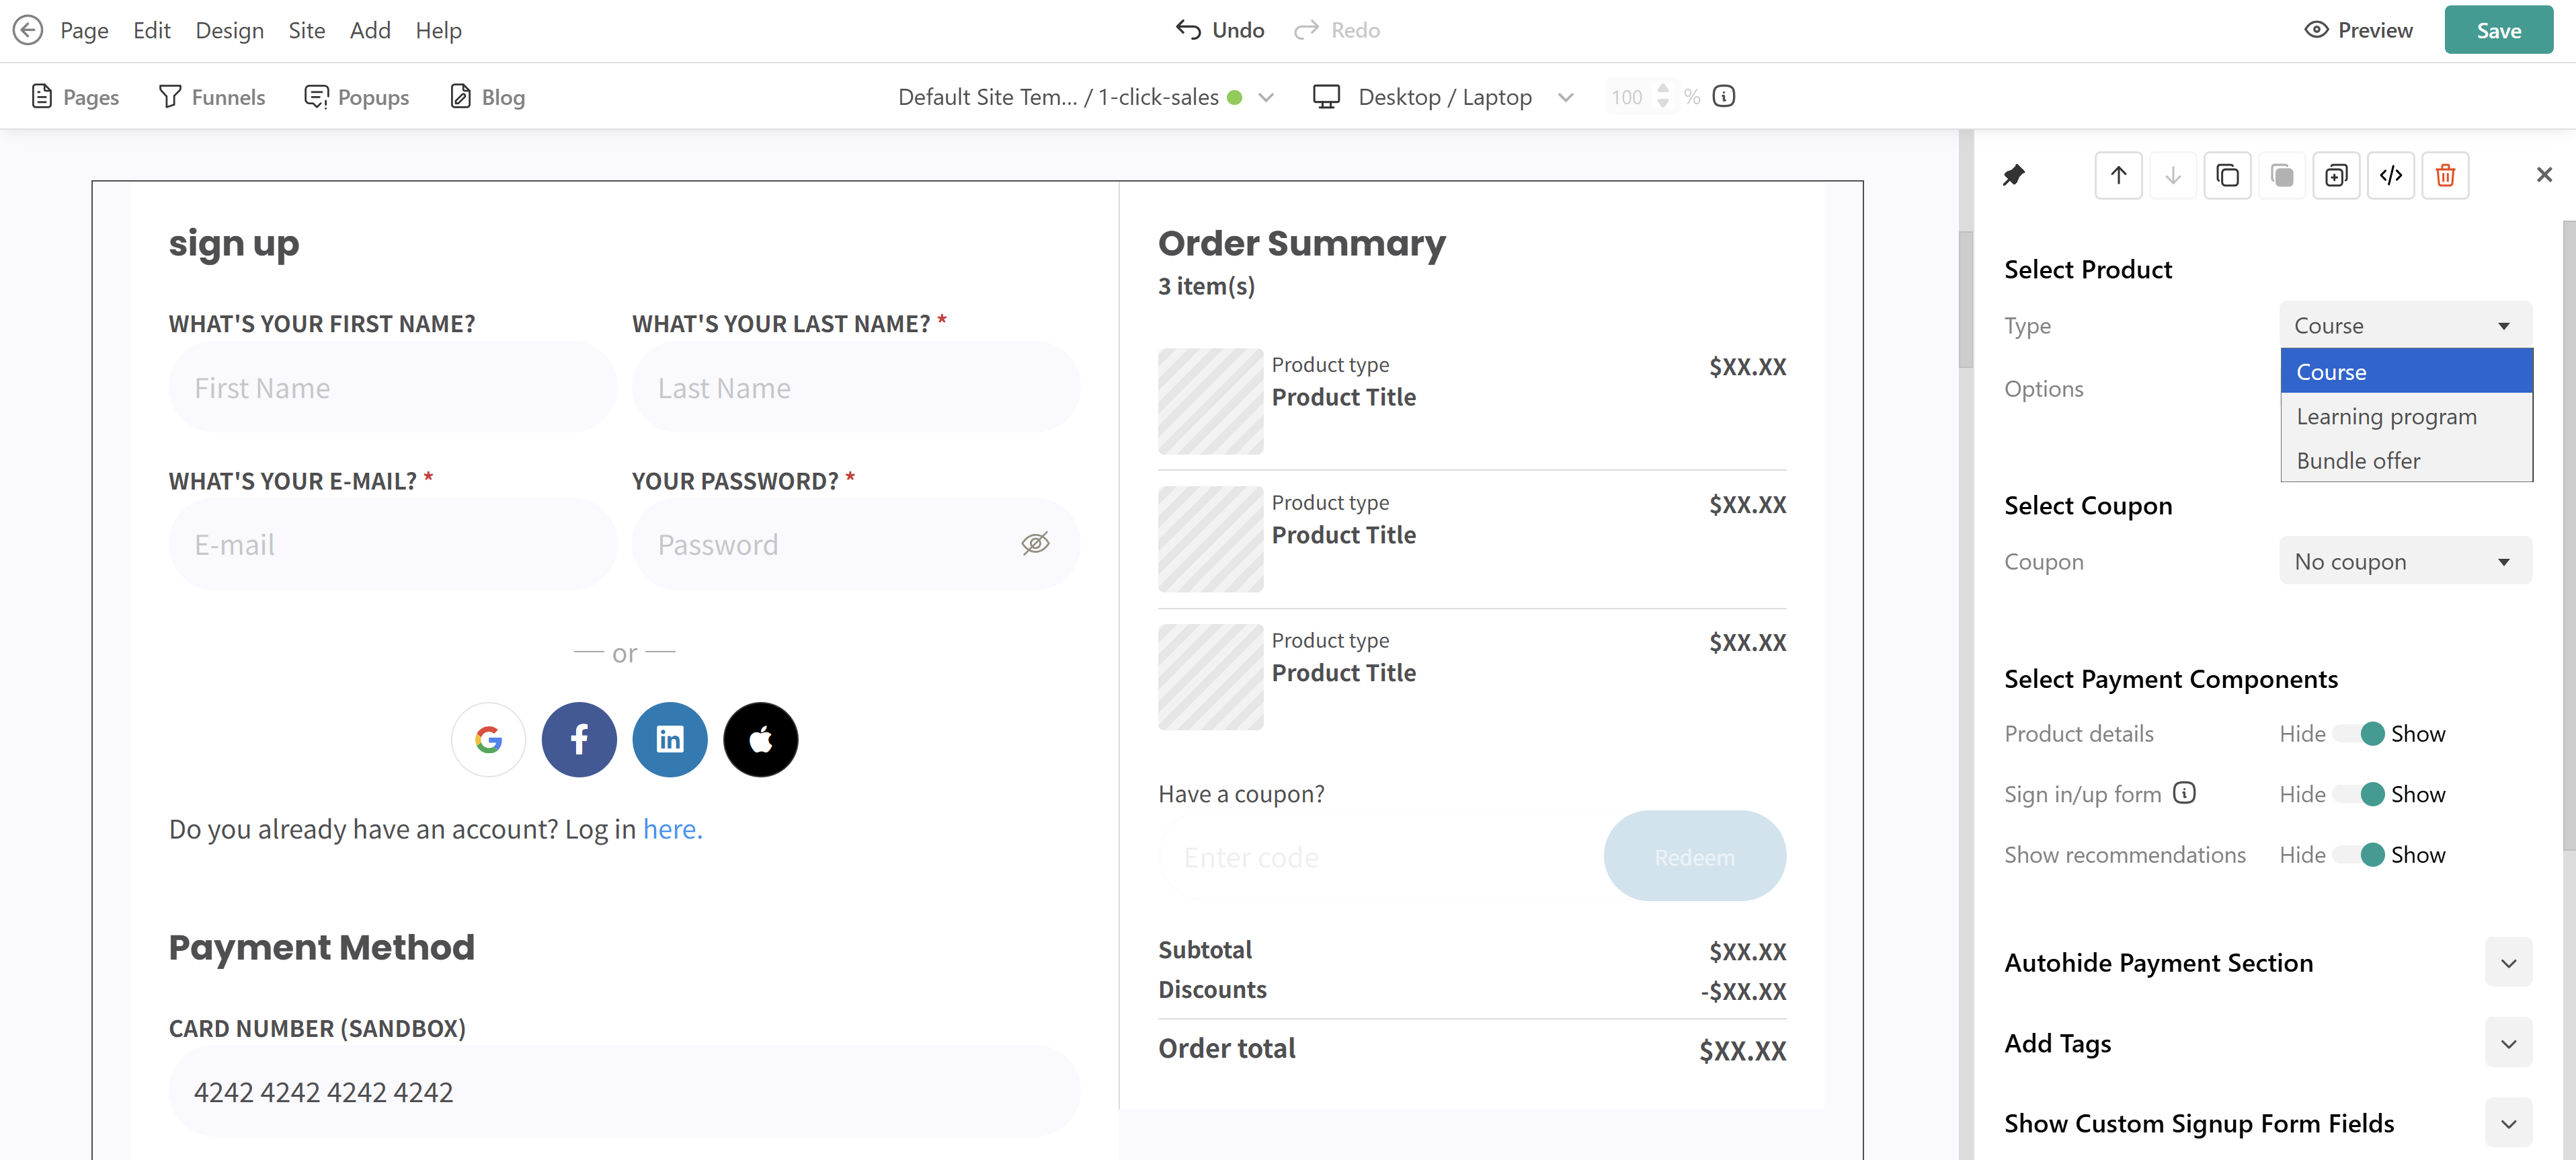
Courses and learning programs cannot be combined in the same payment section.2. Apply a Coupon
Optionally apply a default coupon so users don’t have to enter it manually.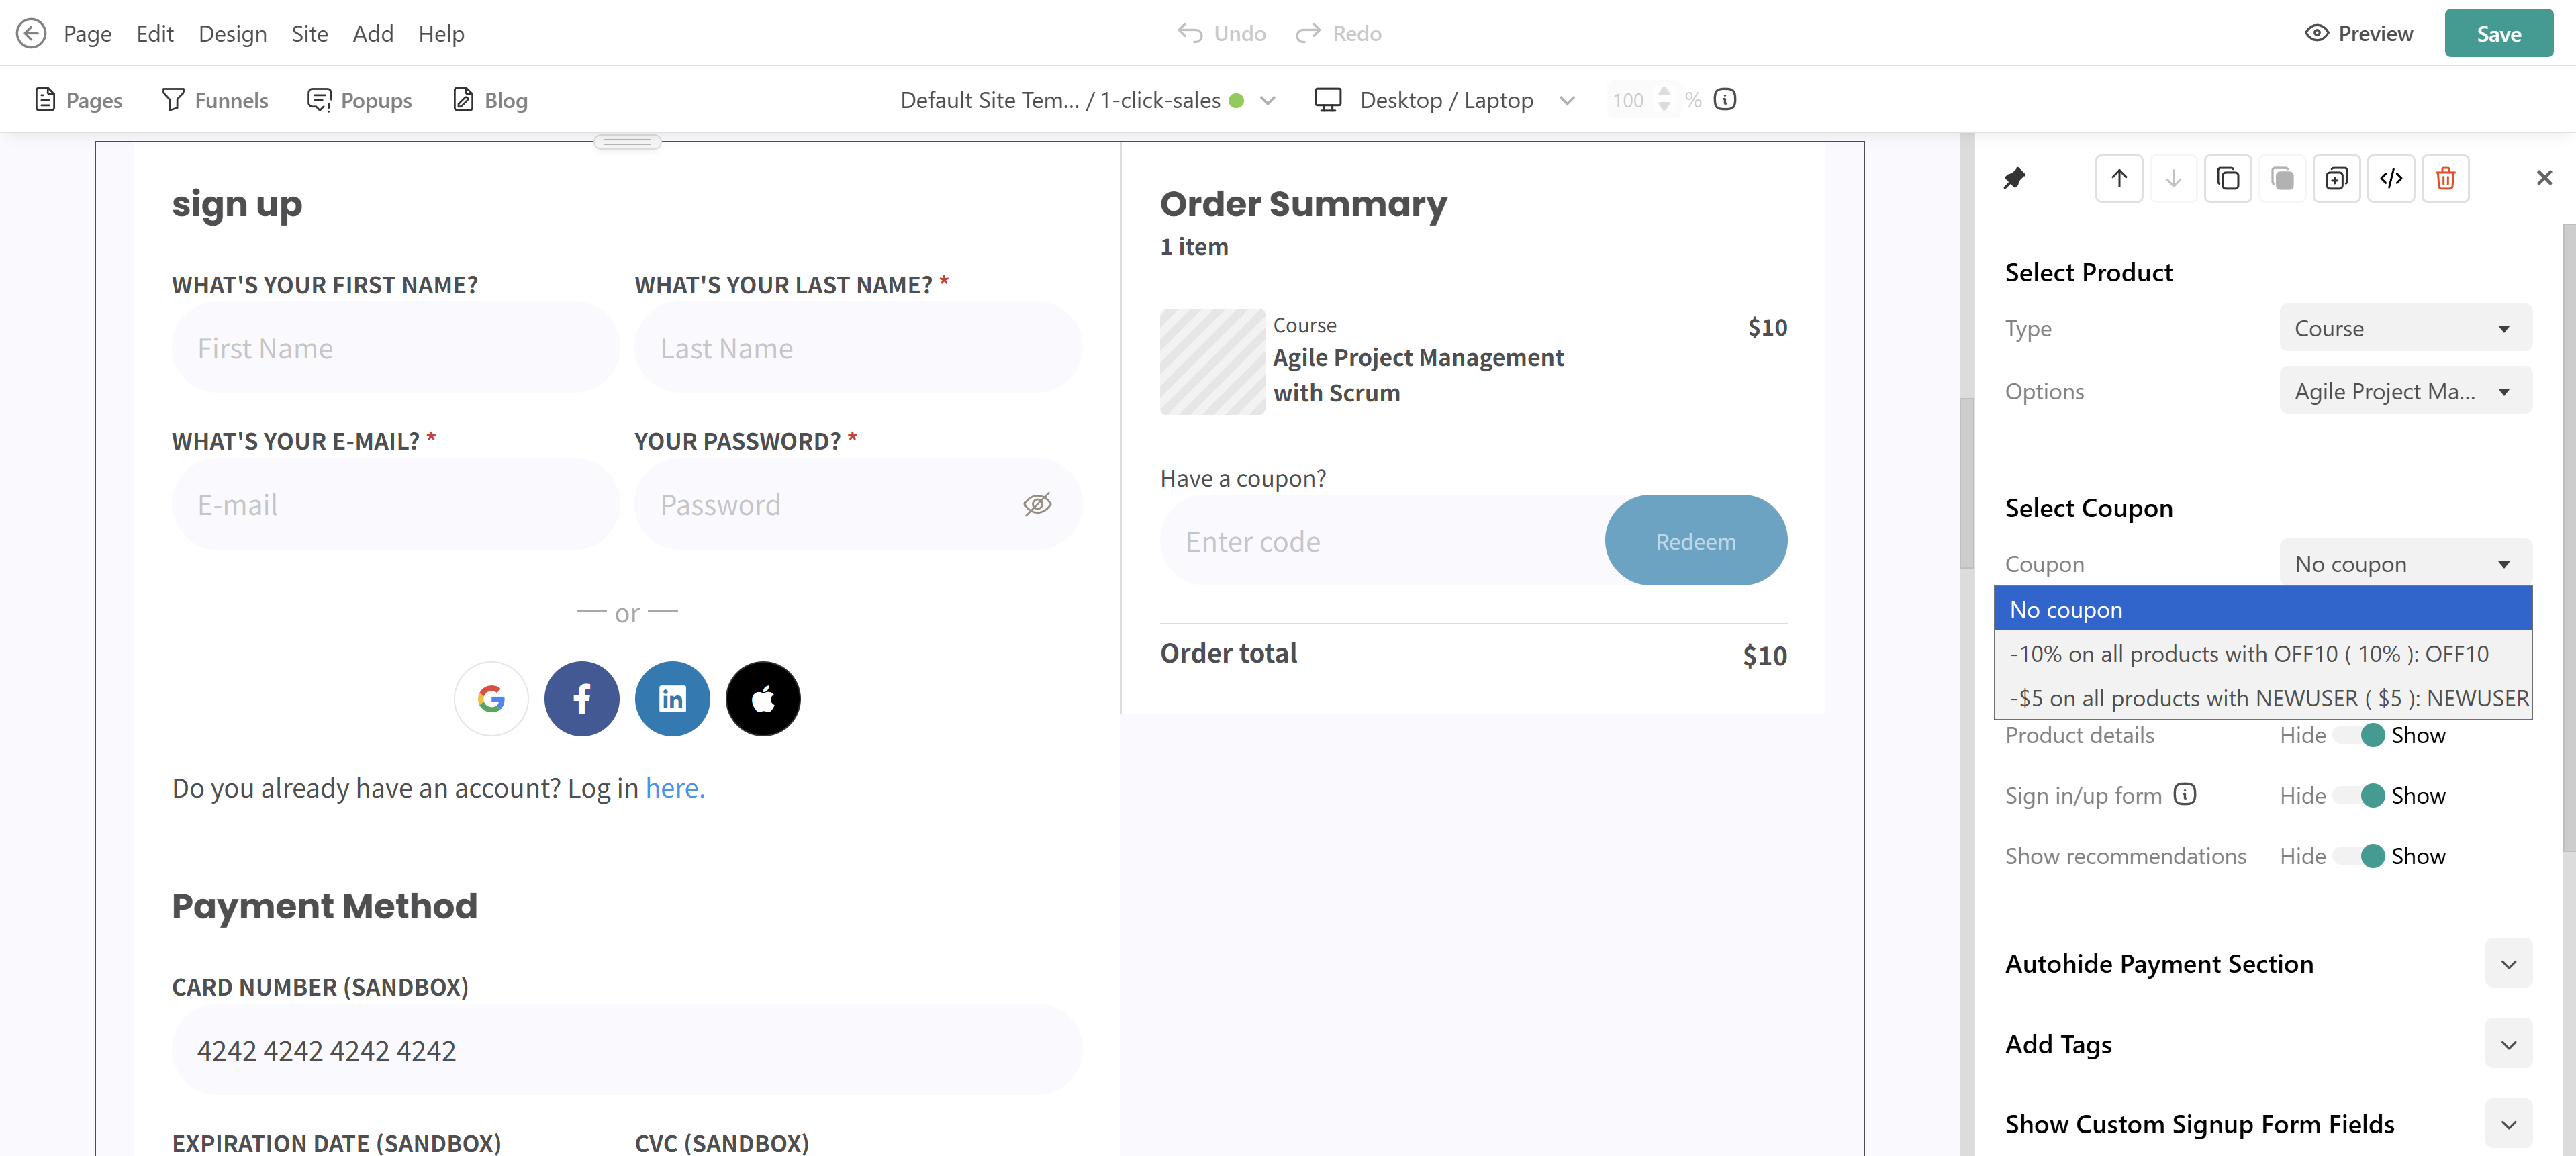
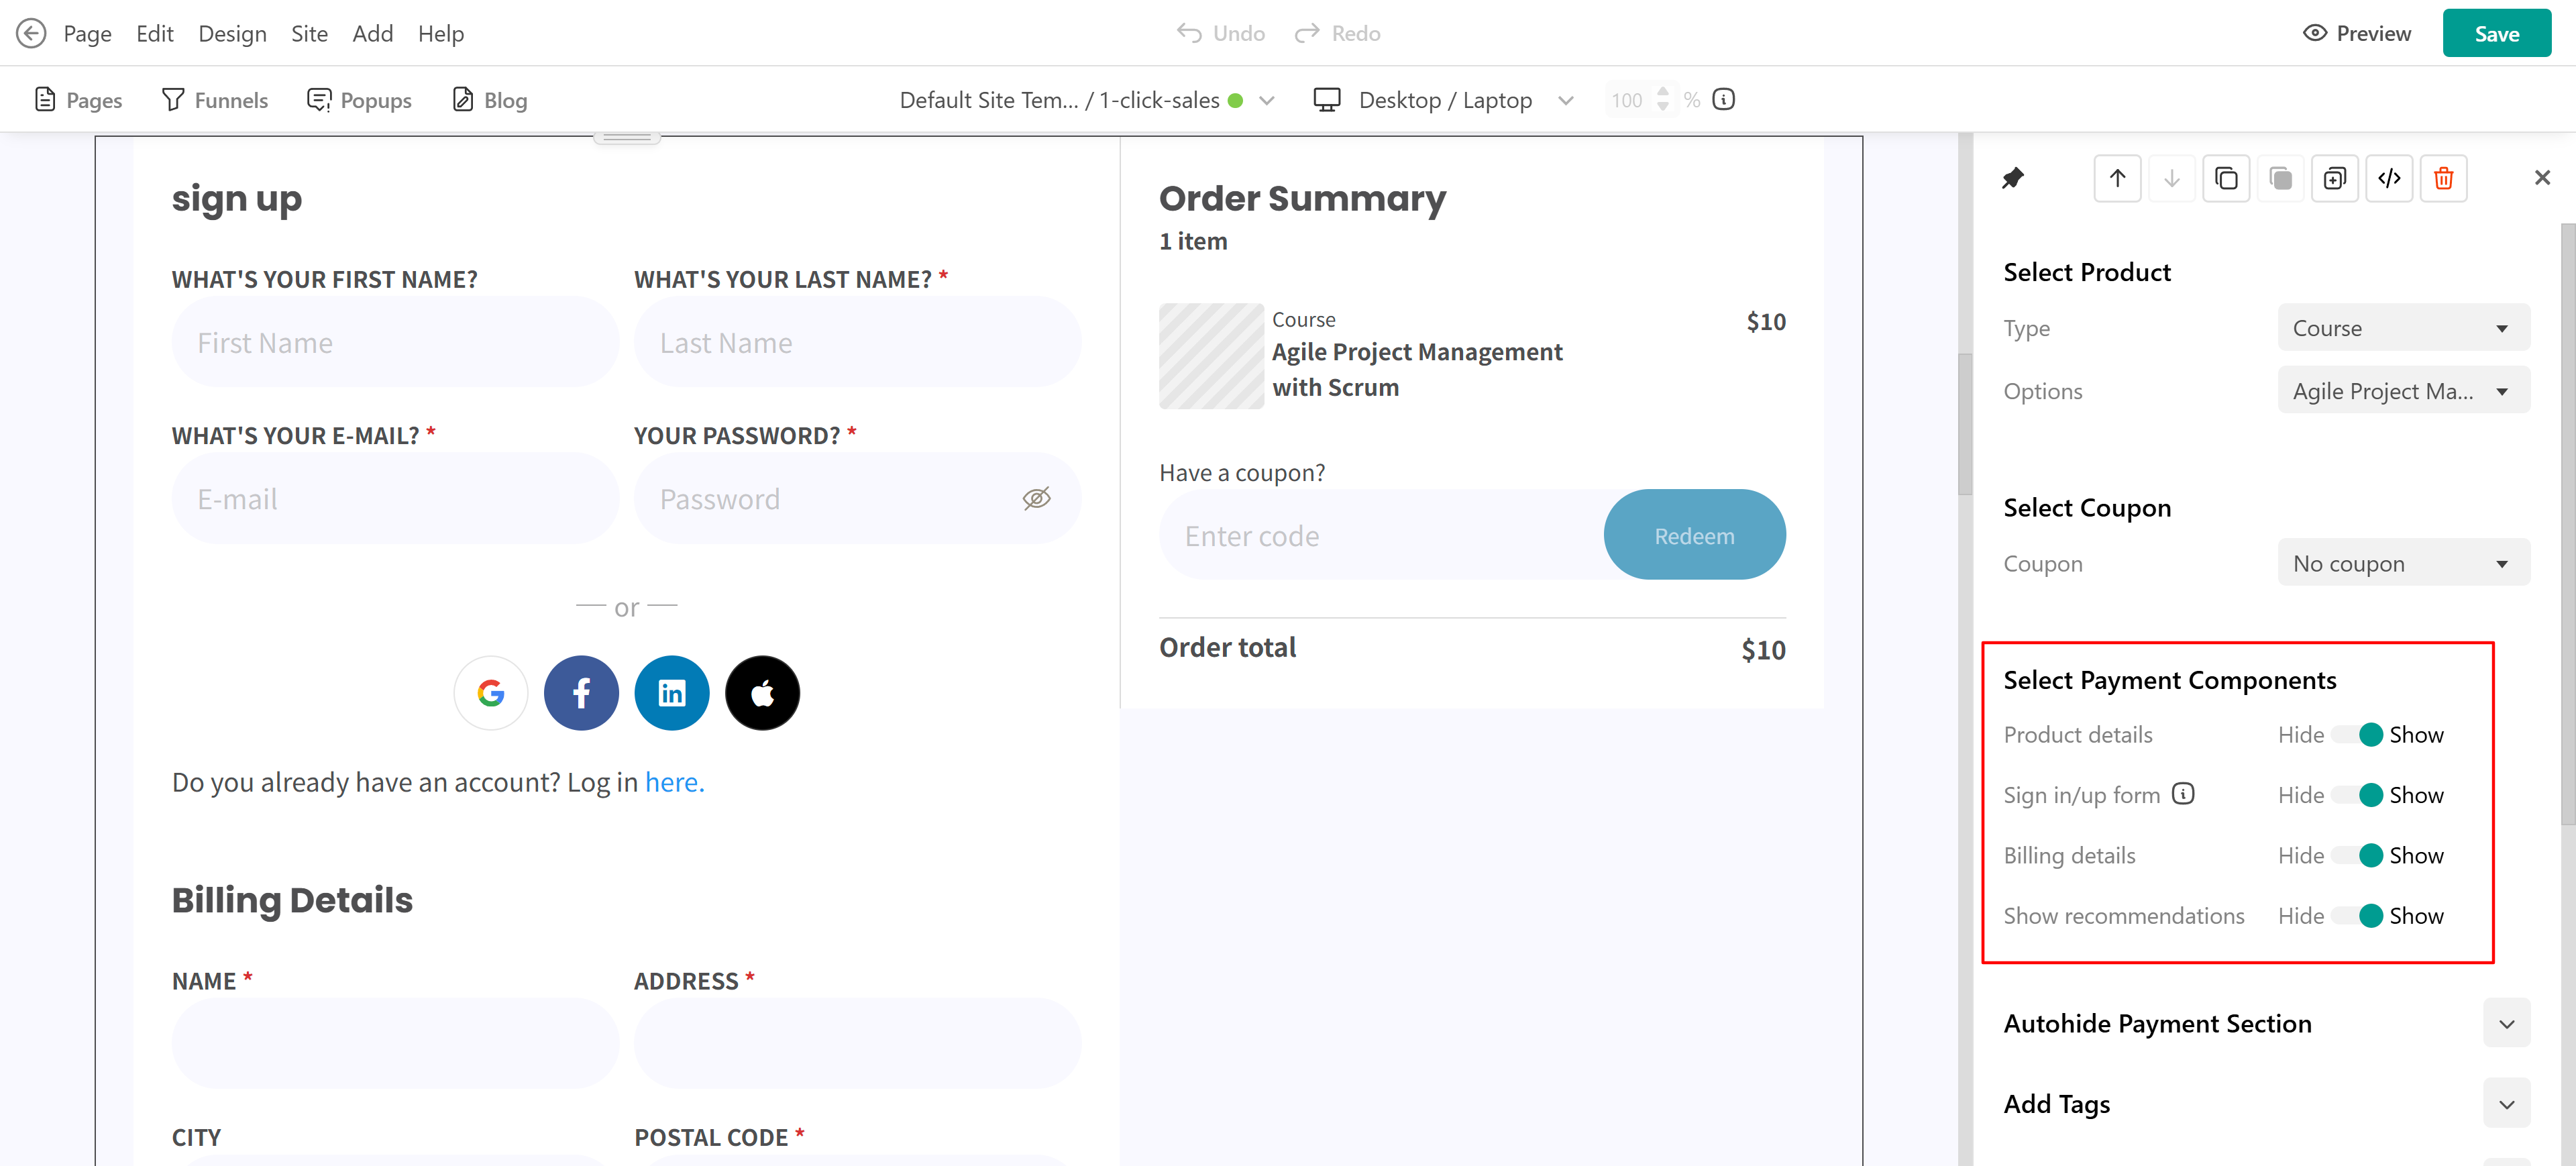
3. Payment Components
Decide which elements to show:
- Product Details (image, price, included content)
- Sign in/up form
- Billing details (invoice fields)
- Recommendations
4. Autohide payment section
The section can auto-hide if:
- The user already owns the product
- The product is missing
- No product has been set
5. Tagging
Assign tags to users who complete a purchase through this section.
6. Custom sign-up form fields
Enable additional registration fields (if configured under your school’s settings).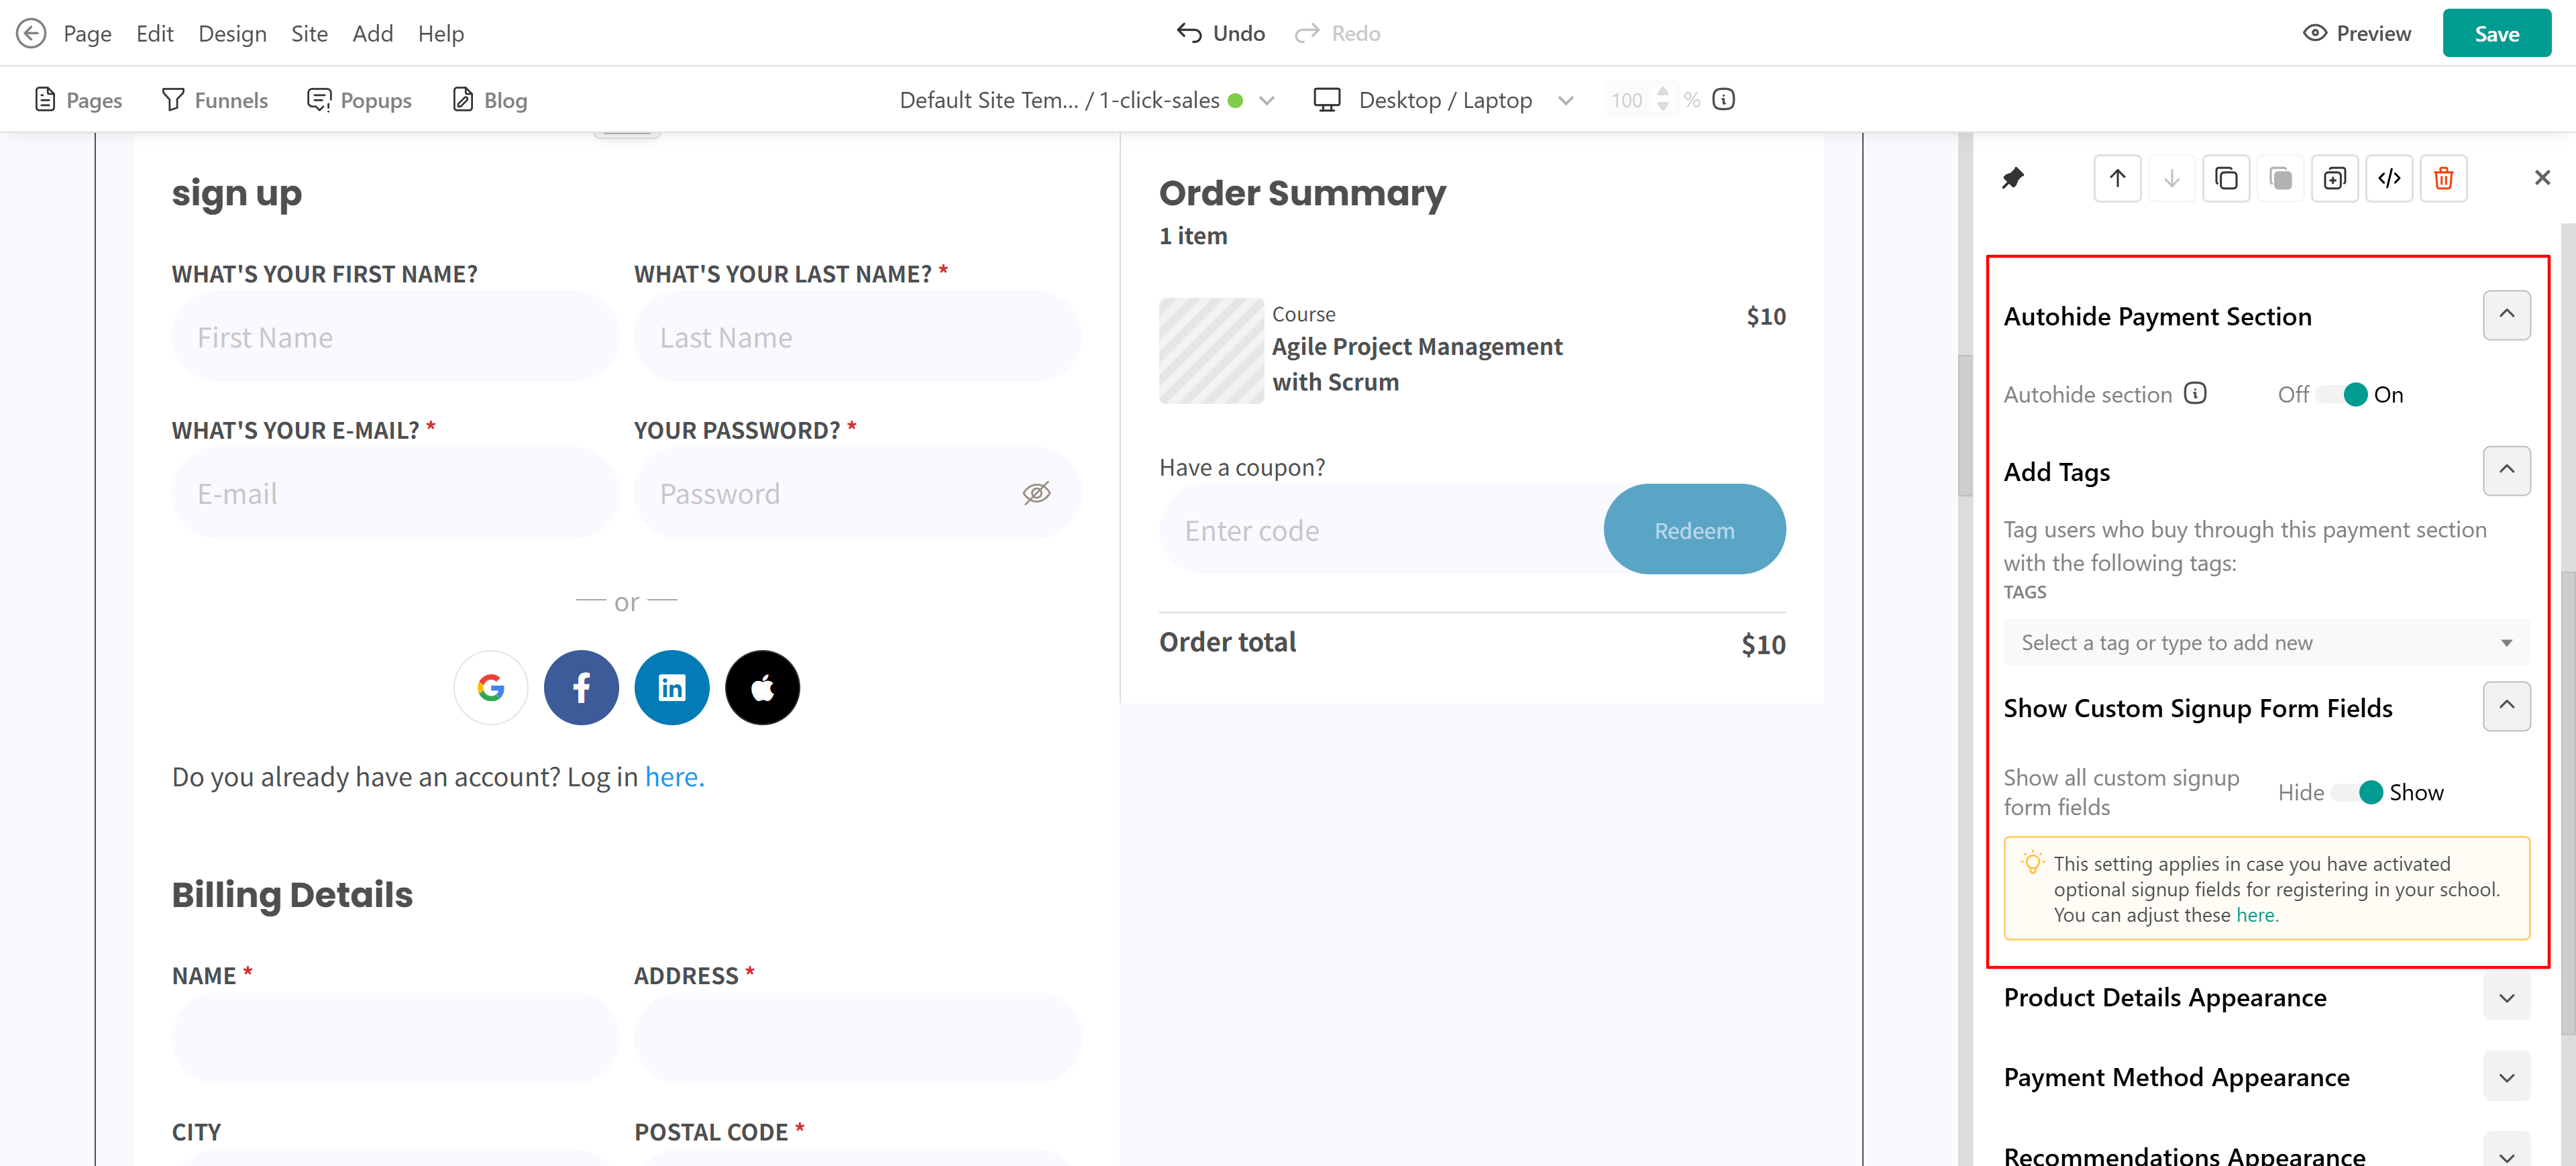
7. Appearance settings
Control which elements are displayed on the product details page. Choose whether to show or hide:
- Product image
- Product prices
- Pricing option selector
- Number of included courses
- List of included courses
- Show coupon input
- Show order summary
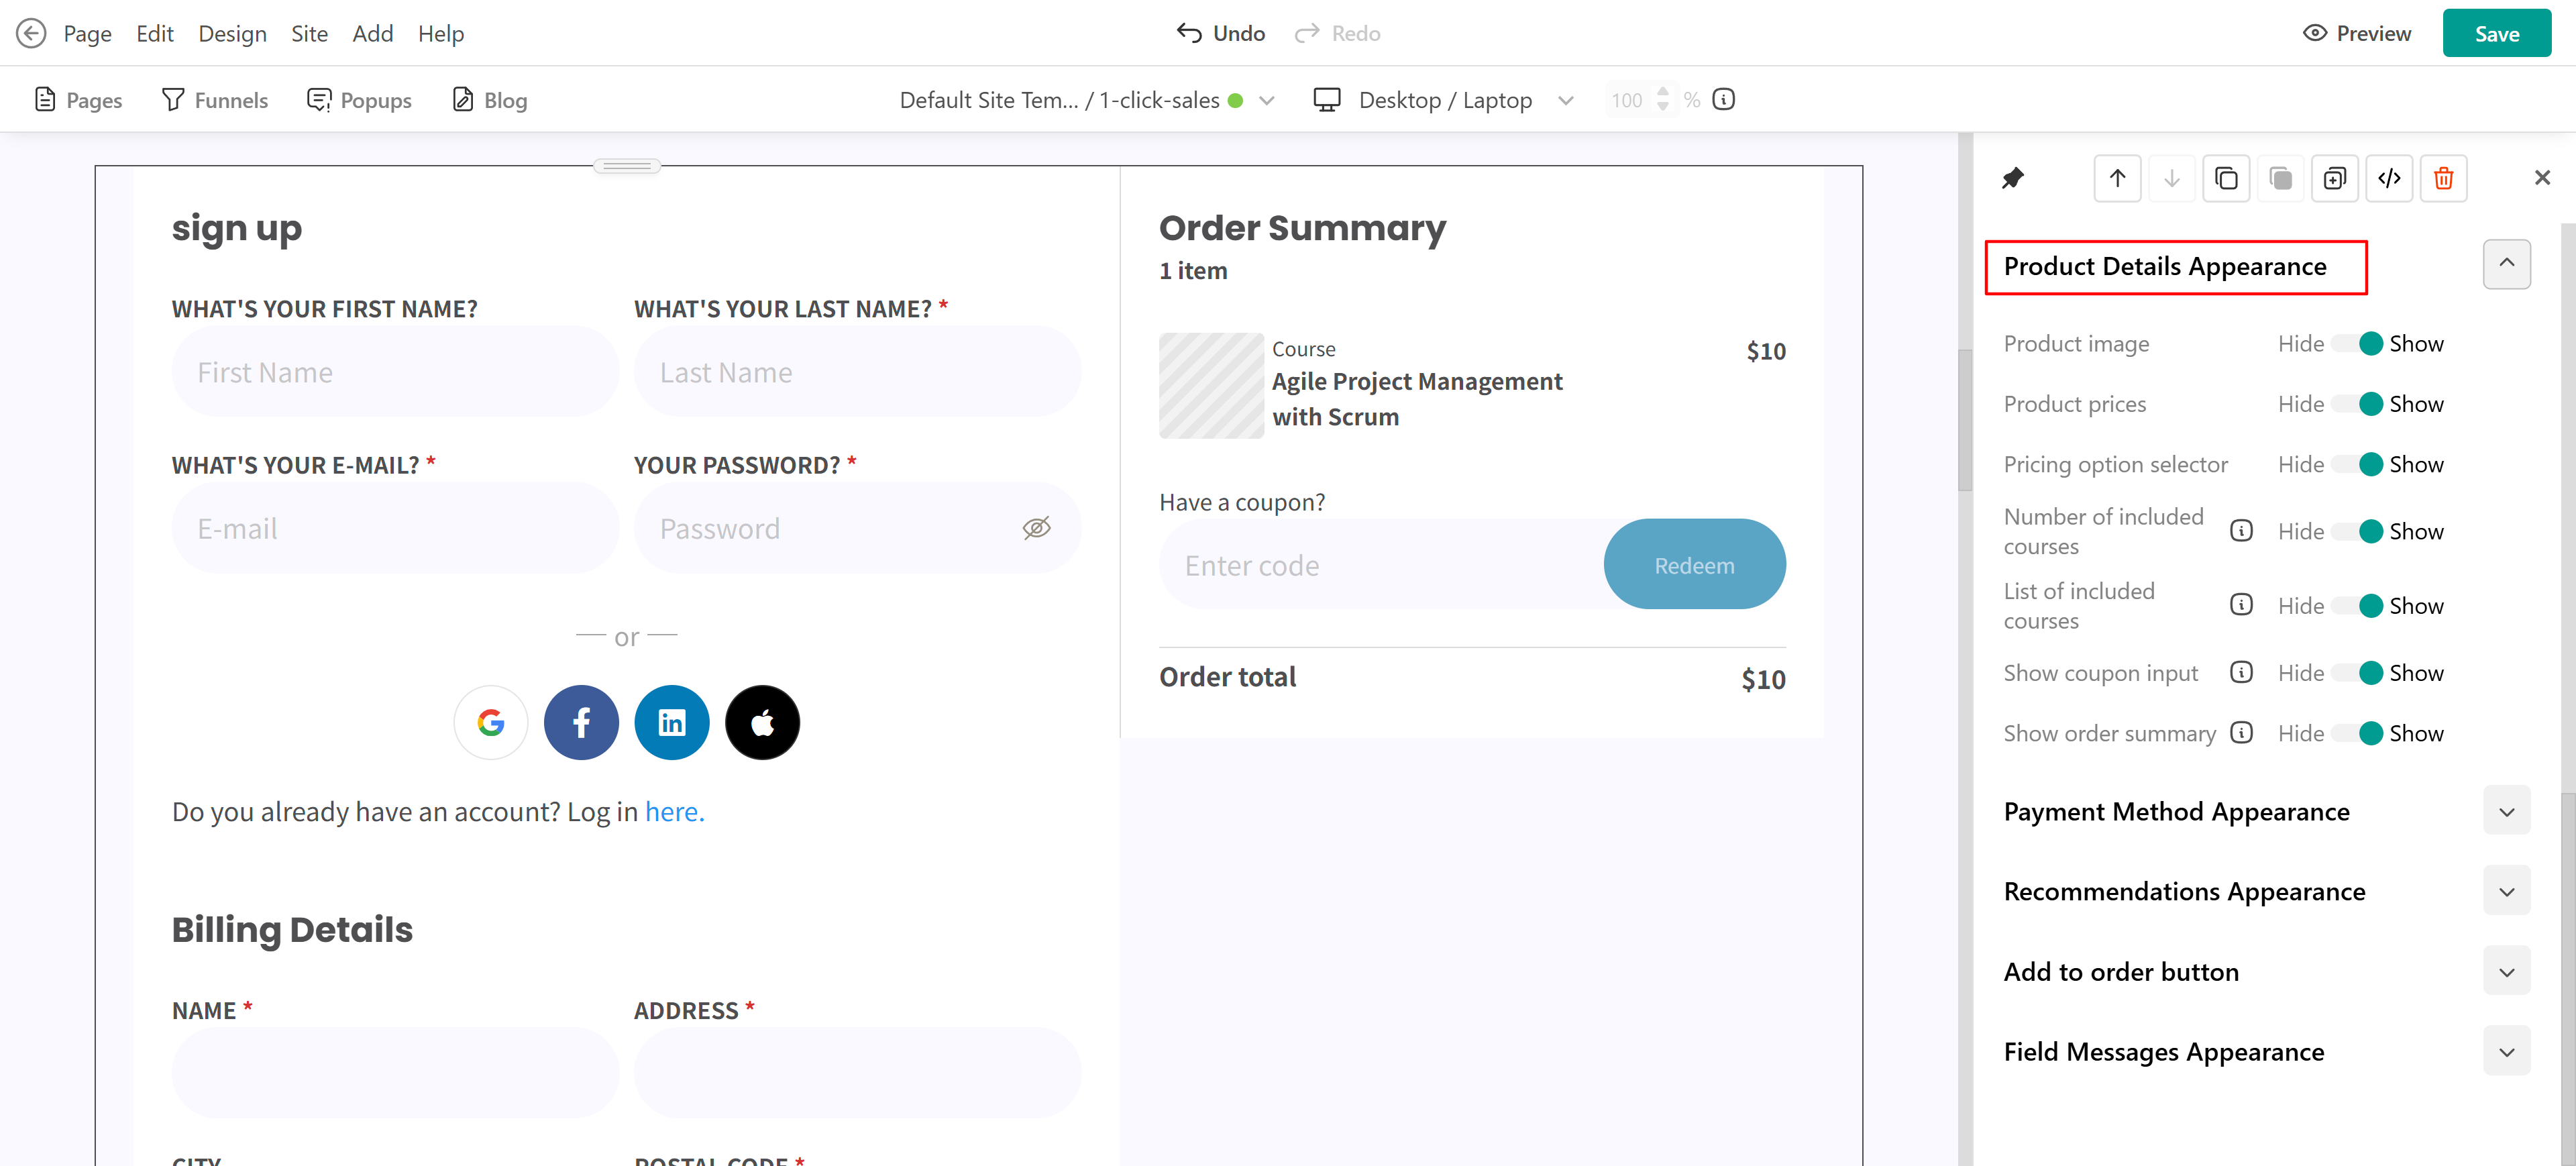
8. Payment Method Appearance
This group of settings lets you tailor how the actual payment experience looks:
- Show coupon input: Toggle whether the user sees a coupon code entry field
- Show order summary: Display or hide the full price breakdown (including item list, subtotal, discounts, and total)
- Show price in buy button: Display the price directly on the payment button (e.g. "Buy for $49.99")
9. Apple play/ Google play buttons
These buttons are displayed based on the user’s environment and settings. For example, the Apple Pay button appears only in Safari and only when Apple Wallet is enabled. With this setting, you can choose whether the button is displayed in a light or dark style.
10. Recommendations appearance
Here, you can choose which recommendation strategy to display, configure the placement of recommendations, and customize the layout. Find more information about recommendations here.
11. Add to order button
Choose whether to display the Add to Order button.
12. Field Messages appearance
Change the color of the error message.
Payment sections vs. the Shopping cart: How checkout flows work
LearnWorlds supports two types of checkout flows:
1. Shopping Cart (Multi-Product Checkout)
When the Shopping Cart is enabled (via E-commerce → Cart & Checkout Flow), clicking “Buy” or “Enroll” on cart-compatible products, like courses, bundles, or learning programs, will take users to the /cart page. This allows them to purchase multiple items in a single transaction.
- An "Add to Cart" button is shown instead of "Buy Now."
- A floating cart icon appears across most pages for quick access.
- Admins can configure additional options such as mini-cart display, post-purchase redirection, and global coupon rules.
2. Payment Sections (Single-Product Checkout)
If you add a Payment Section directly to a page, users will most likely complete their purchase through it, even if the Shopping Cart is enabled. That’s because the Payment Section is more visible, the product is already selected, and the checkout requires fewer clicks.
In this case, the cart is effectively bypassed, and the user completes checkout immediately for that single product, which is ideal for fast, high-conversion flows.
After purchase ehavior
After a learner completes checkout or enrollment, you can customize the destination page they are redirected to. This applies whether they enroll in a single course or multiple products. You can configure the post-purchase redirection settings under E-commerce → Cart & Checkout Flow → After purchase. You can check the available options here.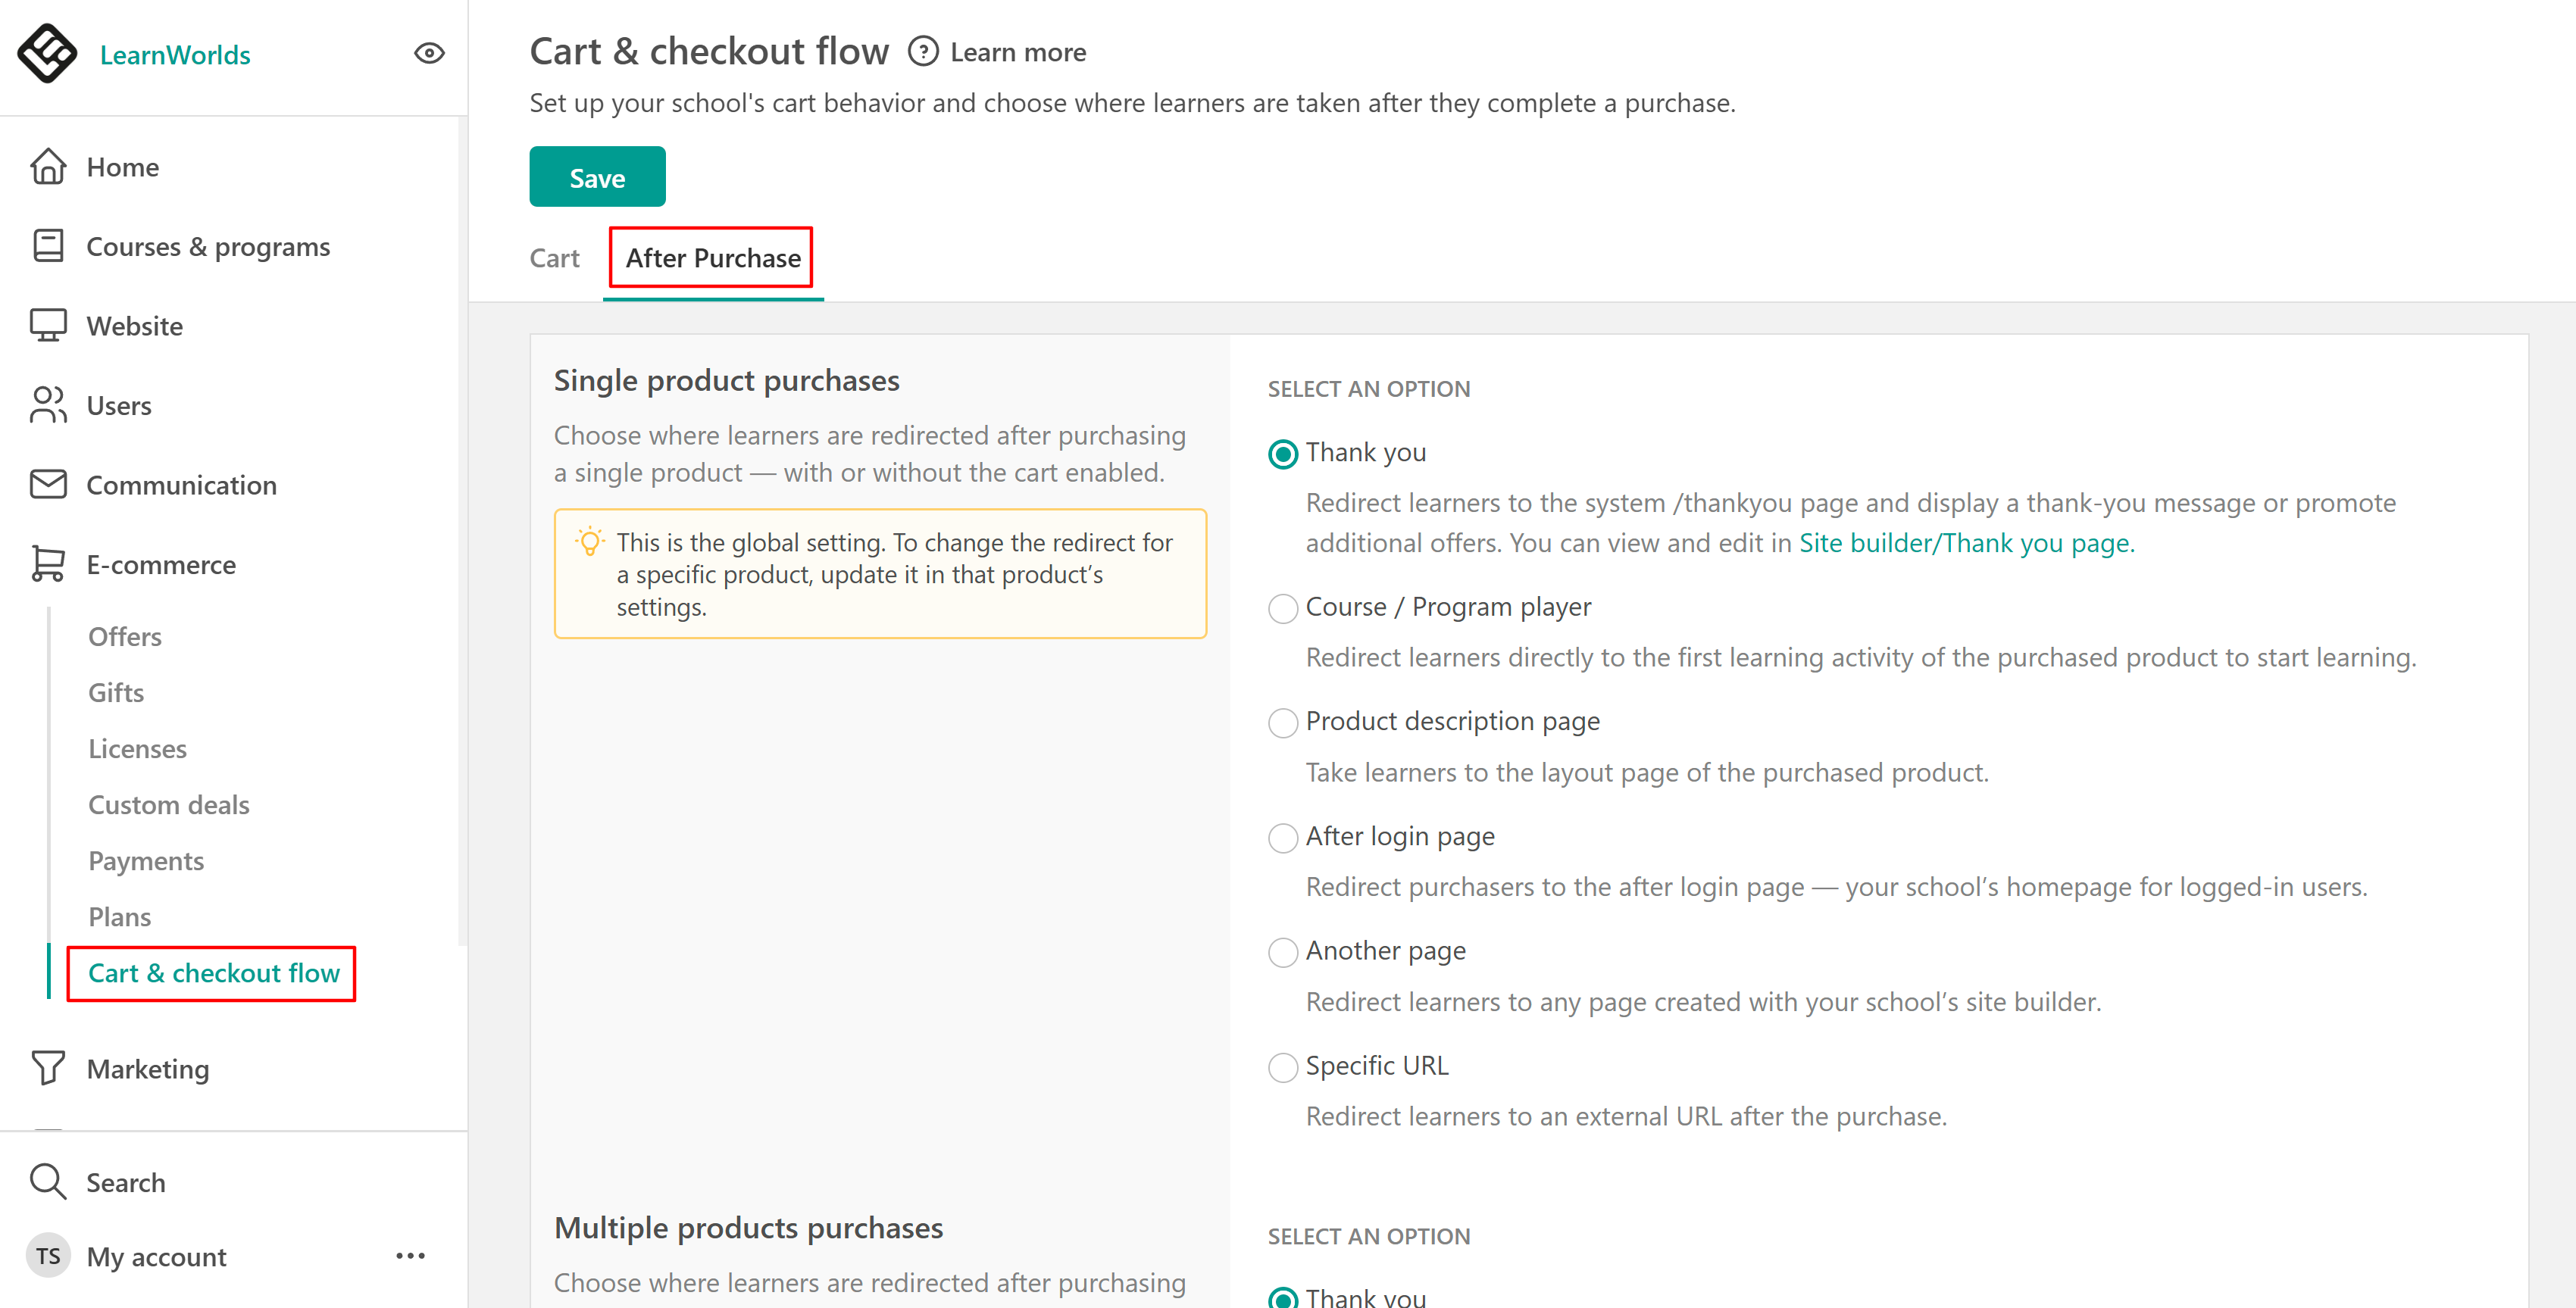
Additionally, you can set up confirmation emails to be automatically sent after enrollment or purchase. These can be configured in Communication → School Emails.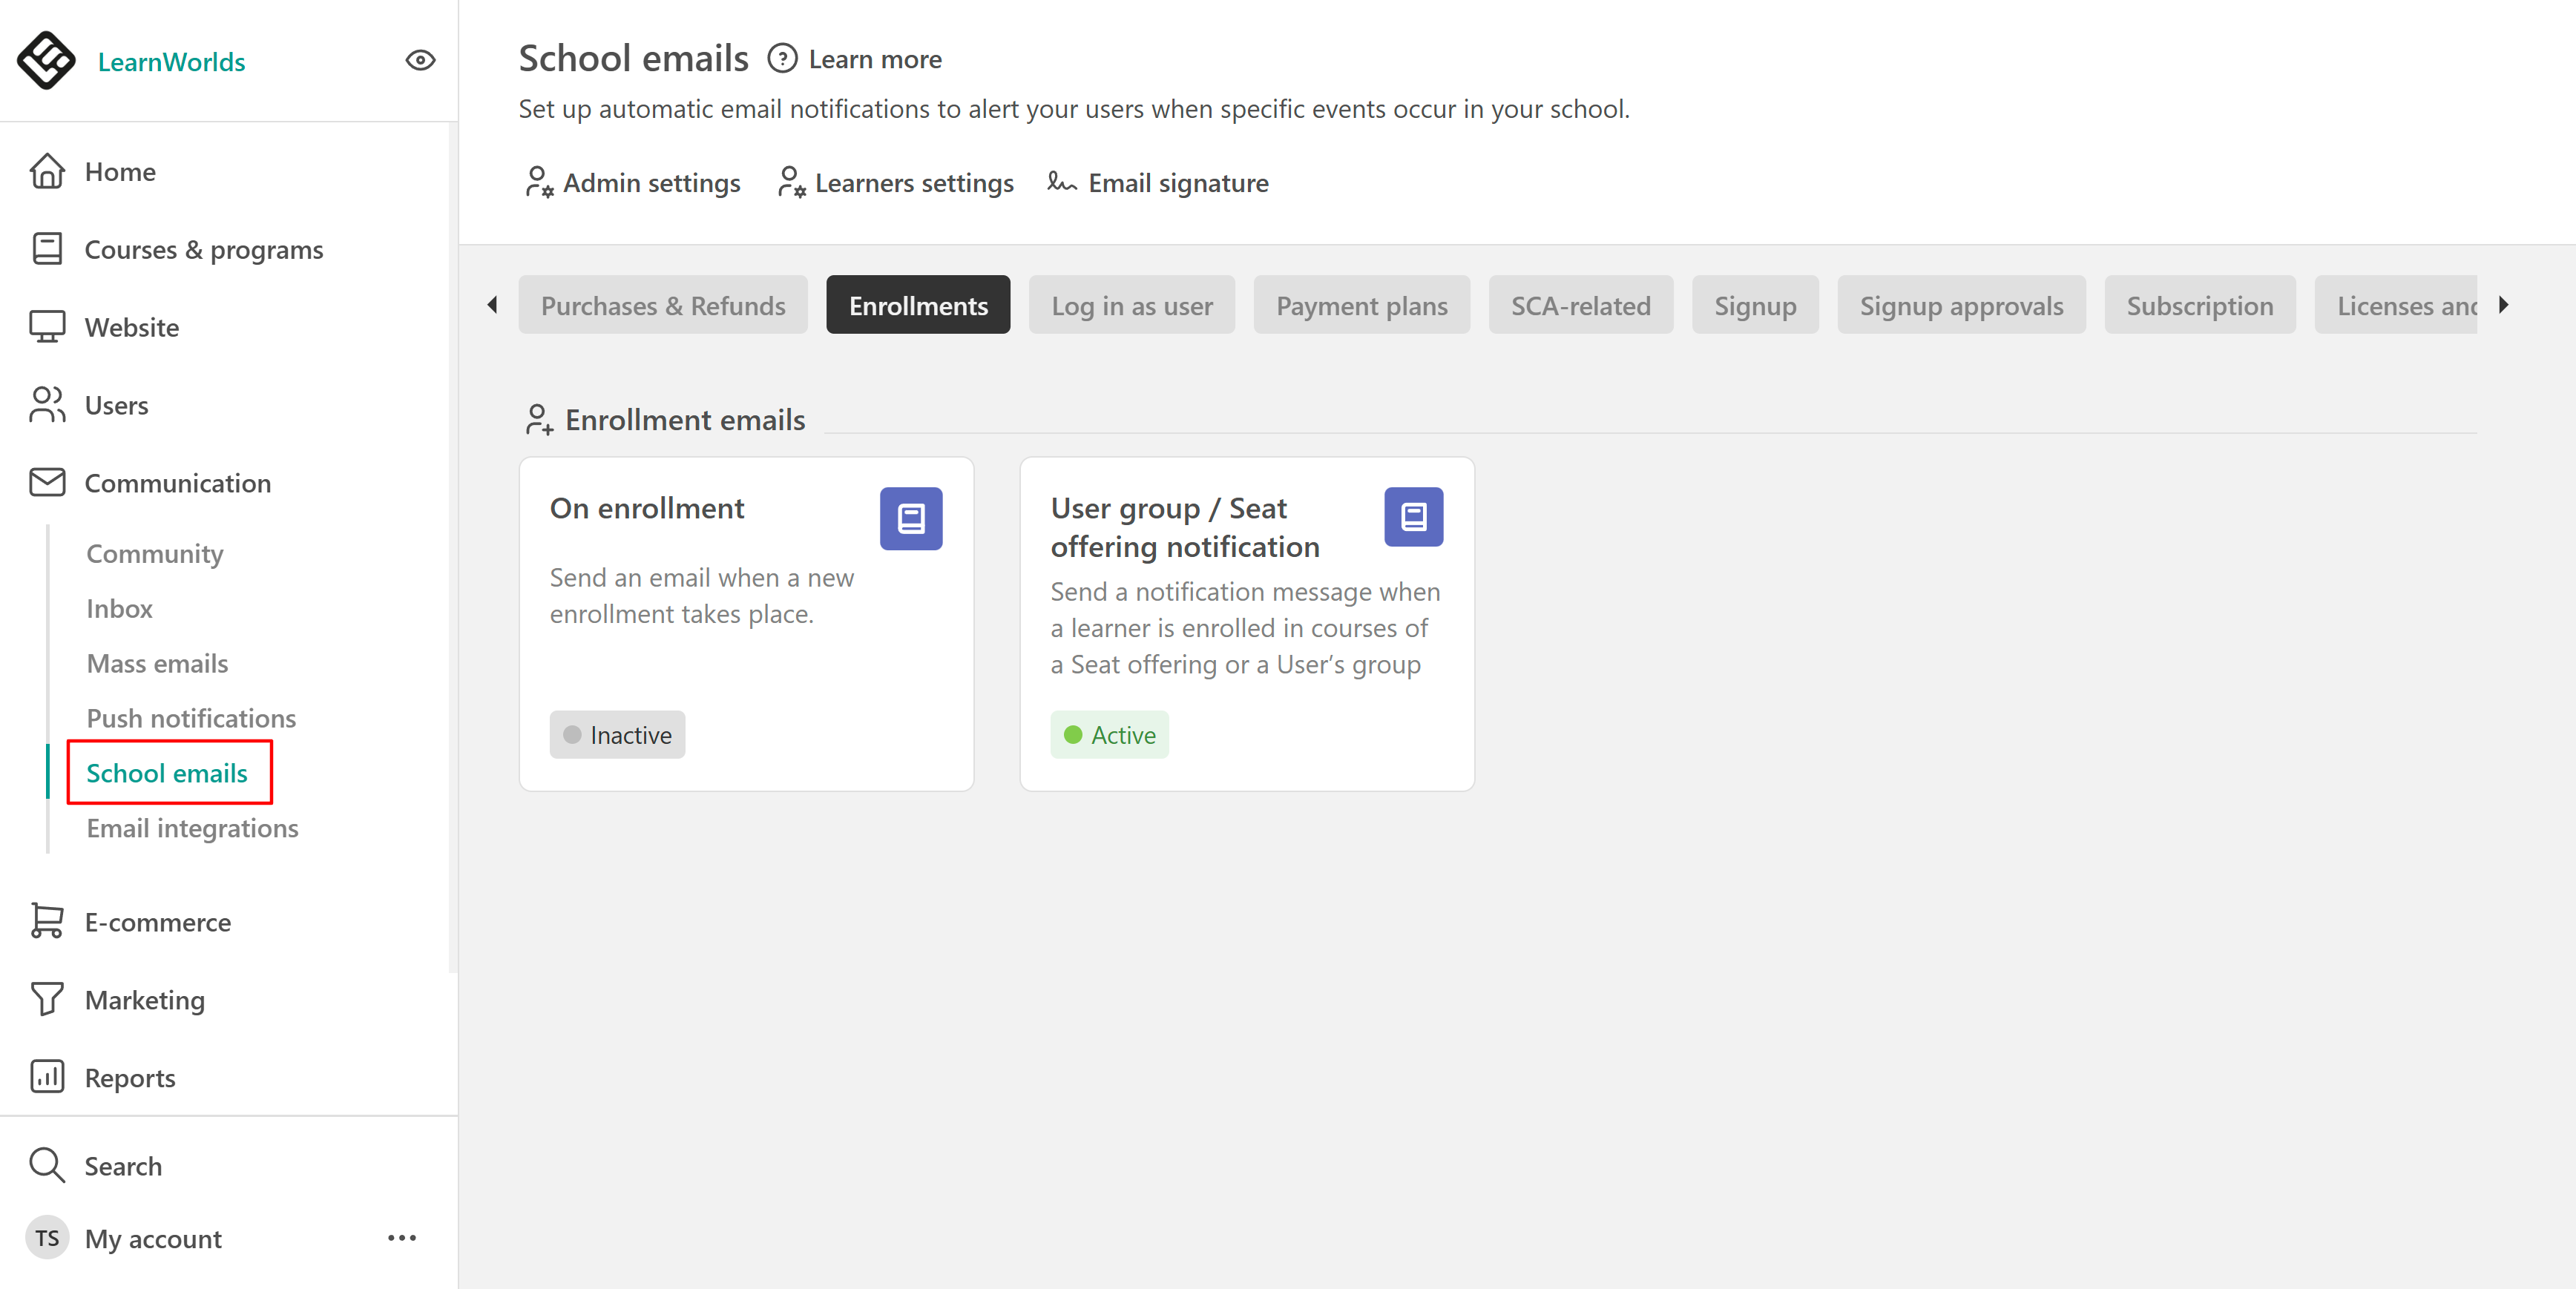
After selecting the page that users will see after completing their purchase, you can also customize it.
If you’re using a custom page instead of the default thank you page, you can add a Thank You widget to display purchase details. This section will show the products users bought and provide an option to download their invoice.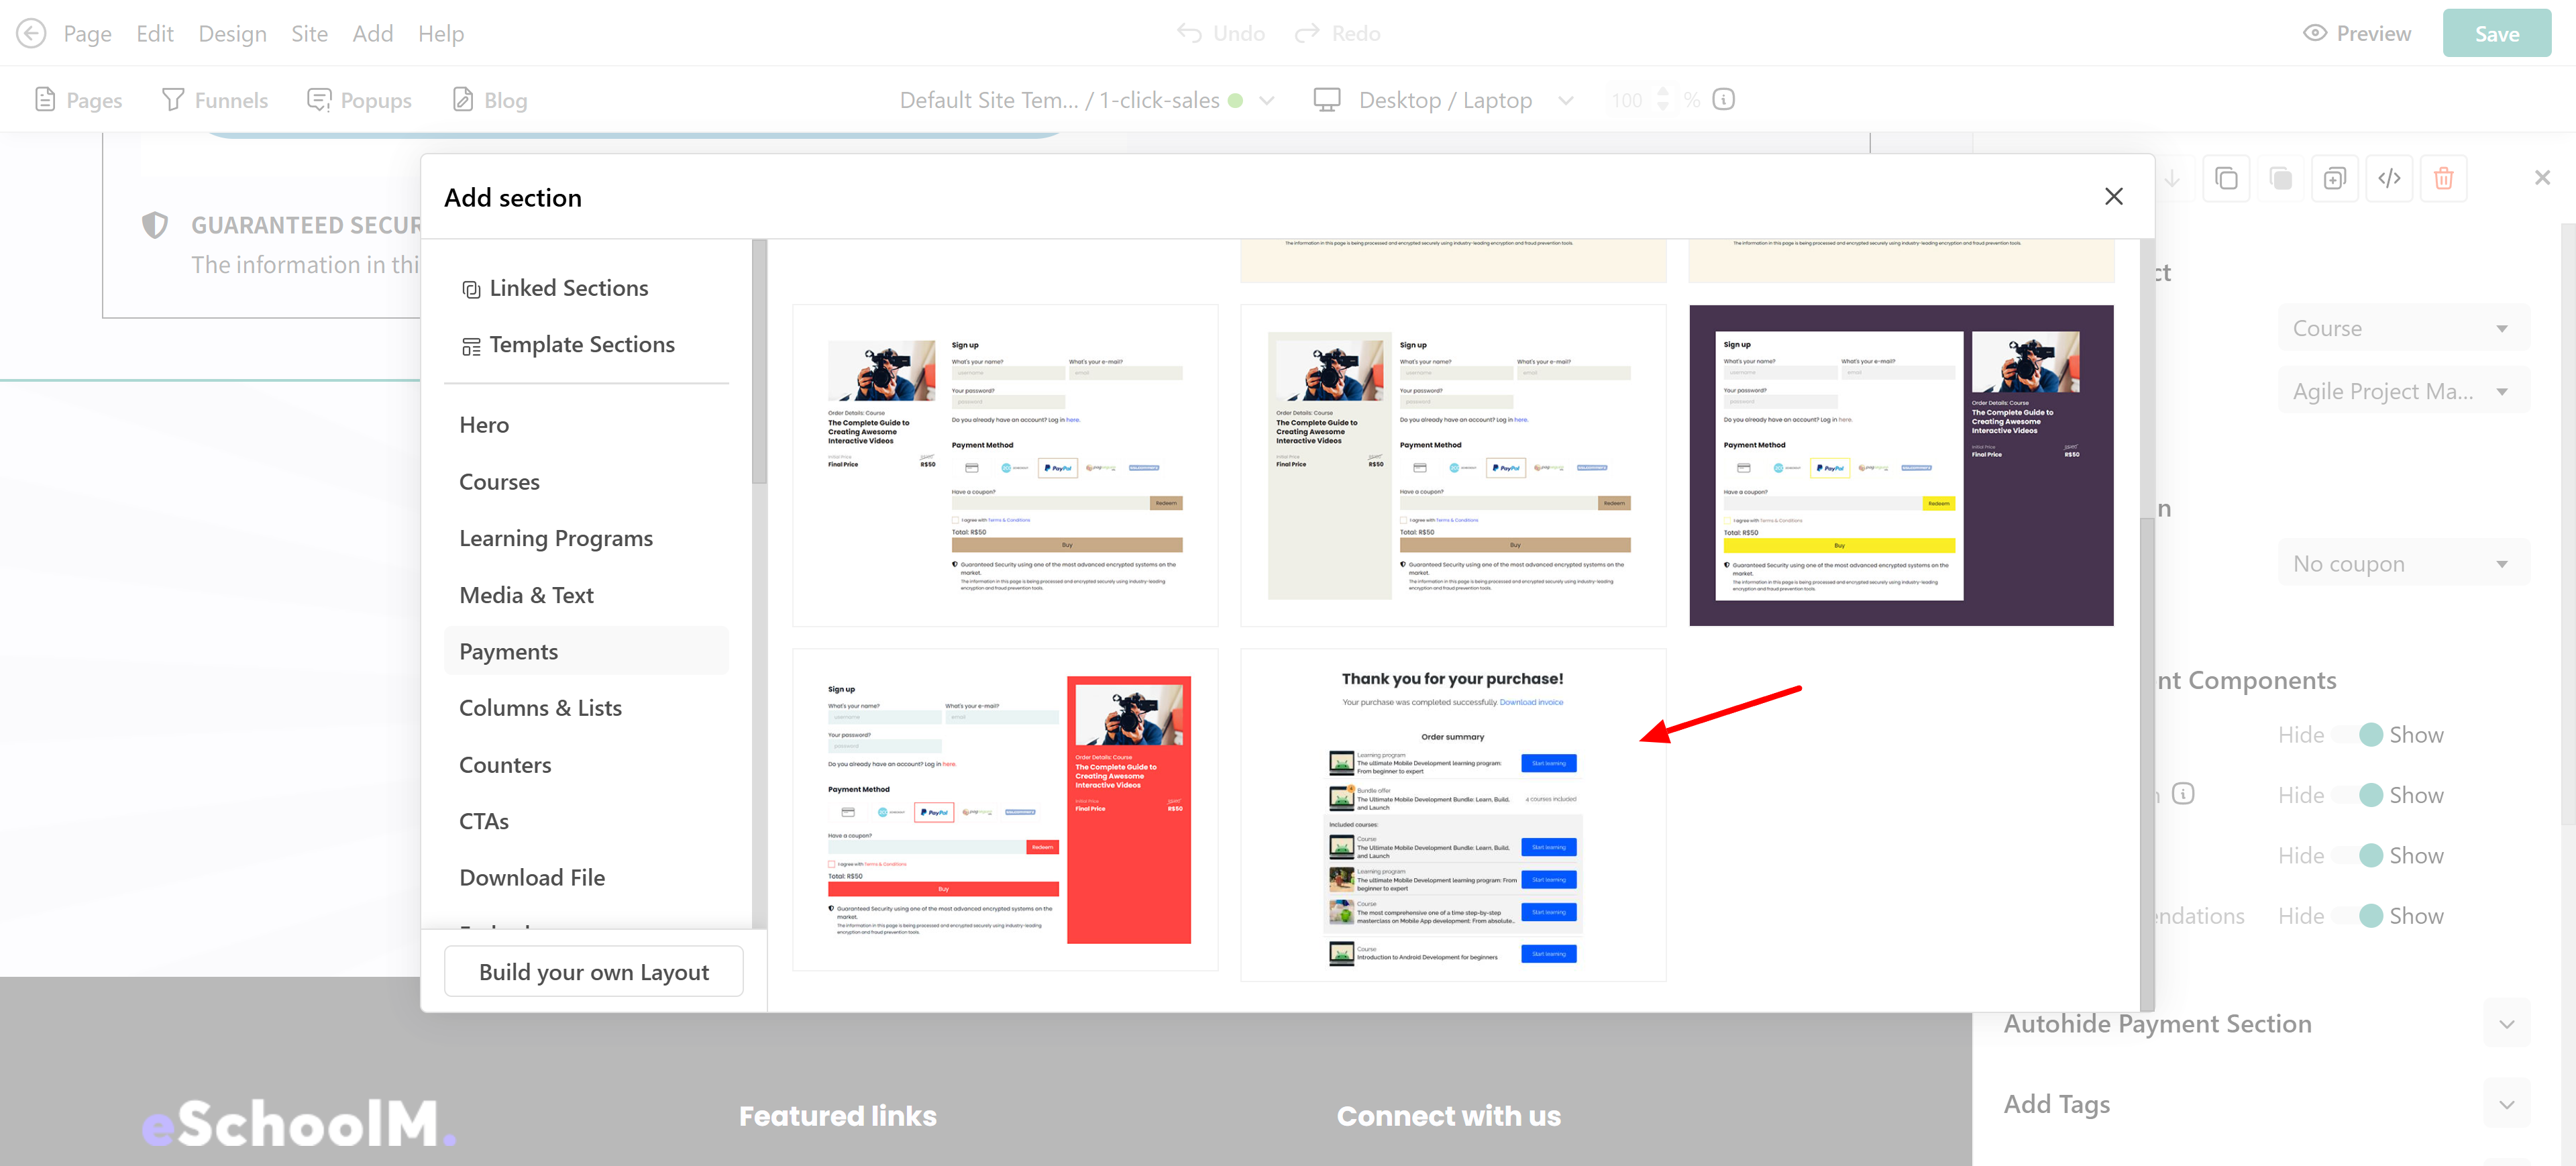
- In your Site Navigation, you can specify whether logged-out users can access the payment section and navigate to the payment page. In this way, new users can buy and sign-up for the course at once.
- If you have specified that users can sign up/log in to your school through social media on your Sign in/up page, this option will appear on your payment form.
- It's important to disable the sandbox option from your payment gateway settings before going live so everything can work smoothly and users can pay for the product.