Buttons help users navigate smoothly throughout your school by directing them to relevant pages, products, forms, and other actions. They are essential for guiding users through the desired learning and sales flow on your website.
In this article, you will learn how to add and customize Button widgets on your LearnWorlds pages.
Types of buttons
You can choose between two types of buttons: Simple buttons and Enrollment buttons.
Simple buttons redirect users based on the action you configure in the Site Builder. They can be linked to pages, URLs, sections, forms, pop-ups, and other destinations within or outside your school. Their appearance, text, size, and behavior can also be fully customized to match your design and user flow.
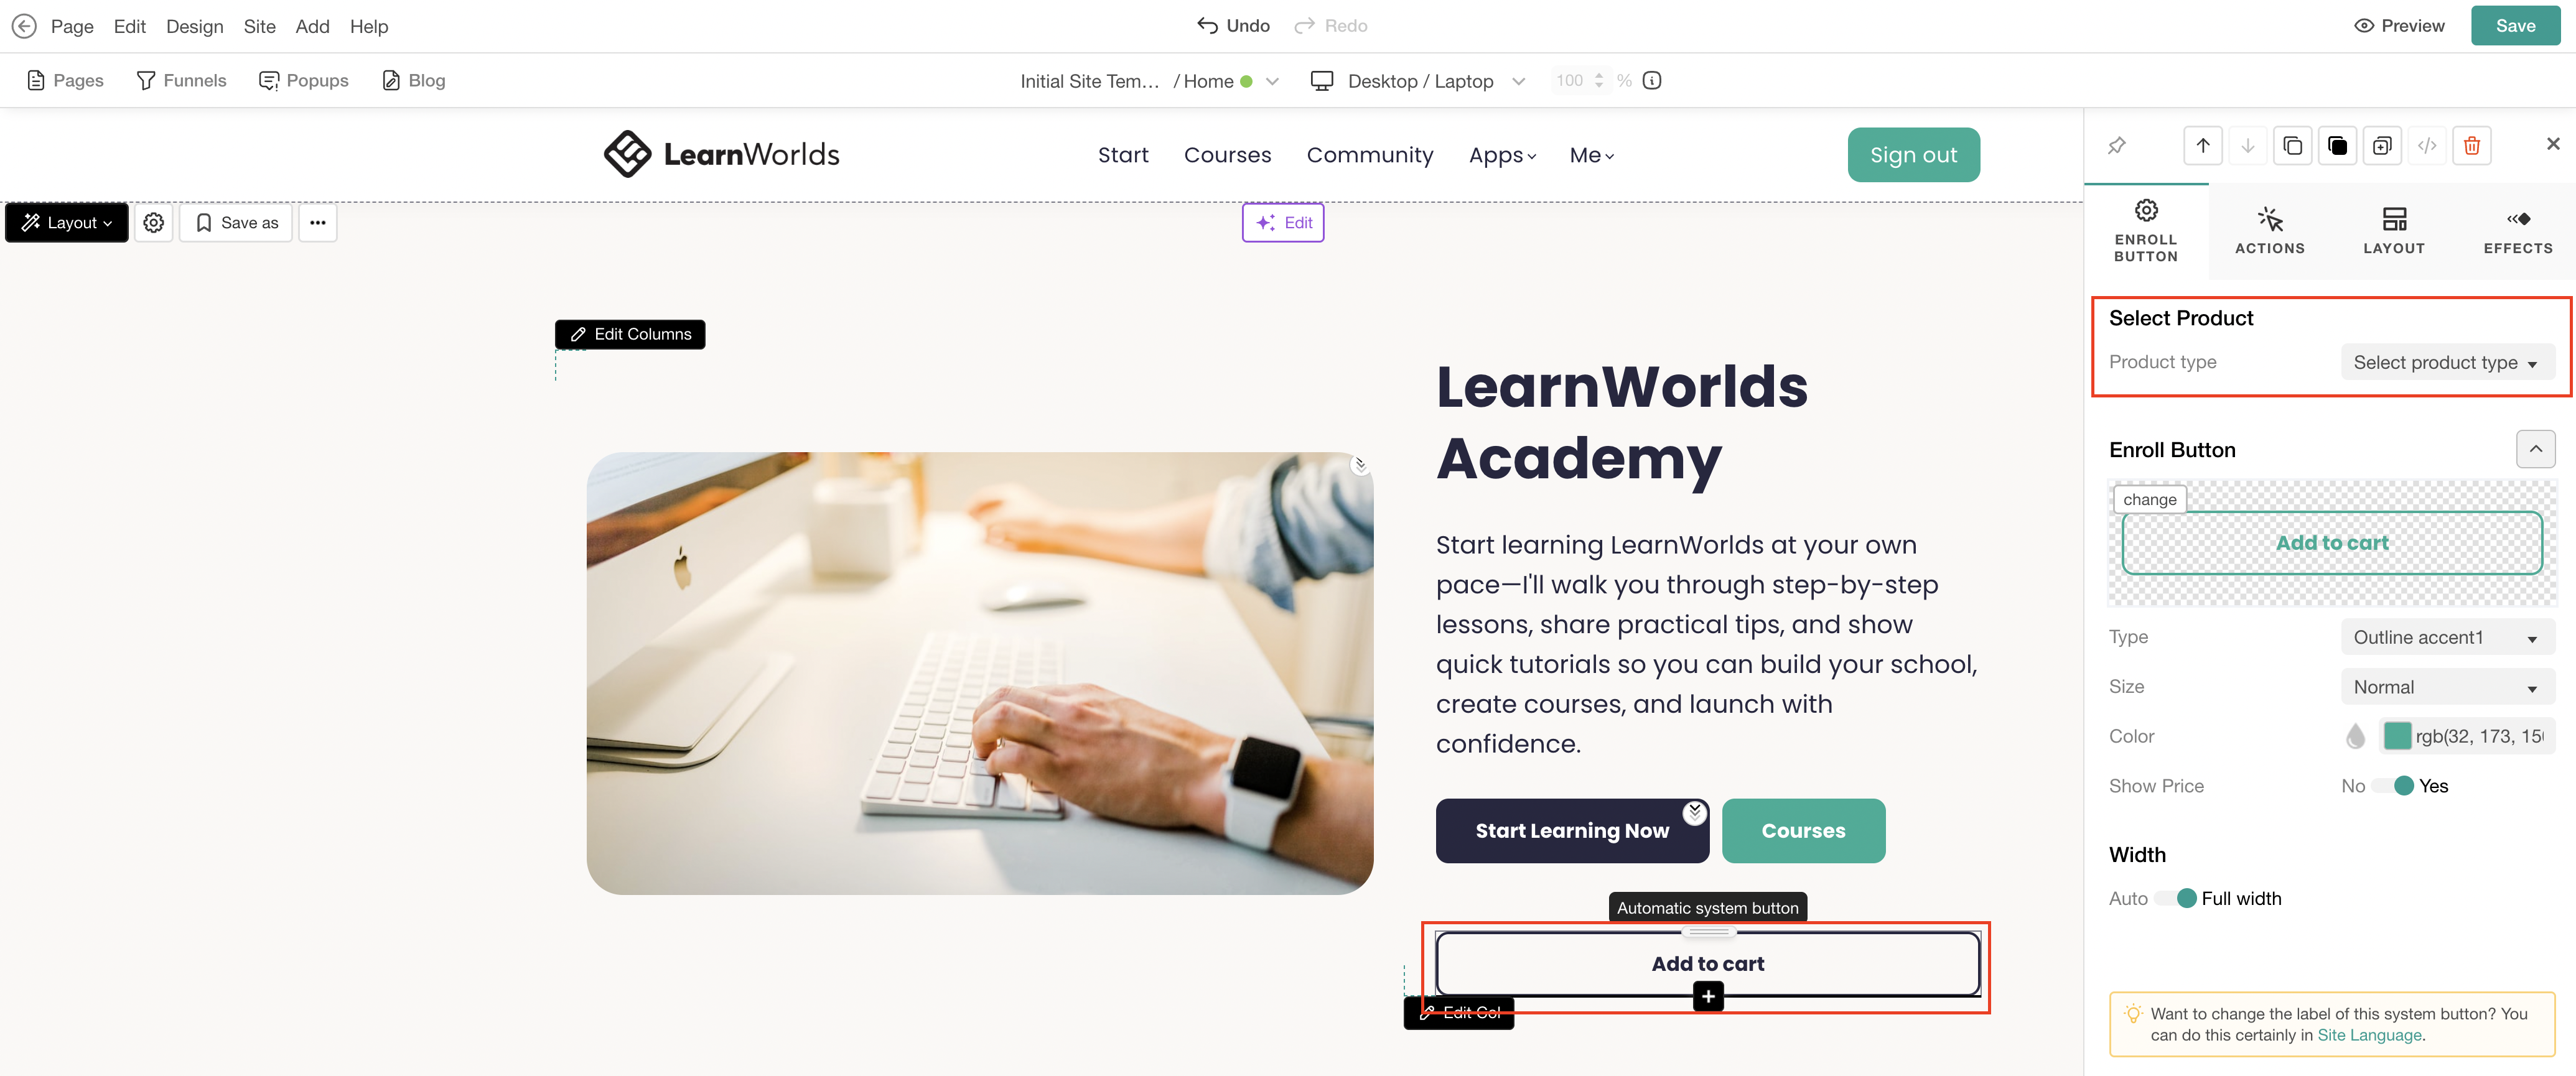
Enrollment buttons are designed to simplify the purchasing and navigation experience for your users by automatically adjusting based on their enrollment status:
- Unenrolled users can purchase or enroll in a product.
- Enrolled users are automatically redirected to continue learning from where they left off.
For more information about Enrollment buttons, click here.
Add buttons
1. Navigate to Website → Design → Edit Website.
2. Choose any page to edit from the Page Manager.
3. Hover over the element under which you want to add the widget and click the (+) icon to add it directly below that specific element. If a button already exists in the selected element, the + Button option will also appear, allowing you to add another button based on the existing layout and further customize it.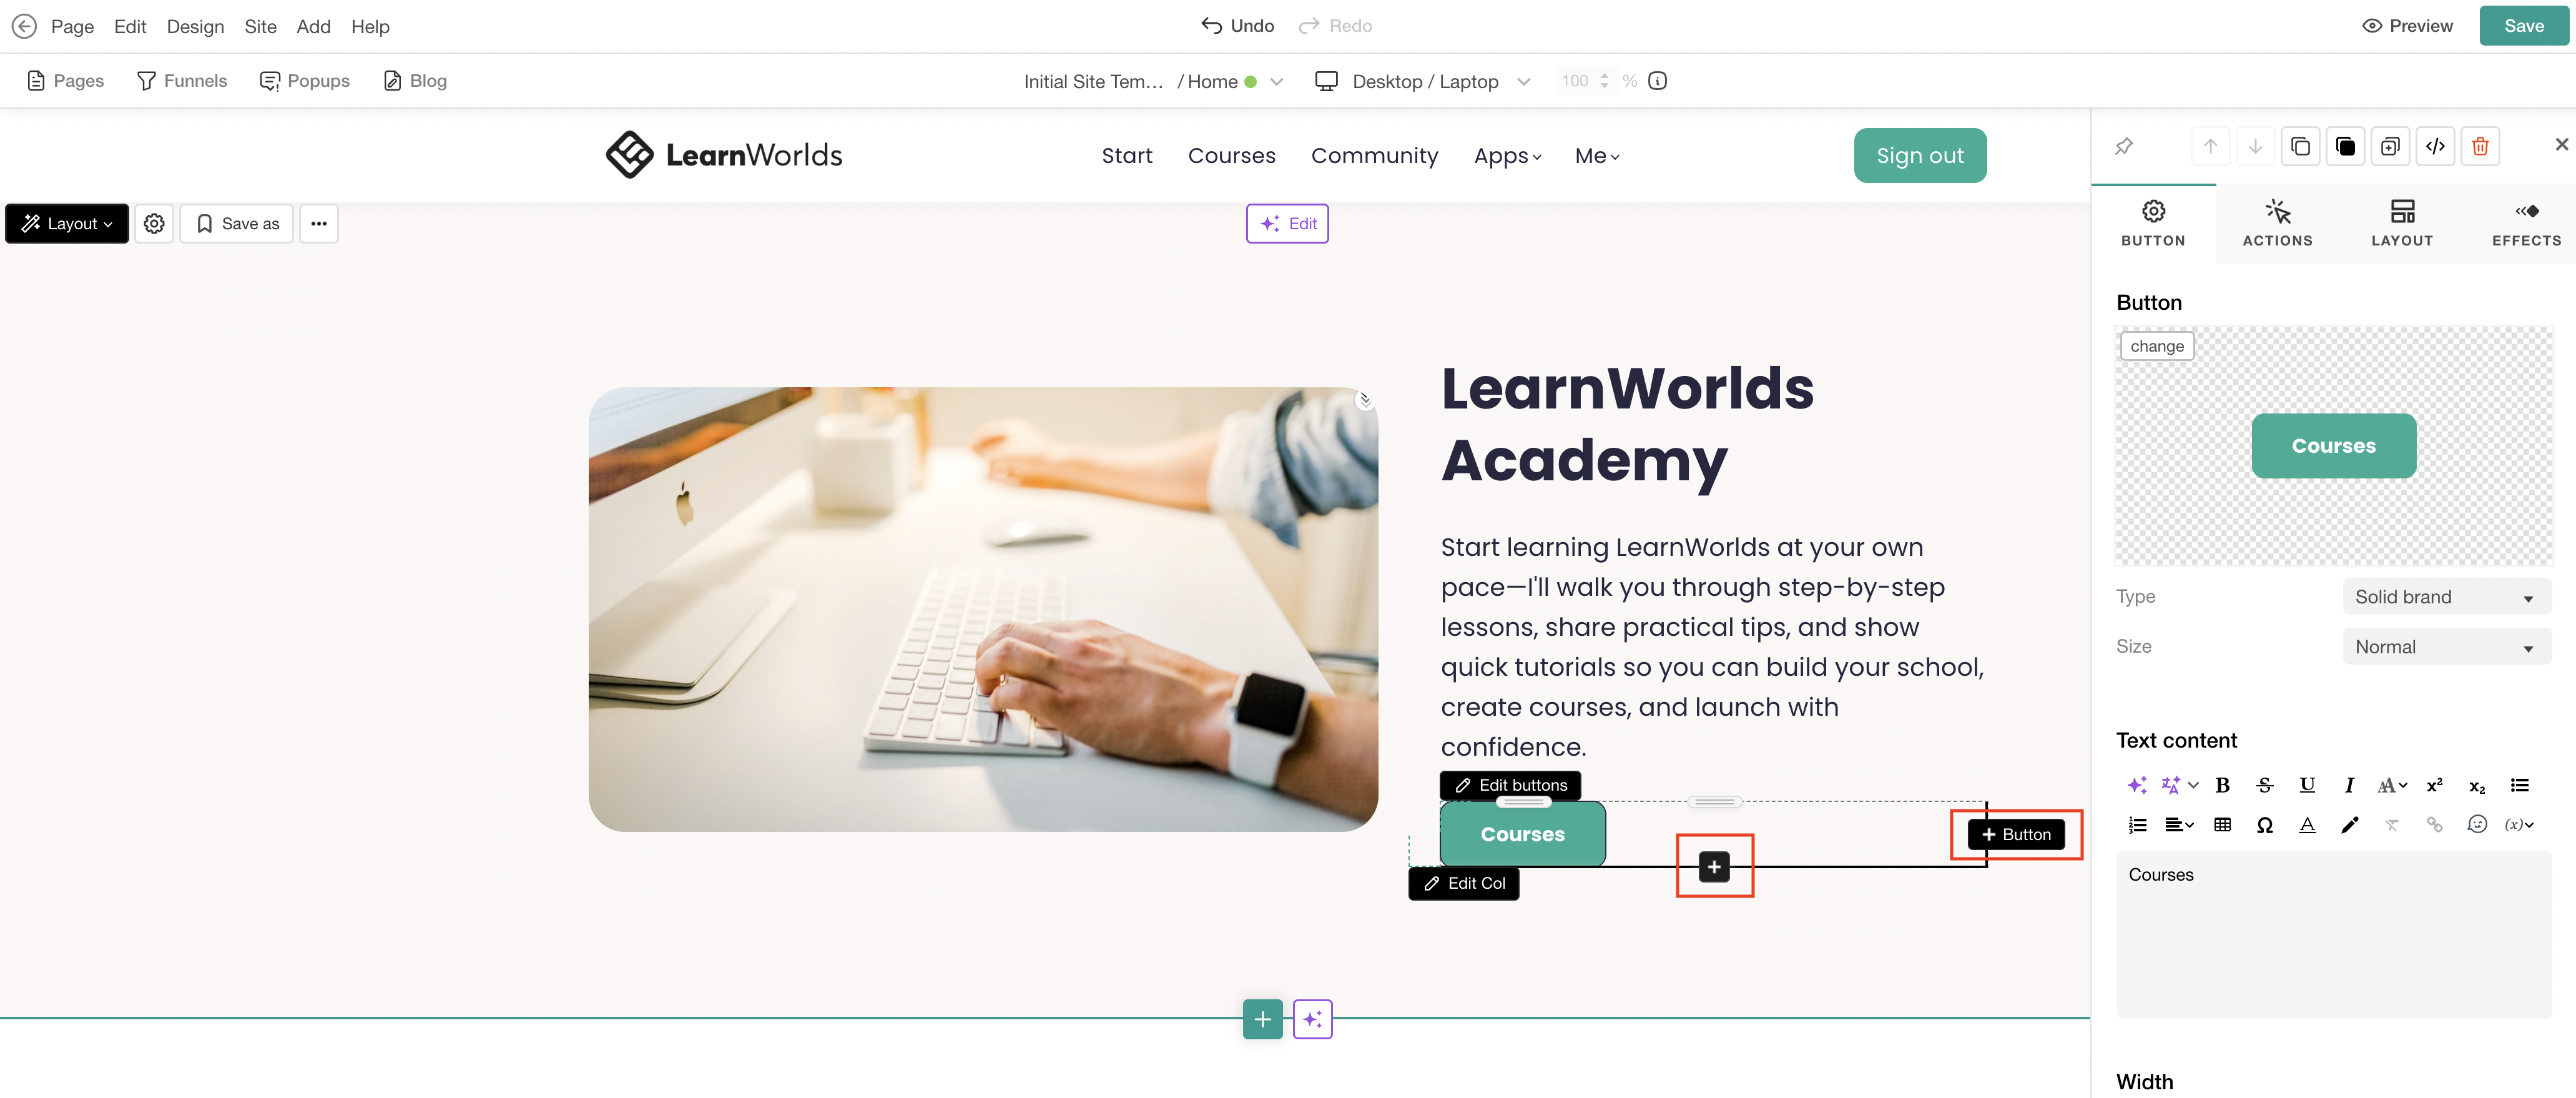
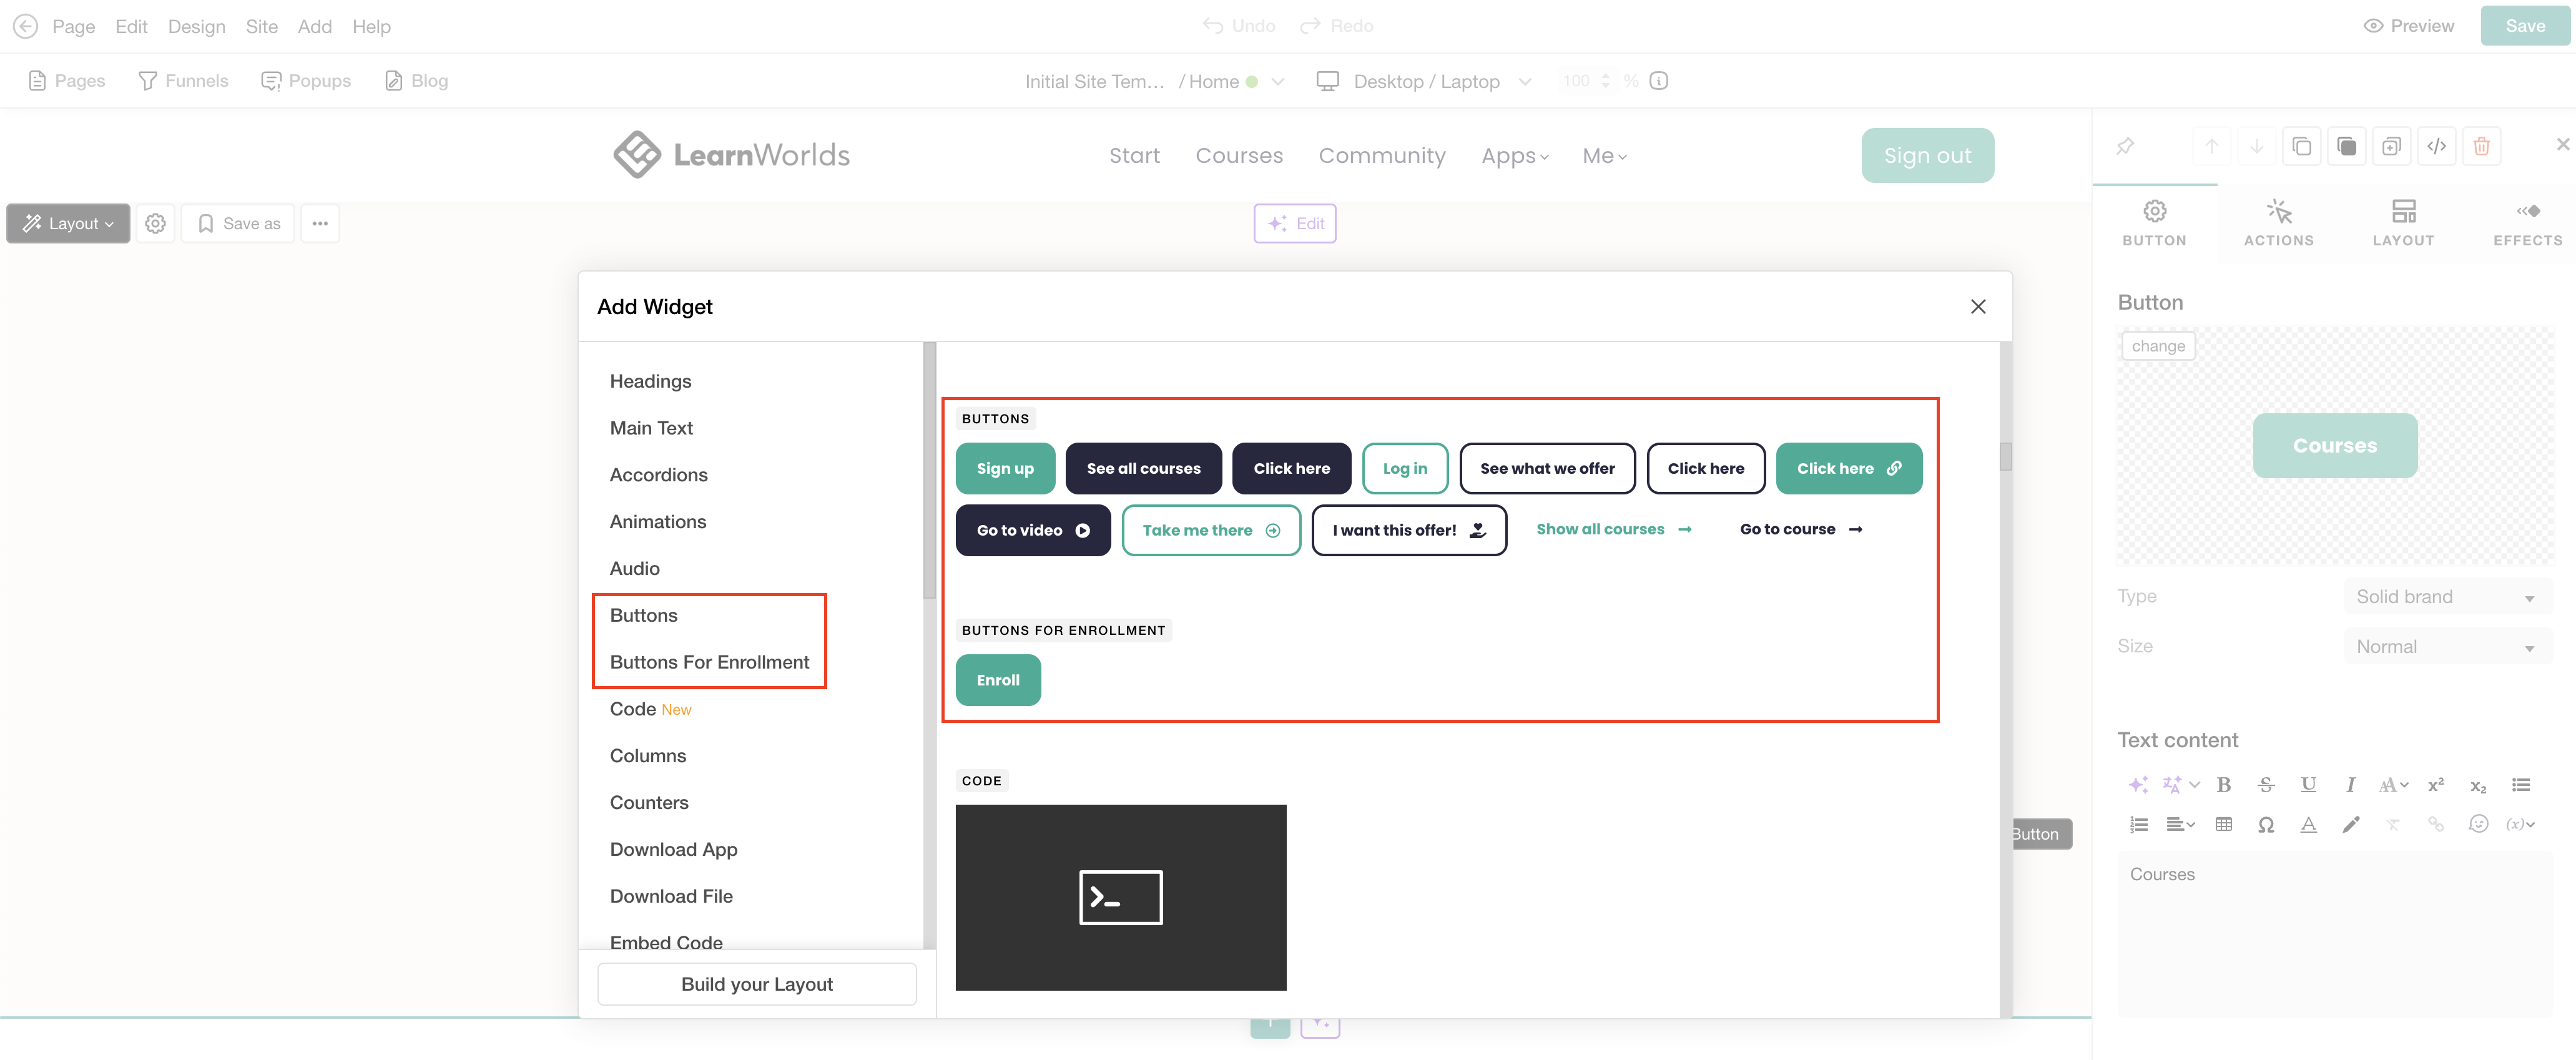
4. Select the Buttons or Buttons For Enrollment category. Insert the preferred widget.
5. Click Save to save changes on the page.
Customize buttons
1. Click on the button for the sideform to appear.
2. Use the Button tab to configure the button's text and appearance.
3. Use the Actions tab to configure the on-click action, visibility, add tags upon click, and on-hover colors.
4. Use the Layout tab to further adjust the positioning and appearance.
4. Click Save to save changes on the page.
- For Enrollment buttons, custom on-click actions are not available, as the button behavior is automatically determined based on the user’s enrollment status. Make sure to select the product the button should be connected to.
- All interface texts can be edited via the Site Language.
- For more information on how to further customize sections using the sideform, click here.