In LearnWorlds, all your Courses and Learning Programs are displayed as Cards, offering a compact, visually appealing, and easy-to-navigate presentation. These cards appear in the Course Catalogue and Learning Program Catalogue, allowing visitors to view, explore, and purchase your offerings quickly.
Each Card showcases essential details like the title, image, description, author, and more, providing a snapshot of what learners can expect.
In this article, we will learn how to customize the product's Cards.
Where cards appear: Catalogue sections
The Course Cards and Learning Program Cards appear within the:
They are an eye-catching point of attraction since they offer a brief sum-up (title, image, description, author, etc.) of what your products have to offer.
To add a catalogue section while designing a page, click on +Add section between the desired sections. Then, choose Courses or Programs and select one of the available catalogue layout options. 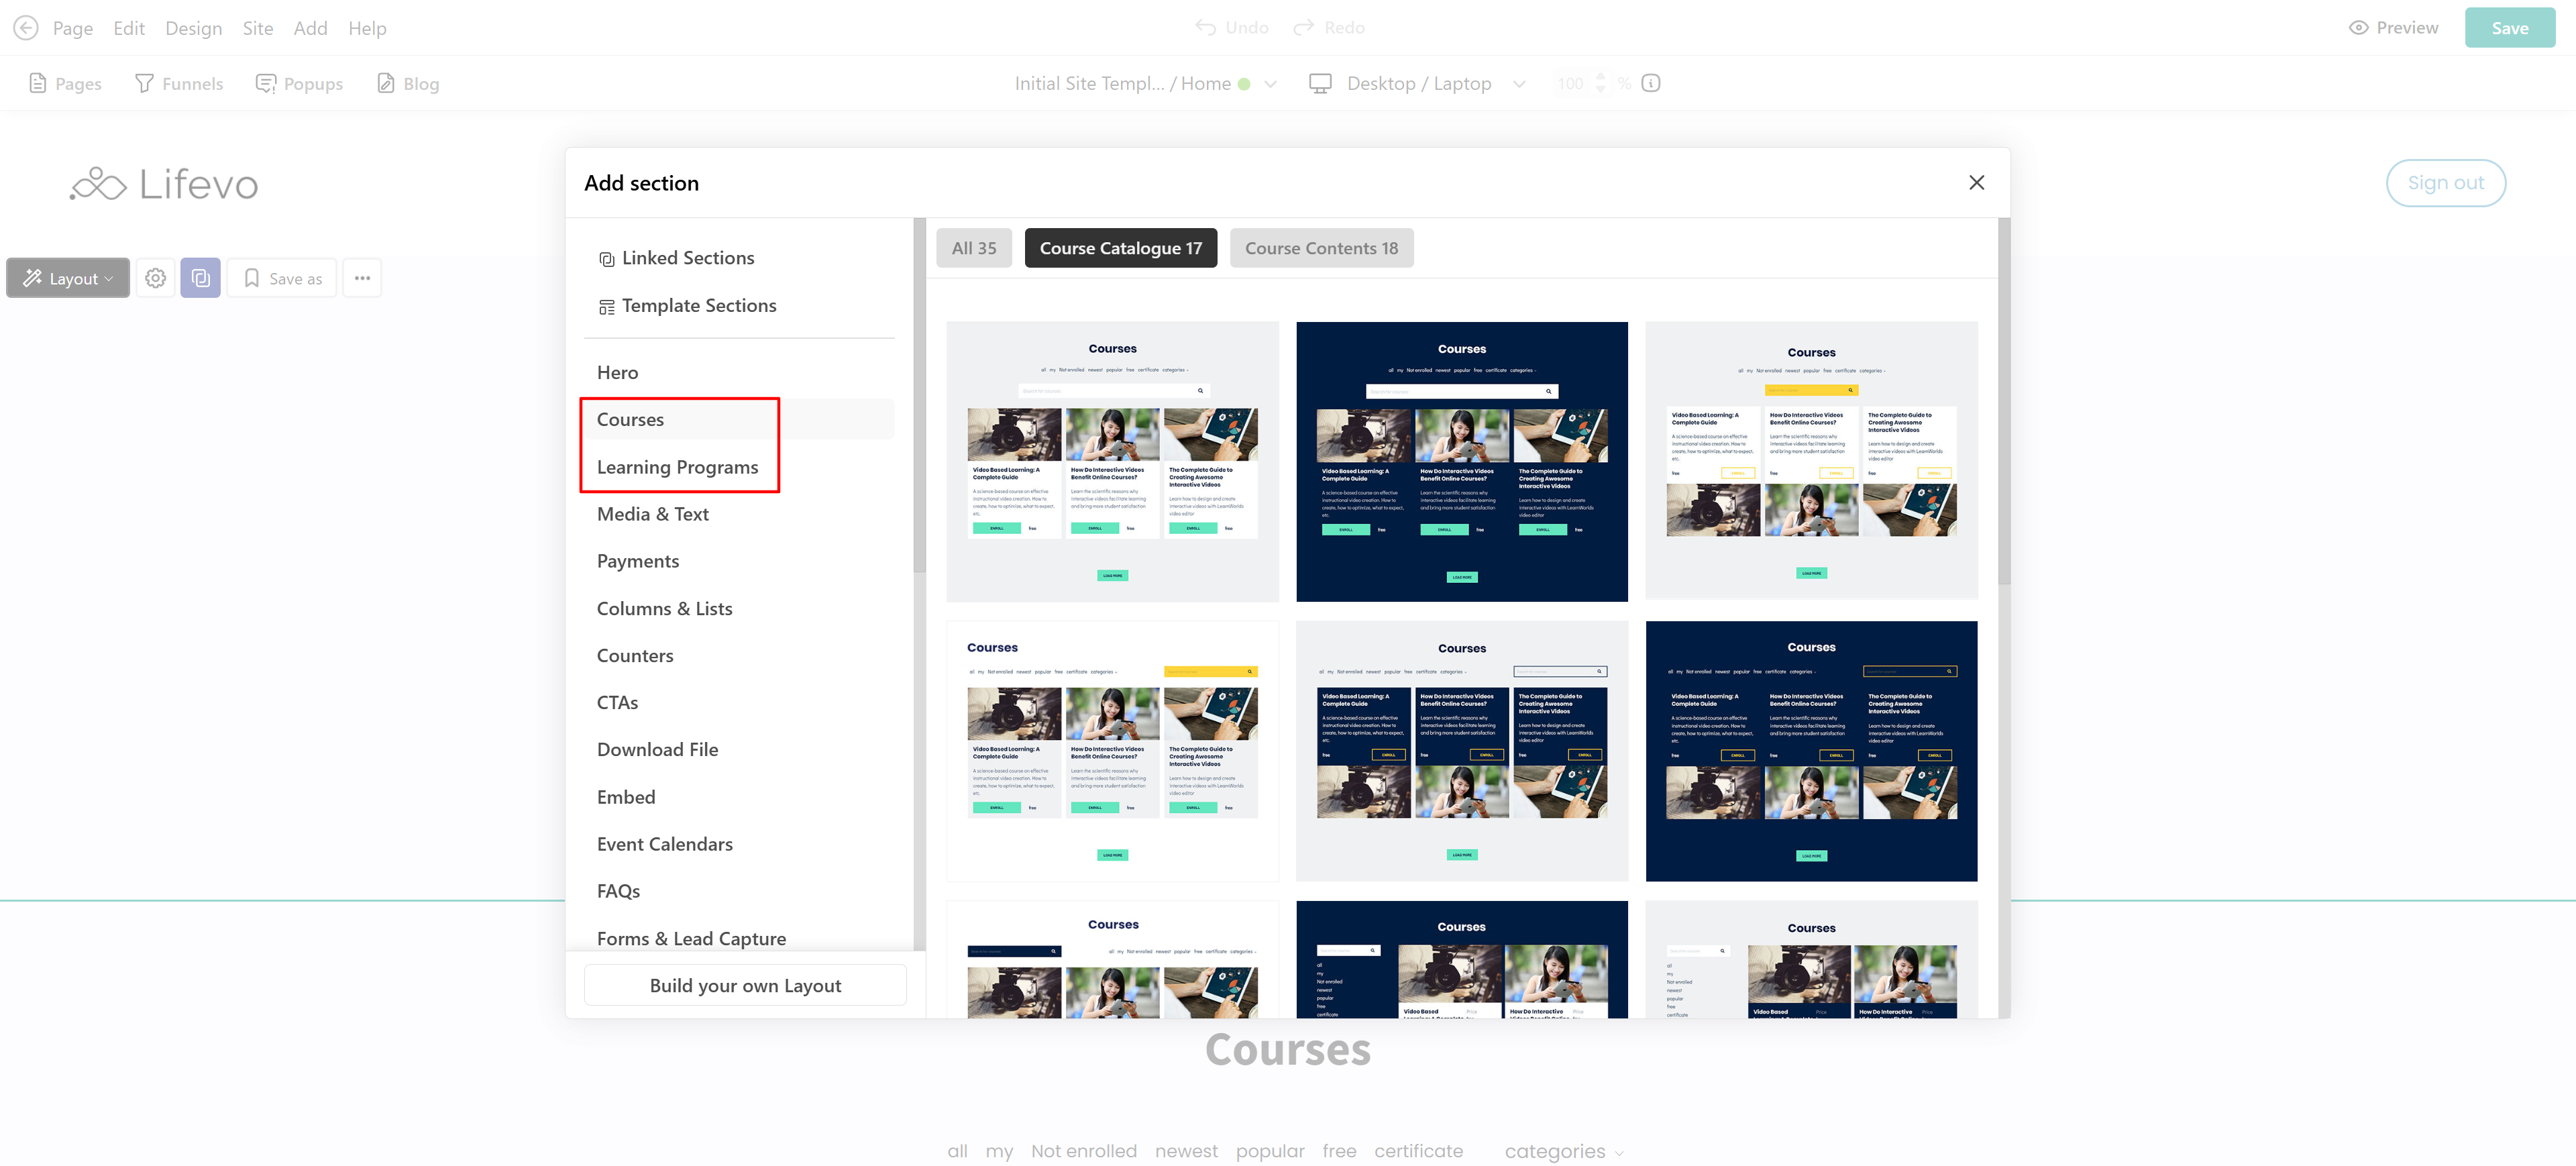
After adding the Catalogue section to your pages, visitors can click on a card to be redirected to the product's dedicated layout page, the checkout page to proceed with purchasing the product, or directly within the course player if applicable (for courses)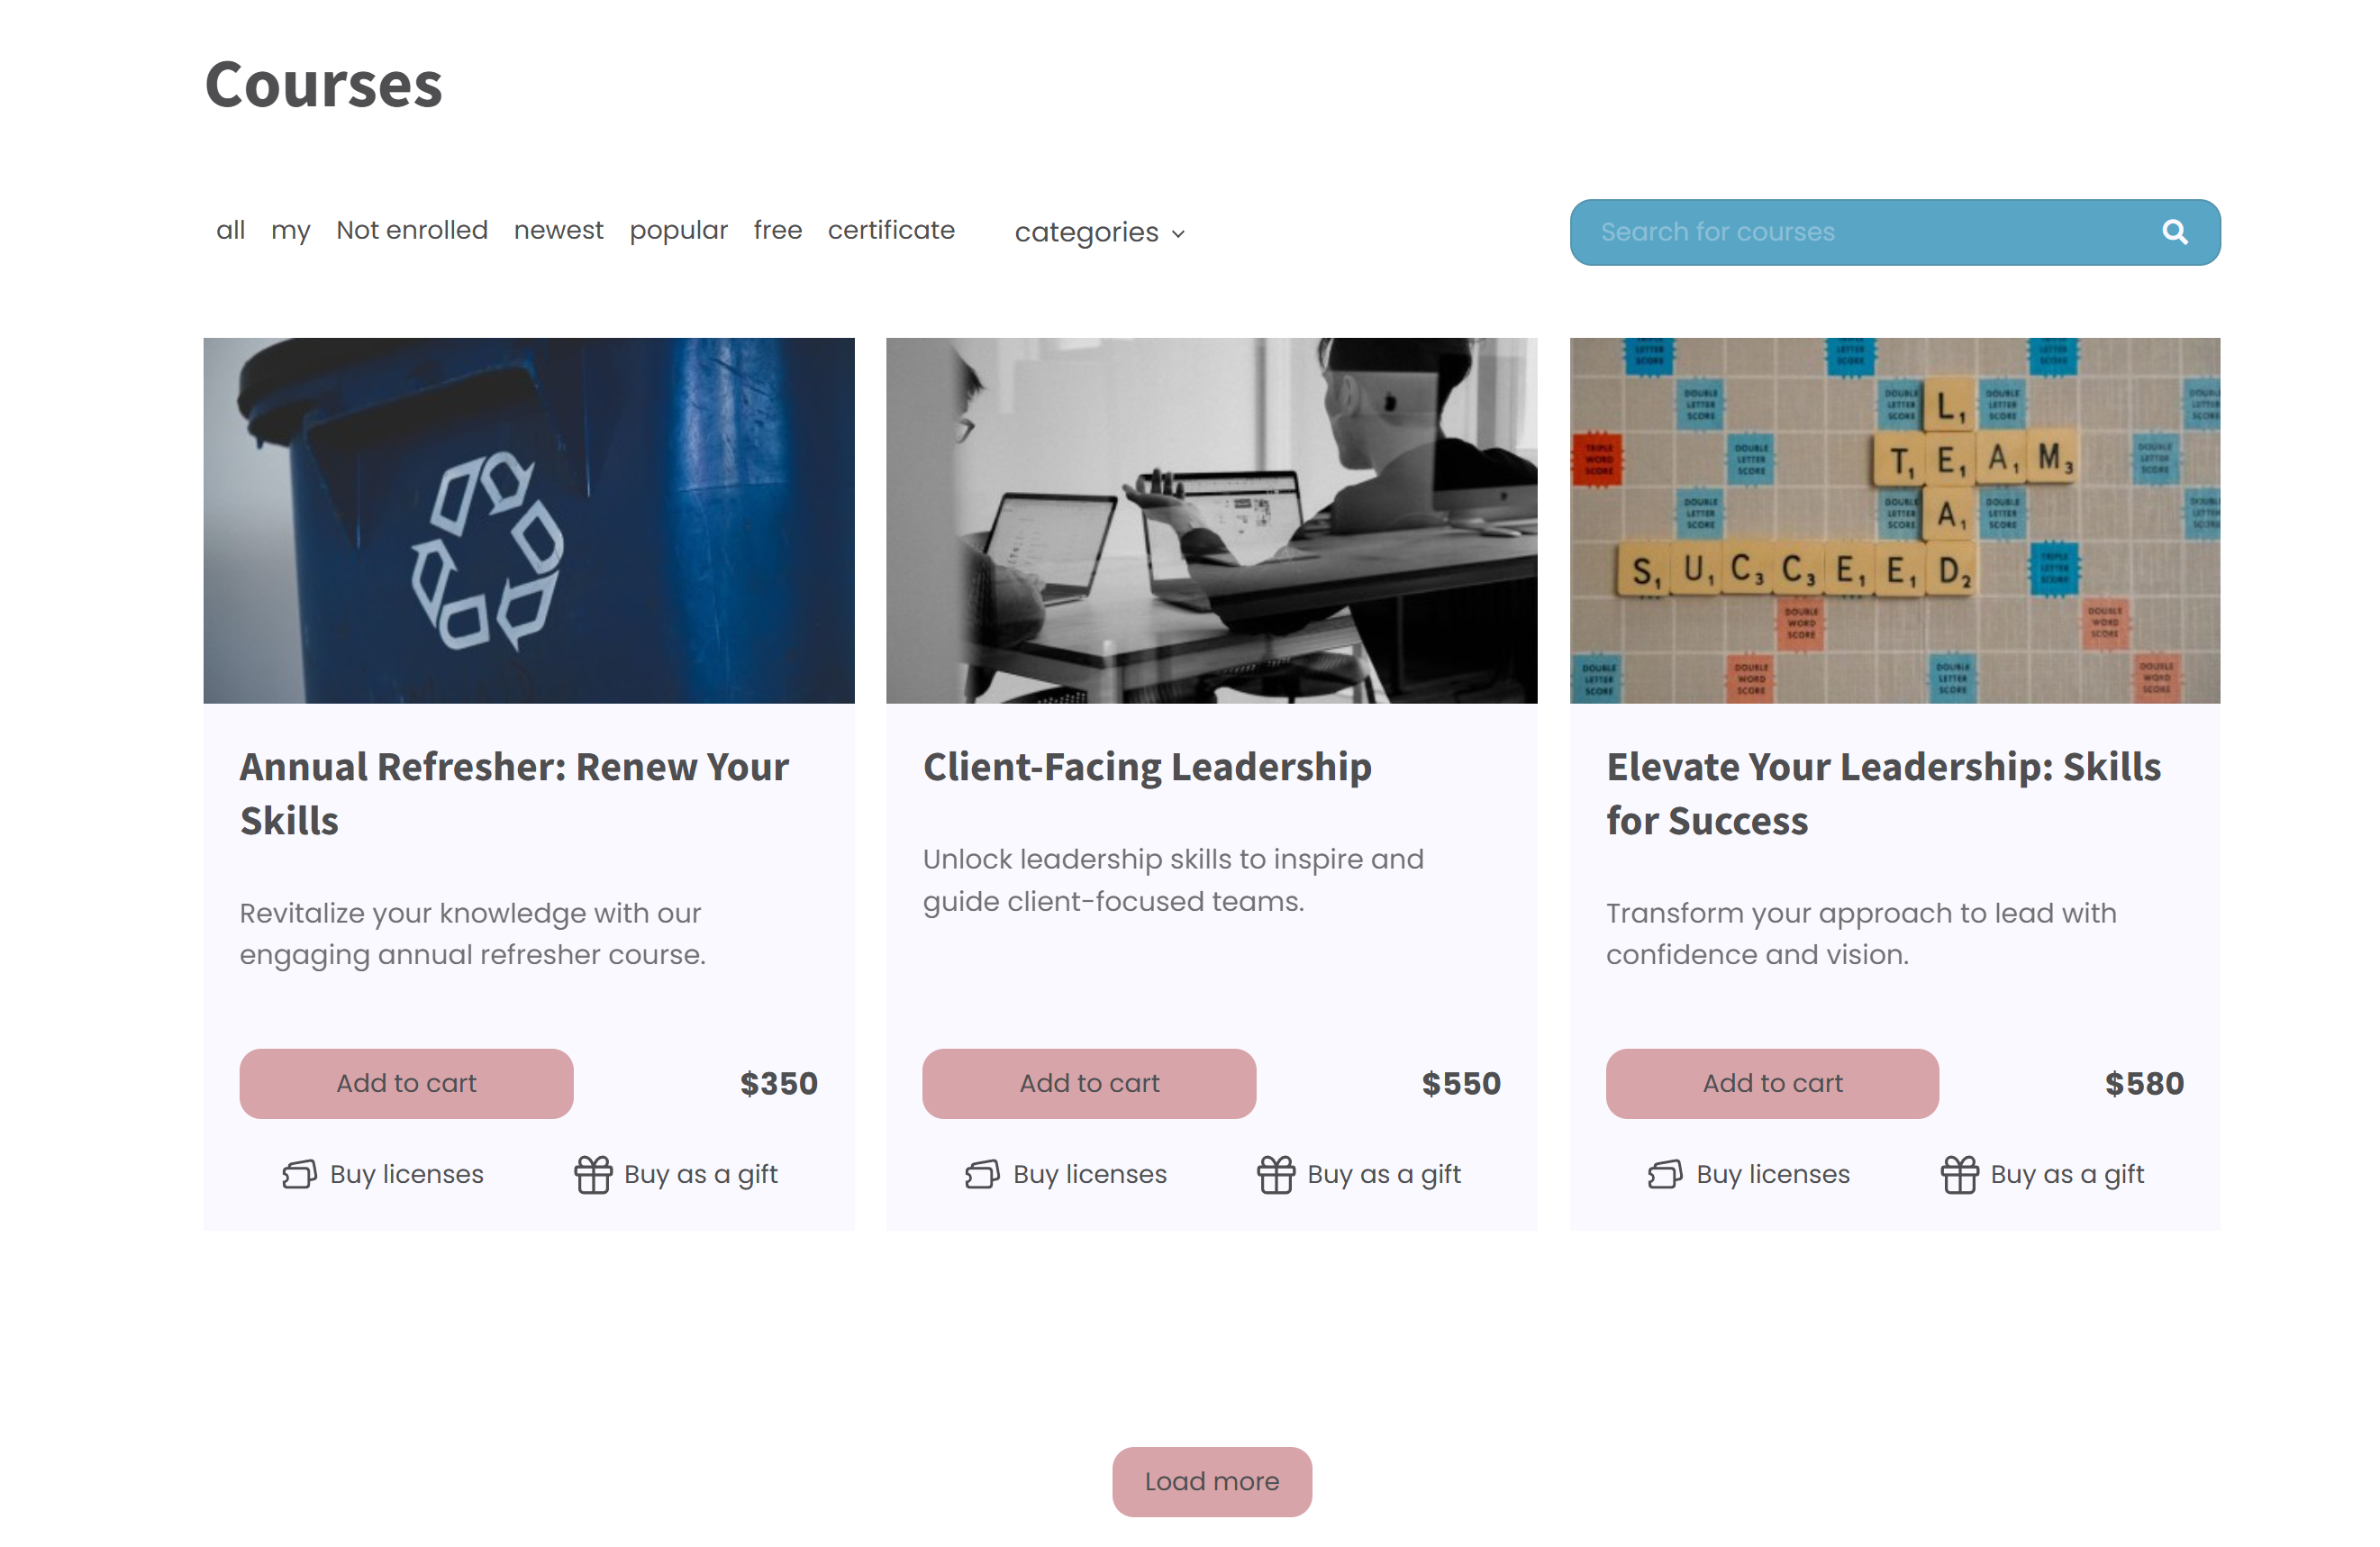
Product cards settings
Before adding these cards to your pages, it’s best to configure their visual and descriptive elements, like the Image, Title, and Description, for all the products in your school.
To set up a Course or Learning Program Card:
1. Go to Course Manager (for Courses) or Learning Program Manager (for Programs) and select the item you want to edit.
2. Navigate to the General tab.
3. Click Choose Image to upload an existing image, or use Fill with AI to generate one for you.
For best results, upload a 640 X 360 image file. 4. Add or change the Title and Description of your product.
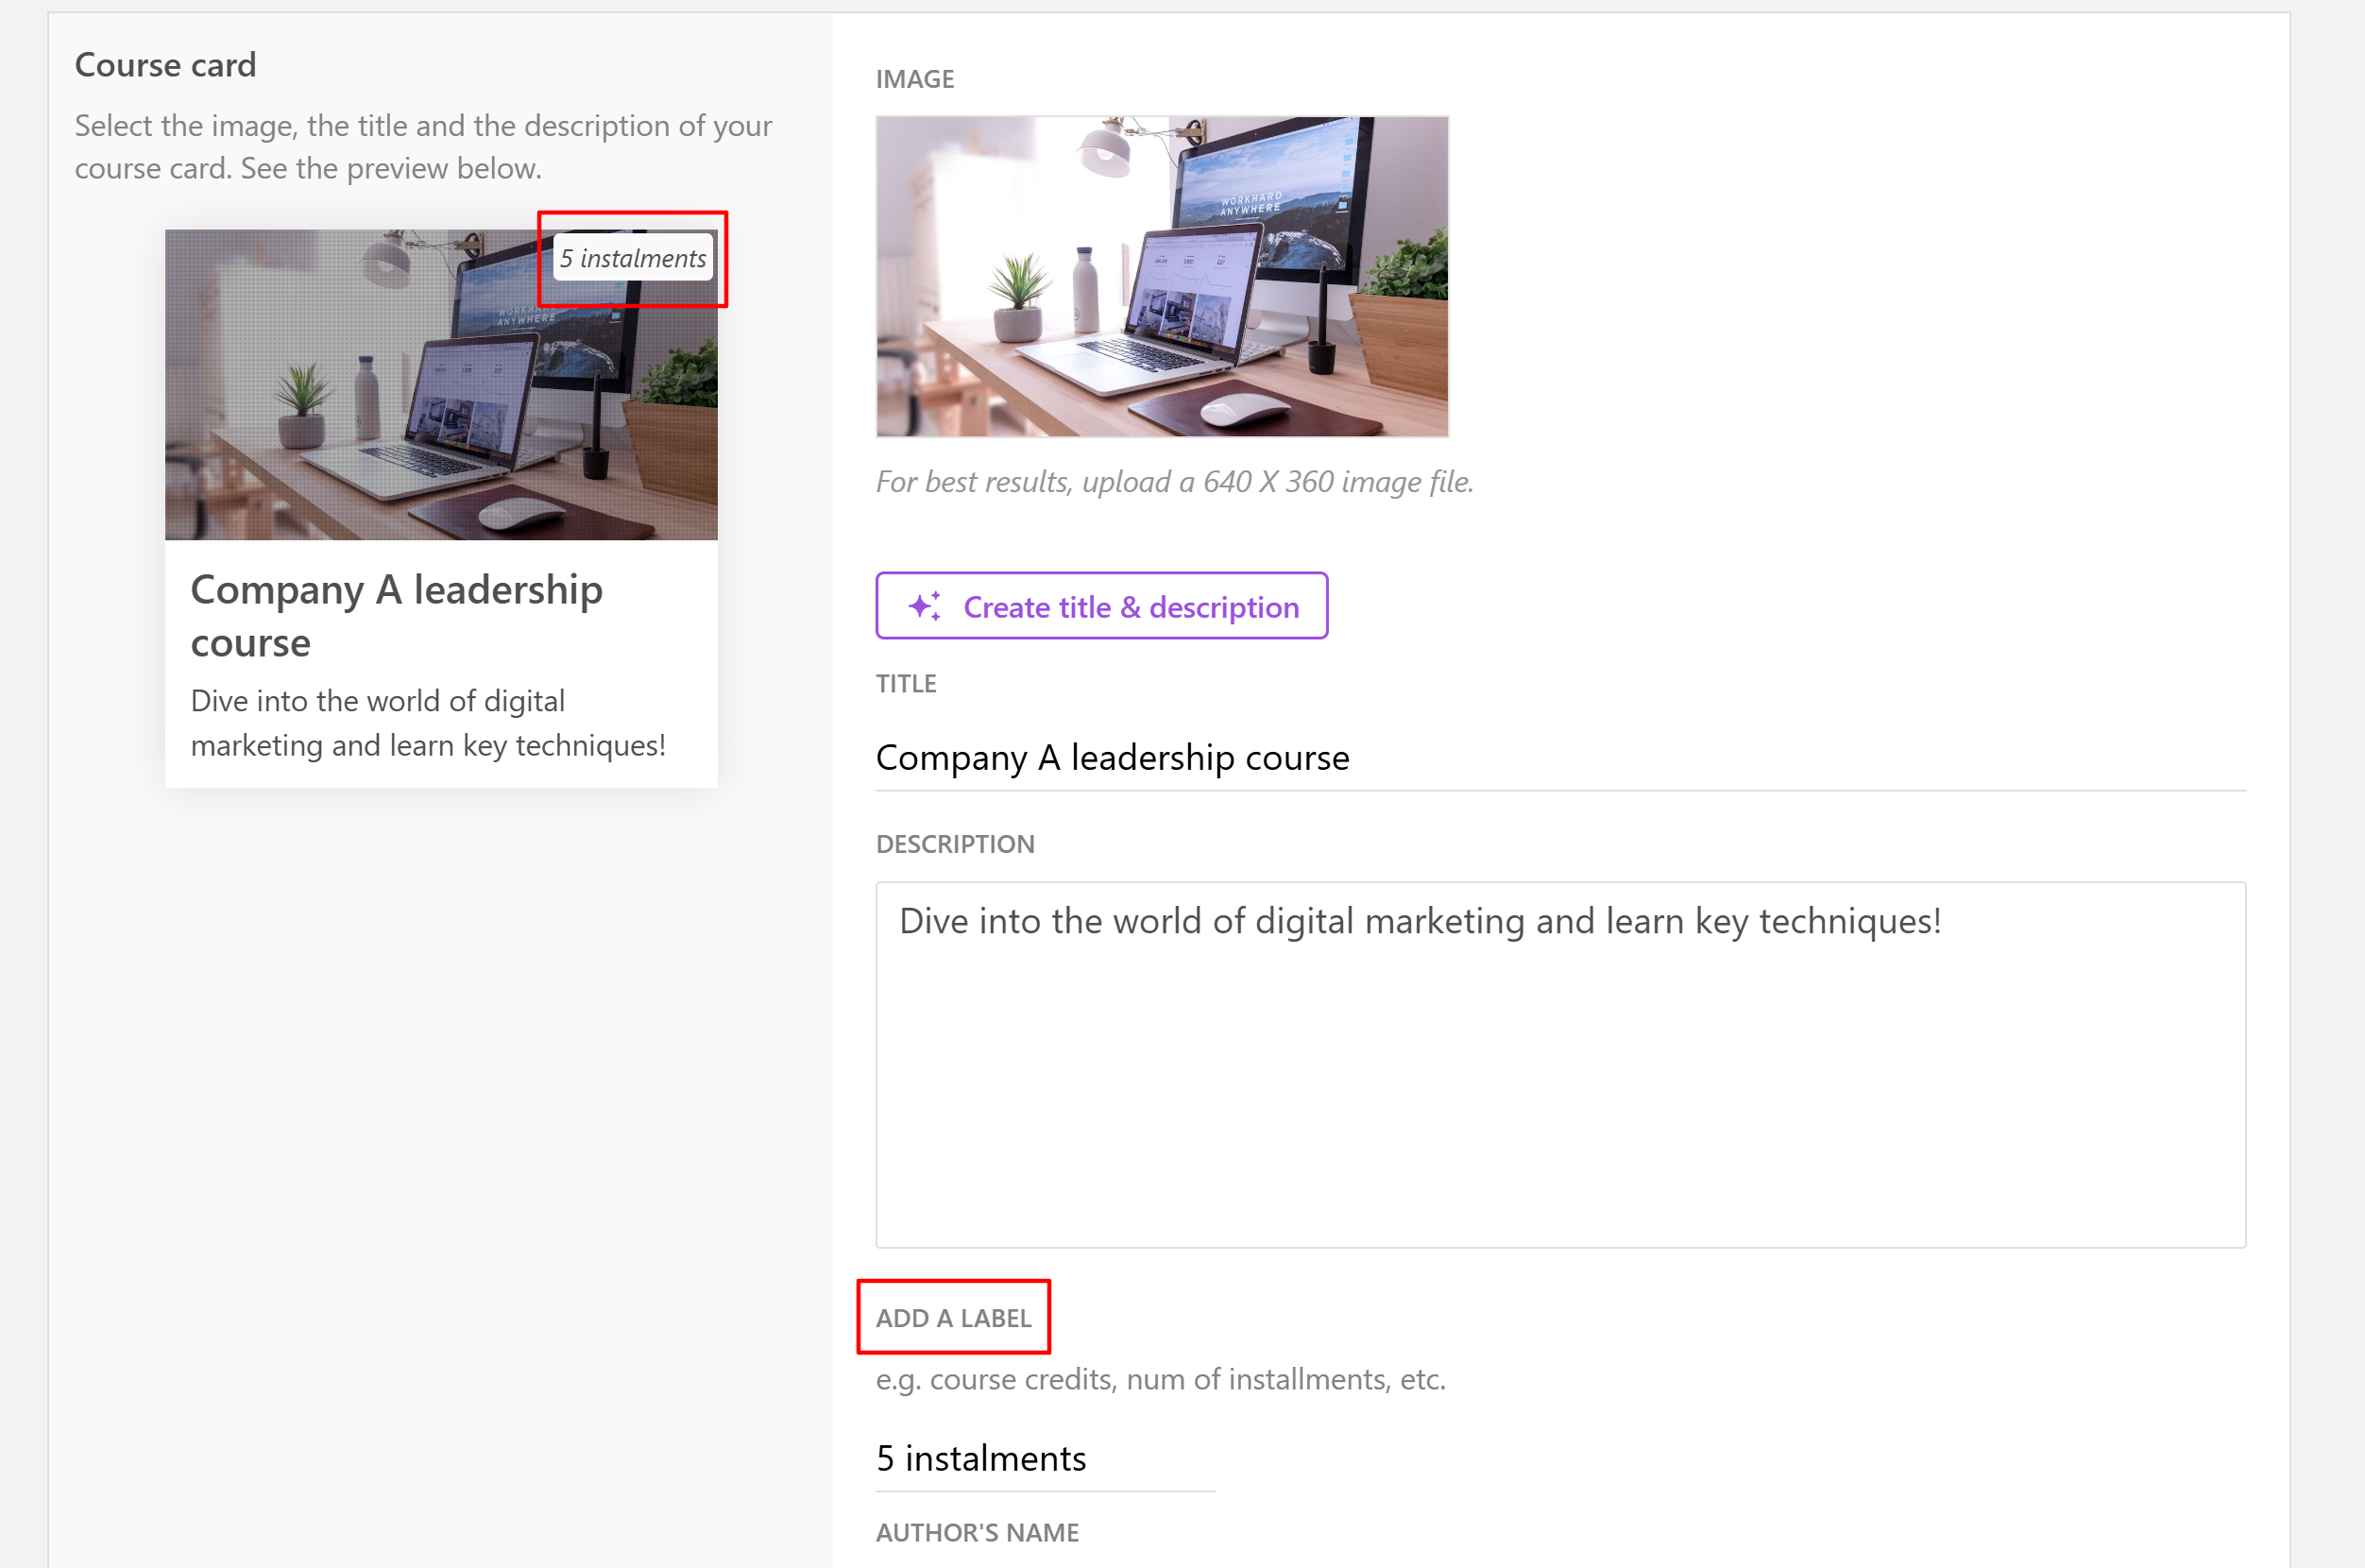
5. Add a Label. For courses, you can also add the Author’s Name and the Author’s Avatar.
6. Click on Save.

If you’d like to use the AI Assistant to generate a title or description, click Create Title & Description and enter a prompt describing what you need. Even after adding a title or description, you can click the AI button next to each field at any time to refine and enhance the text later.
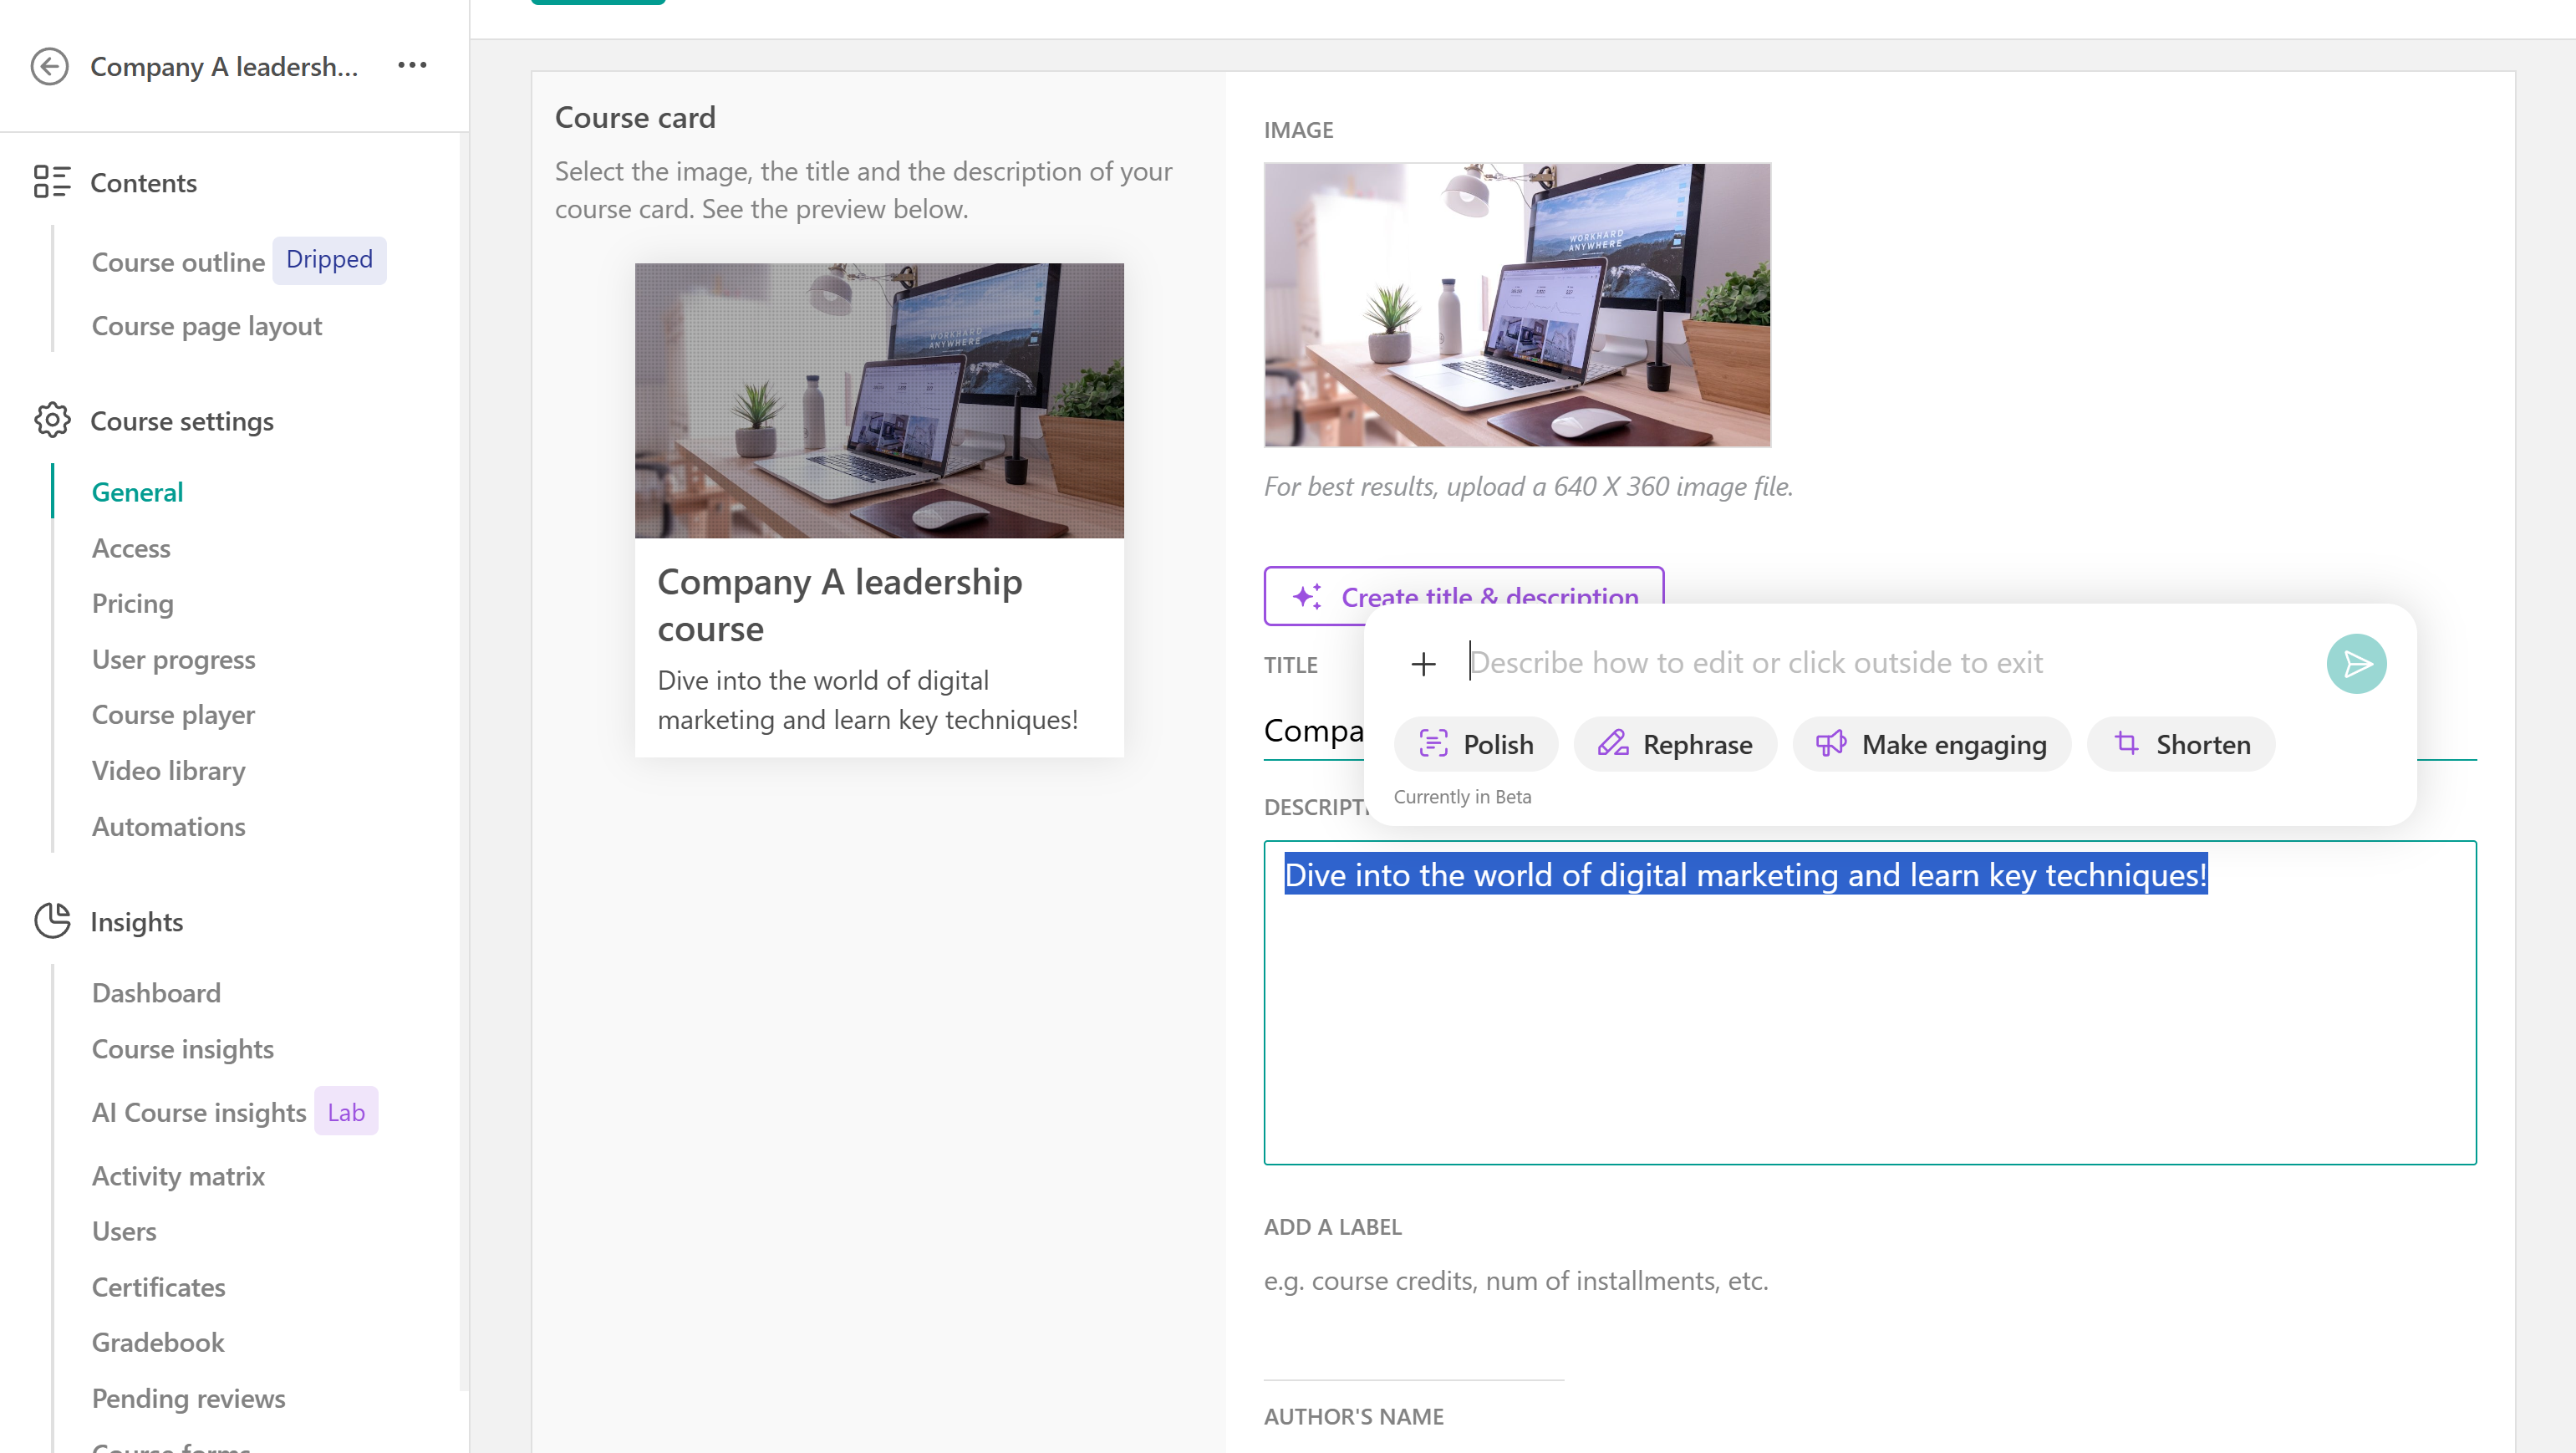
Everything you set up (title, description, label, author name & picture) will be reflected on the Catalogue section and its Cards.
Notes:
- The Title & Card image can also be added while initially creating your products.
- The special offer ribbon appears when you have activated the compare at price option in the Pricing tab or if you have created an offer for this product.
- The Author's Name field and the Categories field will appear in your Courses section under the Author filter and the Categories filter, respectively.
- The Add a label field can be used in your custom certificate template, as the Credits custom field.
- The label field will also be displayed on the Product card as shown below:
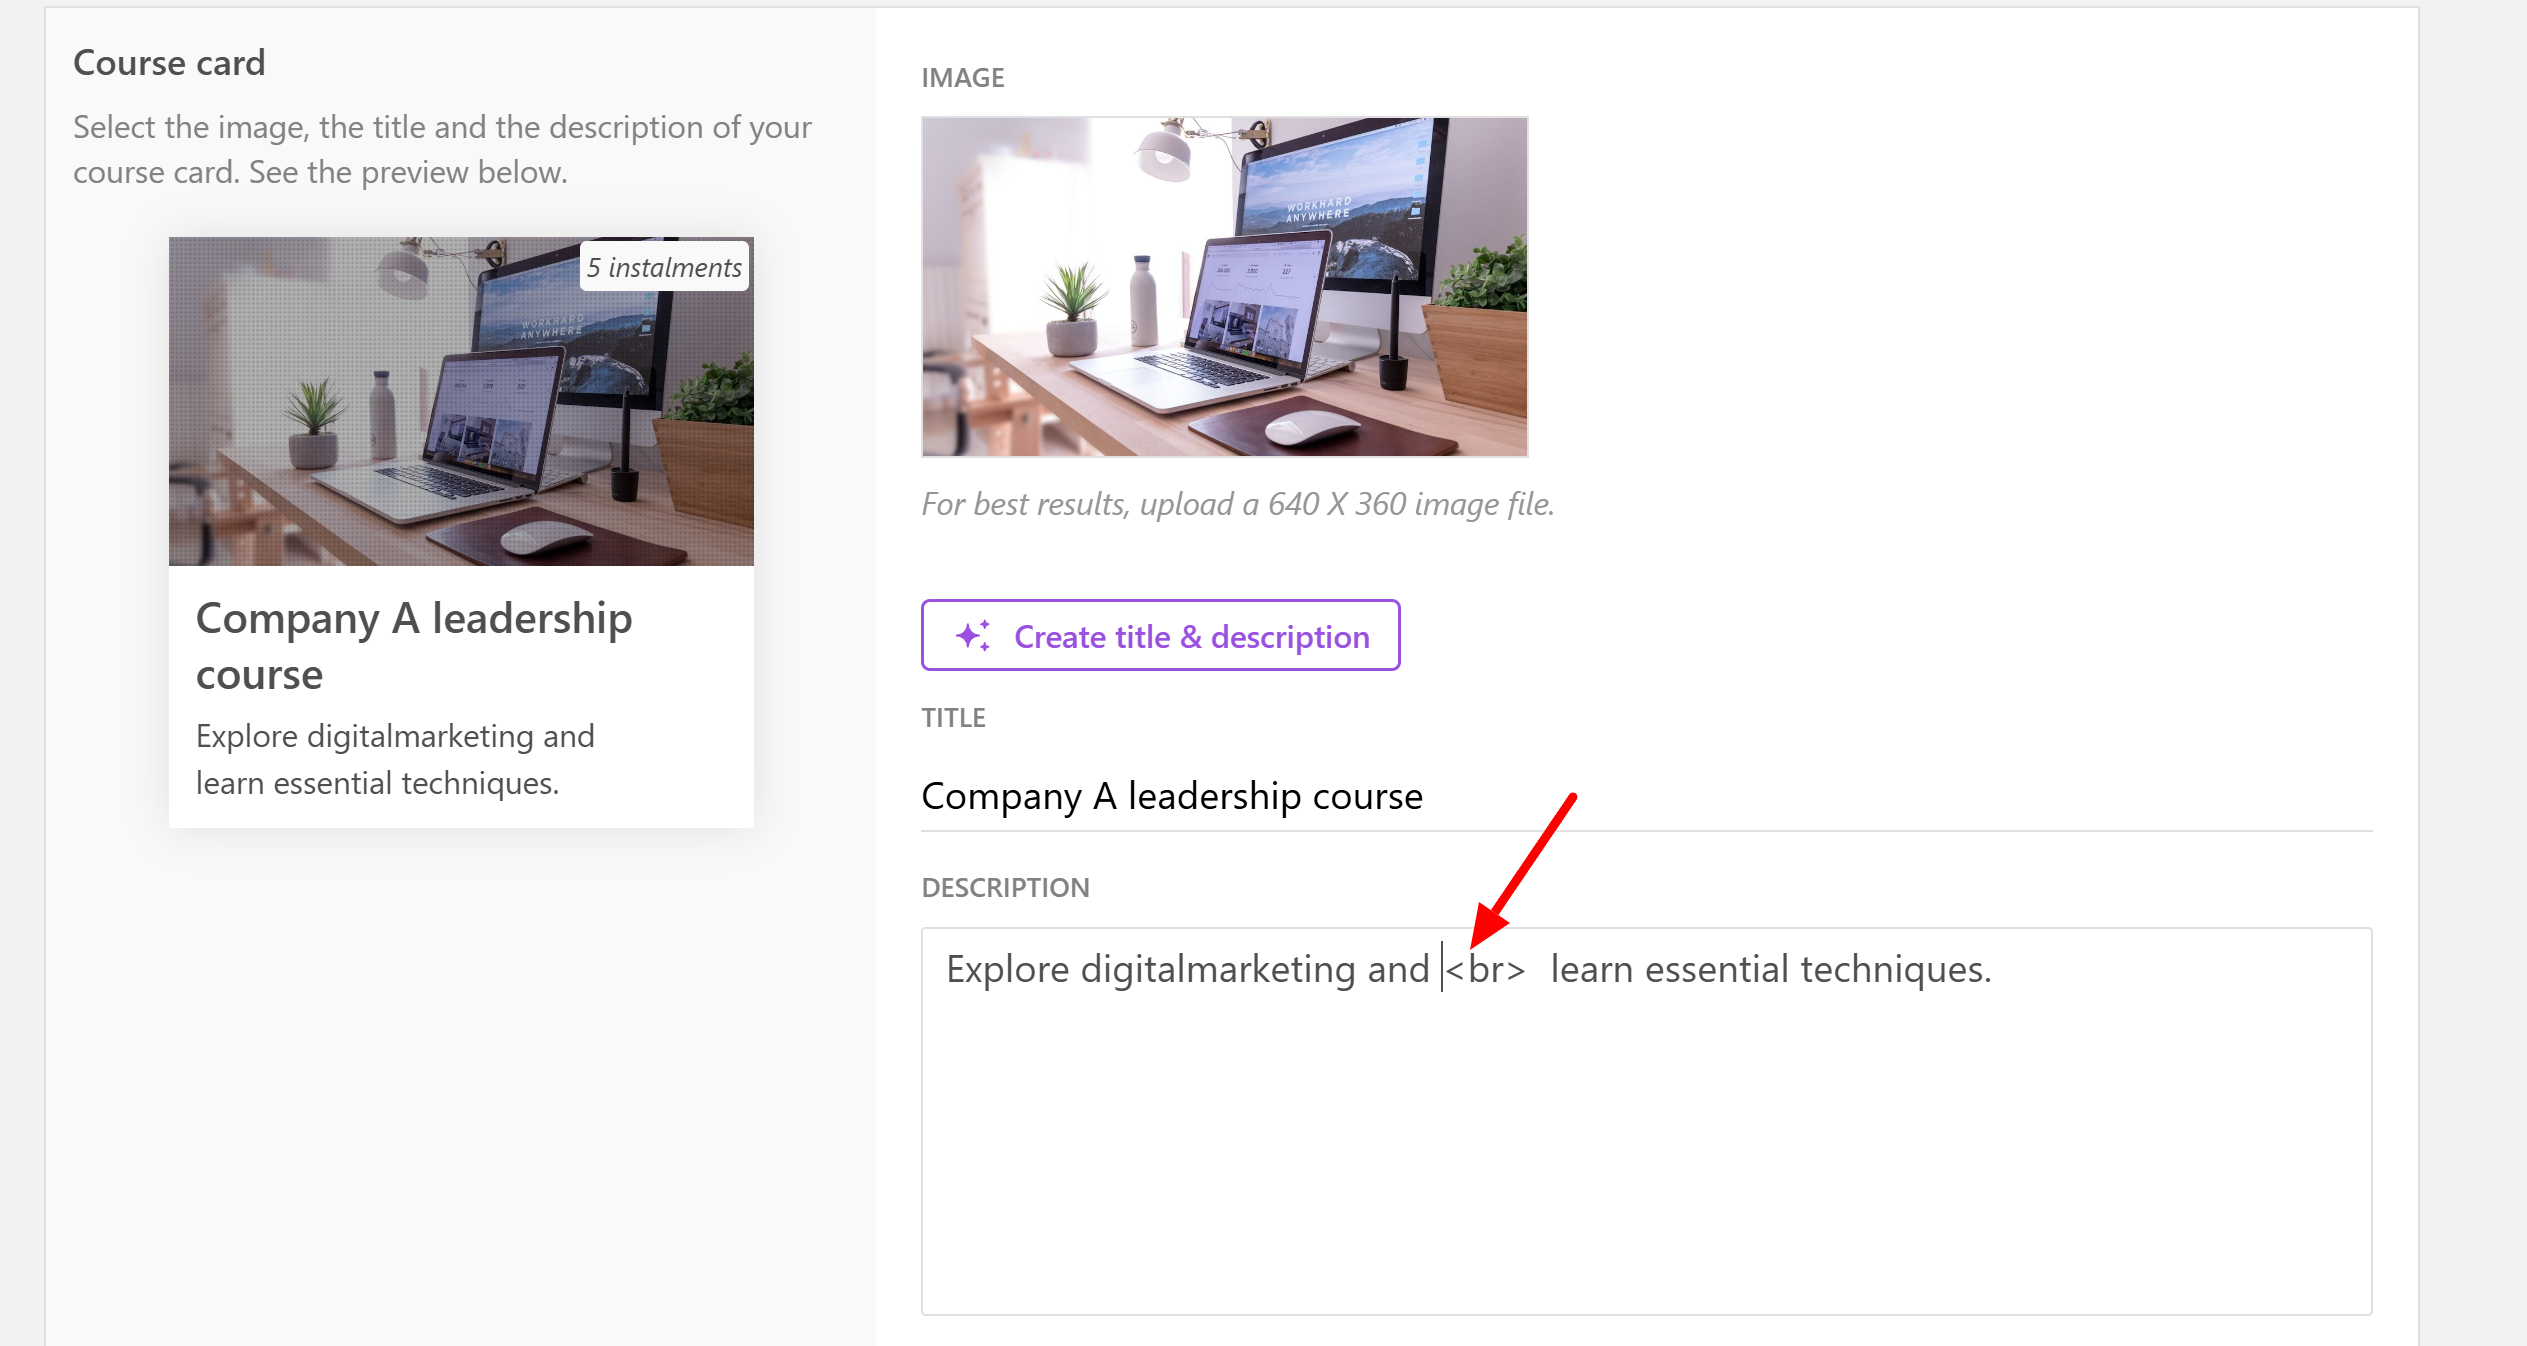
- If you would like to add space between the description lines, you can add <br> under each description sentence, and the space will be displayed in the Cards section.
Card appearance
After setting up your Cards, you can adjust their appearance within the Catalogue section settings:
- Hide/show the Price
- Hide/show the Progress bar
- Optimize image (When enabled, it will compress the image, which will result in slightly lowering its resolution while making it faster to load; when disabled, it will preserve the original image without any compression, which could result in slower loading times)
- Hide/show the Ribbon
- Change the Ribbon's position
