Your LearnWorlds school automatically sends email notifications for certain key events. You can enable or disable these notifications and customize the content of the emails that users will receive.
In this article, we’ll walk through how to enable and customize automatic email notifications related to key learner actions, such as enrollments, purchases, refunds, and course or program completions.
Navigate to Communication → School Emails in your admin dashboard and select the notification category you want to manage.
There, you’ll find the relevant notification tabs grouped by event type.
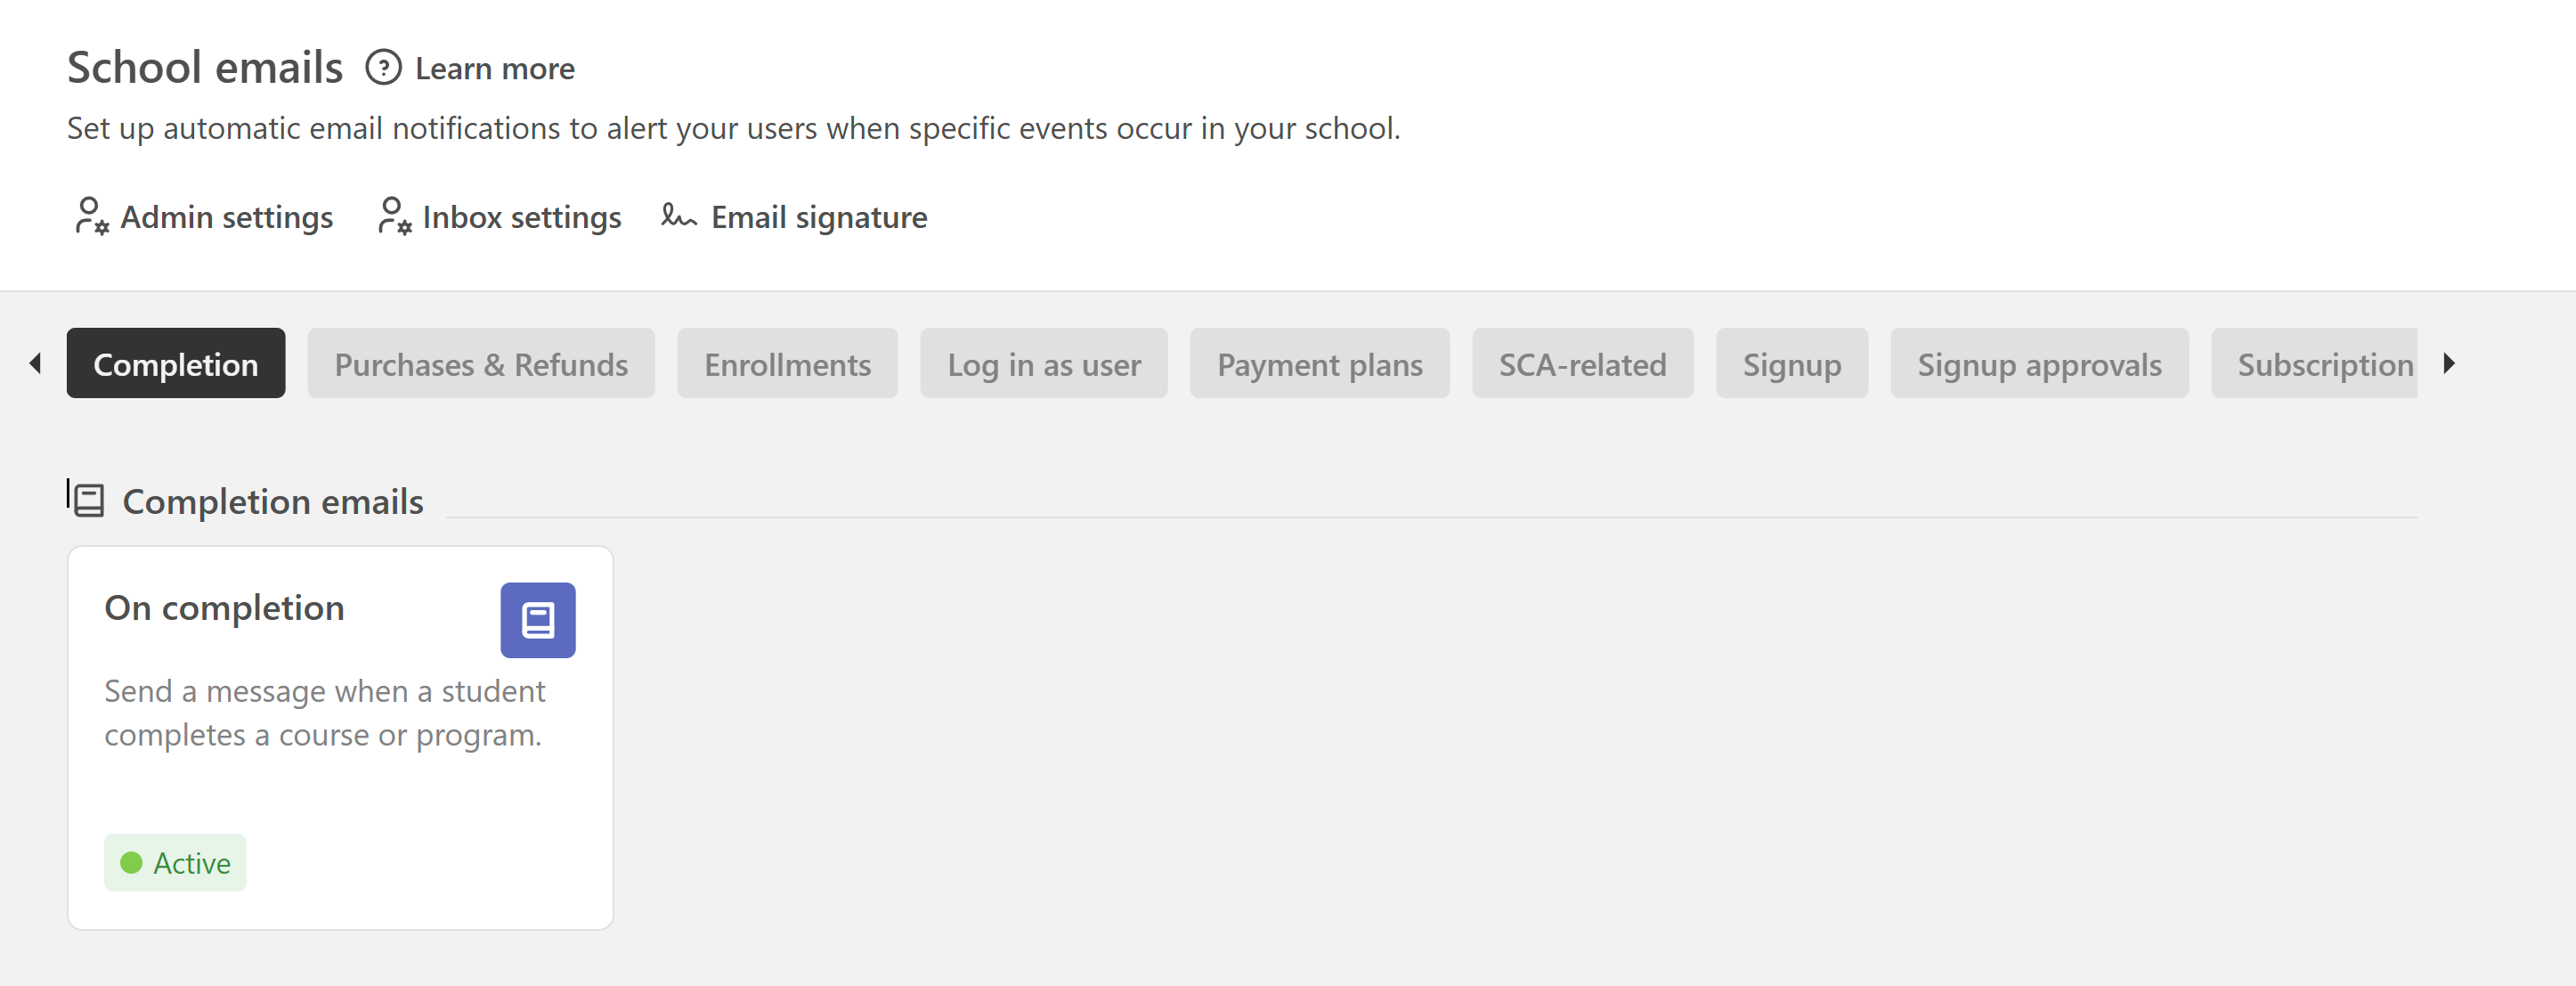
Completion notifications
Automatically sends an email to learners when they complete a course or a program.
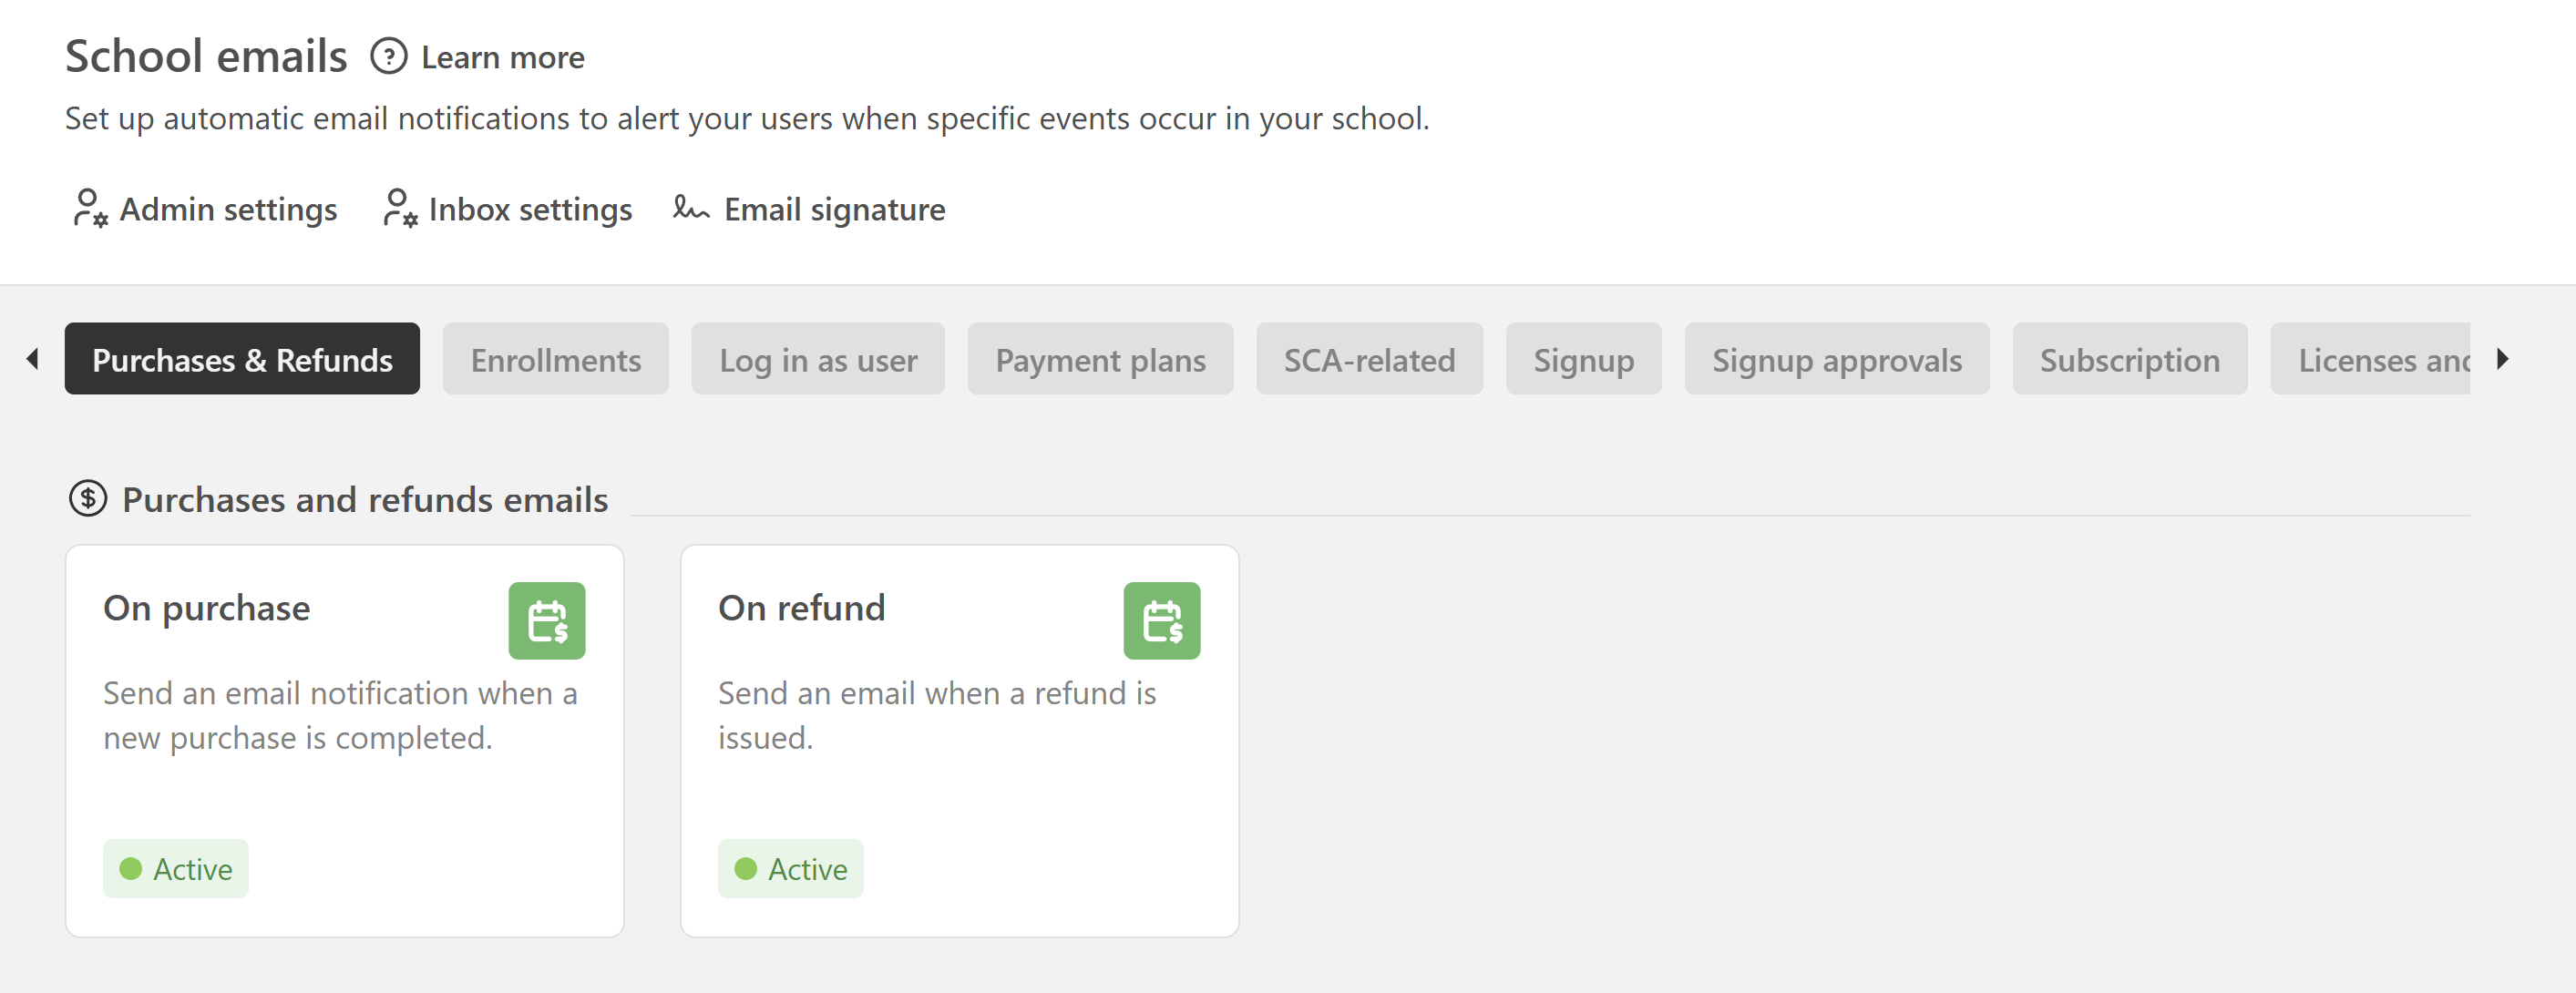
Purchases & refunds
Here you can find two separate email notifications,
- Purchase Email: Sent when a learner buys a product. If an invoice has been generated, it'll be included as an attachment.
- Refund Email: Sent when a refund is processed.
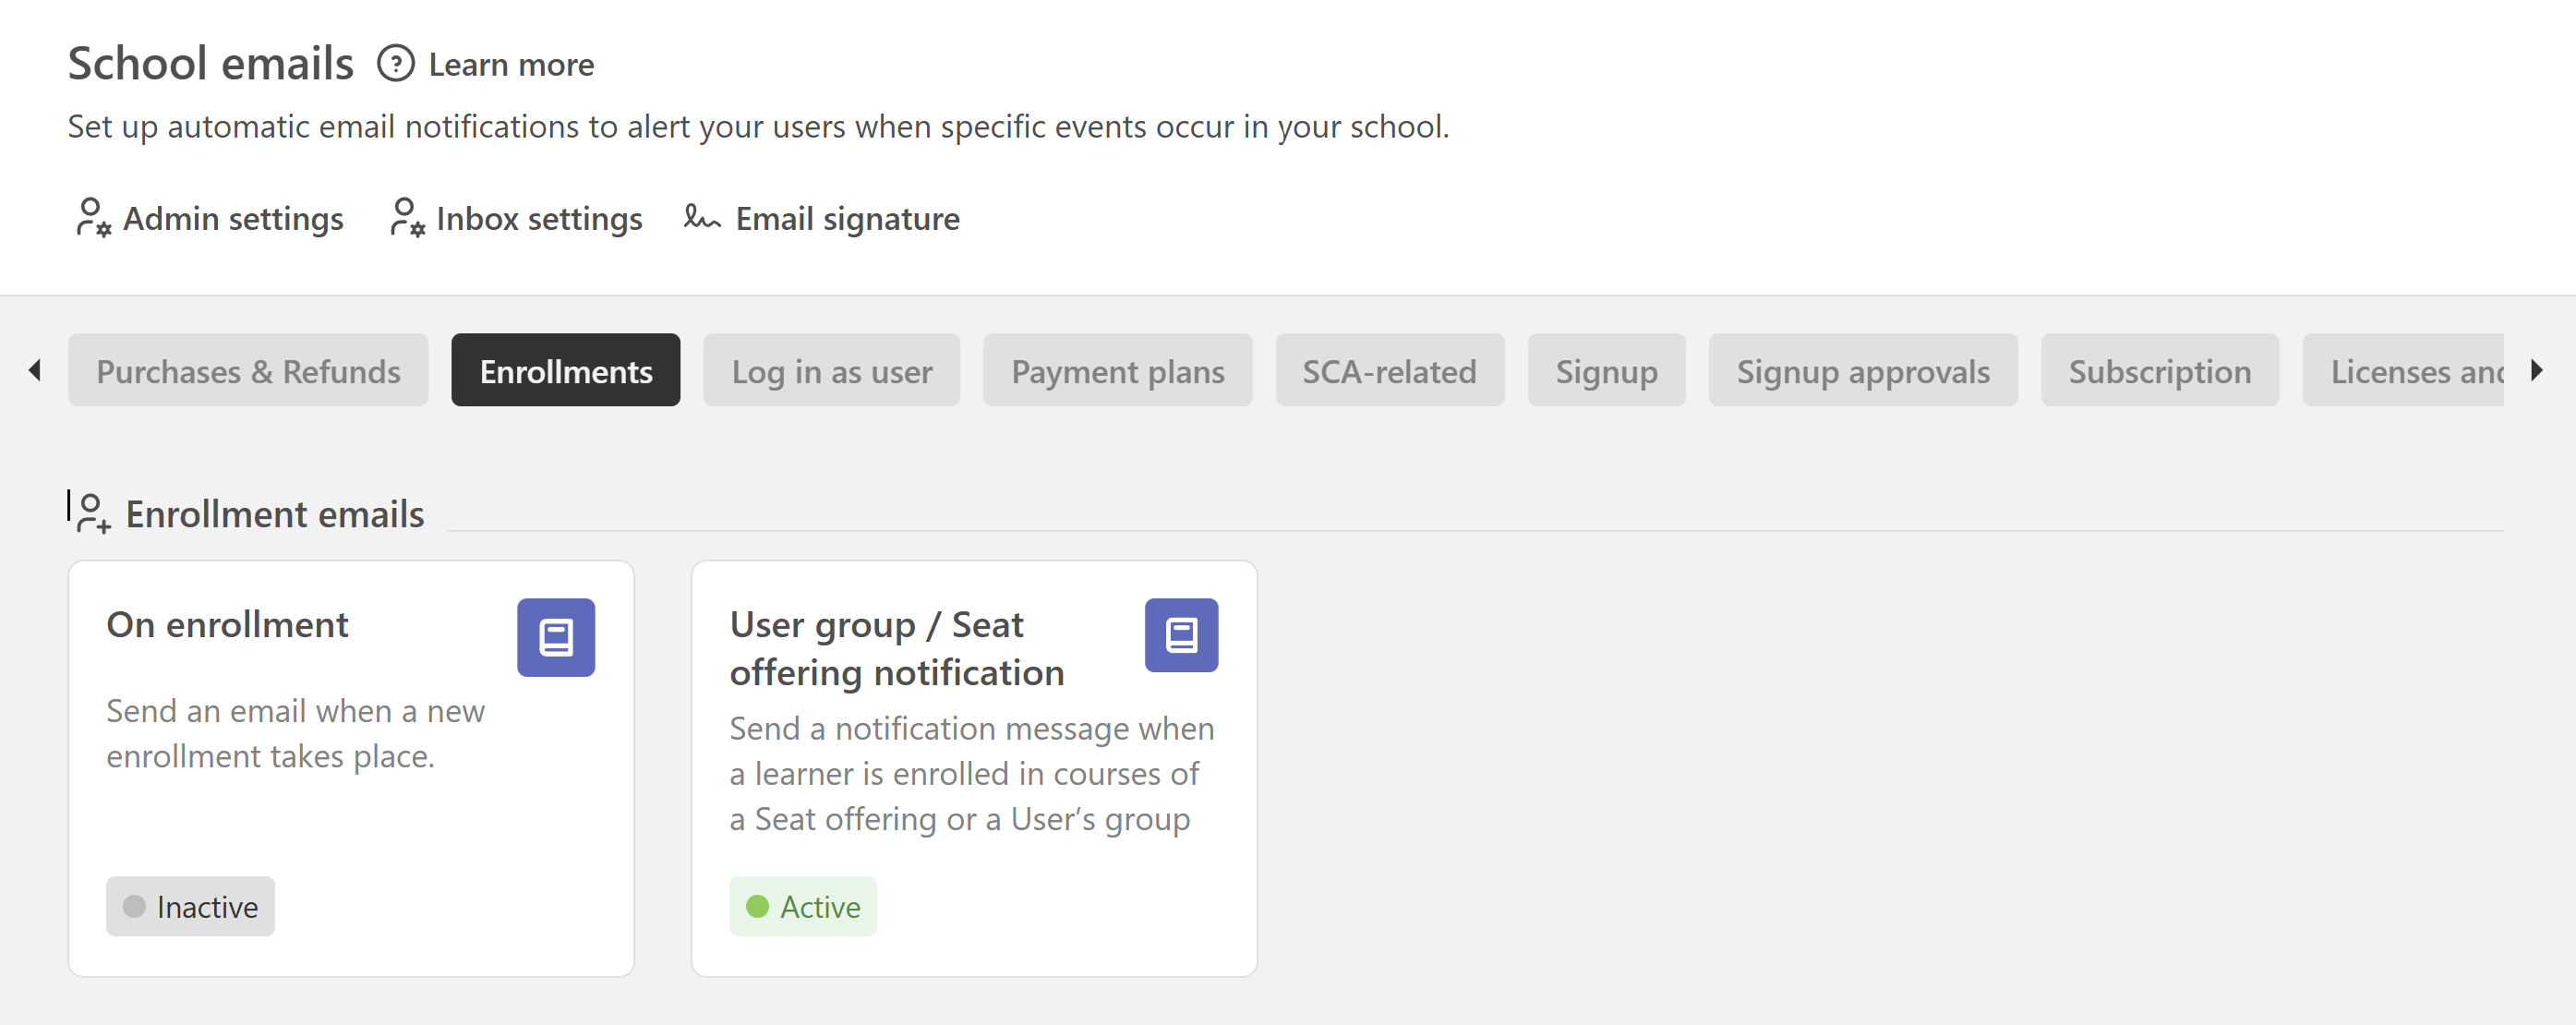
Enrollments
This section includes emails related to new enrollments.
- New Enrollment Email: Send an email when a new enrollment takes place.
- User Group / Seat Offering Notification: If enabled, this sends a custom email after enrollment related to user groups or seat-based offerings
Edit email templates
Click on any email template to:
- Enable or disable the notification
- Edit the email subject
- Customize the email content
You can include links and variables that automatically display personalized information for each user.
Course notification emails
In addition to managing your school-wide email notifications, you can also control which course notification emails are sent for individual courses. To configure course-specific notification emails open the course you are interested in, go to Course settings → General and scroll down to the Course notification emails section. There, you can choose between:
- Send the default school-wide course emails. This option uses the course notification emails configured under Communication → School Emails. Any updates you make to your school-wide email templates will automatically apply to the course.
- Select the emails you want to send for this course. This option allows you to choose which of the available school-wide course notifications will be sent specifically for the selected course. Depending on your setup, these may include notifications such as.
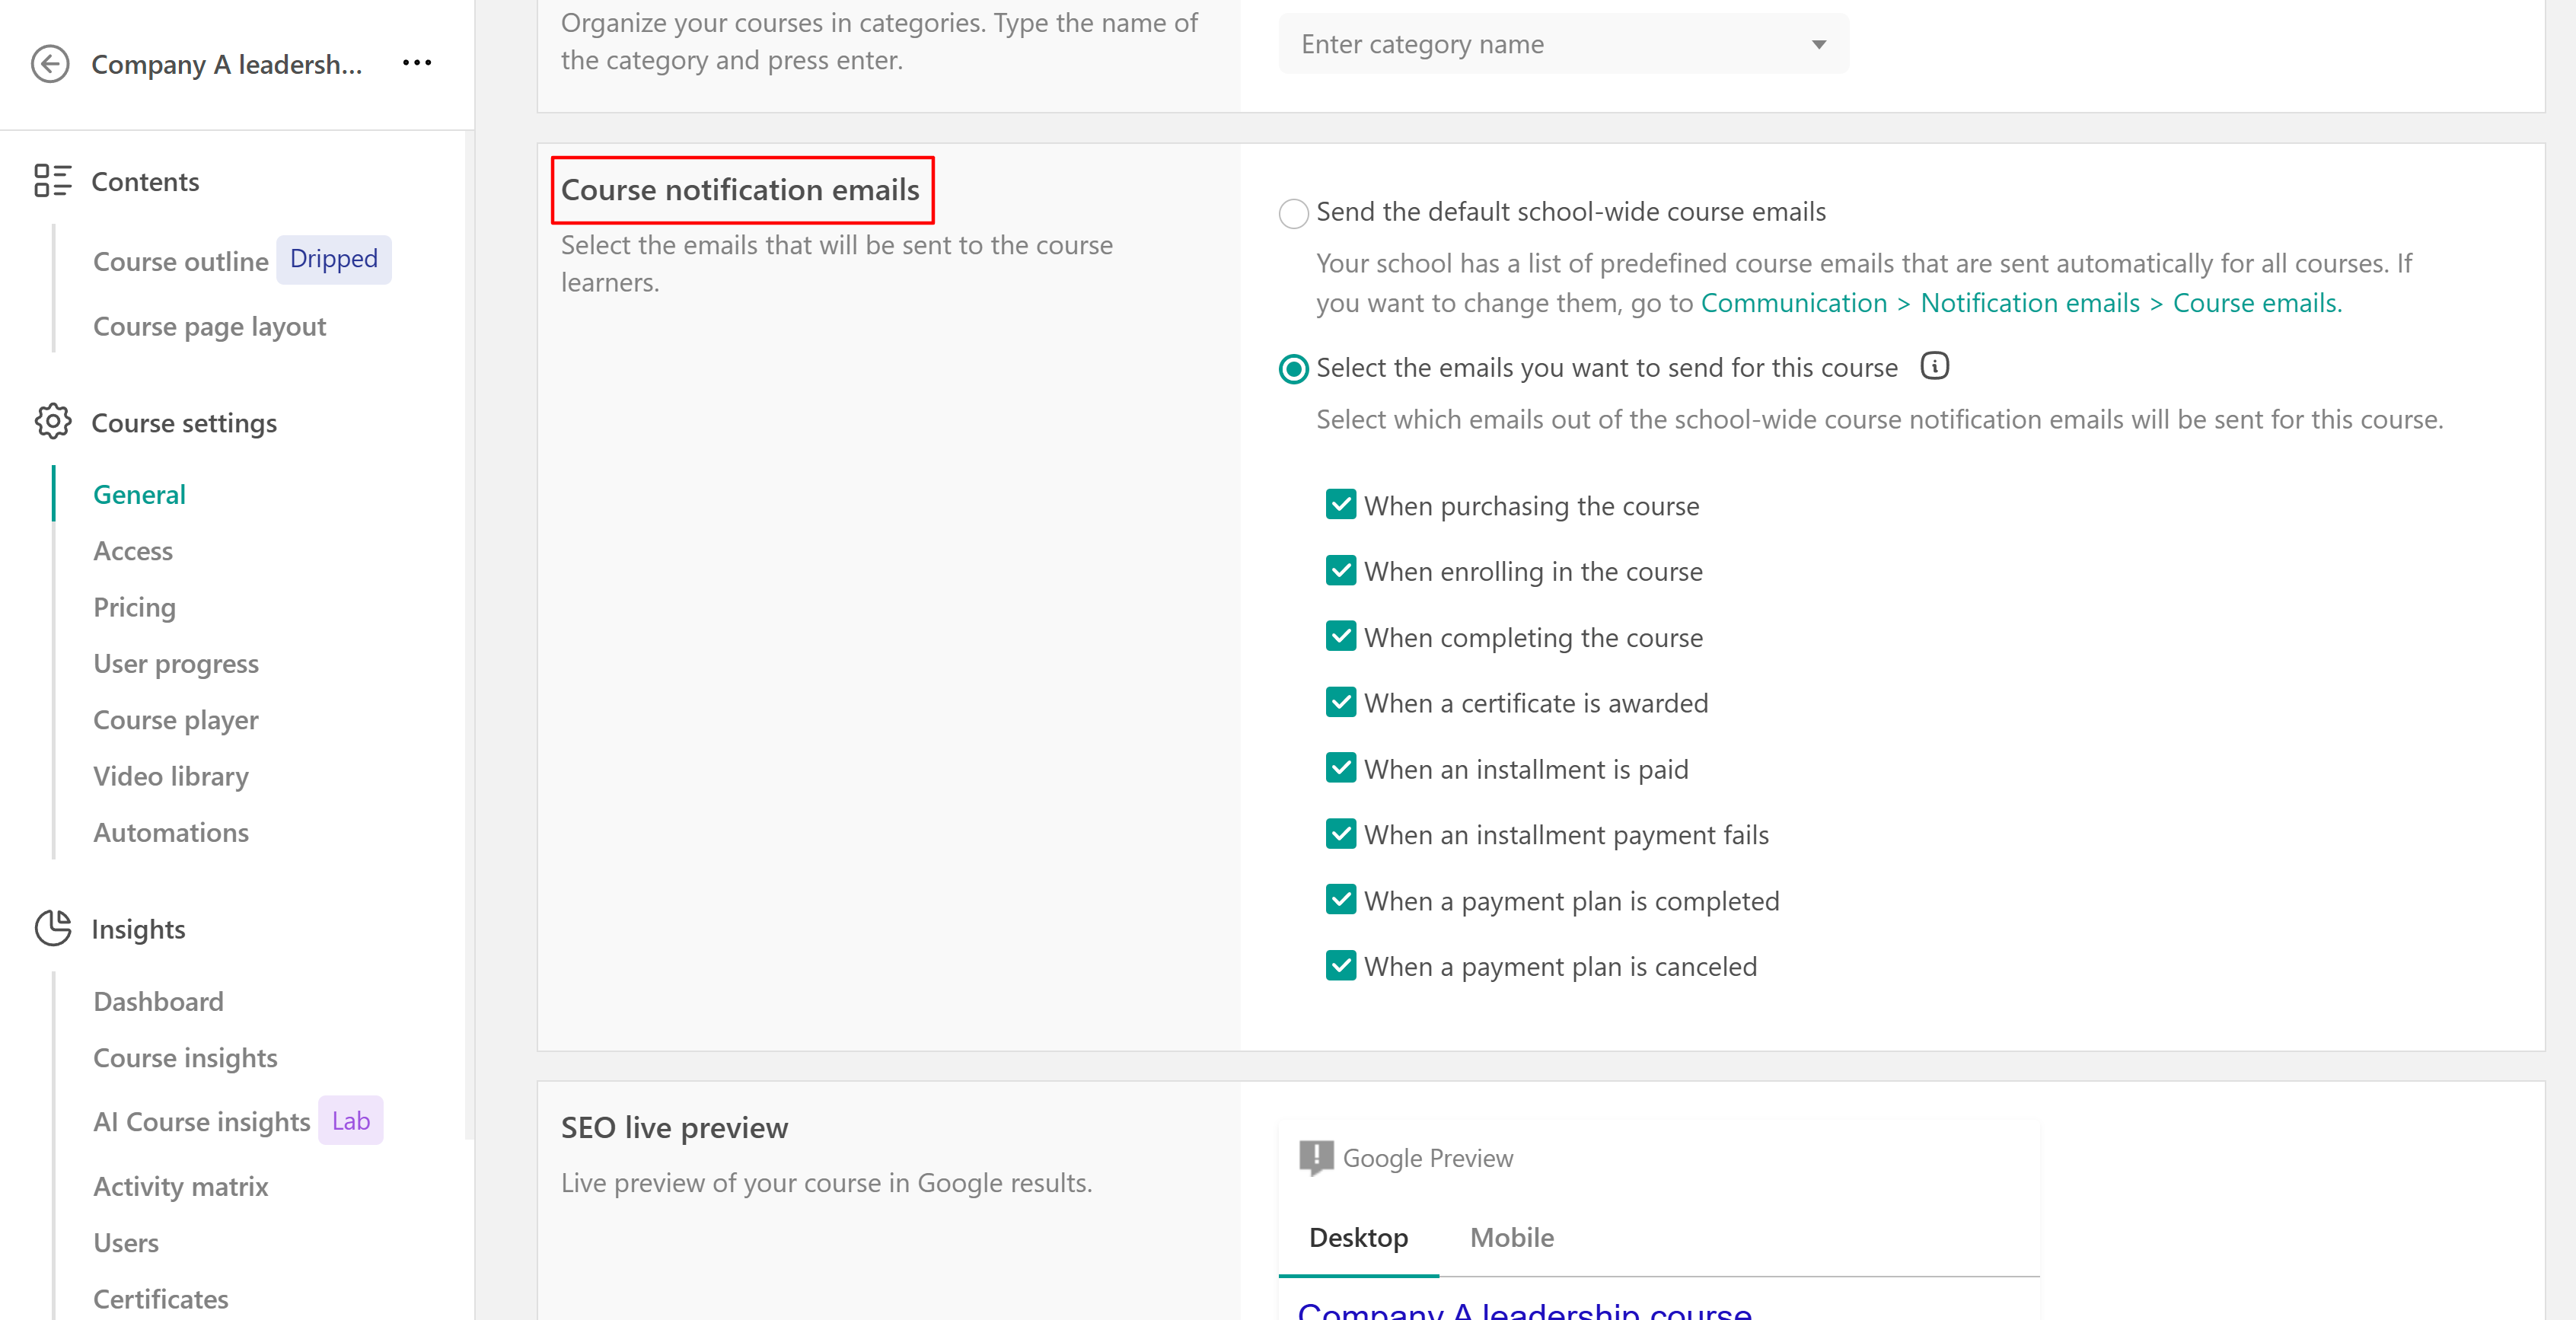
The content of these emails is still managed from Communication → School Emails. The course-level setting only determines which of the available course notification emails are sent for that specific course.
 When you customize the email flow for a specific course, those settings override the default course email behavior for that course only. Other courses will continue to follow the school-wide configuration unless they have their own custom settings.
Use AI to improve your emails
You can use AI to help you create or refine your email content.
- Click Set up with AI
- Describe what you want in the prompt box
You can also use AI to:
- Improve wording and tone
- Rephrase content
- Generate email copy
- Translate your email content

- If you wish to edit the links/variables of your Email Notifications, follow the steps in this article.