This article is a guide, that can be shared with the Seat Managers to assist with their training. We recommend school administrators extract the relevant settings and information from this article and share it with their Seat Managers, enabling them to get the most out of the Seat Management feature.
Seat manager overview
The Seat Manager's role is to manage the product that they are assigned to, which consists of Seats and Courses. They can add and enroll users in bulk, to the product they are assigned to, manage the course enrollments, and monitor the users' progress. They can see the Seats and included Courses, the maximum number of users that can be added, as well as the number of seats that are available for use.

A Seat is a virtual chair and defines the number of users that are allowed to be simultaneously enrolled in the courses and occupy a Seat. This means that the number of users added to the seat could be a lot more than the number of seats available, as the functionality allows multiple turnovers of the seats.
For example, you are managing a product that consists of 50 total seats & a maximum number of 100 users. This enables you to e.g. let the first 50 users occupy the 50 seats, remove them, and then let another 50 users occupy the 50 seats. In total, the manager will allow 100 users to occupy the 50 seats sequentially.

Seat manager capabilities
As a seat manager you will be able to manage the users added to this product you have been assigned to (e.g., bulk add and enroll users, manage the available seats, manage the user enrollments, and monitor the user progress).
The available capabilities for a manager could be (depending on the permissions that the school administrator has configured):
- Edit course layout
- Create and manage course content
- View user details
- View user tag
- Manage users: create a user, user bulk actions, perform basic and advanced user actions, update user progress, delete a user, assign & remove tags on users, create tags while tagging users.
- View user groups & multiple-seat offerings
- View user group members & multiple-seat users
- Retain enrollments when removing group & seat members
- View user analytics
- Manage user segments
- Export user analytics
- View Activity Matrix
- Manage scheduled reports
- View the activity history of the users who are in the seat offering.
- Manage and View Gradebook
- Manage and View certifications
- Manage and View the review center
Manage seats
1. As soon as you log in to the school, go to your Dashboard → Manage Seats or alternatively Users → Multiple Seats.
In the Multiple Seats dashboard, you can see the Name, the Total Seats, the Vacant Seats, the Maximum Number of users allowed in the seat, the total course enrollments, and the Courses included in the Seat.
2. Hover over the seat of your choice and click on the Manage seats option.

There, you can use mass actions, add members, use bulk actions to add or to add and enroll a user to a seat offering, and you can track the:
- Members details
- Occupying seat status of this user: Never Occupied a seat, Used to Occupy a seat, Currently on Seat.
- Got Seat on: When the user got added to the Seat.
- Last Login
- Currently Enrolled: The courses of the Seat the user is enrolled in.

Managers can unenroll users from a seat offering if the admin has enabled the relevant permission. When using mass actions, they can choose to keep or remove the users’ enrollments . This option is not available when removing users individually.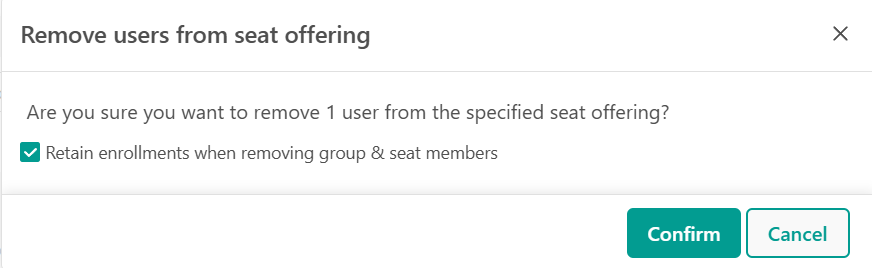
Add and/or enroll users
Hover over the Actions tab and click on the Manage seats option. There you can:
Add Member
You can add a single user to the Seat Offering and choose if they should occupy a seat or not.
Bulk Αctions
- Add members: You can download the Excel template and fill in the user details (username and email) in Excel to add users to this specific Seat Offering user list.
Note: You do not add the users in the seat itself, nor do you enroll them in any course hence these users will not have an occupied Seat or enrollment. You basically just upload the users to the Seat pool list and they don't occupy a seat yet. Only users who occupy a seat will be able to be enrolled in the courses.
- Add & Enroll members: You can download the Excel template and fill in the user details (username and email) in Excel to add the users for the Seat offering. They will be added to the Seat offering and will be enrolled in all of the courses linked to the Seat Offering.
For both the Add Members & Add & Enroll Members bulk actions, you will need to download & upload the Excel template. There is also an option to add the user password when bulk adding and enrolling users.

The file you will upload shouldn't be differentiated from the Excel template. Here are some tips to follow:
a. Download the sample file (Excel template).
b. Use this template and add the data in the respective default fields. Do not alter the fields or add additional ones. Username and email are required (for "username," you can add a name and surname).
c. Clear Formatting: In the case of copy-paste, keep in mind to copy the cells without any formatting, and since you will be adding emails, make sure they are not added as links.
Note: Ctrl+Shift+V for Windows or Command+Shift+V for Mac would help to clear formatting when copy-pasting.

When the Excel file is ready, upload it to the respective field.

Meanwhile, you can track the progress of the bulk action if you go to the Reports Center → Activity log → User Actions
When managing the Seat Offering, you can also view the:
- Total number of available and occupied seats (e.g. 10 occupied seats out of 30)
- Courses
- Total Enrollments. This is the total number of times anyone has been enrolled in a course included in the seat offering.

You can also edit the user's default settings, such as password etc., independently from the seat offering context.
Reports center
In User Analytics, as a manager, you have access to the (if the admin has granted the respective permissions):
- Reports Center: Αnalytic engines that allow you to interpret and analyze data about the seat users' progress.
- Activity Log: Τhis offers an overview of the scheduled reports and allows you to filter their reports by type and date and view the "In progress" and "Upcoming" reports.

In regard to the Exams, as a manager, you have access to the (if the admin has granted the respective permissions):
- Gradebook: Ηelps you keep an online record of their users' grades in exams, assignments, and certifications. You can view, reset, edit their grades, and export assessment results.
- Certifications: The dashboard where you can find all the details related to user-issued certificates.
- Review Center: Τhe tool where you will see users' responses pending for grading and/or feedback.

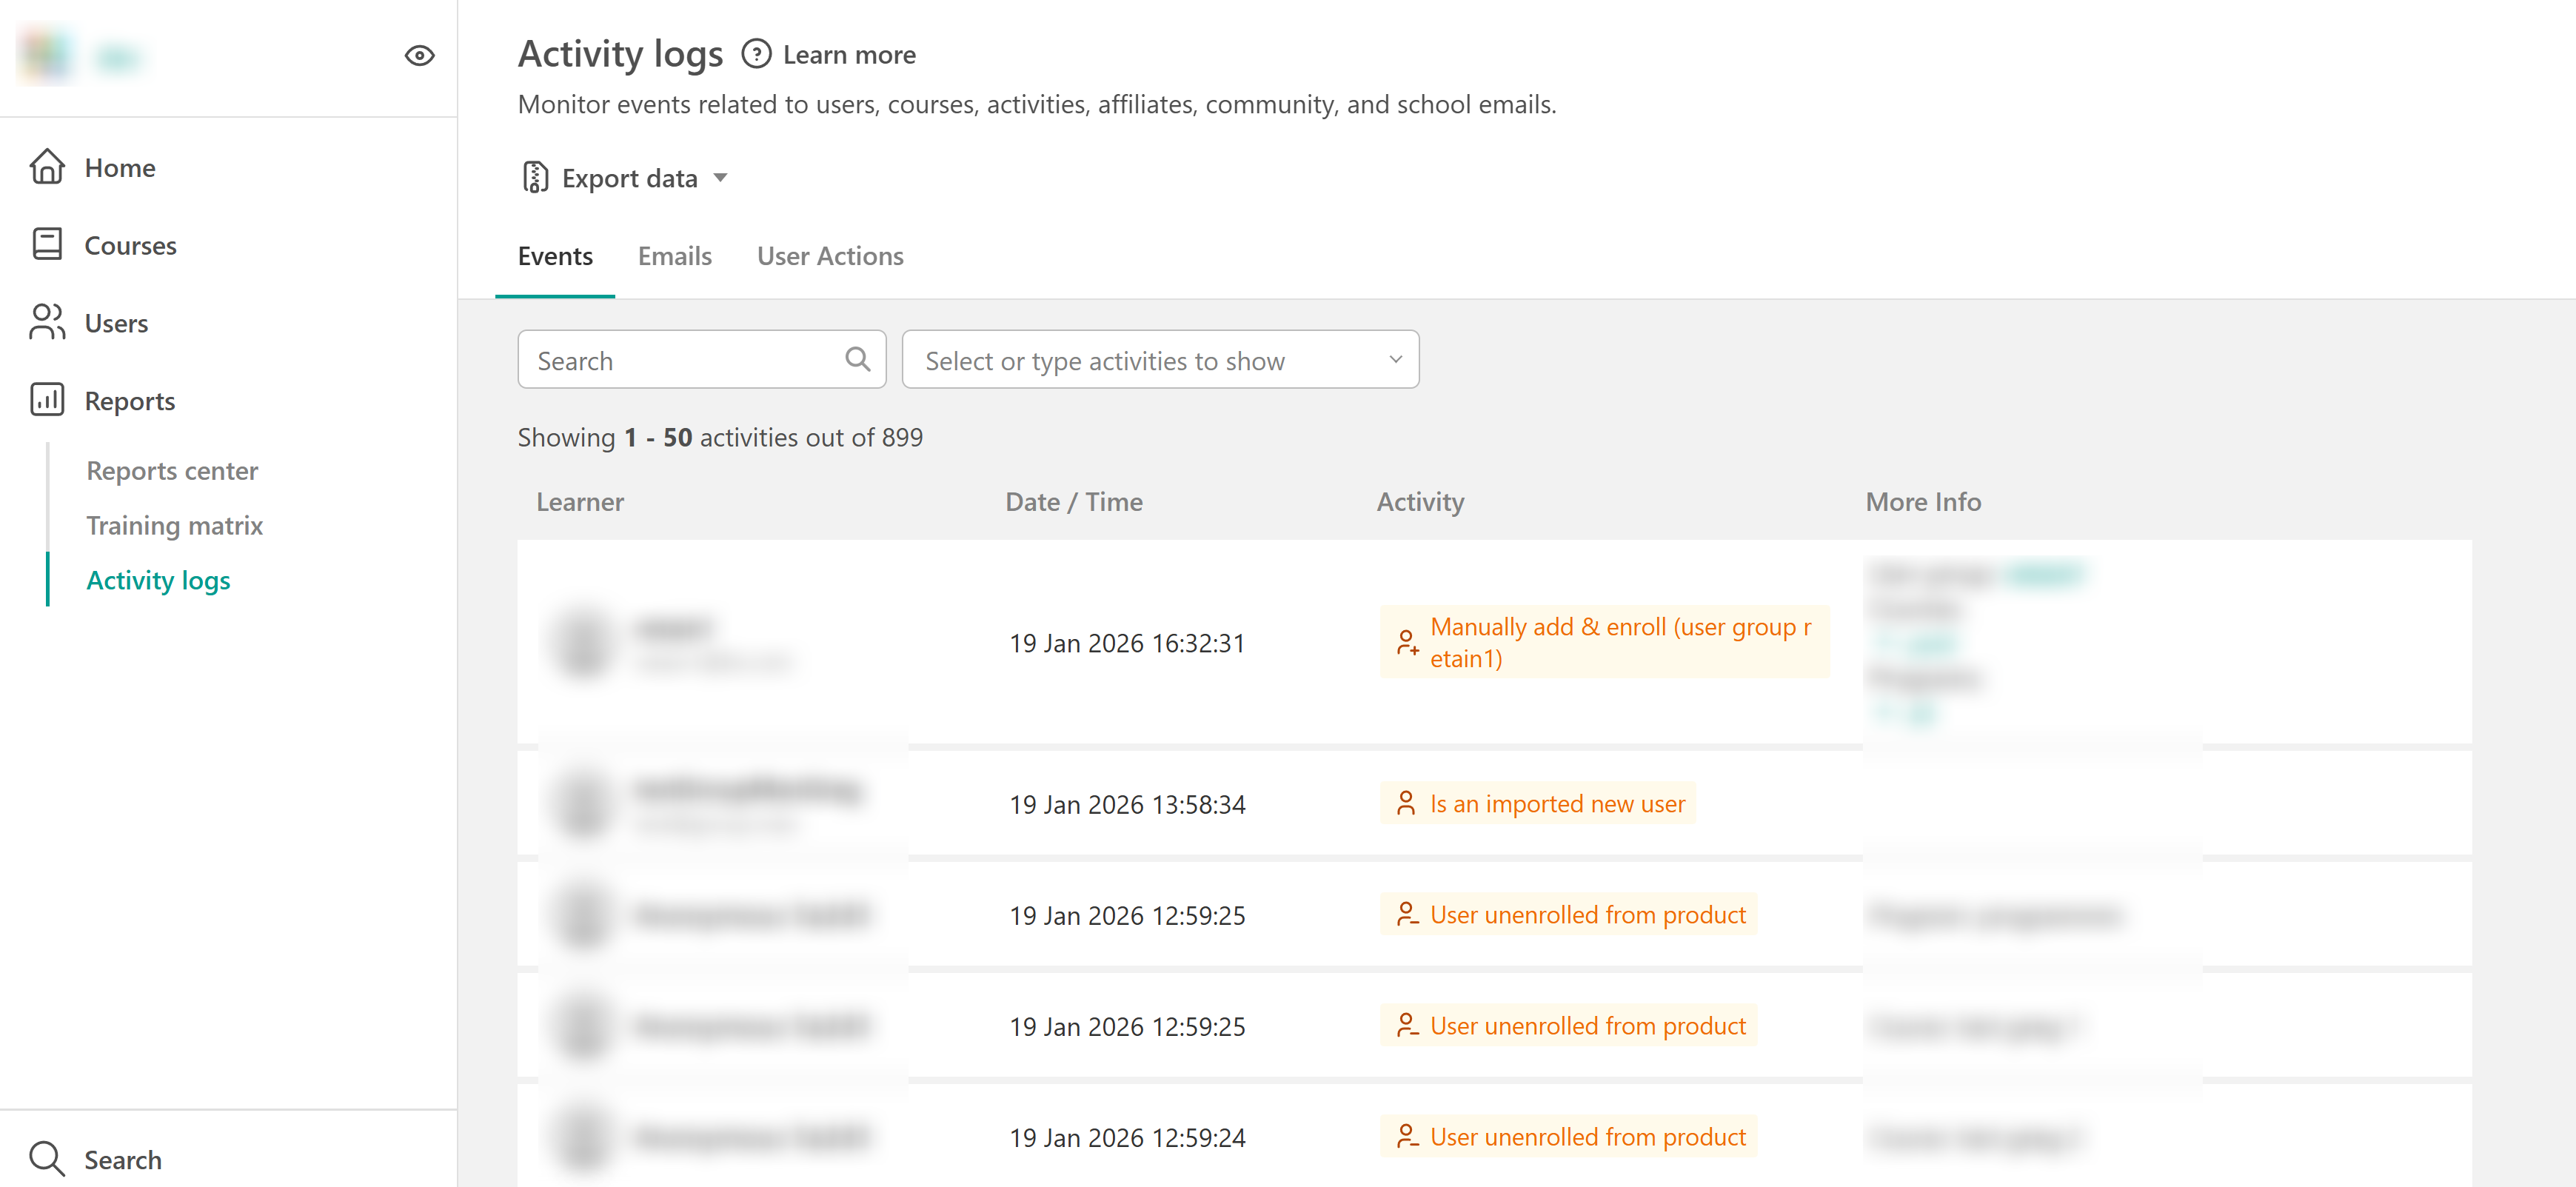
About the Activity Log, as a manager, you have access to (if the admin has granted the respective permissions):
- Events : Gives real-time information about the school activity. A great tool to help you keep track of all the important events that take place in regard to the Seat users and offer better support to them.
- Emails: A reporting tool to track at a glimpse the notification emails being sent automatically to the users upon a trigger e.g., course completion, course enrollment, seat enrollment, etc.
- User action: Where you can see a record of their Bulk actions and filter results according to the Bulk action type and the Date that the action was performed.