As a school admin, you have full control over the appearance and content of your invoices within your LearnWorlds platform. By customizing your invoice template and updating your invoice details, you ensure that each transaction is clear, professional, and aligned with your brand.
This guide will walk you through the process of setting up invoices and credit notes, helping you maintain transparency and provide learners with comprehensive documentation for their purchases.
Setup
Begin customizing your invoices/ credit notes by navigating to Settings → Financial → Invoices Setup.
Here you can:
1. Activate/Deactivate the Built-in invoicing system. If you enable this, invoices will automatically be generated and attached to transactions processed through your platform.
2. Set the Invoice prefix
3. Set the Credit note prefix.
4. Set the Company VAT Number.
5. Enable/ Disable the Invoice for 100% discounts setting. With this option, you select whether or not to issue invoices for 100% discounted purchases.
Appearance
In this next tab, you can customize how the file will look. You can edit the:
1. Invoice/credit note logo. Provide an image to be placed in the upper left corner of the invoices.
2. Add a Thank you message in invoices for your learners.
3. Include a Tax message in invoices that explains your tax policy.
4. You can translate the default Invoice Text fields as shown below: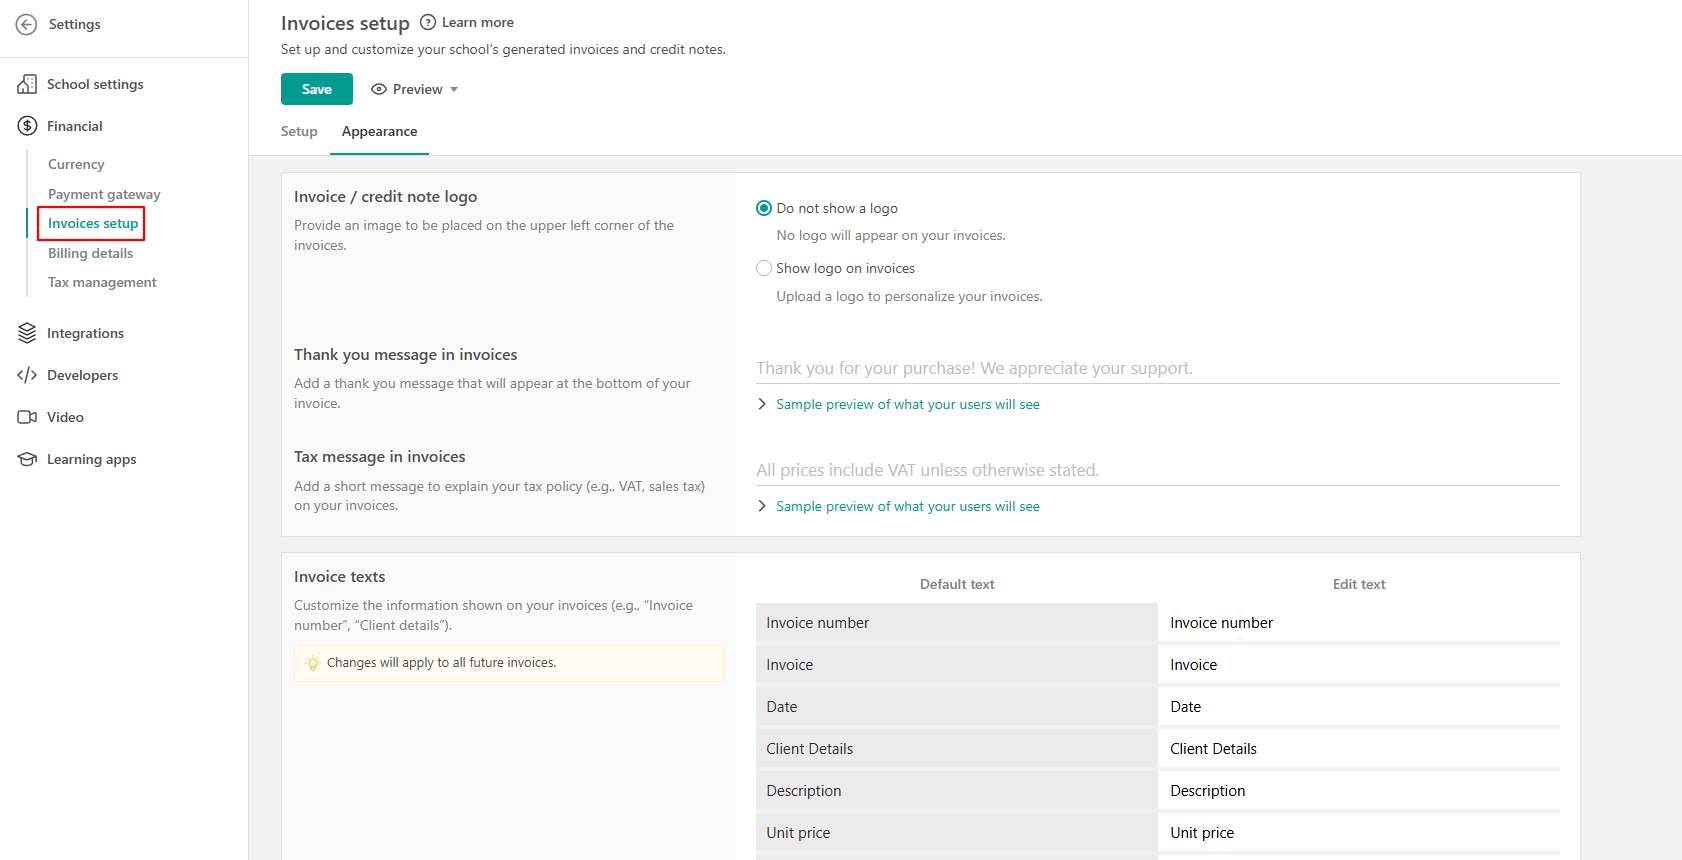
If you want to review the invoice/ credit note you have customized, you can click on the Preview option.

- If you are using Japanese, Chinese, or Arabic characters in your invoices, please contact our support team, and we will further assist you. You can send us an email with the respective request at support@learnworlds.com or submit a ticket.
- If you have enabled Quaderno or Stripe Tax for the calculation of taxes on the checkout page of your school, the standard Billing details will automatically be enabled, and the information provided by the user will then be utilized by the external tool to calculate the applicable taxes
- To access the billing information that you will enable and request from your customers, navigate to the Financial → Billing Details tab.
- Sales reports can be exported by navigating to Ecommerce → Payments .
- The date format within your invoices will be affected by your School settings. Your selected option of the available Short date formats will be displayed in your invoices.

- By navigating to Settings → School Settings → School Info, you can also edit the following fields:
-The School Name
-The Address (seller)
- If you decide to use Quaderno for tax calculation, you can activate the corresponding setting (under Tax Management → Fetch Quaderno Invoices) to also use the invoice generation mechanism provided by Quaderno. If you enable this option, the invoice settings under Financial → Invoices Setup will become inactive.
- The logo image (.png, .jpeg) should have a maximum width of 200px, a maximum height of 300px, and a file size not exceeding 1MB.