The Course Catalogue, allows you to showcase a concise overview of your courses. This includes details such as the course title, image, description, author, pricing, and more. Additionally, the course catalogue can be filtered to display specific content based on category, certificate availability, author, and more.
You can find how to customize the appearance of the Course Cards in this article.
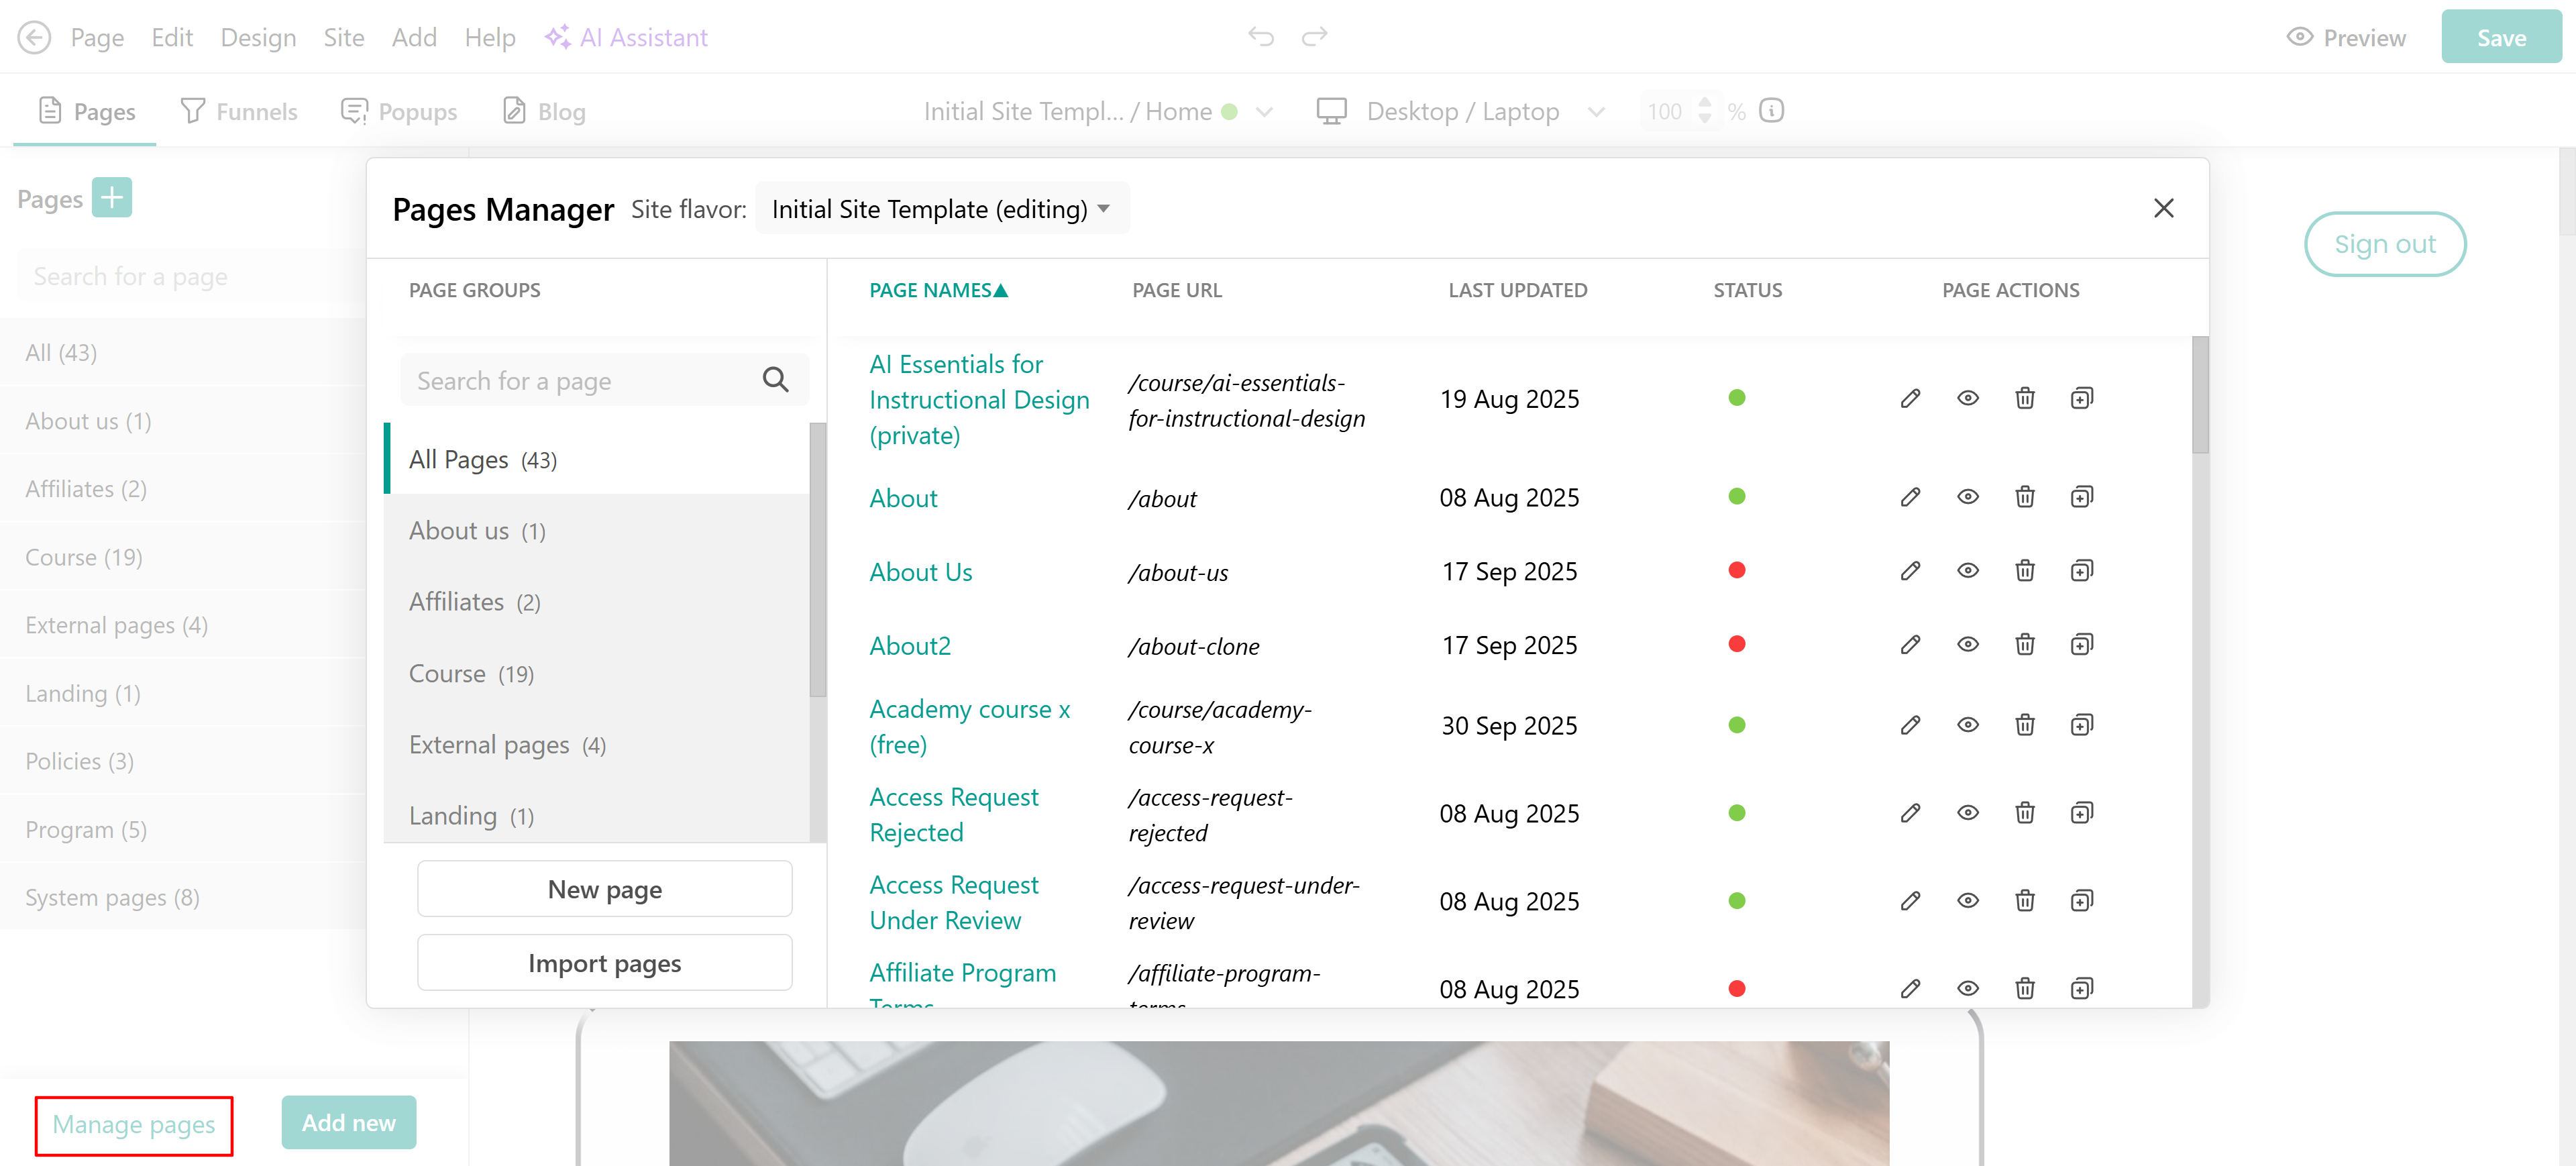
Add the course catalogue (course cards) section
You can add the Course Catalogue section to any page of your school so users can easily compare courses, bundles, and subscriptions and choose the one that best suits their needs.
1. Click on Website → Design → Edit Website.
2. Choose any page you want to edit from the Page Manager.
3. Hover over the page and click on +Add Section.
4. Find the Course Catalogue under the Courses→ Course Catalogue. Choose the template of your desire.
5. Click on Save.
|
Edit course cards
After adding the Course Catalogue (Course Cards) section, hover over and click on Edit course cards.  The editing side form will appear. In the side form that appears for the Course Catalogue (Course Cards) section, you can edit a variety of settings:
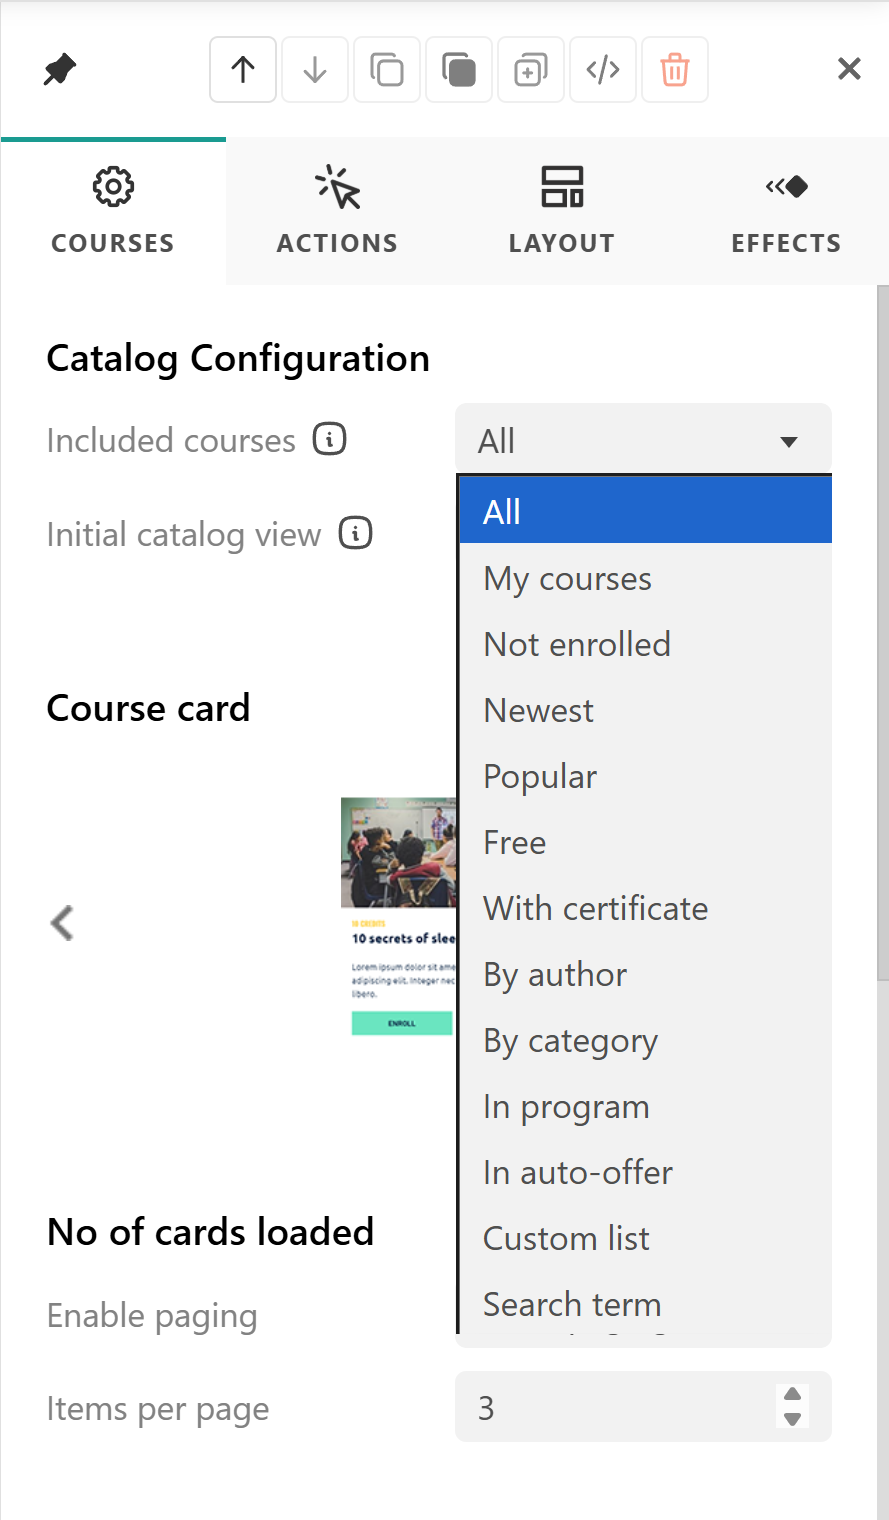
Catalog Configuration: You can edit the Included courses (which courses are included in that specific course catalogue search) and the Initial catalog view (which courses appear as the default view when users access the catalogue).
The available options for those settings are:
- All
- My courses
- Not Enrolled (it can prompt users to purchase courses they haven't purchased yet.)
- Newest
- Popular
- Free
- With certificate
- By Author
- In program
- In auto-offer
- By Category
- Custom List (select custom courses to display)
- Search term (When you choose this option, you can set a default phrase or word to appear in the search bar, guiding users to the relevant results.)

-Users can search based on course titles and course descriptions using the search bar.
- Course card layout: Change the course’s card layout.
- No. of cards loaded: Show all cards or enable paging (you can choose whether all the cards will be displayed all at once, or how many specific cards will appear per row).
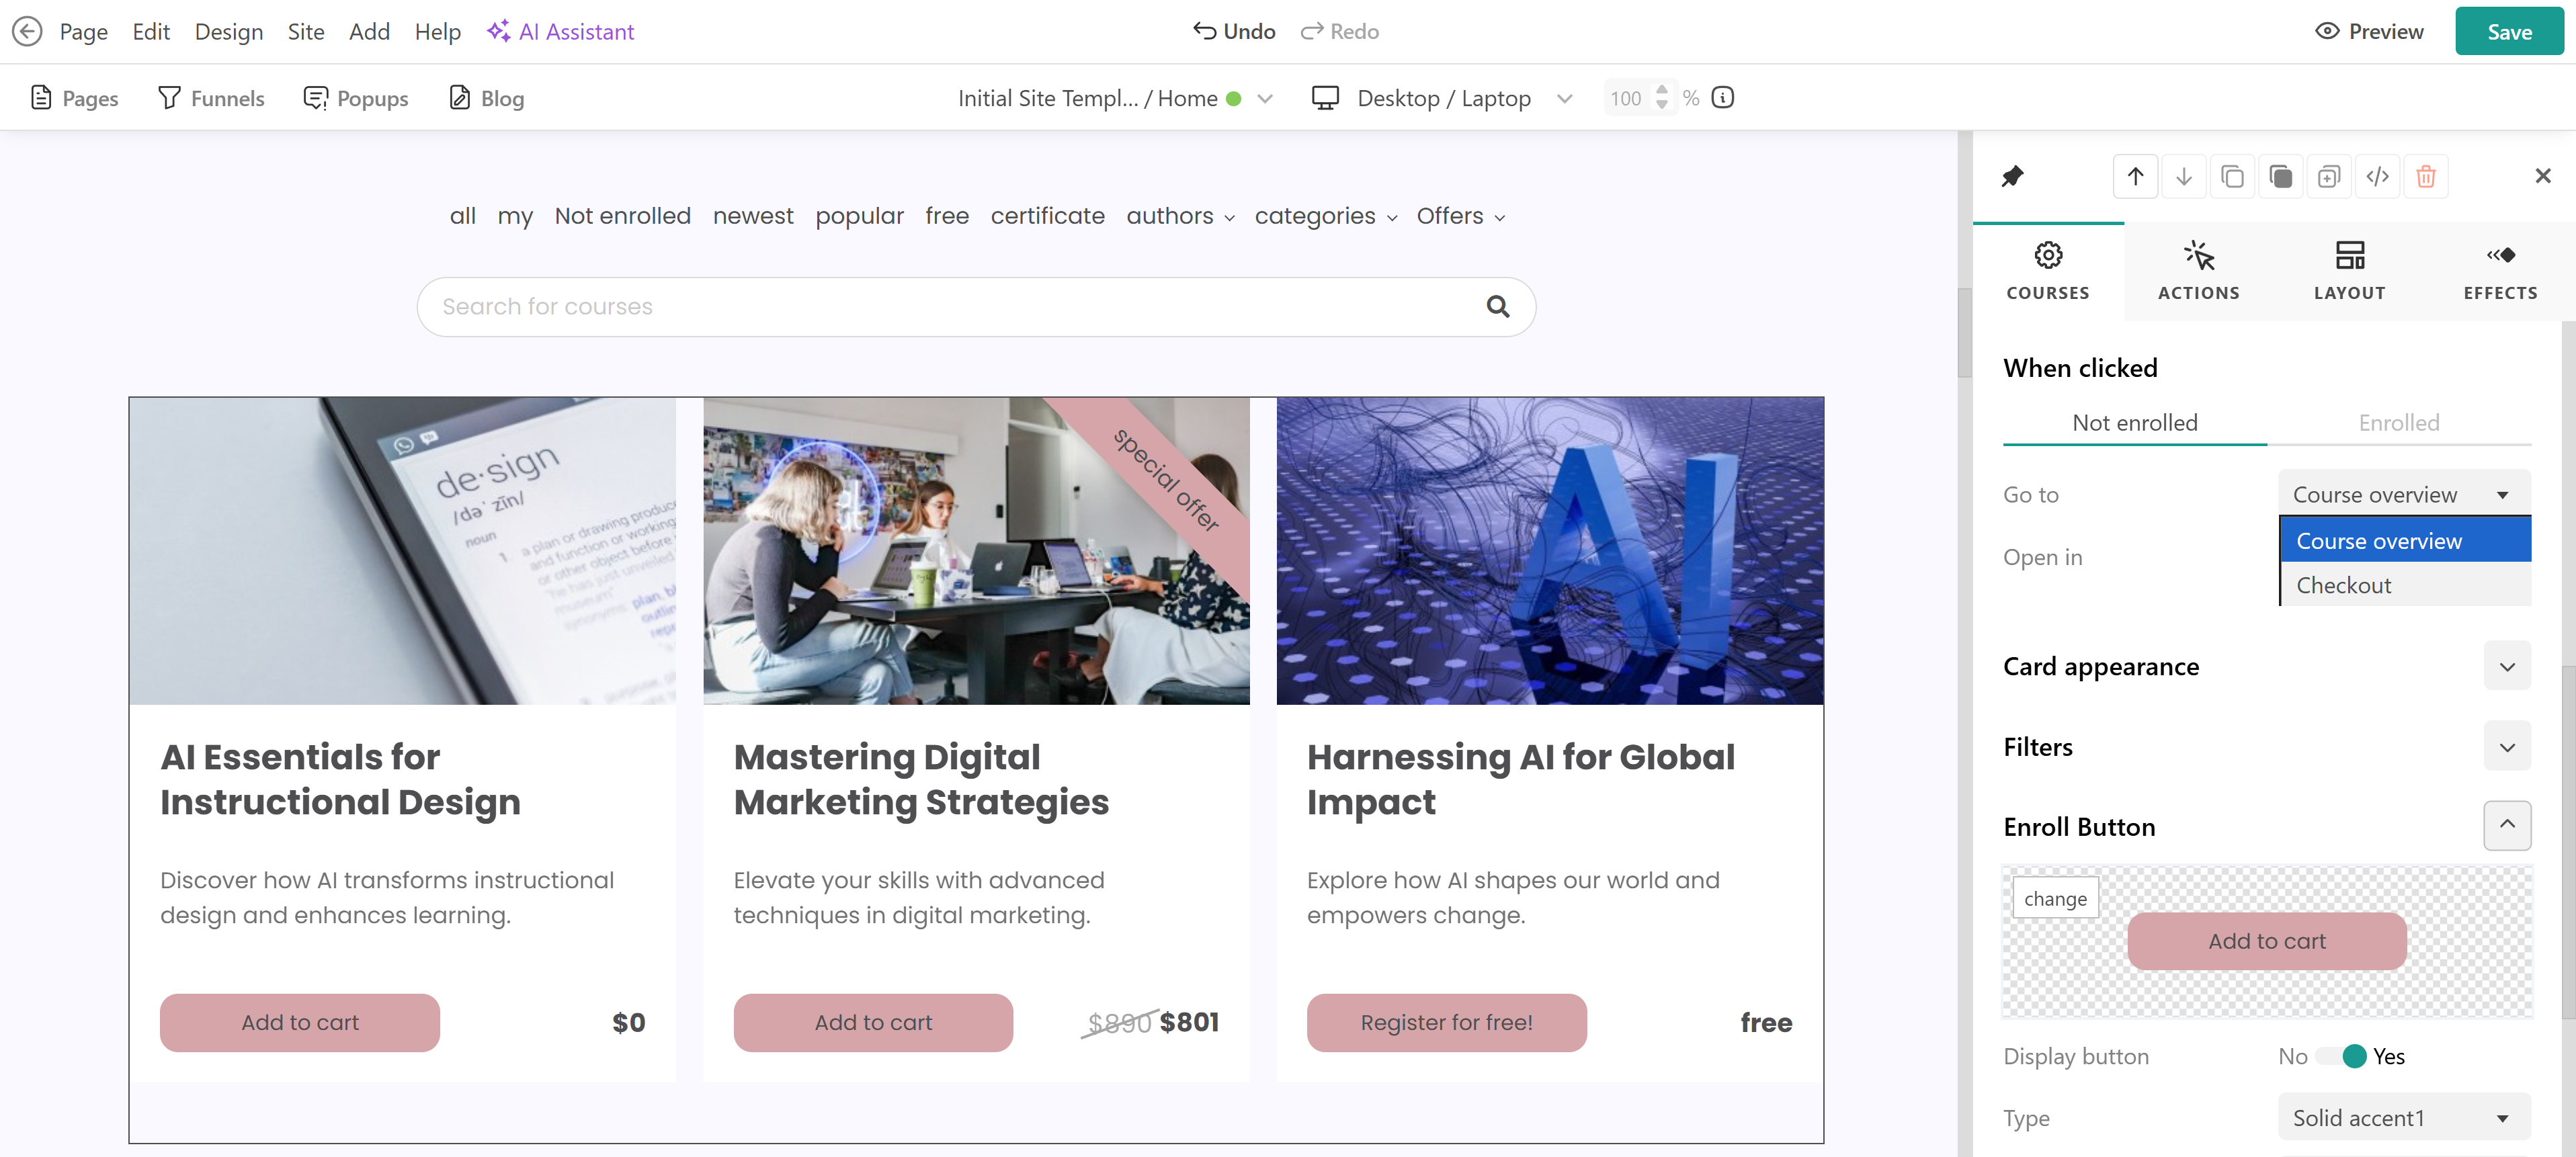
- When clicked: Choose a different setting (redirection) for not enrolled and enrolled users when they click on the course card. Based on their enrollment status, decide the rules for the redirection, whether they will see the course player, payment section, or course overview.

- Card appearance: Change the appearance of the course card (show price, show progress bar, optimize image, show ribbon for discounted prices).
- Filters: Here you can choose if filters will appear on the course catalogue as well as enable/disable specific filters
- Enroll and Load more buttons: Customize the Enroll and Load more buttons.

Automatic enrollment buttons
The Course Catalogue's Products section features attention-grabbing Automatic Enrollment Buttons that appeal to potential buyers. This article also includes detailed instructions on configuring payment flows.
With the When clicked setting, you can set up where the buttons on the course cards will direct users. You can customize different flows for enrolled and non-enrolled users. For instance, you might direct non-enrolled users to the payment page while sending enrolled users directly to the course player.

Apply a coupon code to the course cards
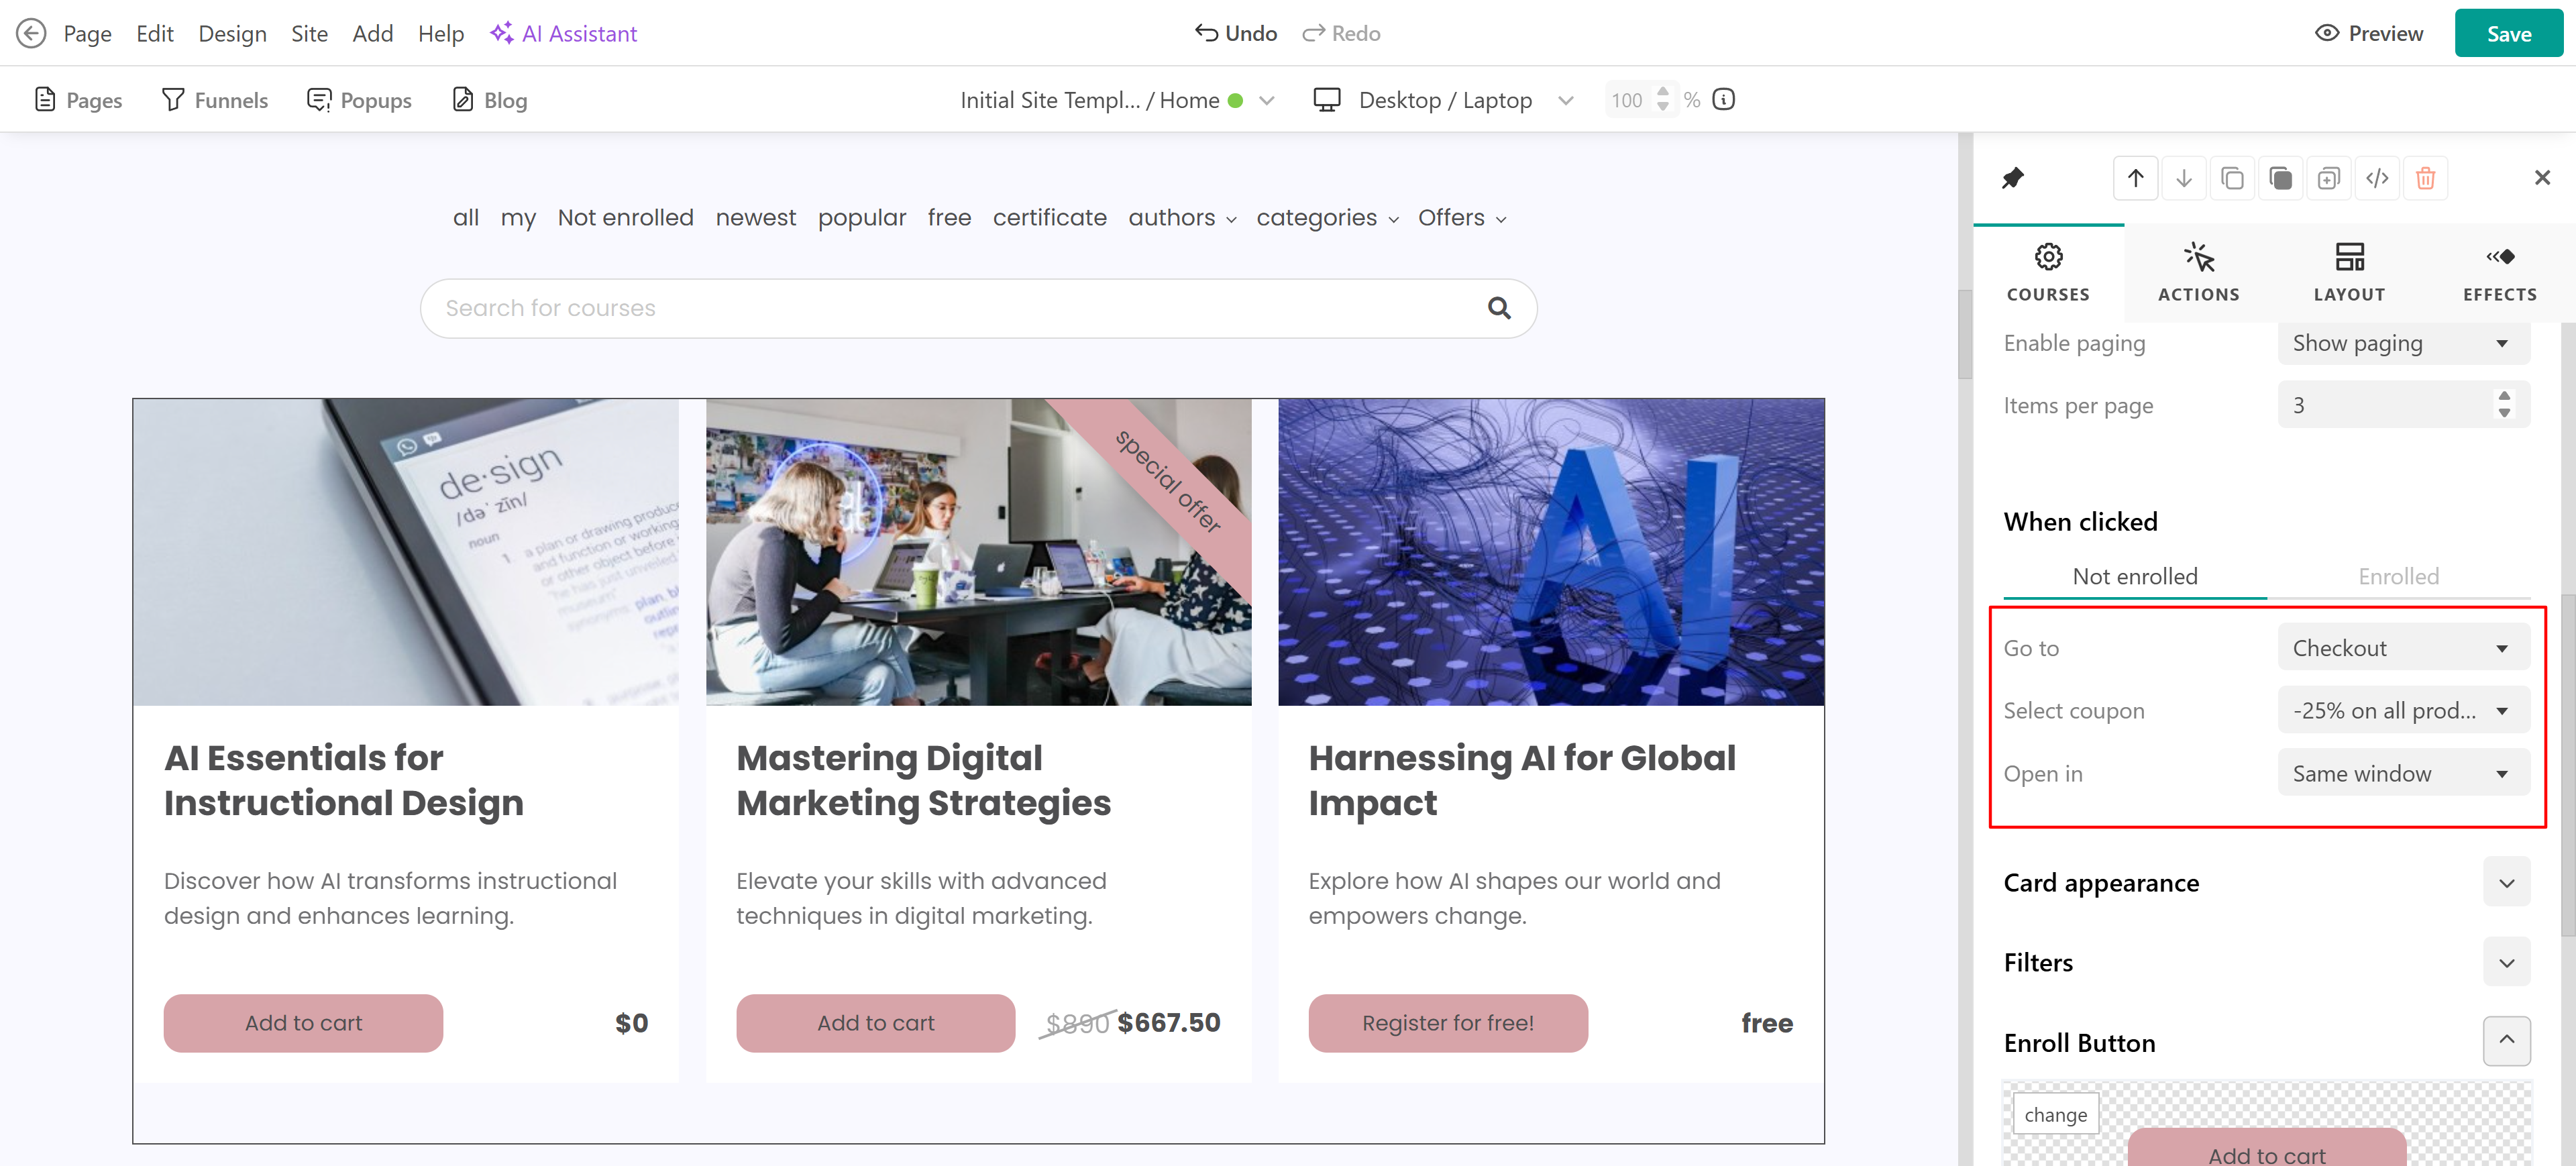
You can set up a coupon promotion to automatically apply to all products in your Course Catalogue section. This means users won't have to enter a code on the Payment page; the discount will be pre-selected for them. This ensures a consistent promotion across your entire school and all its courses simultaneously. To achieve this, you need to:
1. Create the coupon for All courses.
2. Add the Course section to any page of your school.
3. Click on Edit Course Cards.
4. Set up the When clicked action for not enrolled users: Go to checkout → Apply coupon (choose the coupon).
5. Click Save.
Once the users click on the course card of the course they wish to purchase, they will be directed to the Payment page, where the coupon will be already applied. In this article, you can also find out how to give direct access to a Payment Page with an already applied coupon.
