
Pix is a real-time payment method that allows learners to pay for products directly through their bank or supported payment app.
When Pix is enabled through Stripe, learners can select it at checkout, scan the generated QR code, and complete their payment quickly and securely.
In this article, we will see how to set up Pix through Stripe, enable it in your LearnWorlds school, and what the payment process looks like for your learners.
Set your school currency to BRL
Pix supports payments in Brazilian Real (BRL) only. So you first need to update your currency. To update your school currency:
1. Go to Settings → Financial → Currency.
2. Select Brazilian Real (BRL).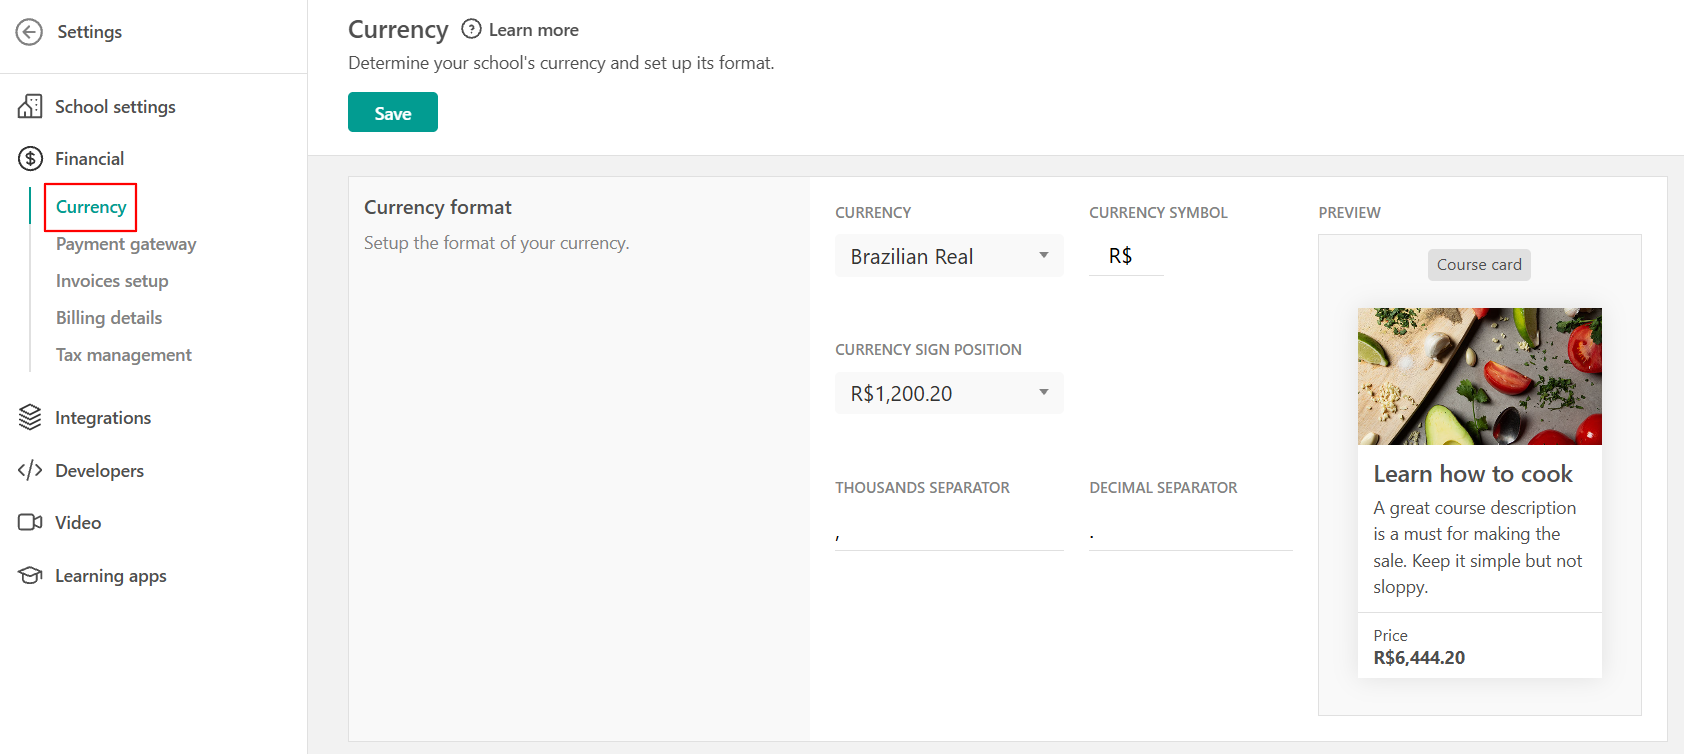
Enable Pix in Stripe
Before you can use Pix in LearnWorlds, you need to activate it in your connected Stripe account.
1. Log in to your Stripe Dashboard.
2. Go to Settings → Payments → Payment methods.
3. Find Pix and Enable it.

- Enabling Pix in LearnWorlds does not automatically enable it in Stripe. Pix must be active in both platforms.
- When creating your Stripe account, make sure your school's business country is set to Brazil for Pix to be available.
- Subscriptions and installments are only supported through Stripe and cannot be used through Pix.
- In order for Pix to be available as a payment method in Stripe, your account must have been active and all payments must have been made on time over the past 60 days.
If Stripe is not already connected:
1. Go to Settings → Financial → Payment gateway.
2. Select Stripe and connect your Stripe account.
For detailed setup instructions, see this guide.
Enable Pix in LearnWorlds
Once Stripe is connected and Pix is enabled in your Stripe account:
1. Go to Settings → Financial → Payment gateway.
2. Scroll to the available Stripe payment methods.
3. Find Pix and turn on the Pix toggle.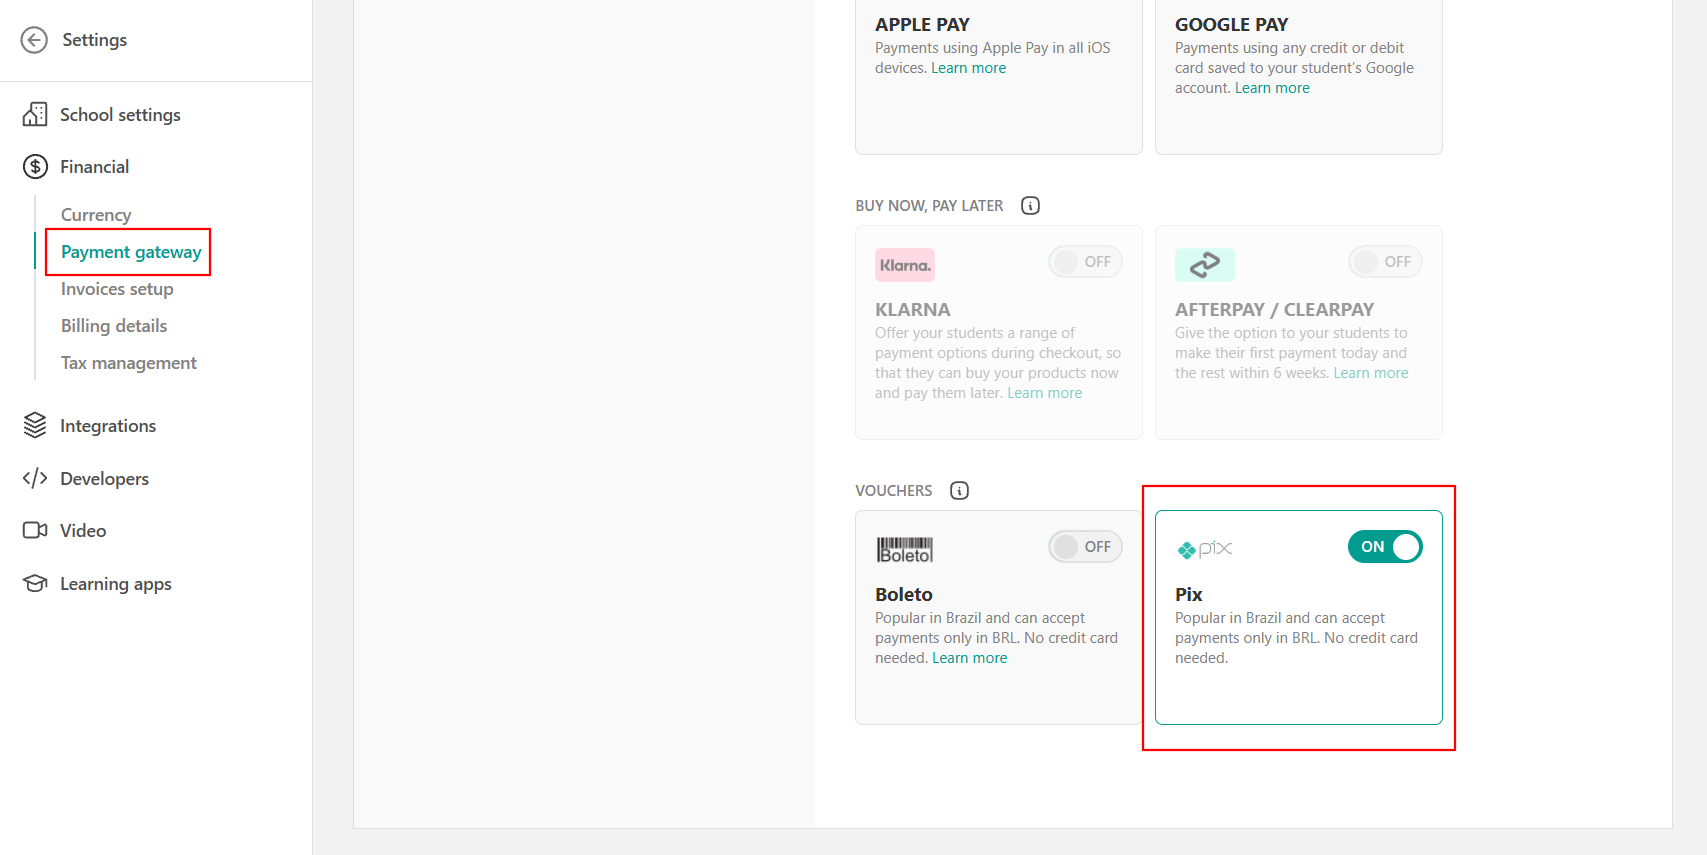
Once enabled, Pix will appear as a payment option for eligible purchases made in BRL.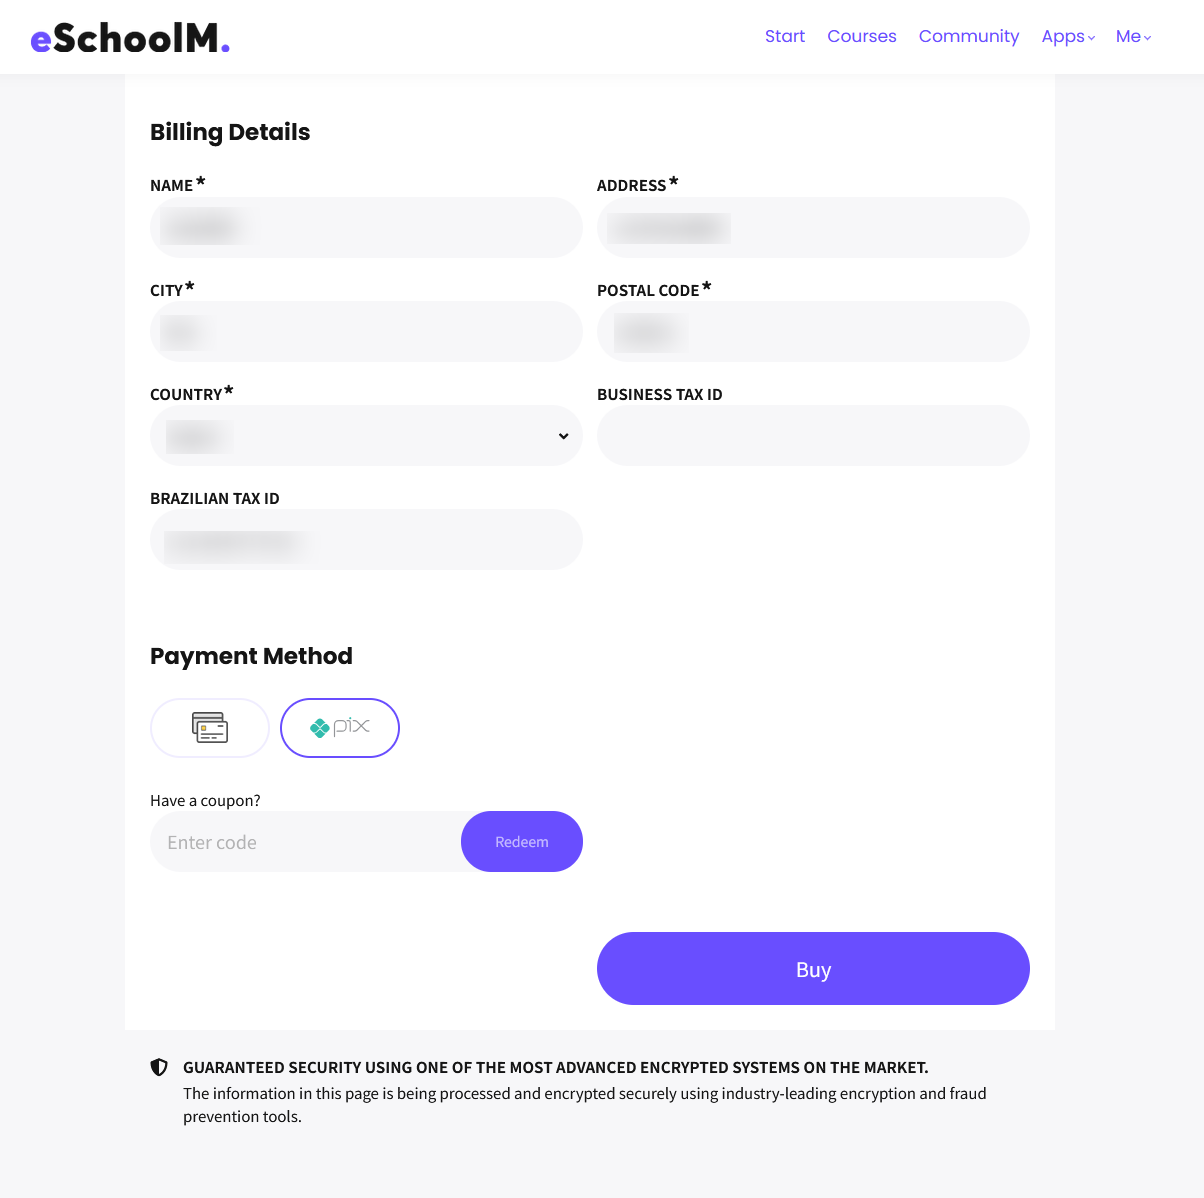
Financial billing details
After you activate Pix with Stripe, you will see some additional Billing Details fields activated on the financial billing details page. These fields are mapped to your Stripe account's billing details, as Stripe is active.
Additional billing details for Pix are activated, once you activate Pix as your payment method on top of Stripe.
1. Go to Settings → Financial → Billing Details.
2. The Pix additional billing details will appear: Brazilian TAX ID, Brazilian State 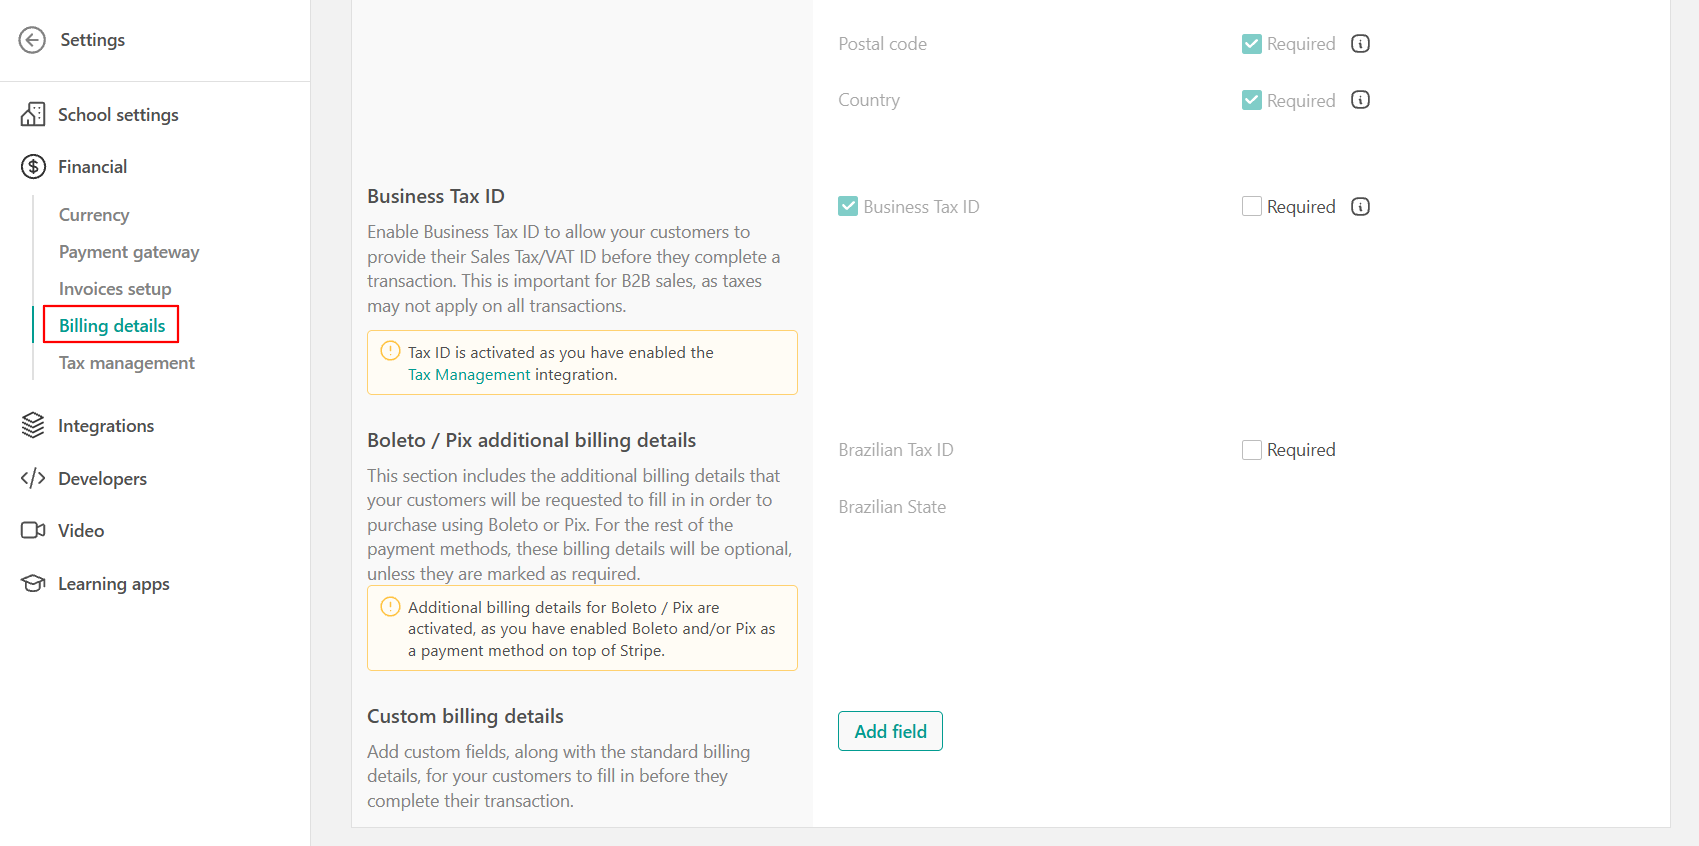
When a learner purchases a product with Pix, the additional billing details fields (Brazilian TAX ID, Brazilian State) will be mandatory/required for the learners to proceed.
For the rest of the payment methods (e.g. Stripe), these additional billing details fields will be optional unless you mark them as required.
How learners pay with Pix
When Pix is available at checkout, learners can select it from the available payment methods. To complete a Pix payment:
1. The learner enters the required billing details.
2. They select Pix as their payment method.
3. They select Buy.
4. A QR code is displayed.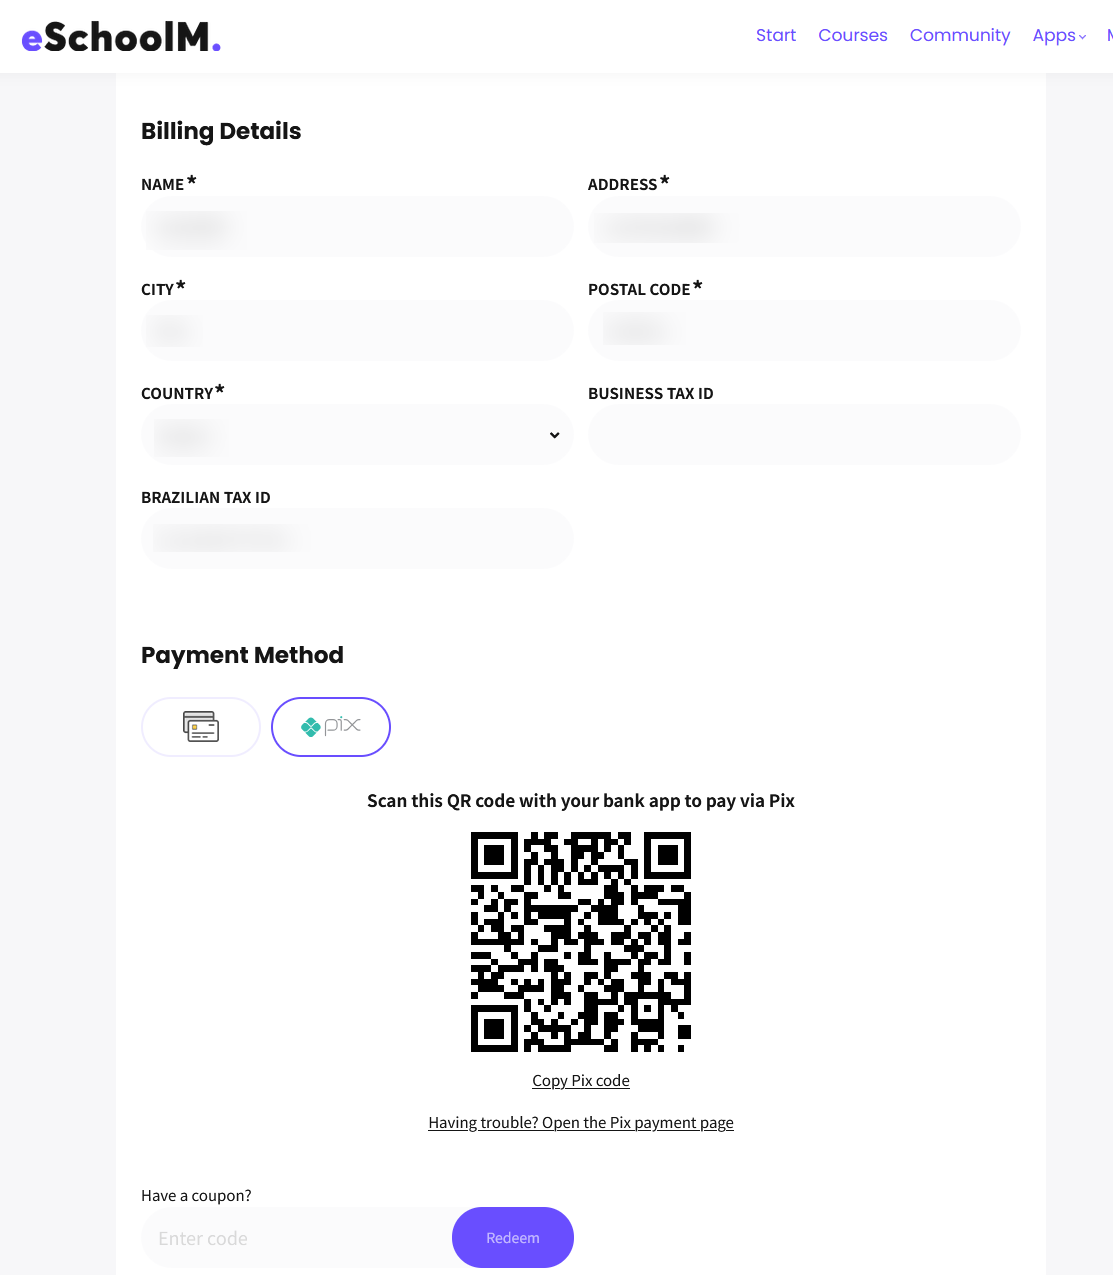
5. The learner scans the QR code using their banking or payment app and confirms the payment.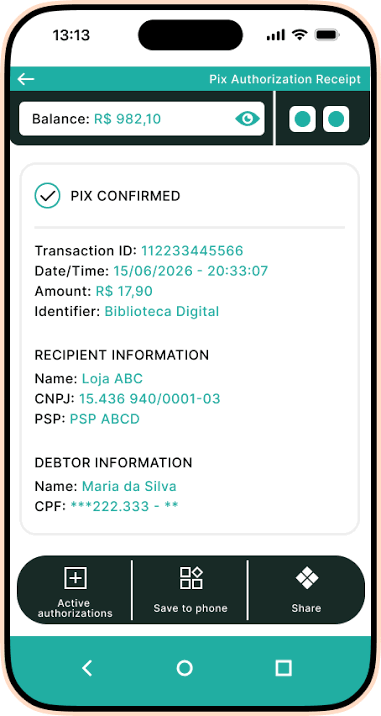
Learners can also select Copy Pix code to copy the payment code manually. Learners must then paste the copied code into their Pix app to complete the payment. When making a purchase on a mobile device, this step is required.
If needed, they can select Open the Pix payment page to complete the payment through the Stripe-hosted Pix page.
Once the payment is successfully confirmed, LearnWorlds processes the purchase and grants the learner access to the purchased product.