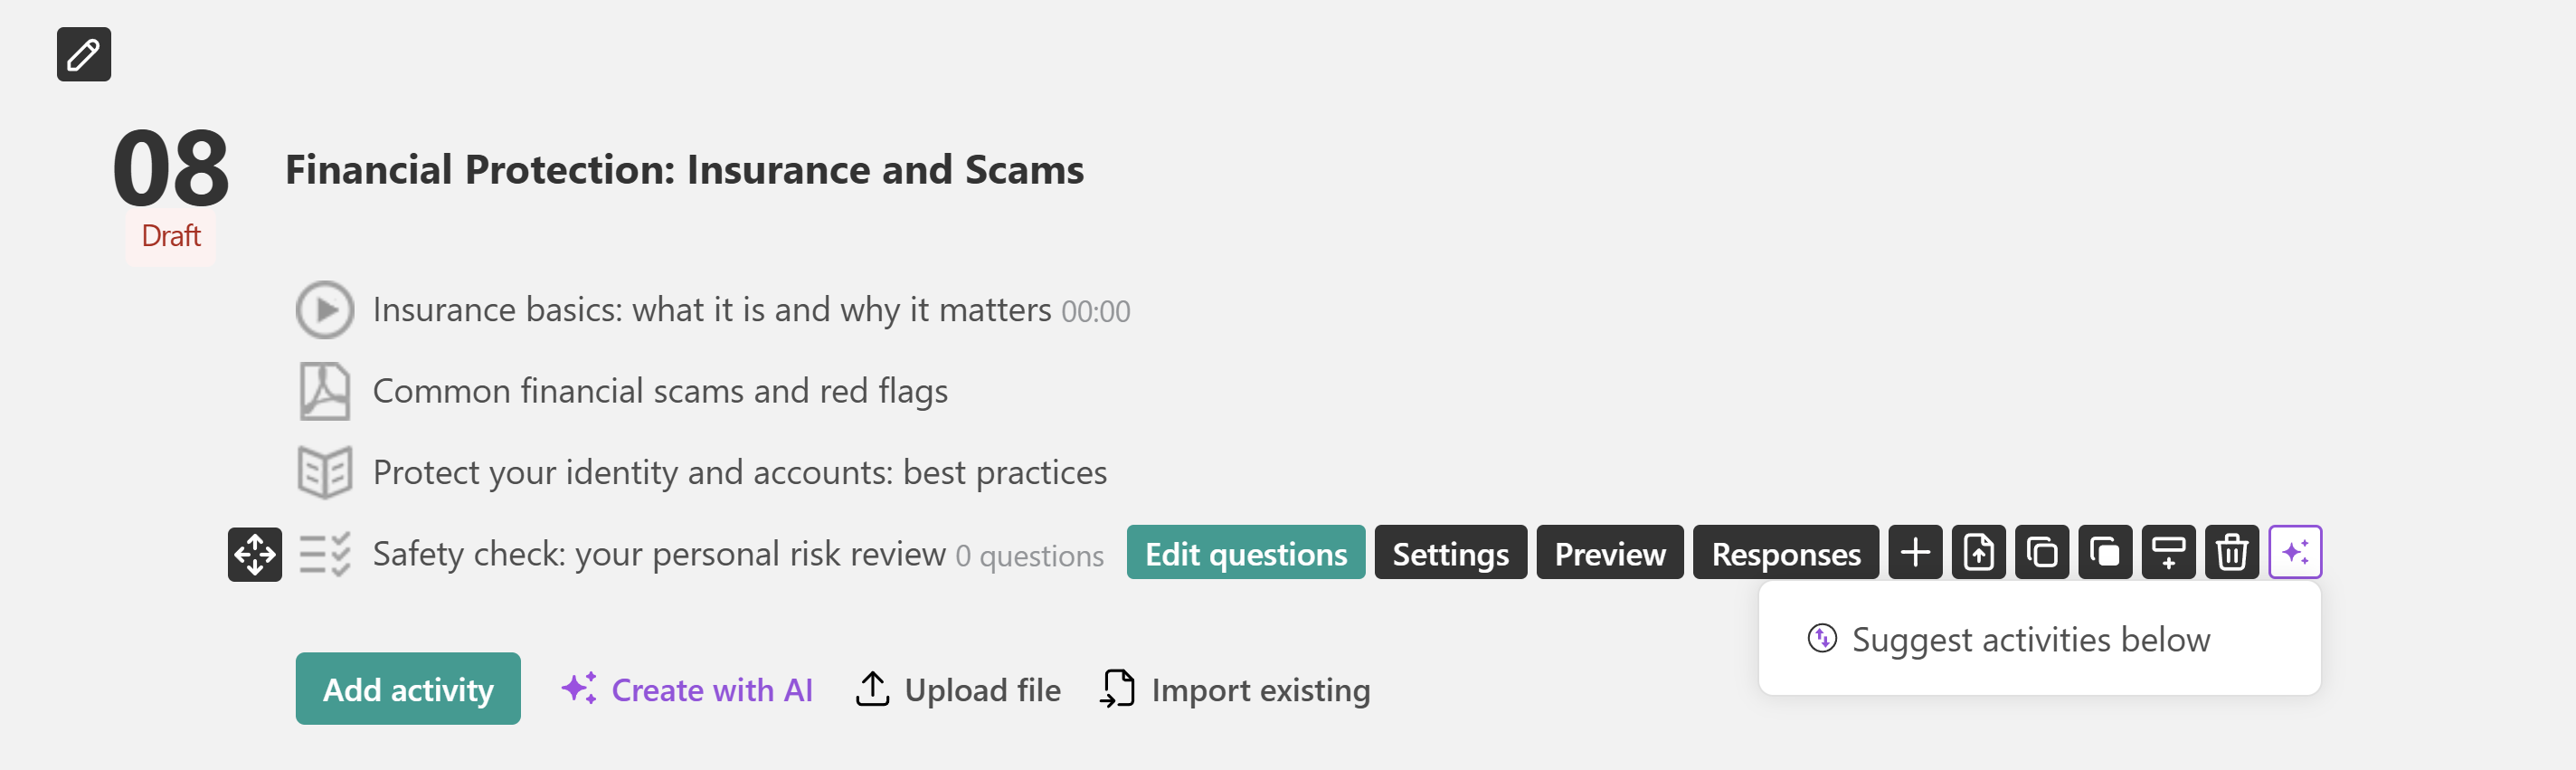
Creating a course outline with our AI (Artificial Intelligence) assistant can save a lot of time in terms of generating a course structure that can organize the learning material and facilitate the learning process of the students. This process can become otherwise challenging, as you will need to consider what kind of course chapters to create while simultaneously keeping your students engaged with the course syllabus.
This article will guide you through the process of crafting a course outline with the aid of the powerful AI assistant. By doing so, you can optimize efficiency and save valuable time.
Understand the available AI course creation options
LearnWorlds offers several ways to use AI when building your course, depending on how much content you want to create.
| AI creation option | What it does |
Create a complete course with AI | Generate a complete course, including its structure, sections, learning activities, and content. Choose between two approaches:
|
Create outline with AI | Generates sections and learning activities to organize your course. |
| Create sections with AI | Adds new sections to an existing course. |
| Create activities with AI | Generates individual learning activities within a section. |
You can start with a complete AI-generated course or use AI to expand and improve an existing one.
Create a complete course with AI
To create a course using AI, navigate to Courses & Programs, click Create course, and select Create course with AI.
This option guides you through the process, from defining your course's learning goals and structure to generating sections, learning activities, and content. At each step, review and refine AI-generated suggestions to ensure the course aligns with your objectives.
Describe the course you want to create
In the AI prompt box, describe the course you want to create. Include its topic, target audience, learning goals, and any specific requirements.
For example: Create a beginner-friendly course on workplace equality, with practical examples, interactive activities, and short knowledge checks.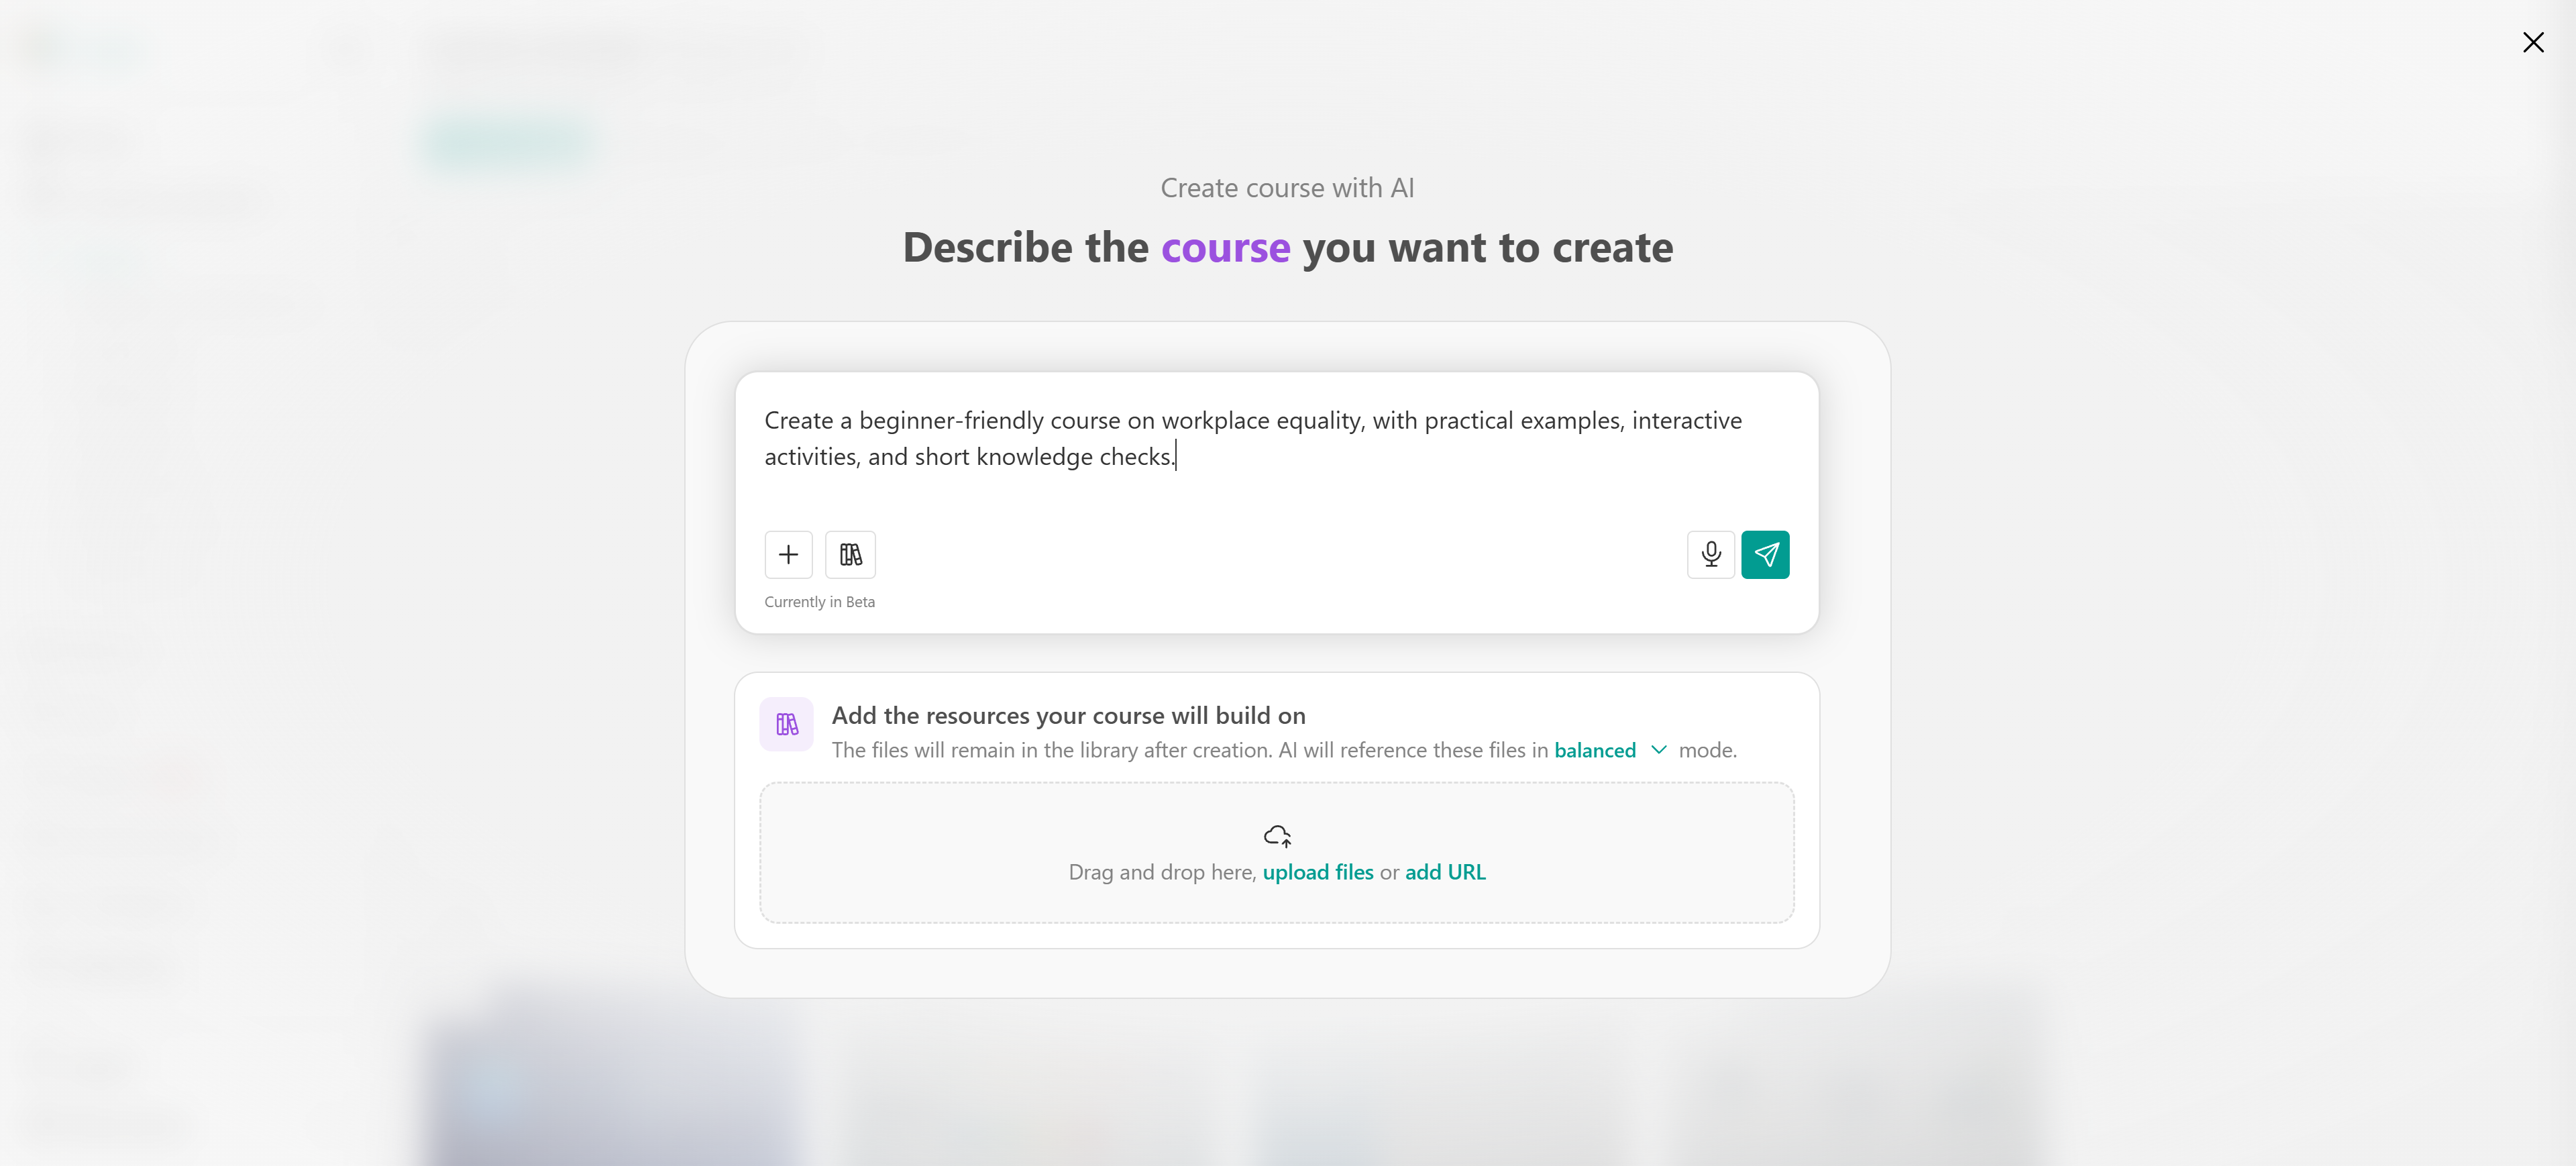
Add the resources your course will build on. Upload reference materials, select existing resources from the AI source library, or reference an existing course or learning program to guide AI when generating your course content.
Once ready, click the Send icon to submit your prompt and begin the course creation process.
Use the AI source library
The Sources library allows you to add and reuse reference materials that help AI generate course content based on your own resources. To add materials, drag and drop files into the AI chatbox, click Upload files to select files from your device, or choose Add URL to include content from a web page.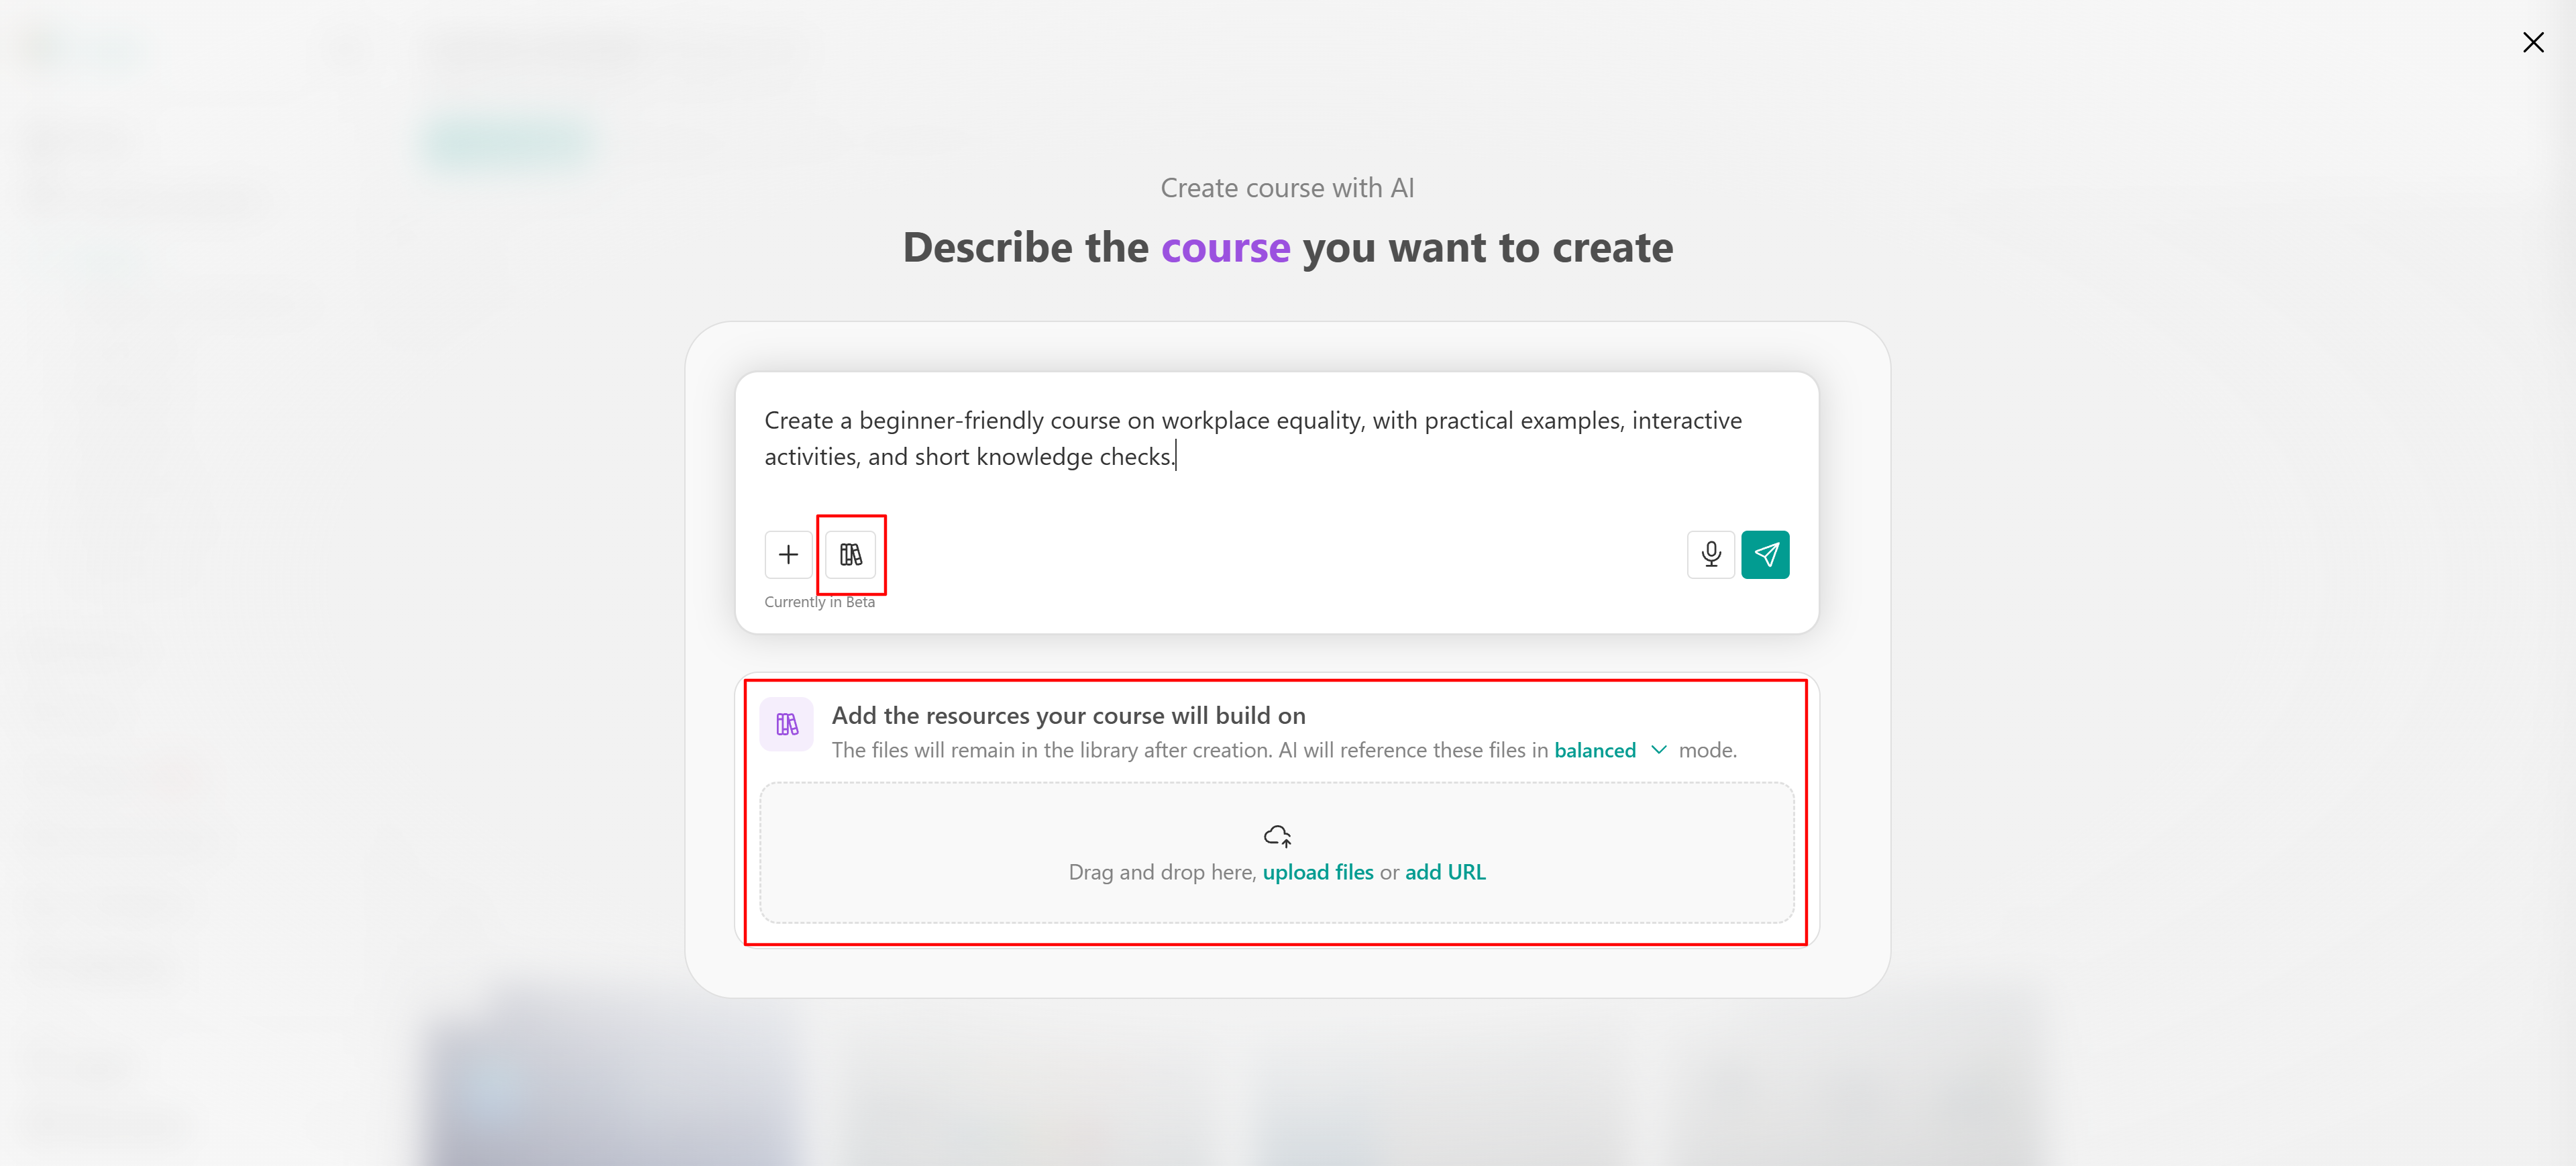
To access materials you've already uploaded, click the book icon in the AI chatbox. This opens the Sources library, where you can find and reuse your existing resources without uploading them again. Files remain available in the library even after course creation. Find more information about this here.
Review and customize your course brief
After submitting your prompt, AI generates a Course brief based on your instructions and any resources you provided. The brief defines the foundation of your course before AI starts planning its structure and content. Review the suggested information, including:
- Target audience: Who the course is intended for.
- Prior knowledge: What learners already know about the subject.
- Learning outcomes: What learners should be able to do after completing the course.
- Topics and skills: What the course should cover.
- Potential misconceptions: Common misunderstandings the course should address.
- Course duration: How much time learners are expected to spend on the course.
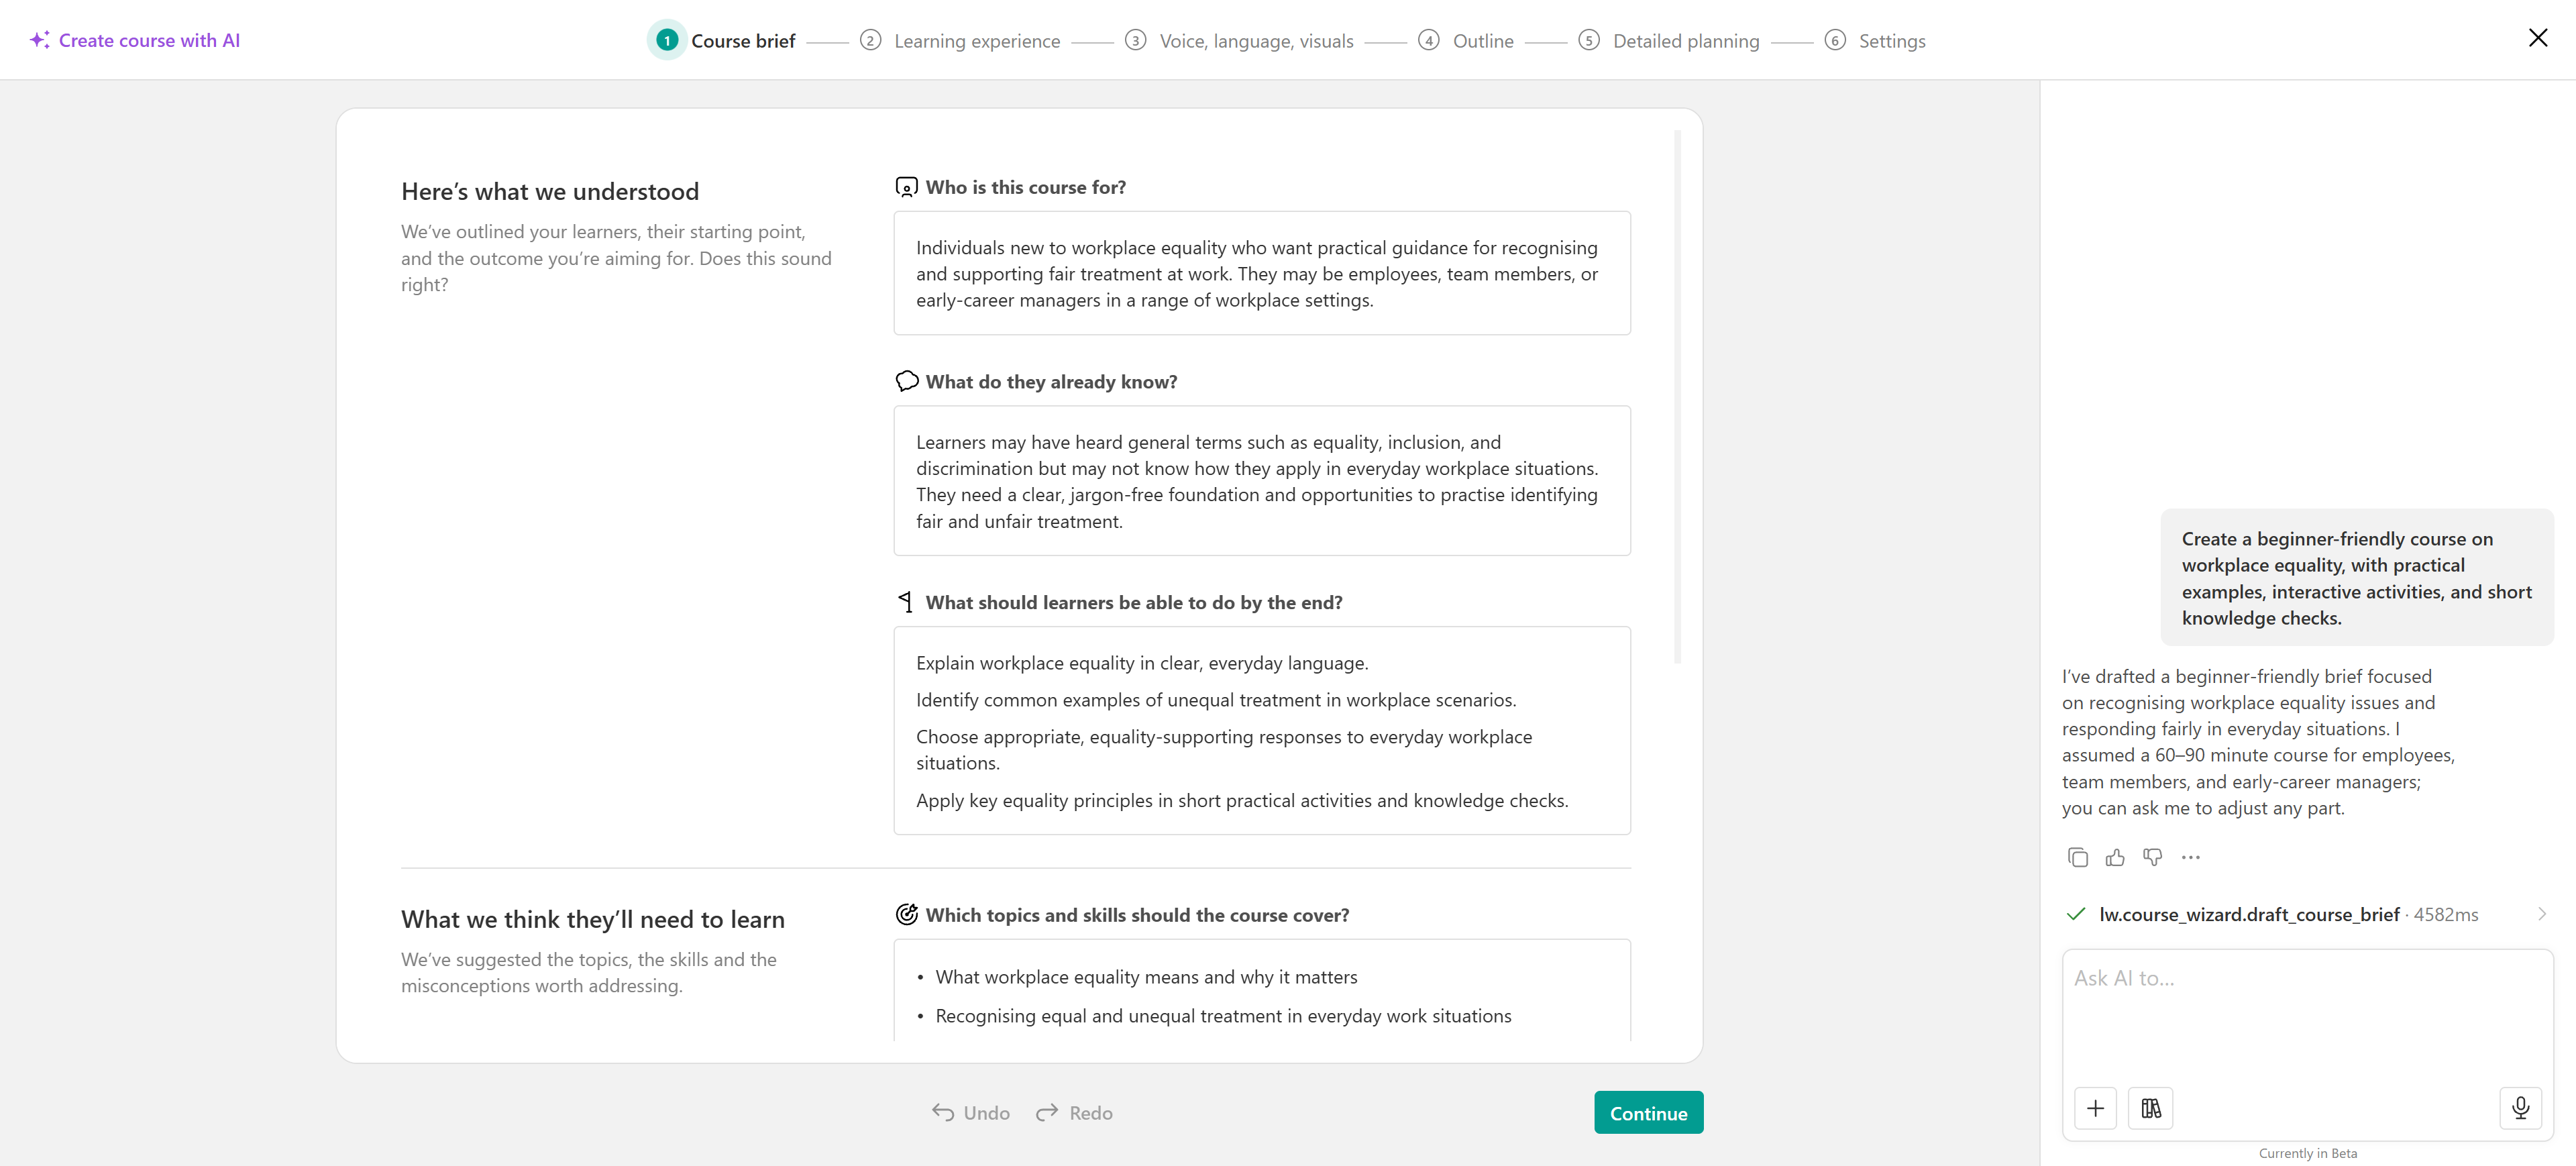 You can edit the suggested information directly in the available fields or use the AI chatbox on the right to request changes.
Once the course brief reflects your goals, click Continue to move to the Learning experience step.
Design the learning experience
In the Learning experience step, define how learners will interact with your course content and progress through their training. Customize the following settings:
- Course interactivity
Choose how frequently learners should interact with the content:
- Light: Fewer interactions throughout the course.
- Regular: A balanced combination of content and opportunities to practice.
- High: More frequent interactions and opportunities for learners to respond.
You can also prioritize specific interaction types, such as answering short questions, explaining choices, participating in polls, reflecting on learning, or using flashcards.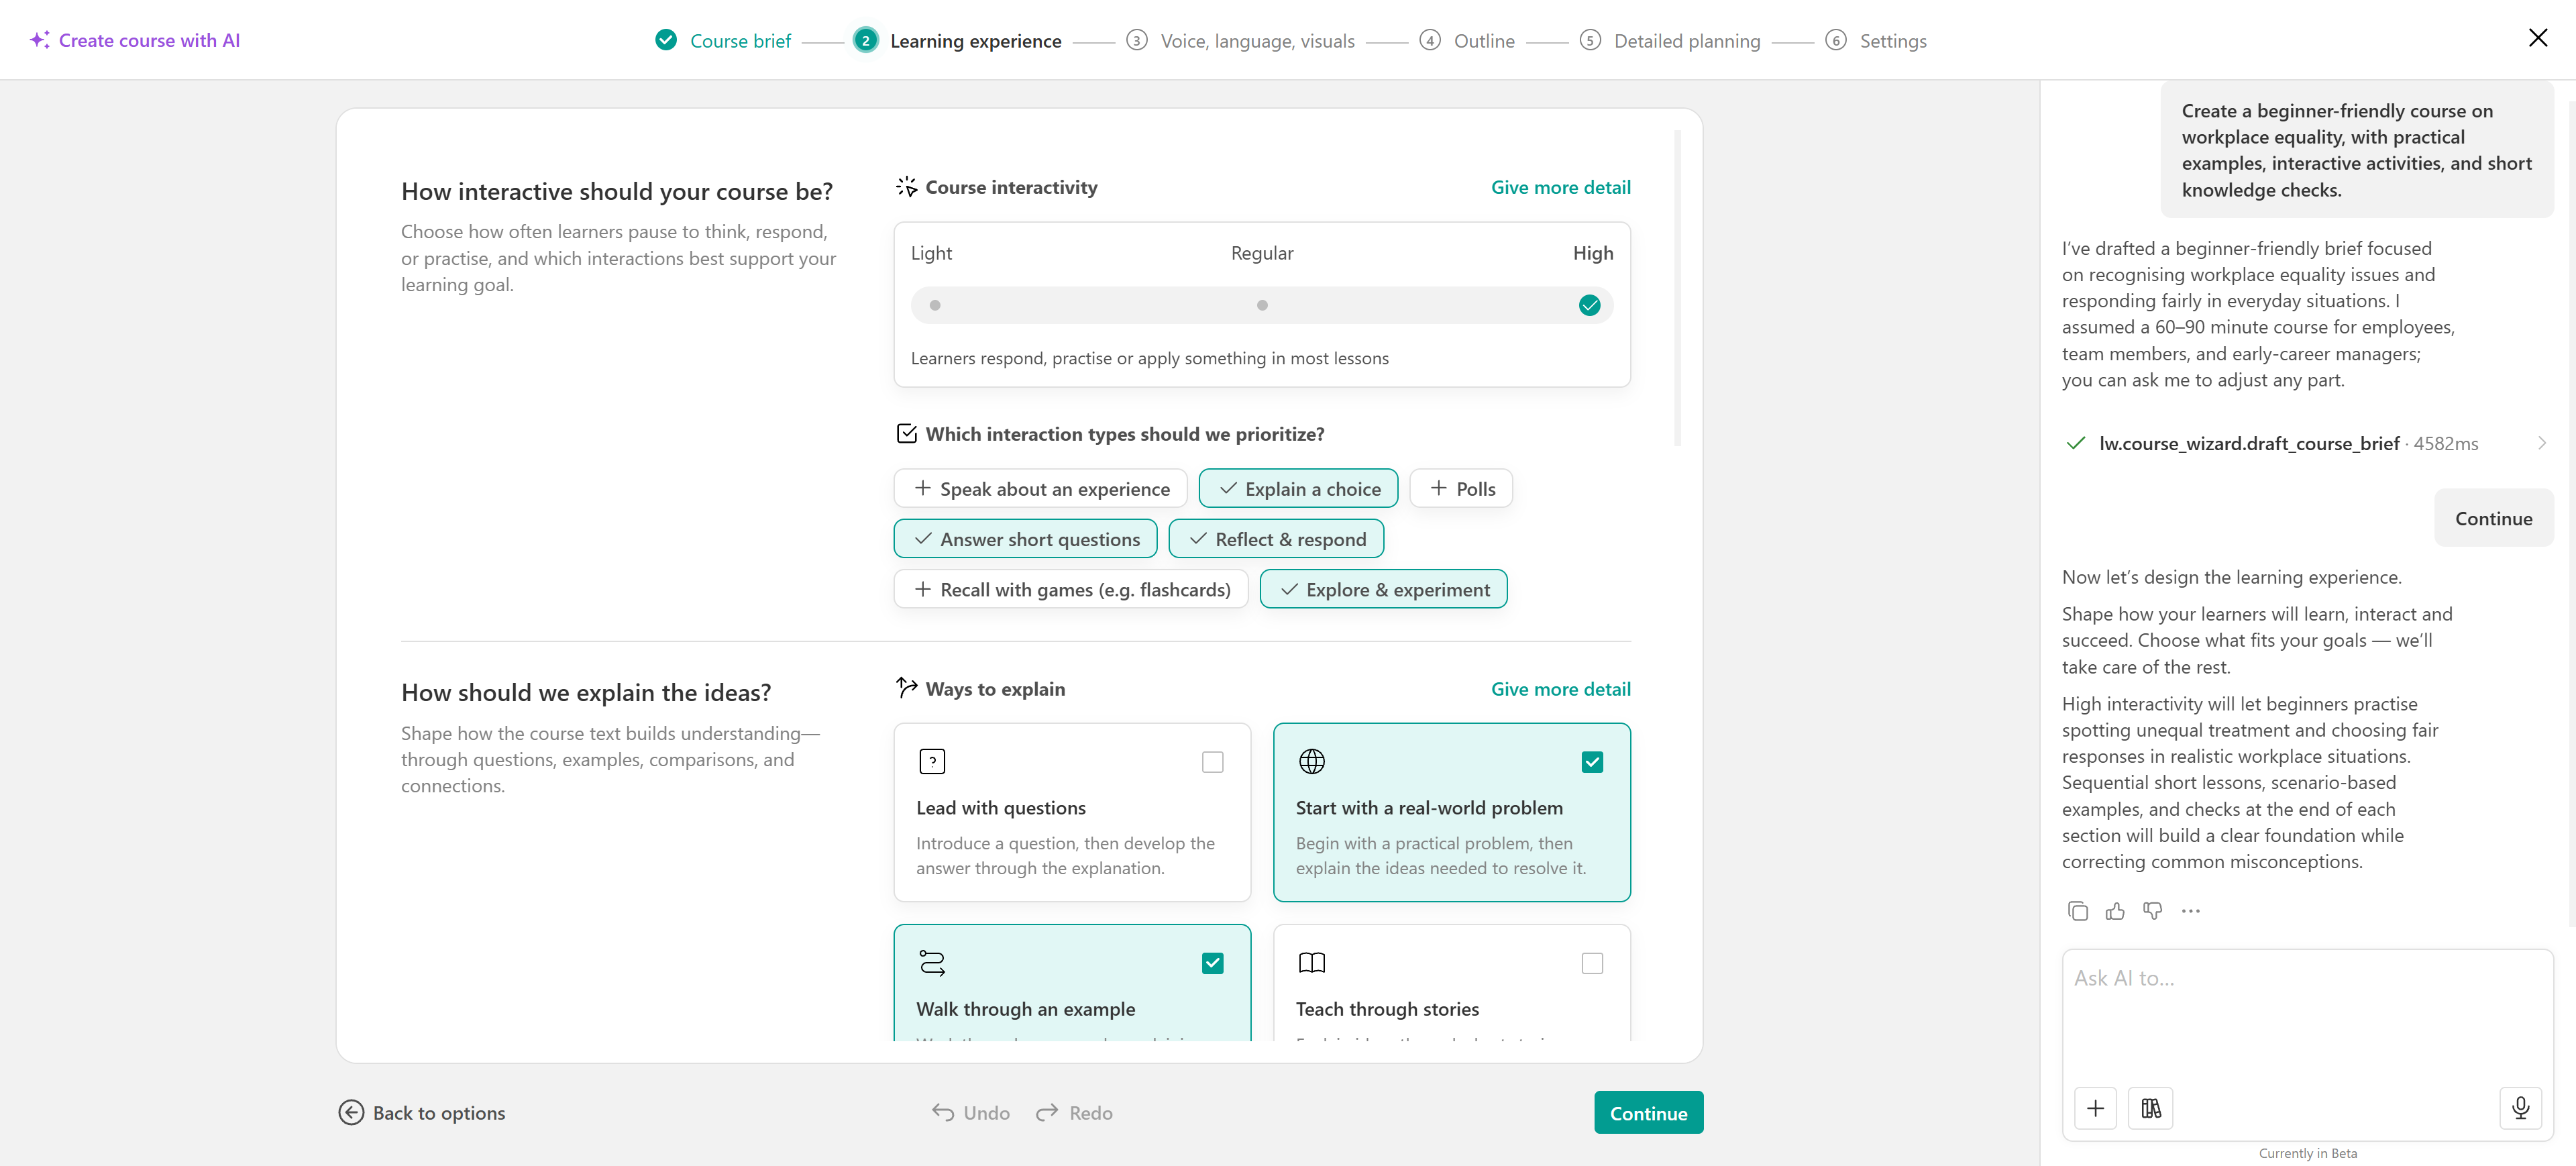
- Ways to explain
Choose how AI should present and explain concepts. For example, you can ask AI to start with a real-world problem, walk learners through examples, compare different approaches, or use stories and analogies.
- Learning activities throughout the course
Define what should happen at different stages of the learning experience:
- When the course starts: Check prior knowledge, set learning goals, or introduce learners to one another.
- During the course: Include knowledge checks, learning reflections, graded assessments, live sessions, or discussions.
- At the end of the course: Add a final assessment, collect feedback, or encourage further learning.
You can also enable Award a certificate and choose whether learners receive it upon course completion or after passing the final assessment.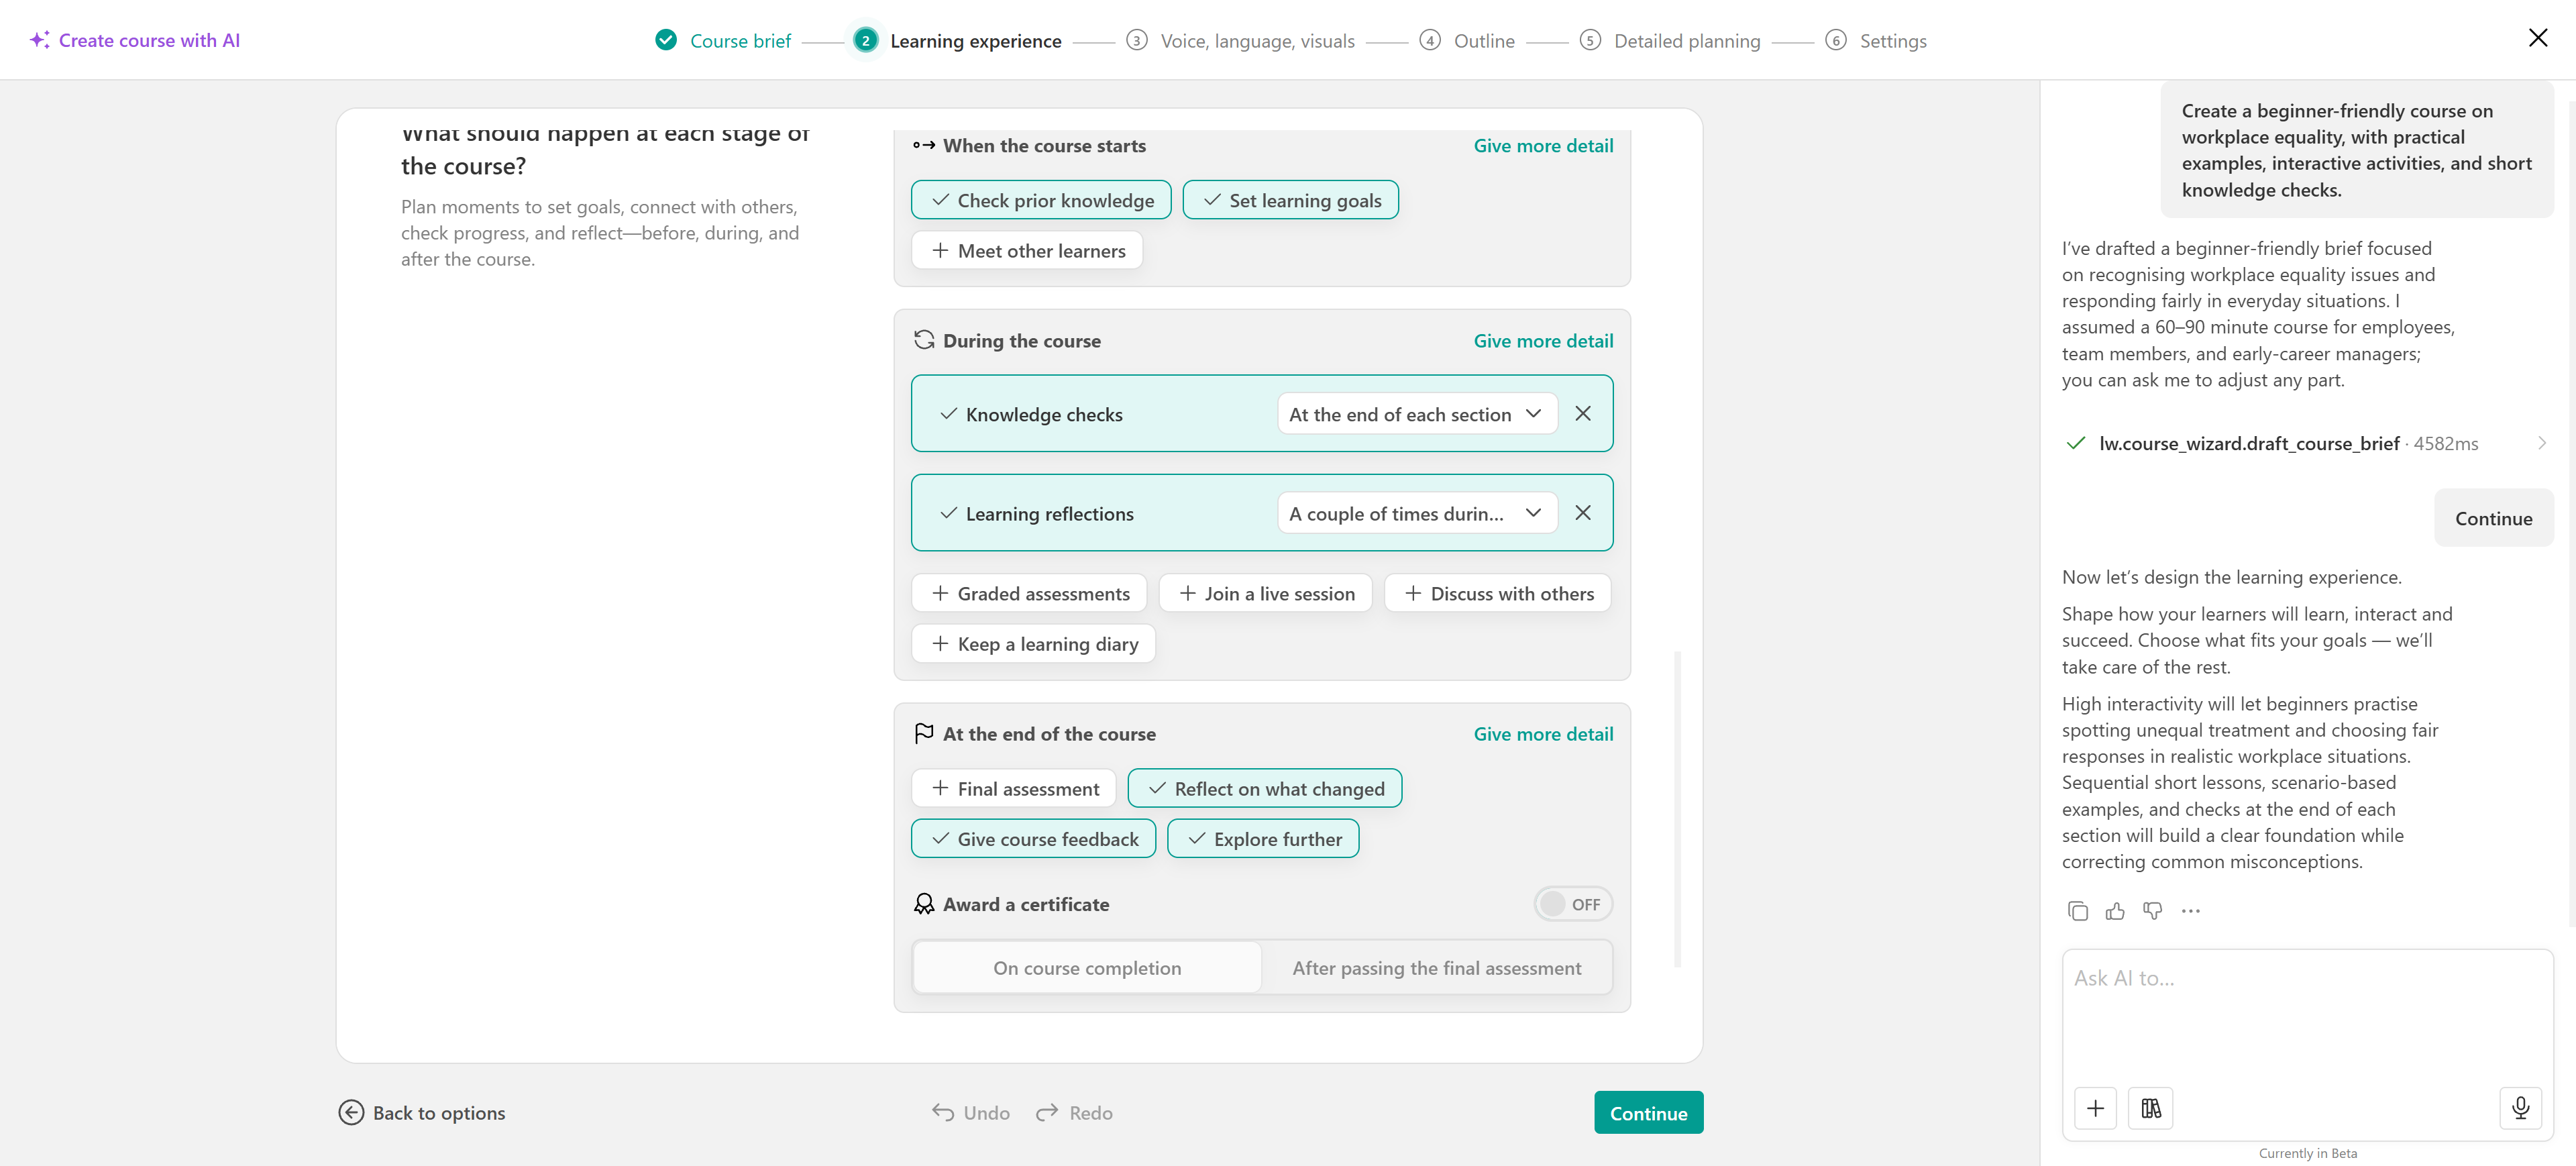
- Course navigation
Choose how learners move through the course:
- Free navigation: Learners can navigate between activities freely.
- Sequential navigation: Learners follow the course activities in order.
Review your selections and click Continue.
Customize the voice, language, and visuals
In the Voice, language, visuals step, define the writing style, language, and visual approach AI should follow when generating your course content.
- Tone of voice
Select the tone that best matches your audience and subject, such as Professional, Academic, Friendly & conversational, or Warm & supportive.
- Language and terminology
Choose the language for your course content and provide any additional writing guidelines, such as preferred terminology, formatting rules, or expressions to avoid.
For example: Use "learners" instead of "students" and explain technical terms in simple language.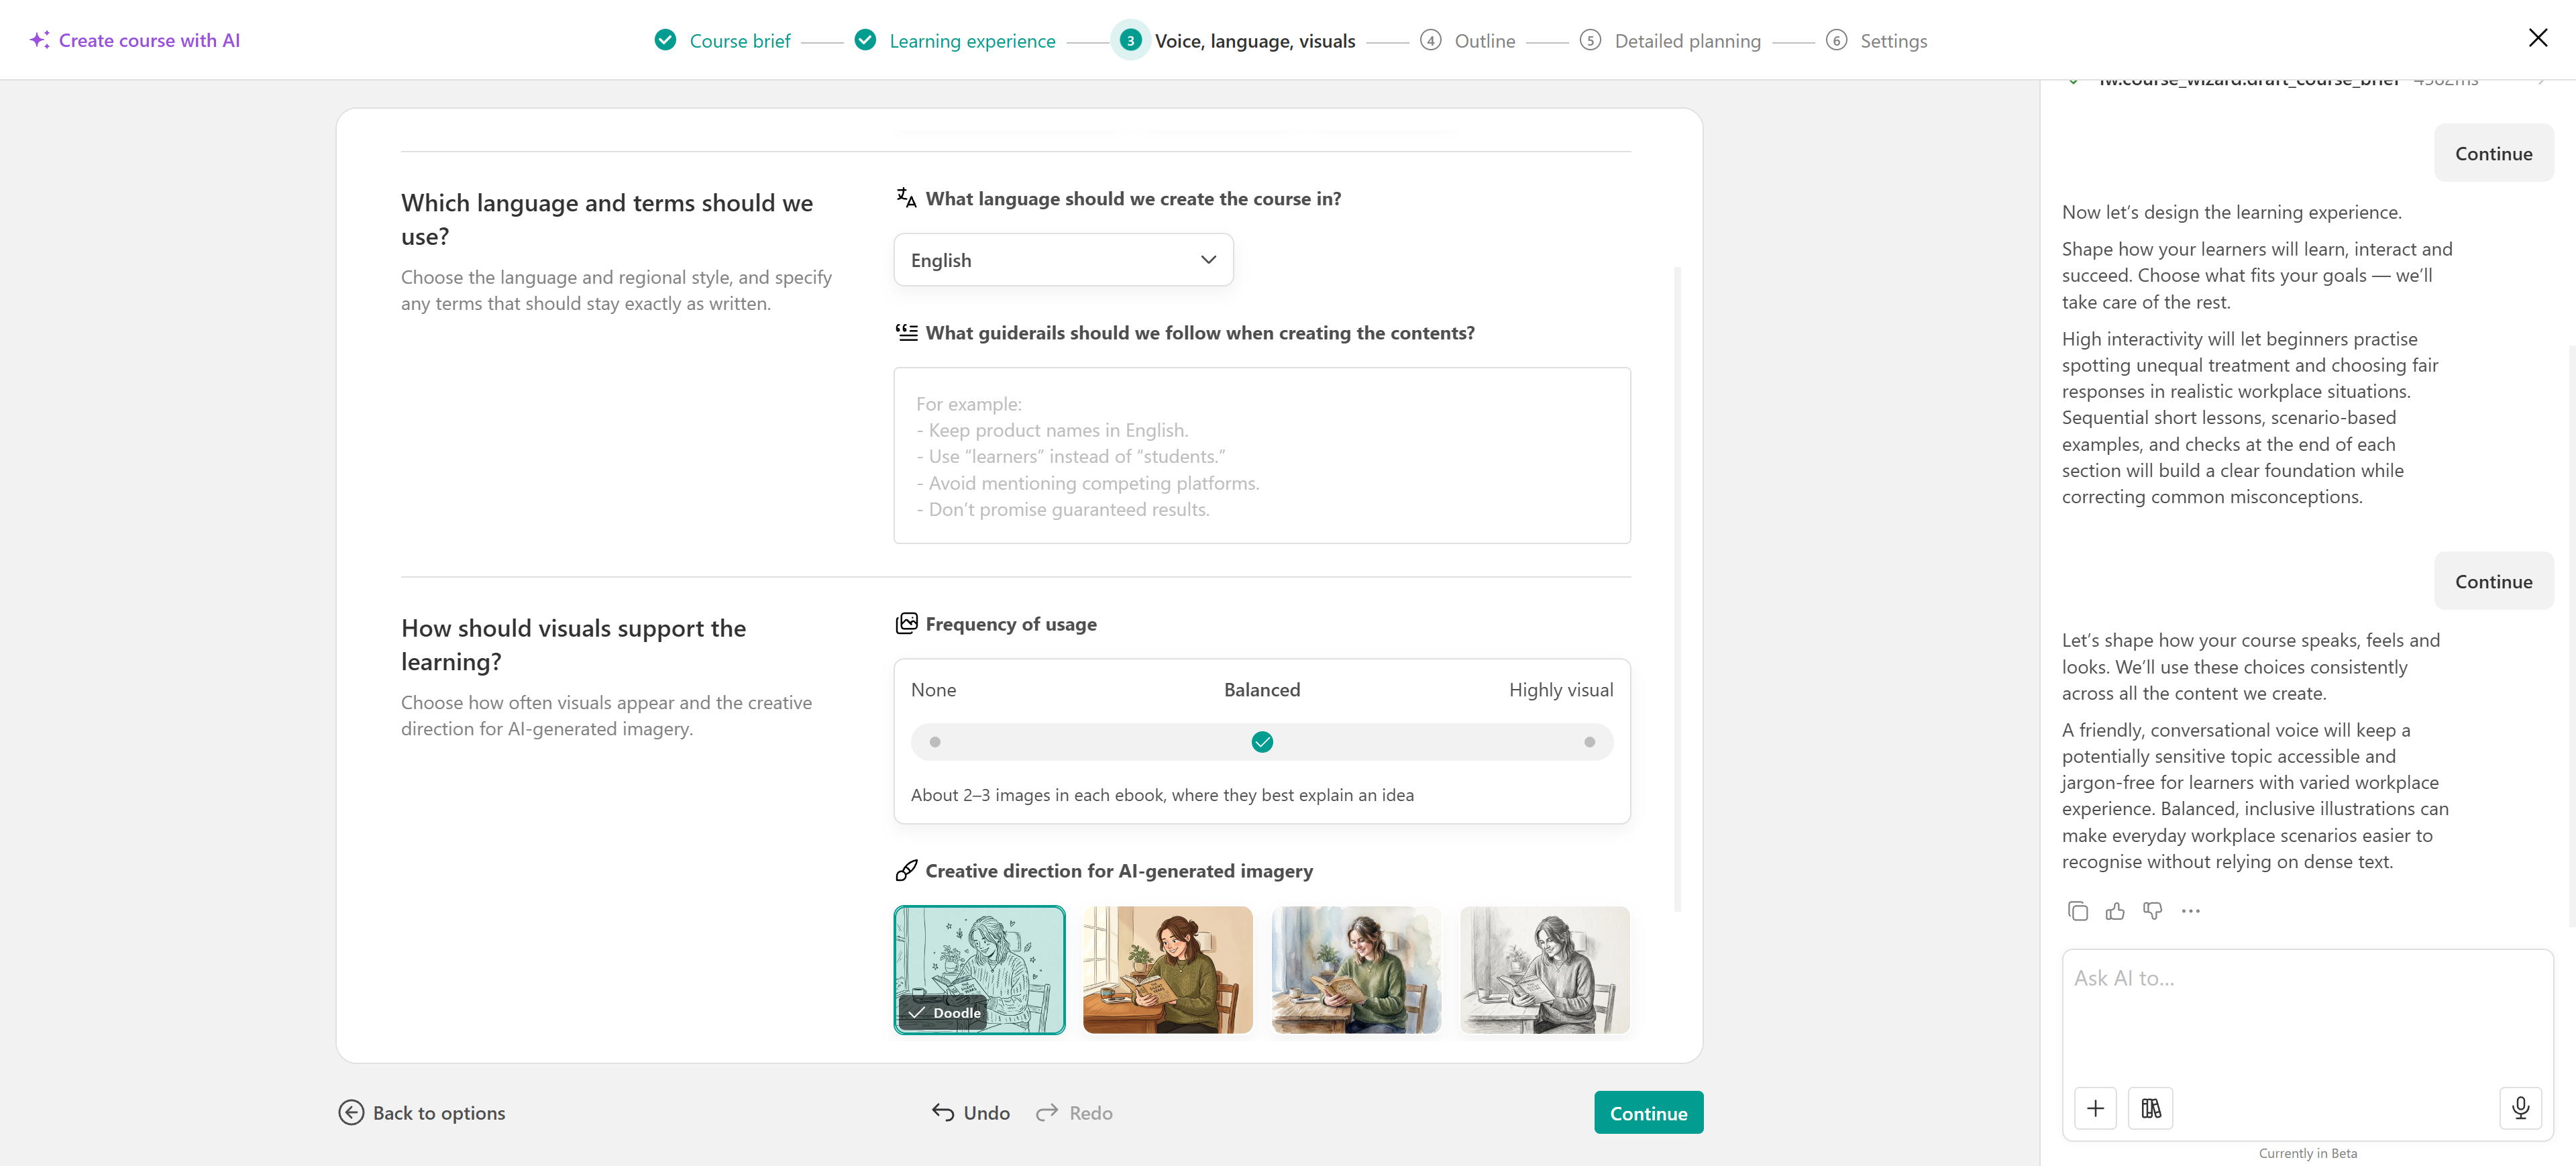
- Visuals
Define how frequently AI-generated images should appear throughout your course, ranging from no images to a highly visual learning experience.
To maintain a consistent visual style, select a Creative direction for AI-generated imagery that reflects your preferred aesthetic.
Once your preferences are set, click Continue to proceed.
Generate and review the course outline
Based on your instructions and the settings selected in the previous steps, AI generates a proposed course outline with sections, learning activities, and the learning intent of each section.
Review the suggested structure to make sure it aligns with your learning goals. Before continuing, you can:
- Select or deselect sections and activities to include in your course.
- Review the suggested learning activity types.
- Adjust the structure to better match your learning objectives.
- Use the AI chatbox on the right or canvas to request changes to the outline.
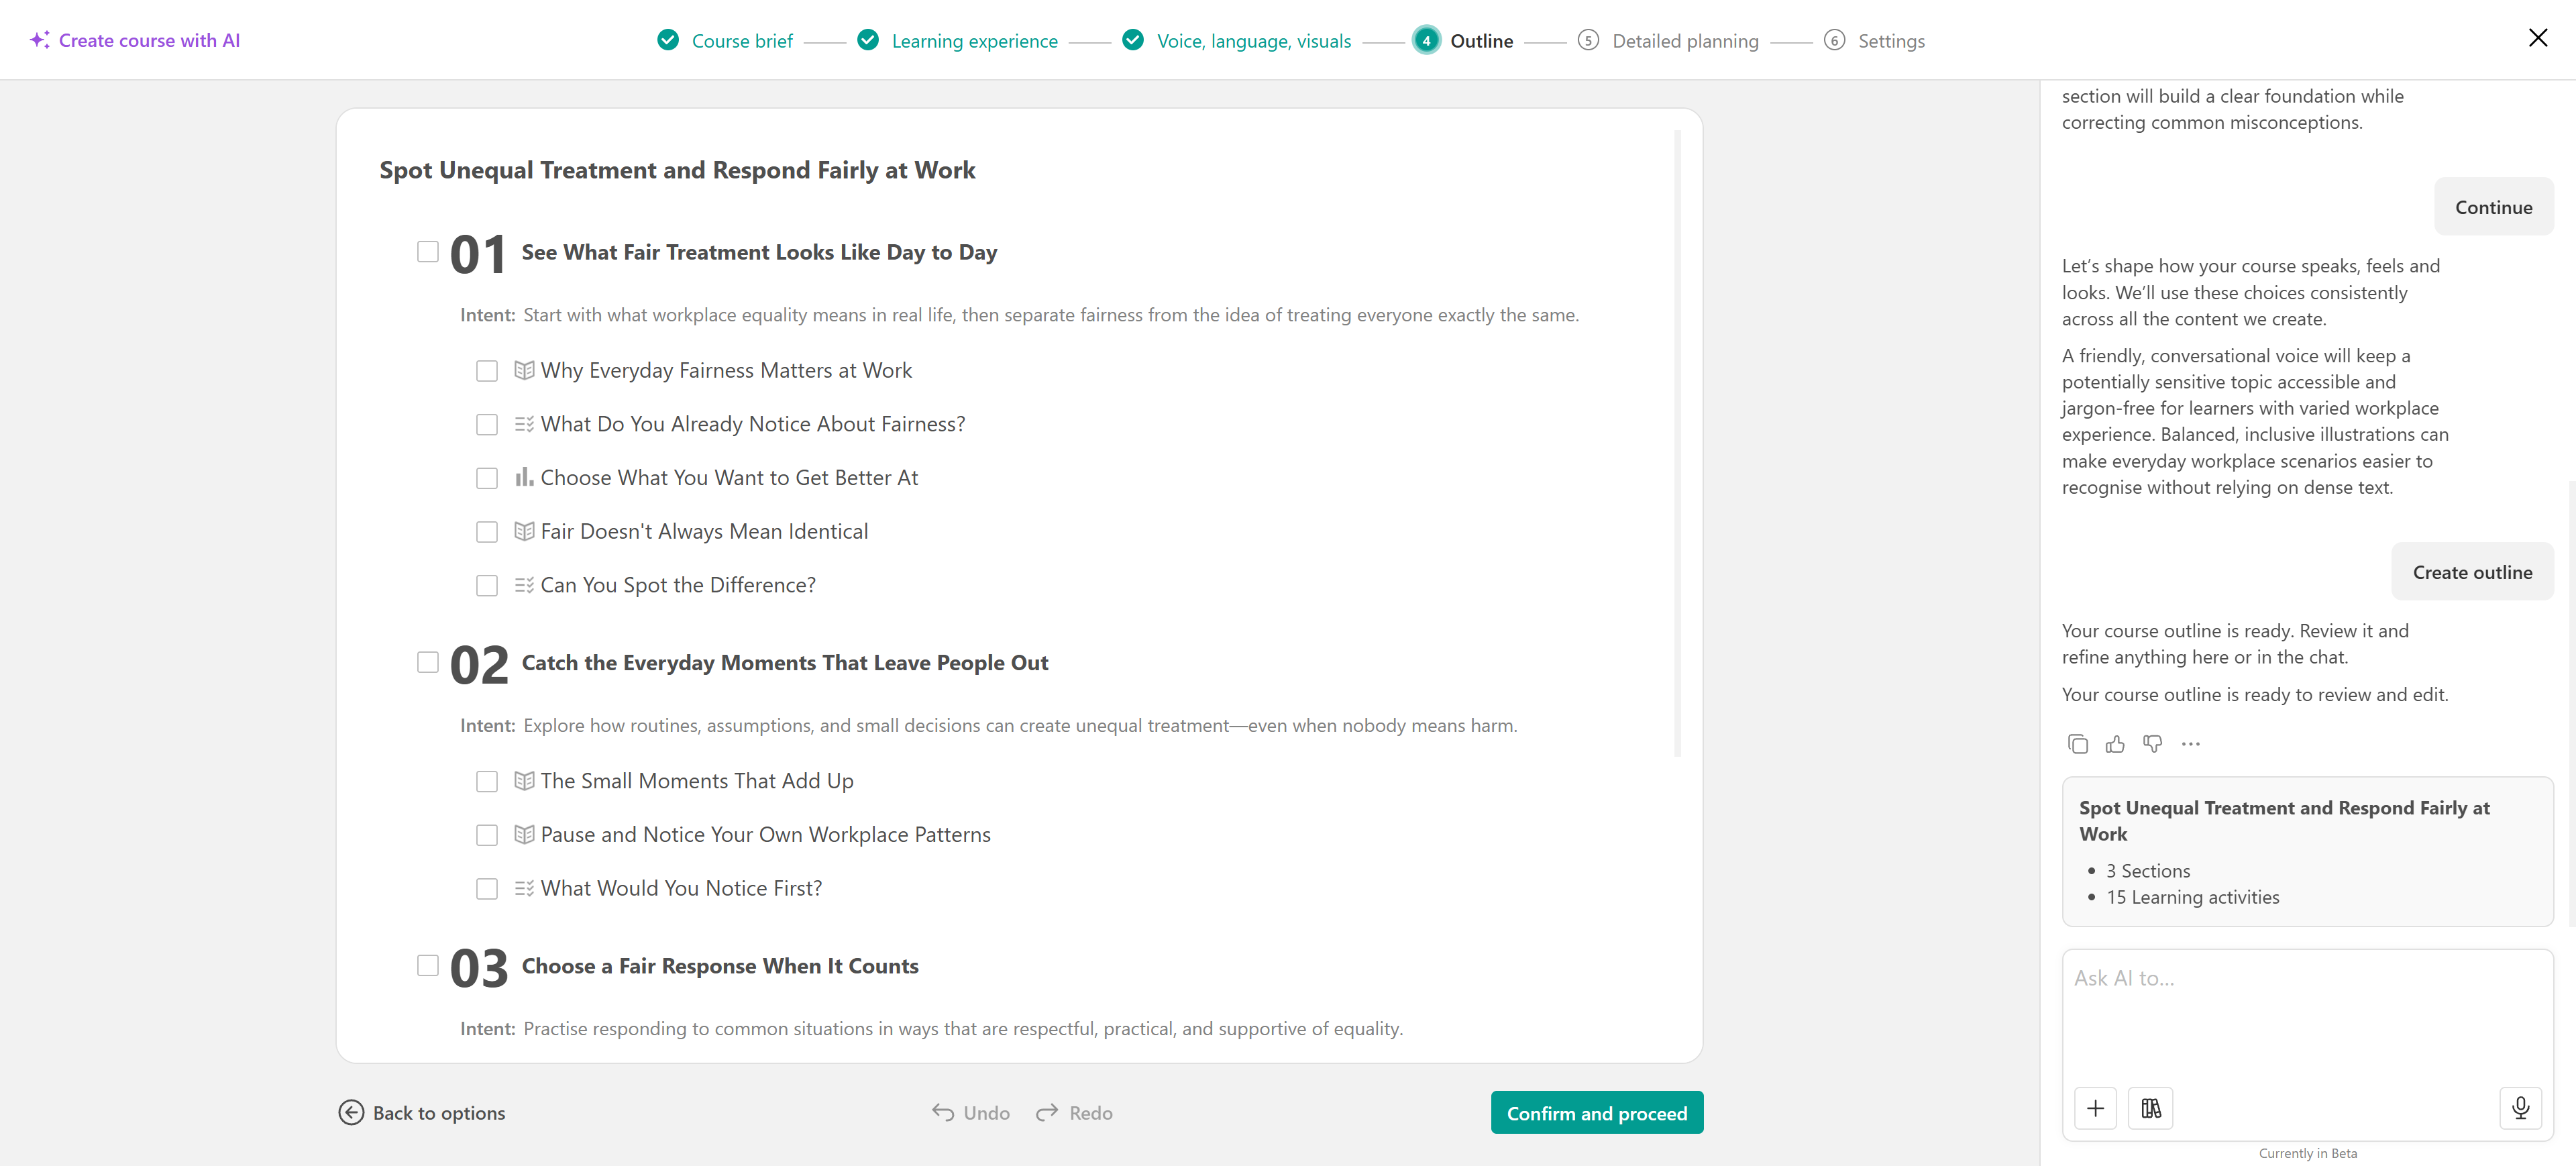
For example, ask AI to add practical exercises, simplify a section, or include additional knowledge checks.
Once the outline reflects your preferred structure, click Confirm and proceed.
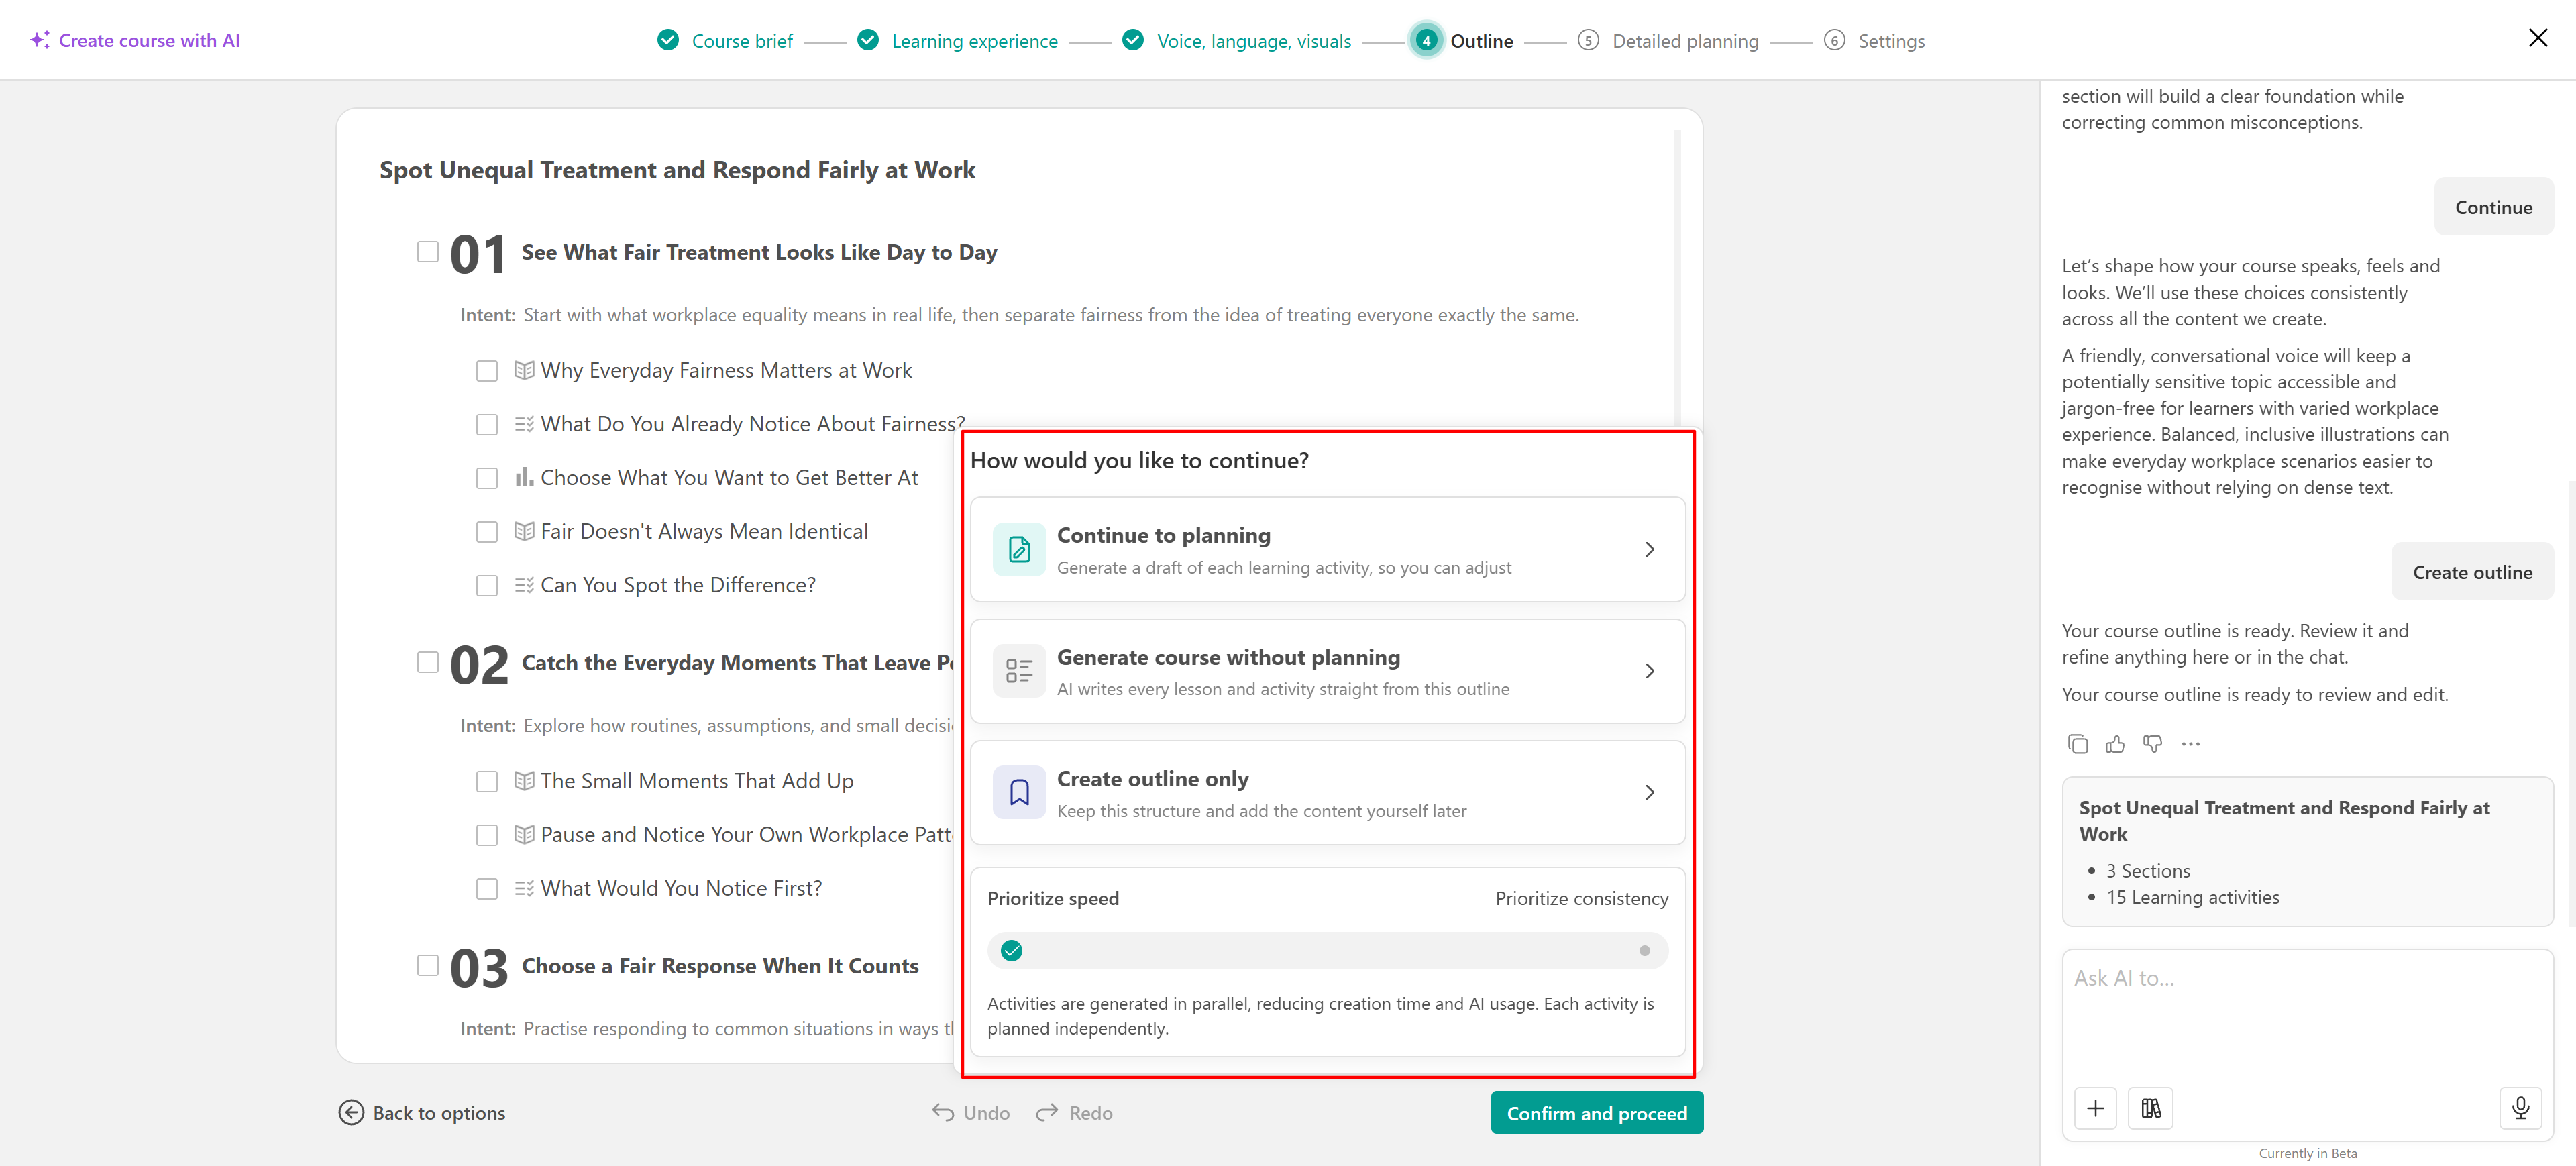
Choose how to continue
After approving the outline, decide how much of the course AI should prepare before creating it.
| Option | Description |
| Continue to planning | Generate a detailed plan for each learning activity, allowing you to review and refine the proposed content before creating the course. |
| Generate course without planning | Generate the course content directly from the approved outline, skipping the detailed planning step. |
| Create outline only | Create the course structure without generating the learning content, so you can add it manually later. |
If you choose to generate course content with AI, adjust the generation preference between Prioritize speed and Prioritize consistency, depending on your needs.
Review the detailed planning
If you selected Continue to planning in the previous step, AI generates a detailed plan for the learning activities included in your course.
This step allows you to review and refine the proposed content before generating the final course.
Select an activity from the left panel to open its plan in the editor. Depending on the activity type, review and edit the suggested text, examples, questions, and other content elements.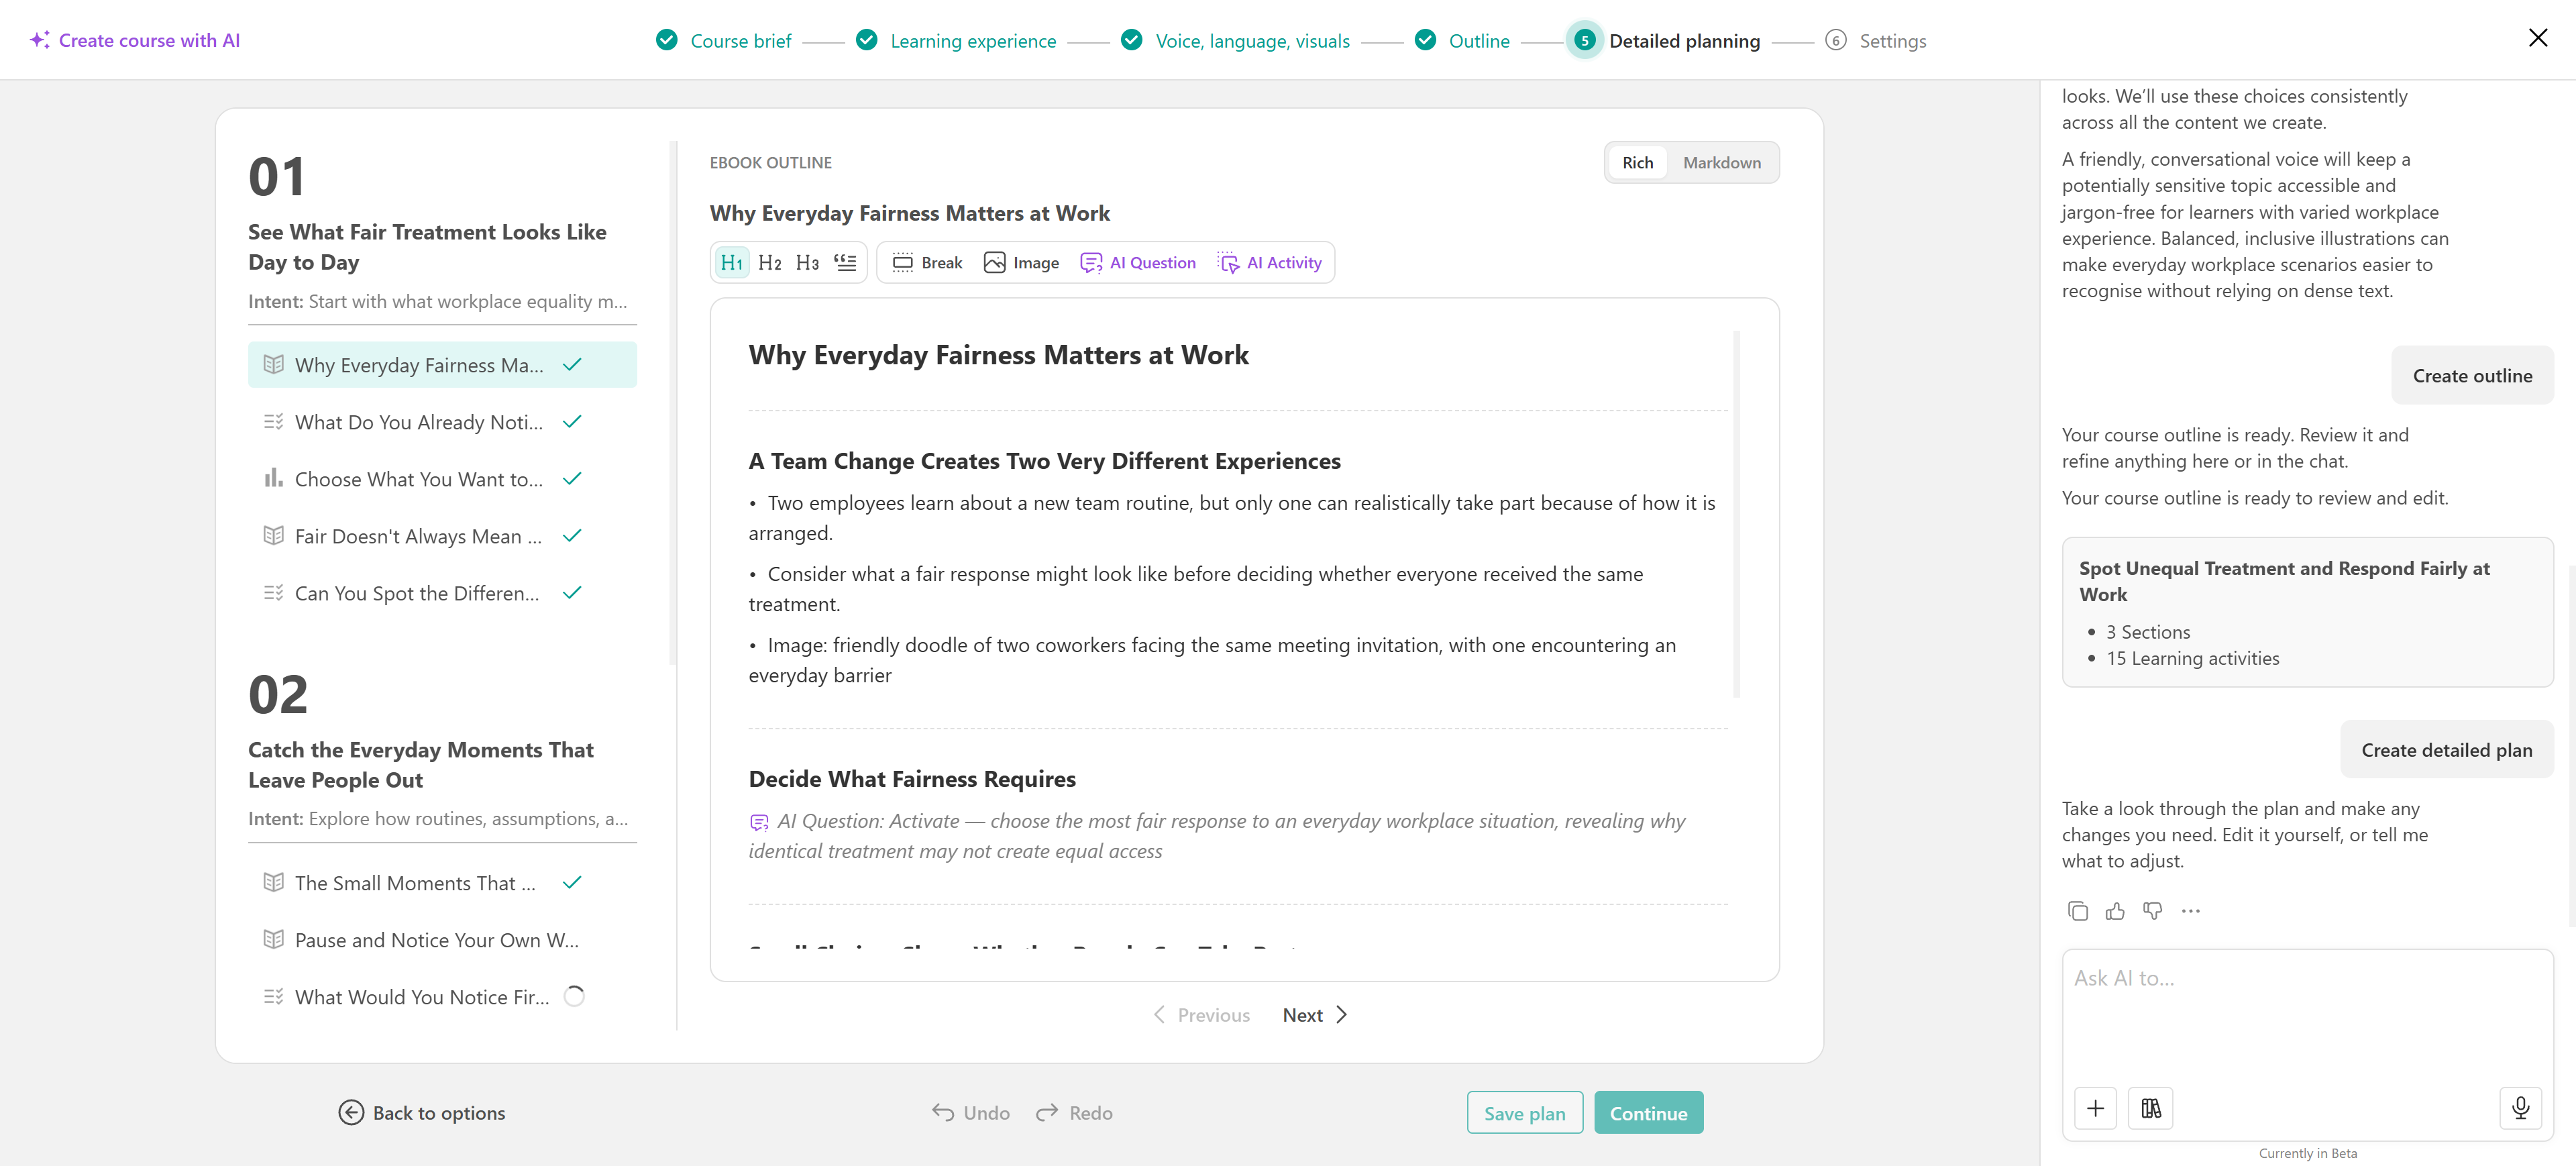
For additional changes, use the AI chatbox to request improvements or refine specific activities.
For eBook activities, the editor includes Rich and Markdown views for editing content, along with options to add AI questions and activities.
Save and resume your AI course creation
You don't have to complete your AI course creation process in one session. You can save your course plan and return to it later or resume an interrupted session without starting from scratch.
To access your saved or unfinished work, navigate to Courses & Programs → Create course. Under Pick how you want to get started, you will find:
- Saved plans: Displays course plans you have saved using the Save plan option. Select a saved plan to continue working on it.
- In progress: Displays AI course creation sessions that were interrupted before completion. Select a session to resume from where you left off.
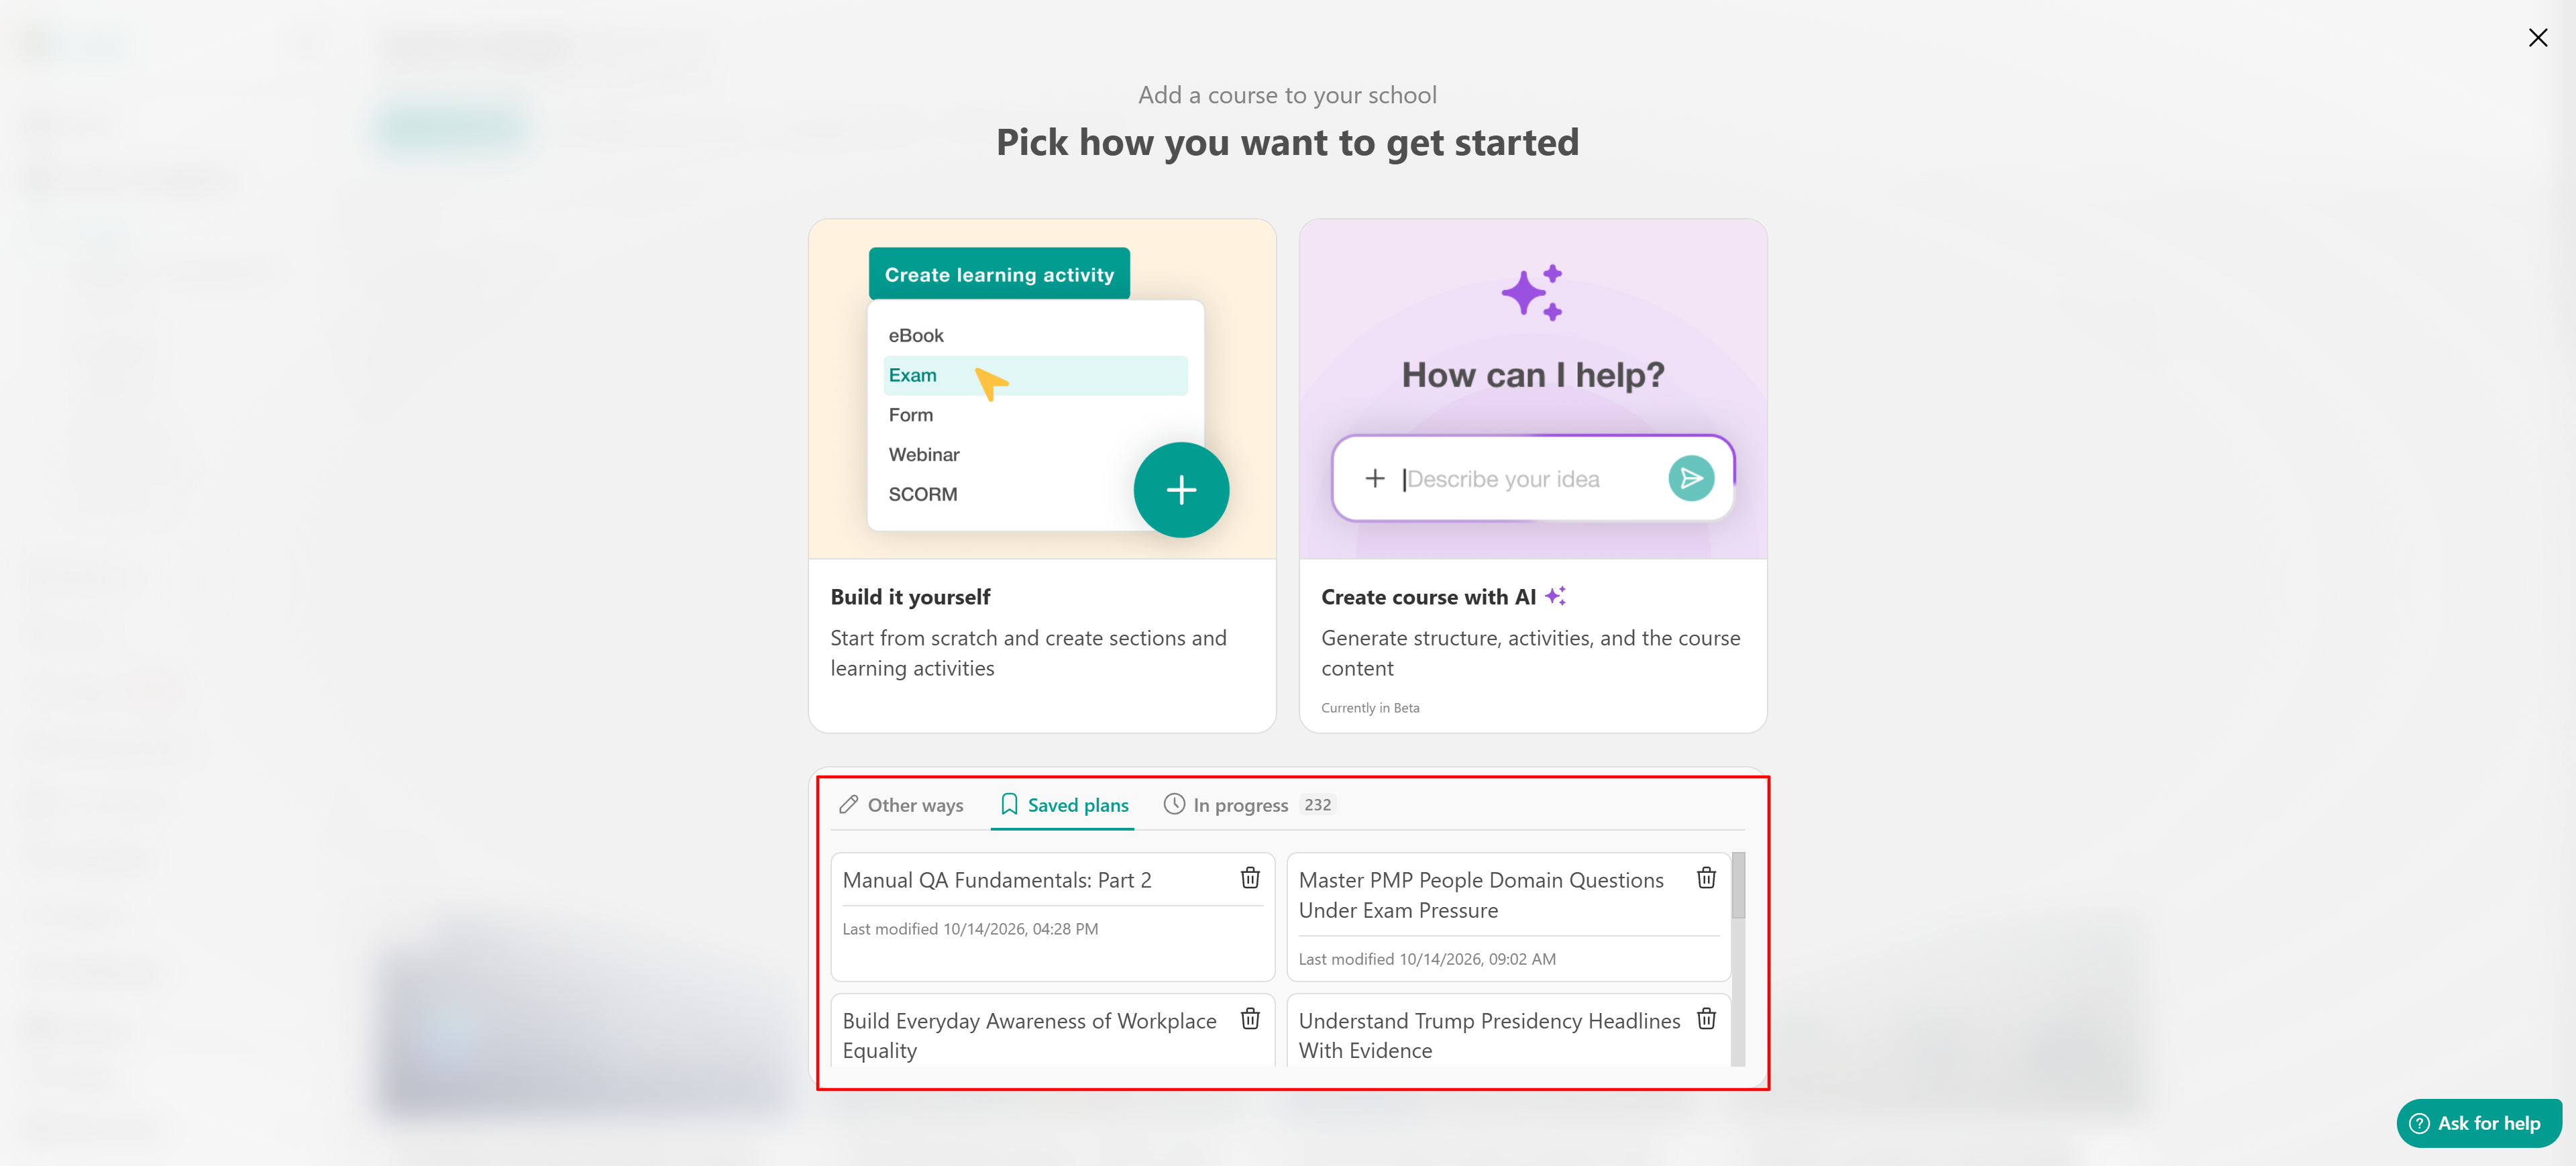
This allows you to continue refining your course structure, content, and settings whenever you're ready.
Configure the course settings
In the final Settings step, define how your course will appear in your LearnWorlds school.
Review and customize the AI-generated:
- Course cover image
- Course title
- Course description
Configure the public course URL and select the page layout you want to use.
Once you have reviewed the settings, click Create course. Your course is created based on the structure, content, and settings you selected during the AI creation process.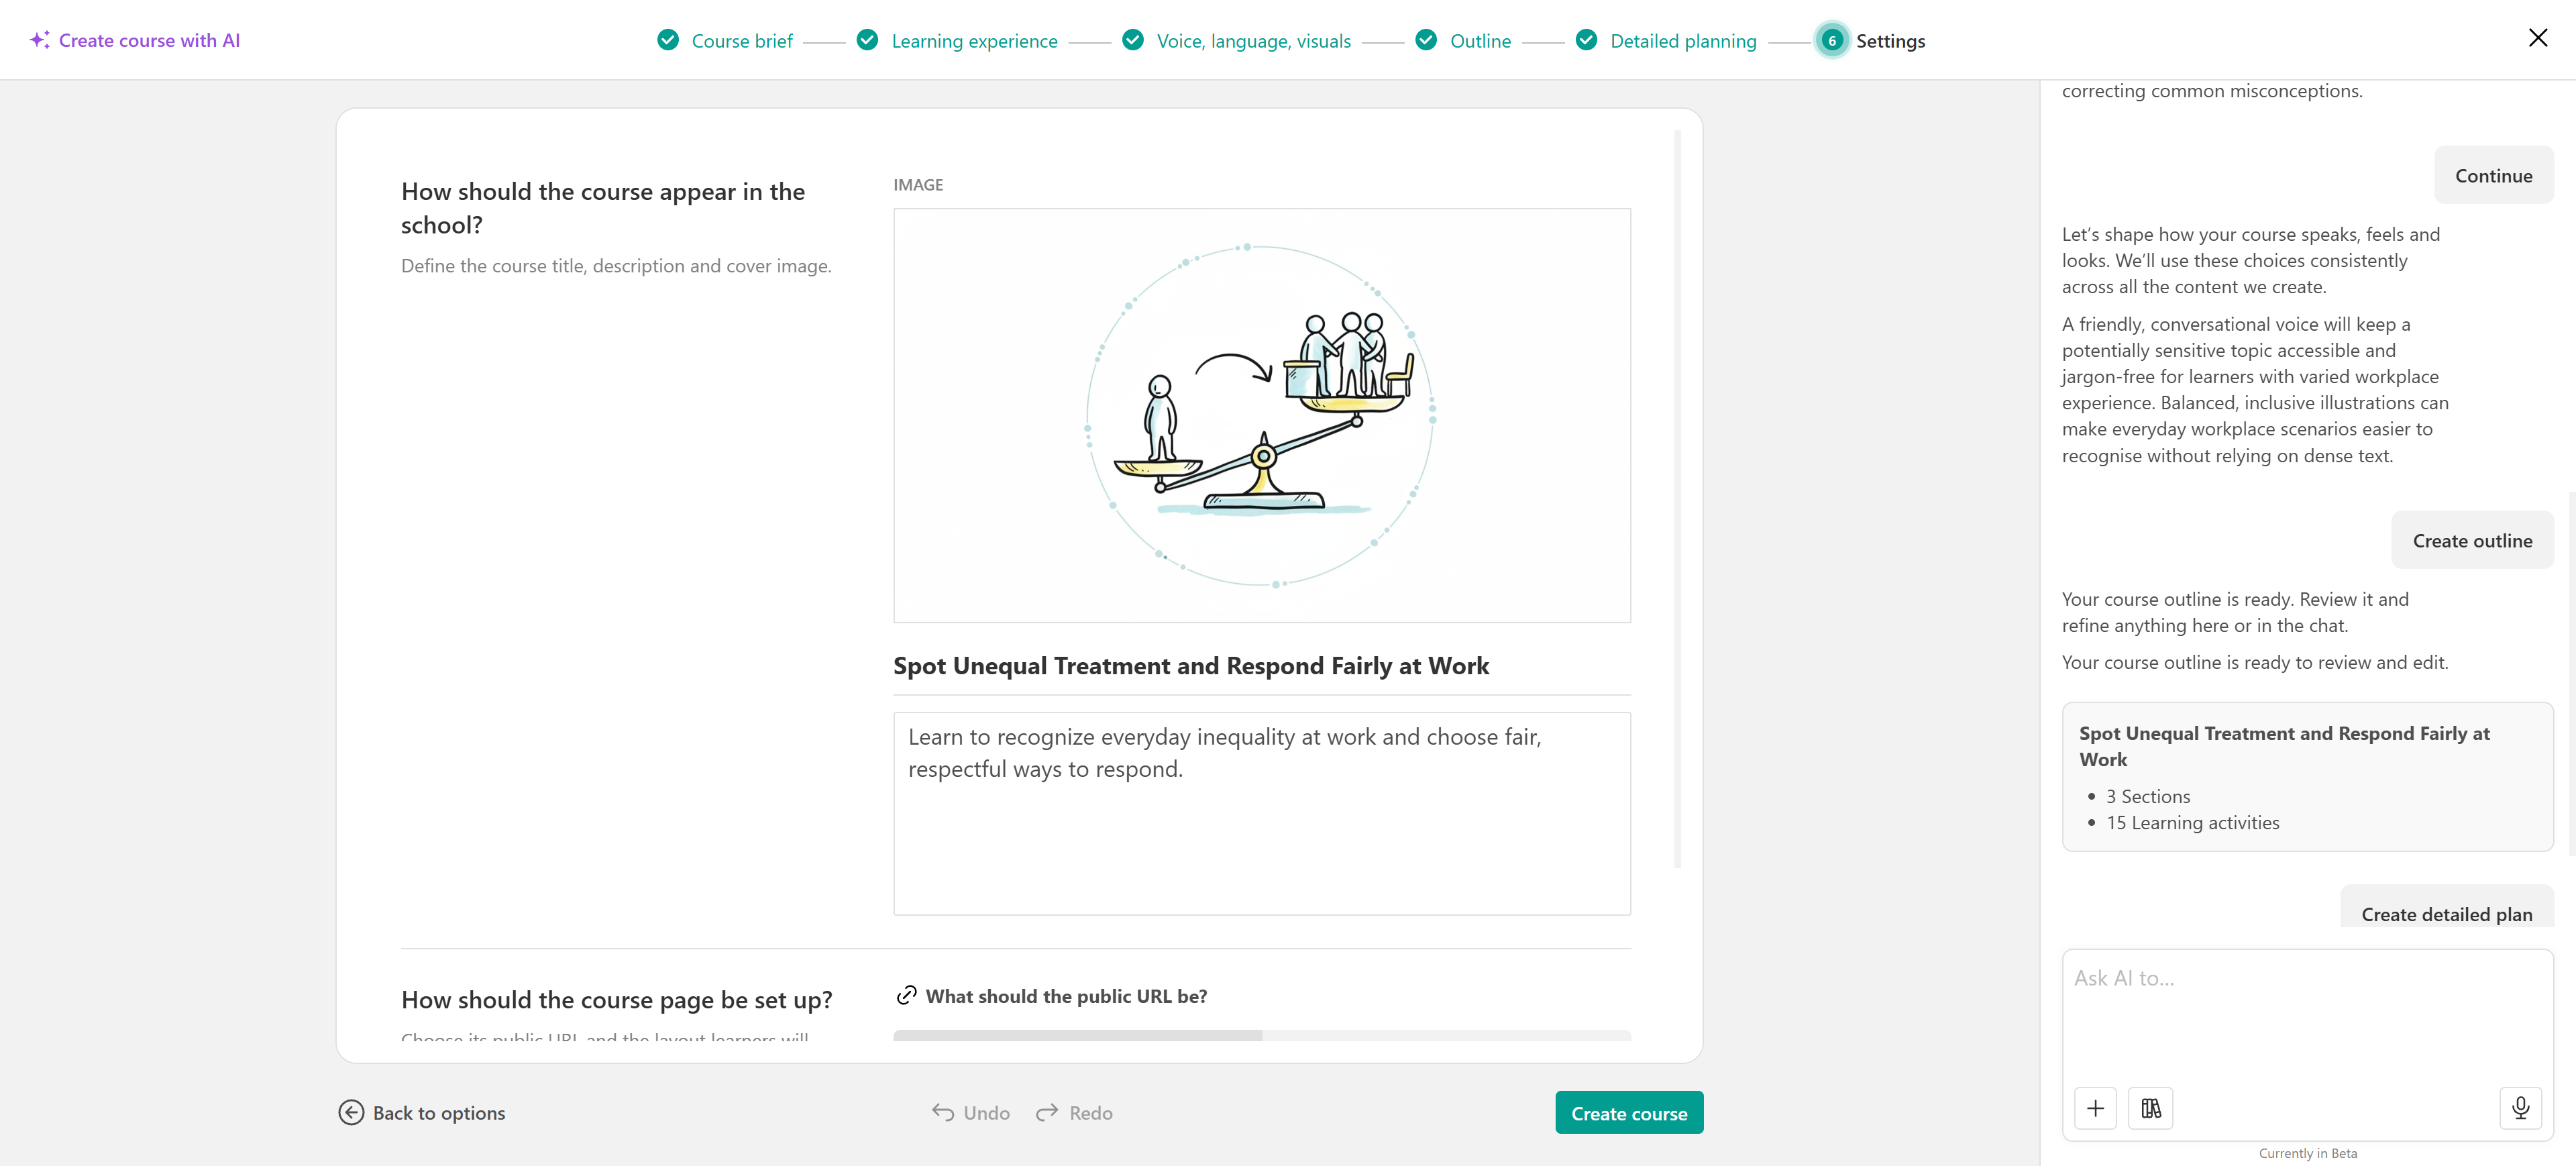
You can then open the course in LearnWorlds to review its activities, make additional changes, and complete any remaining configuration before making it available to learners.
Create a course outline with AI
If you already have a course and want help organizing its content, use Create outline with AI to generate a structured outline with suggested sections and learning activities.
There are two ways to generate a course outline with AI:
- From an existing course: Generate an outline directly within the course editor and add the suggested sections and activities to your course.
- During AI course creation: Follow the Create course with AI process and select Create outline only after reviewing the generated outline. This creates the course structure without generating the learning content, allowing you to add it later.
Both options help you build a course structure with AI. The steps below explain how to generate an outline within an existing course.
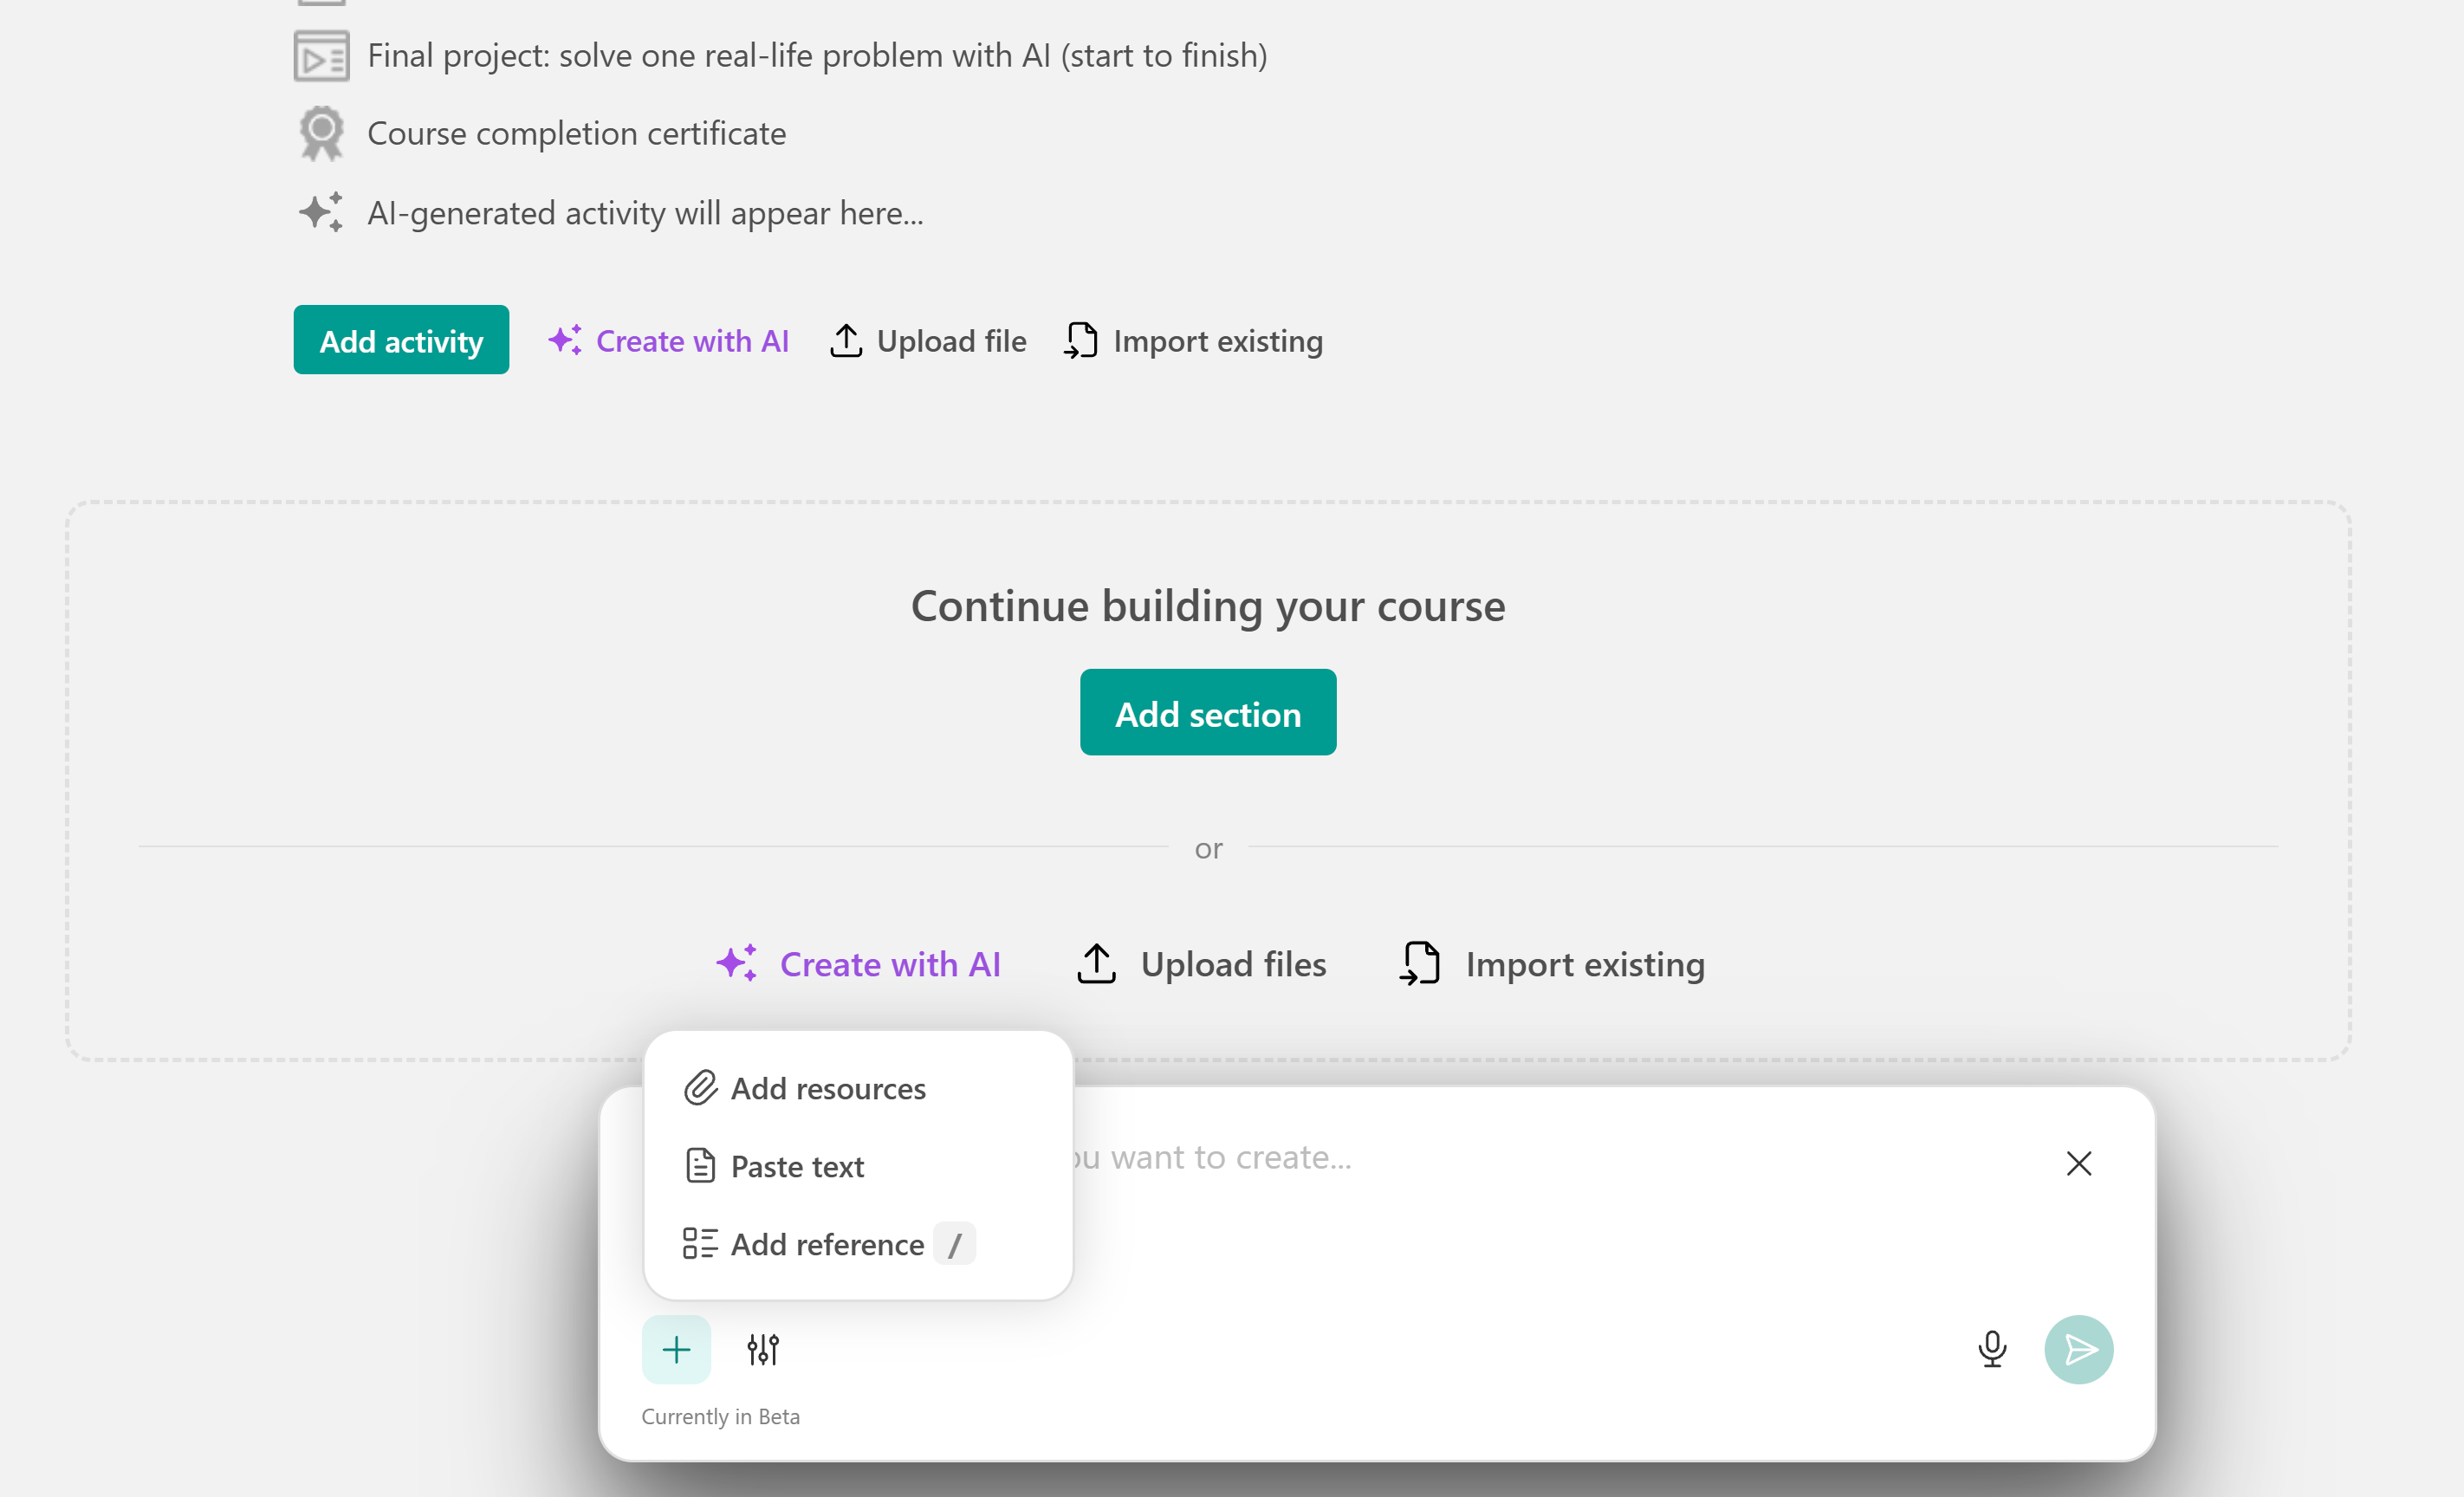
1. Navigate to Courses & Programs and open your course.
2. In the course content area, click Create outline with AI.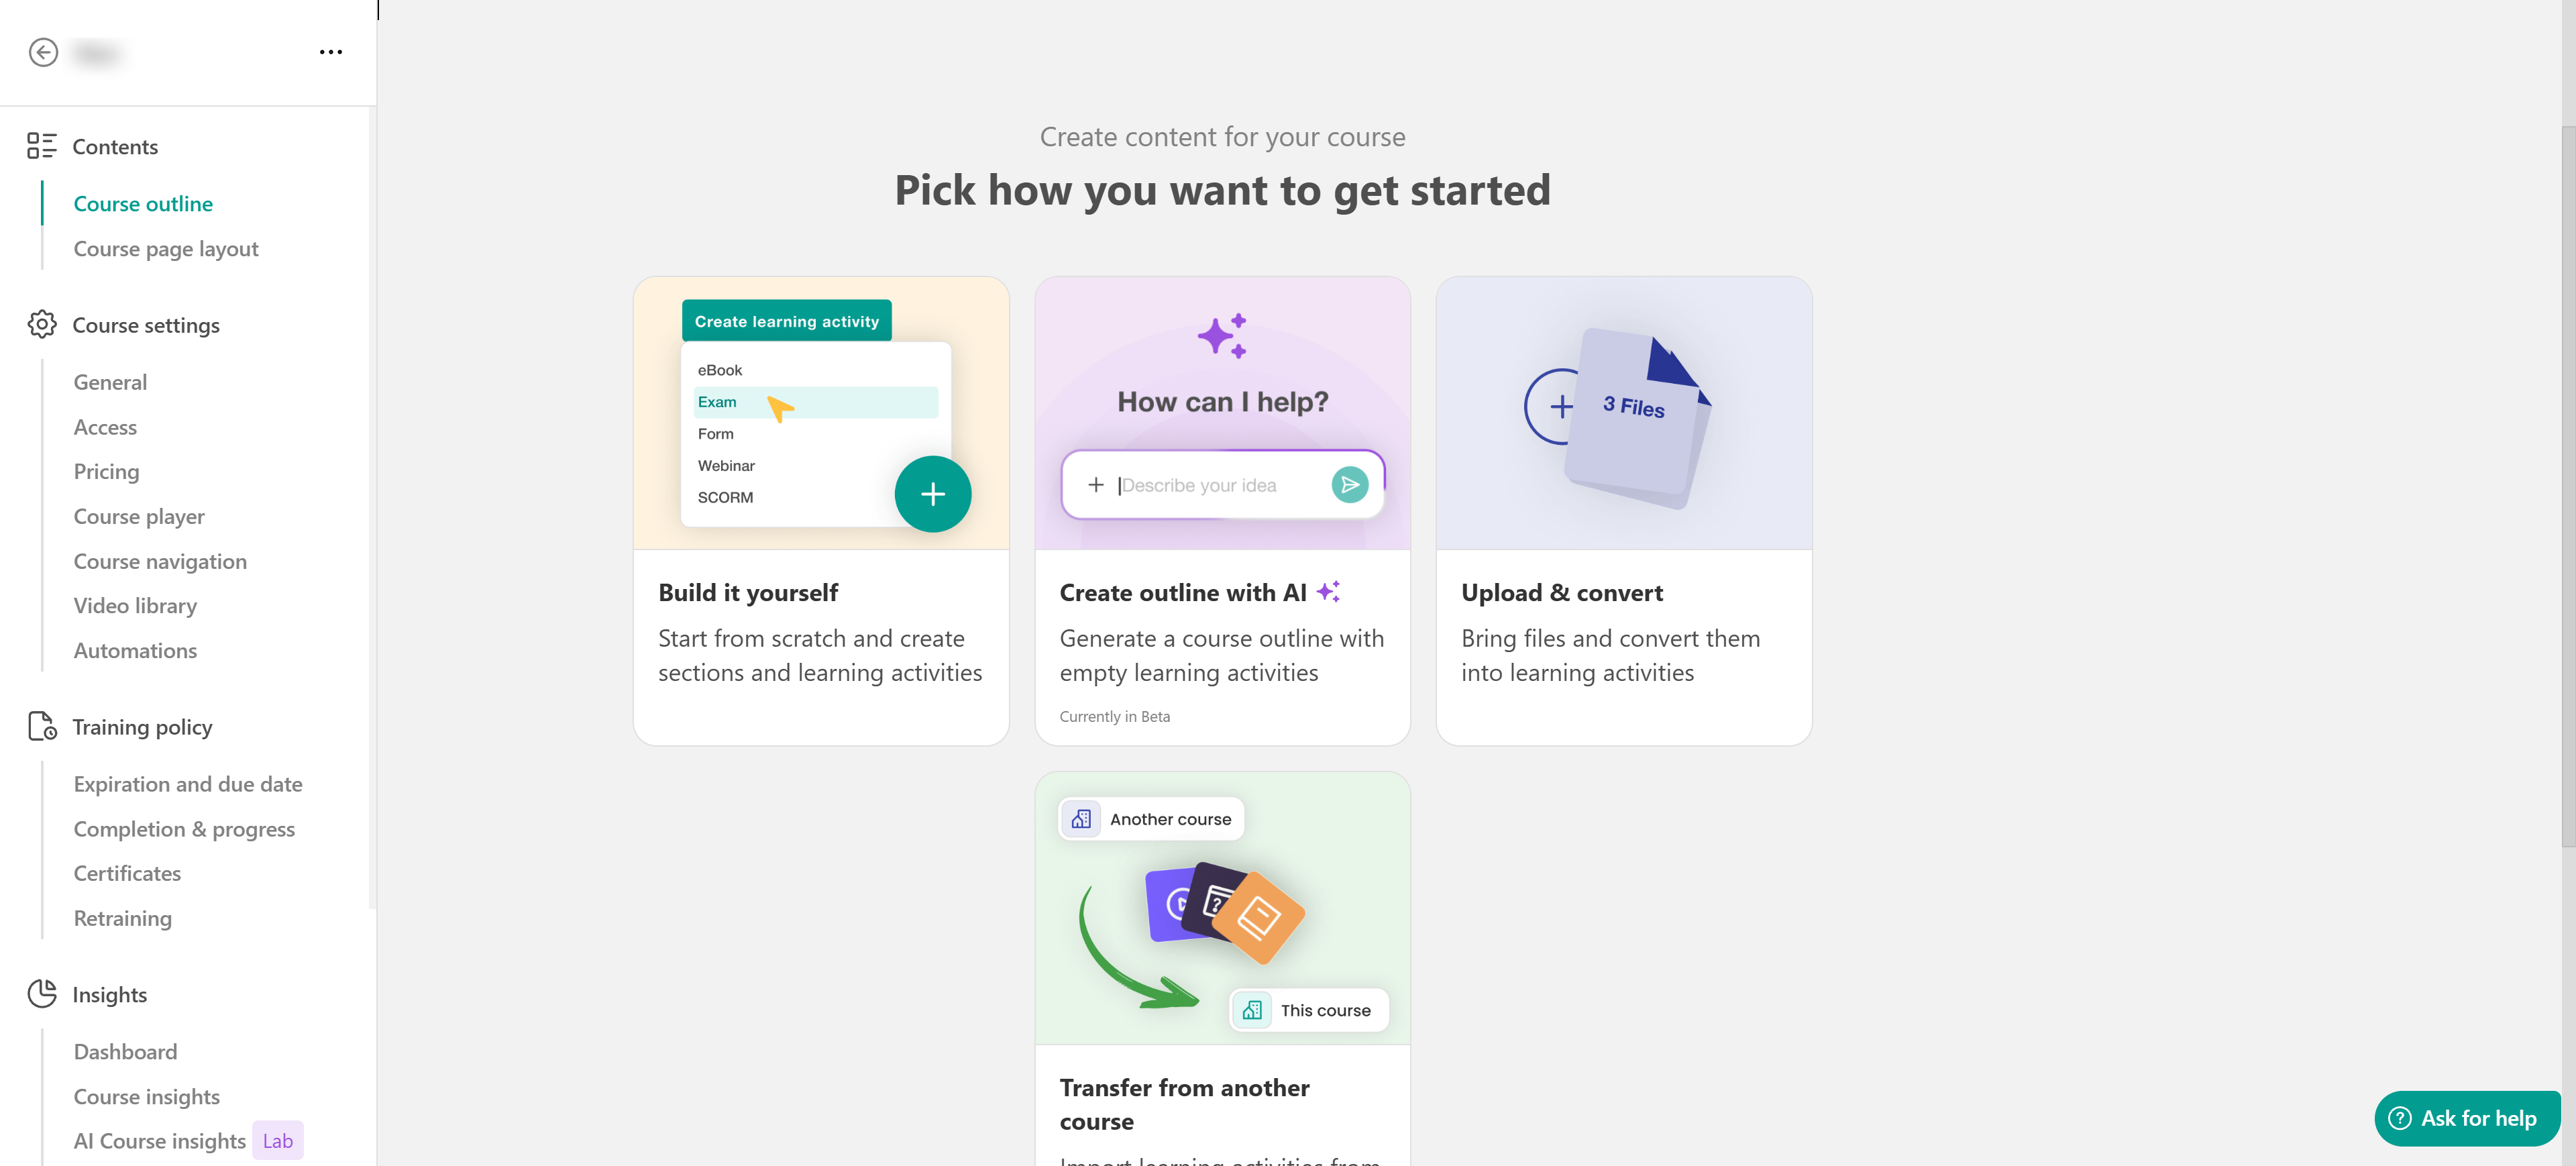
3. In the AI chatbox, describe the course outline you want to generate, including its topic, target audience, and the sections or learning activities you'd like to include.
For example: Create a beginner-friendly course outline on digital marketing, including sections on SEO, social media marketing, and email campaigns.
Alternatively, click the microphone icon to dictate your prompt.
4. Add the resources your course will build on. Upload files, paste text, select resources from the AI Sources library, or reference an existing course or learning program. Include additional instructions, such as learning objectives, target audience, or preferred learning activity types, to guide AI.
5. Click the Send icon to generate your course outline.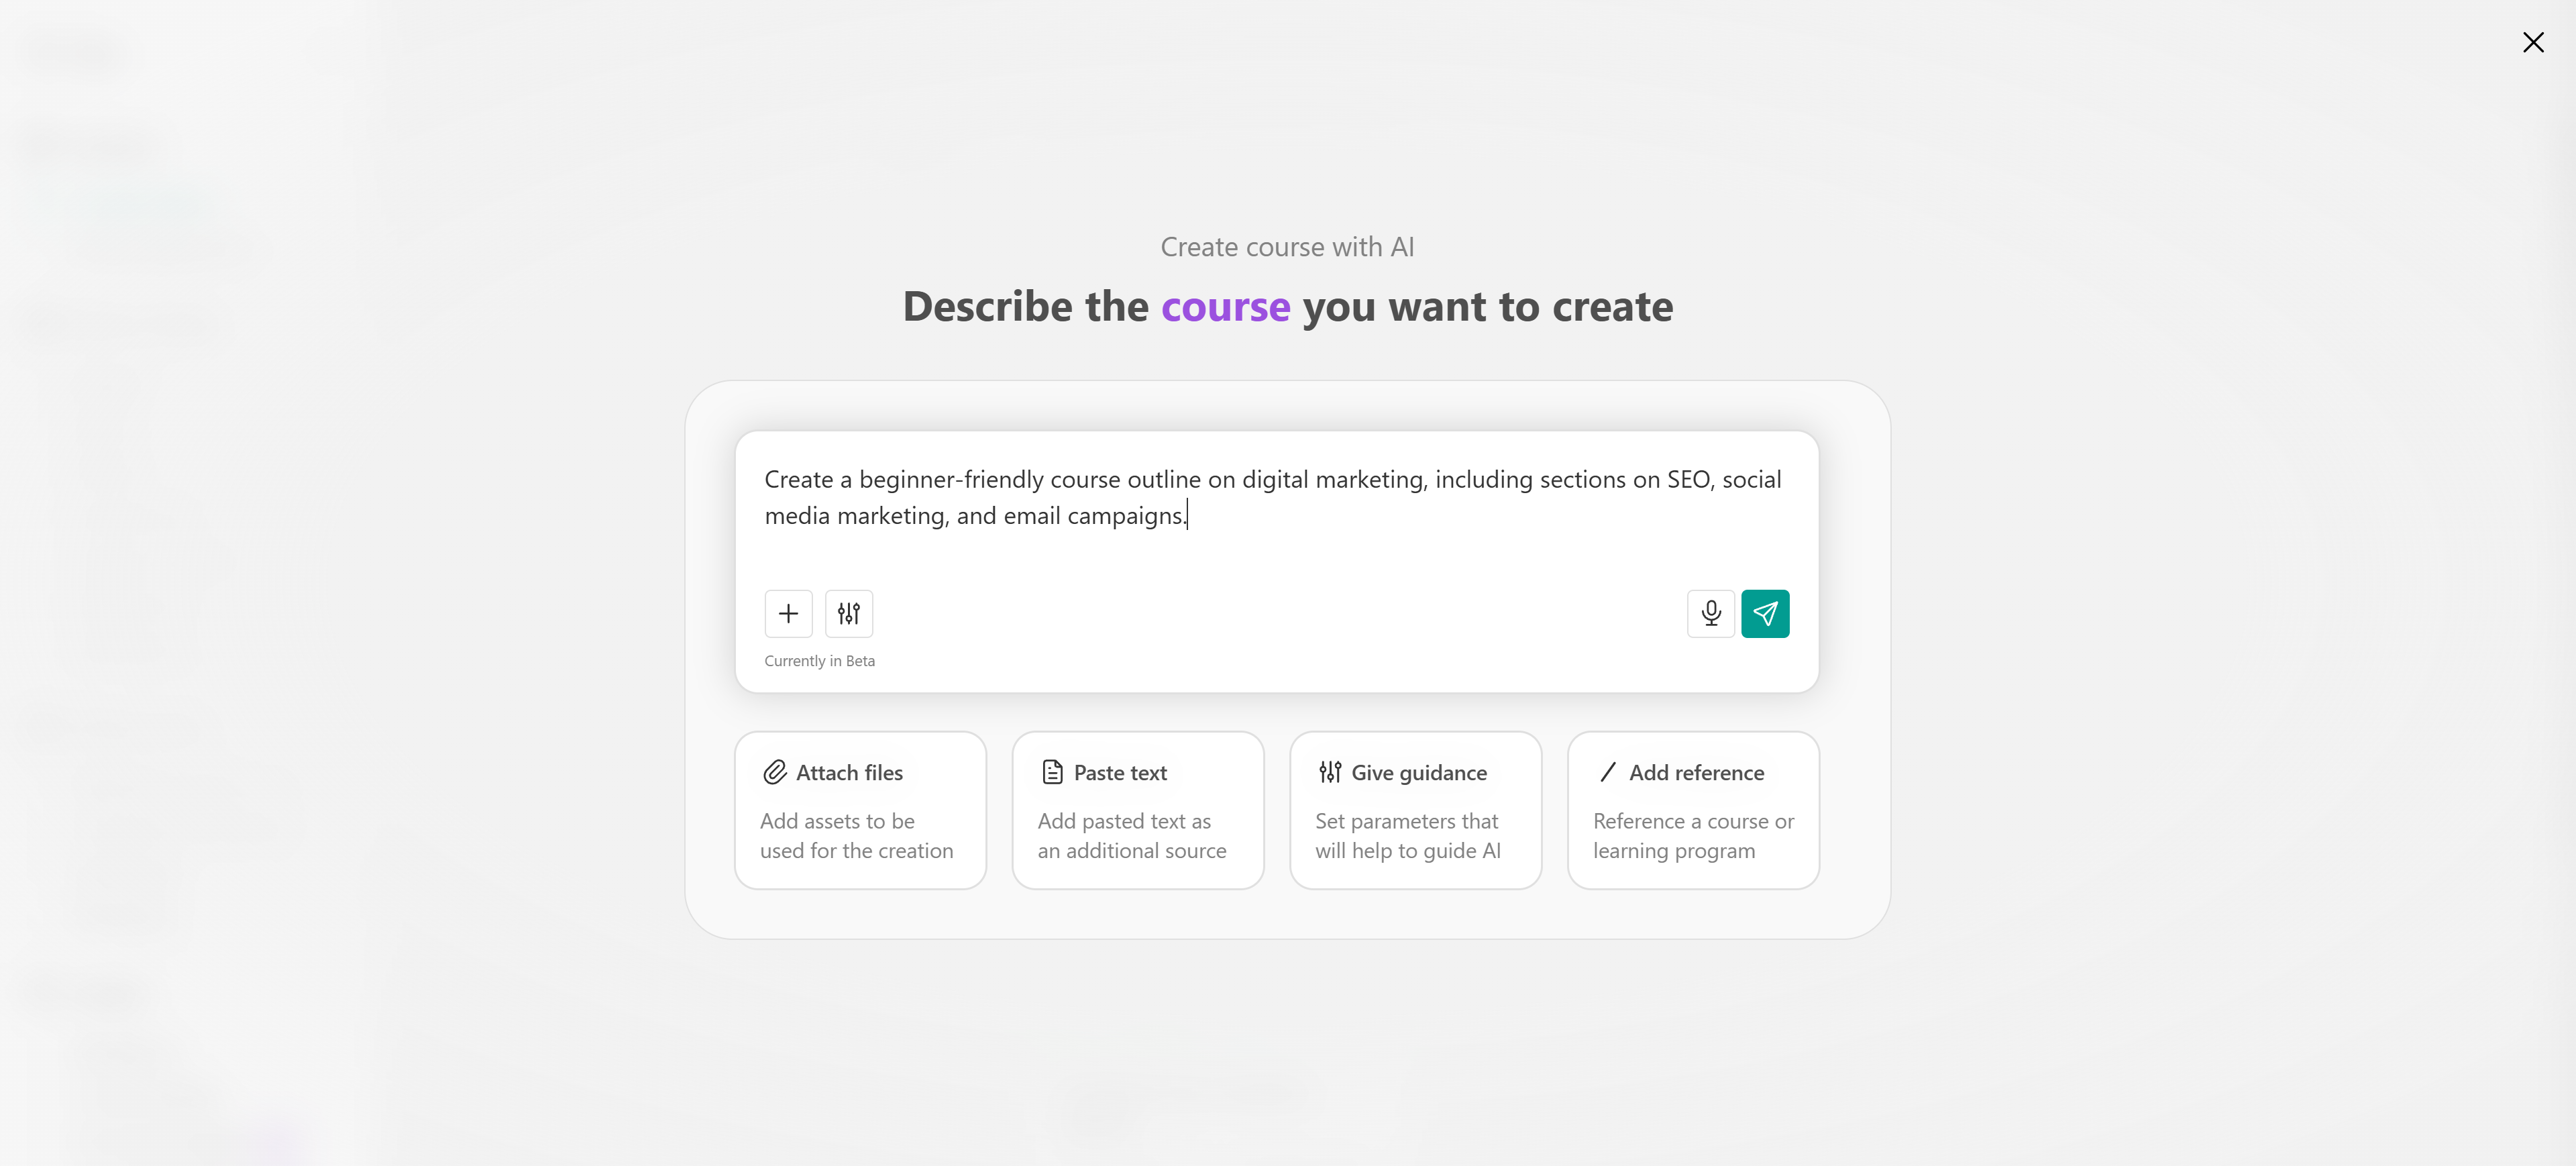
6. Review the suggested sections and learning activities. Add, remove, or reorder content, adjust activity types, or use the AI chatbox on the right to request changes to specific sections or activities.
7. Once the outline reflects your preferred structure, click Insert outline to add the sections and learning activities to your course.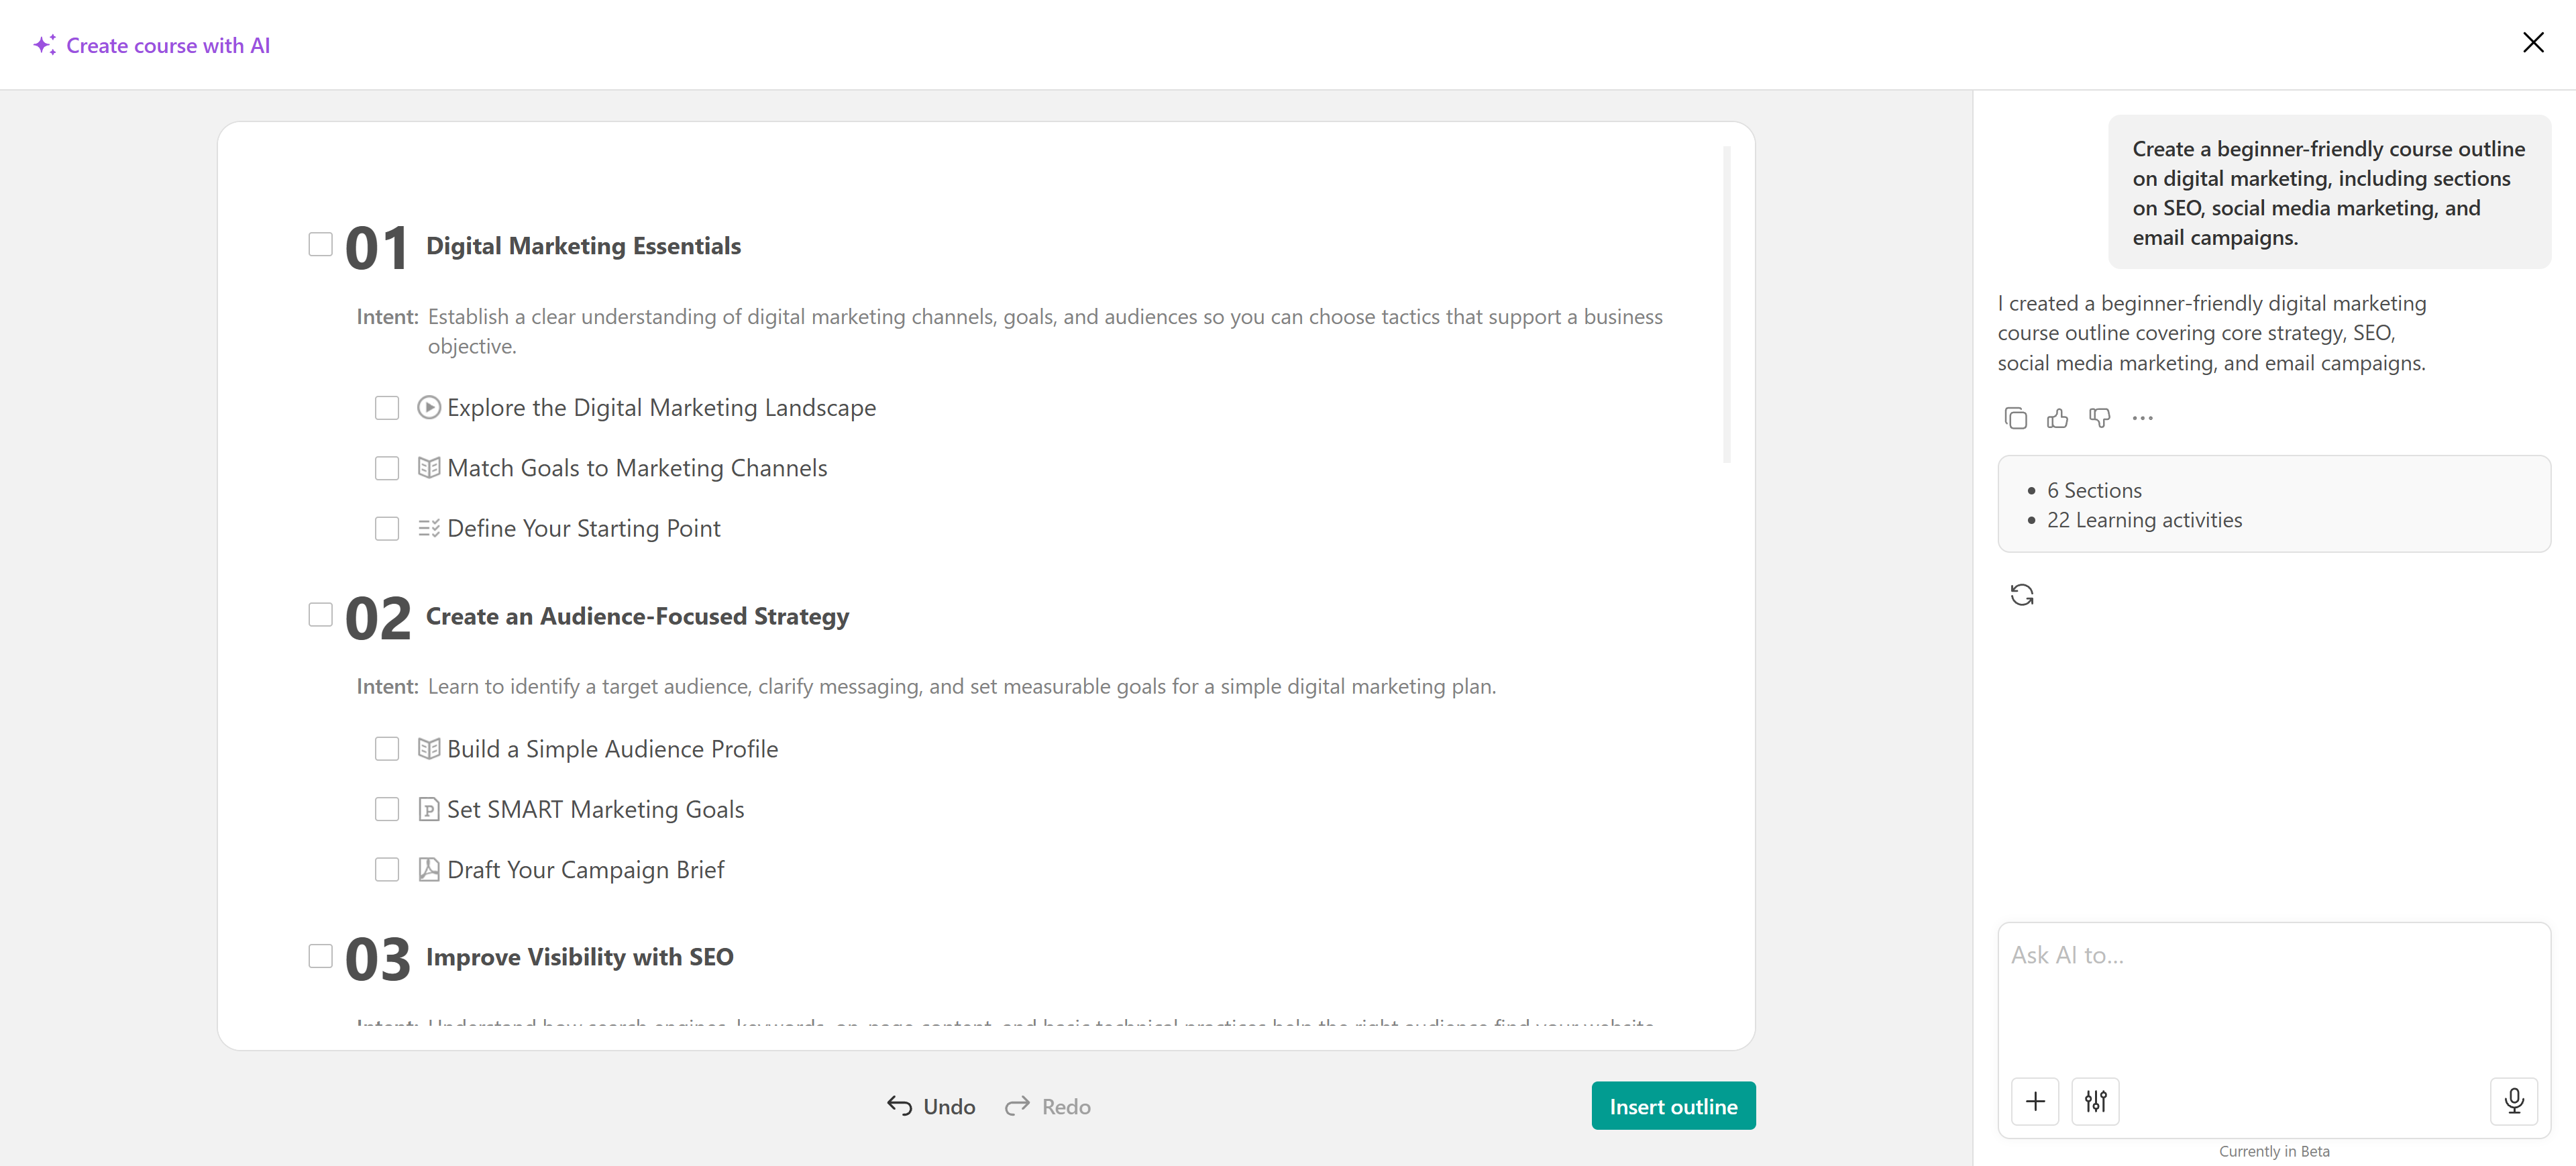
Create or edit sections with AI
You can use AI to add new sections to an existing course without generating an entirely new outline.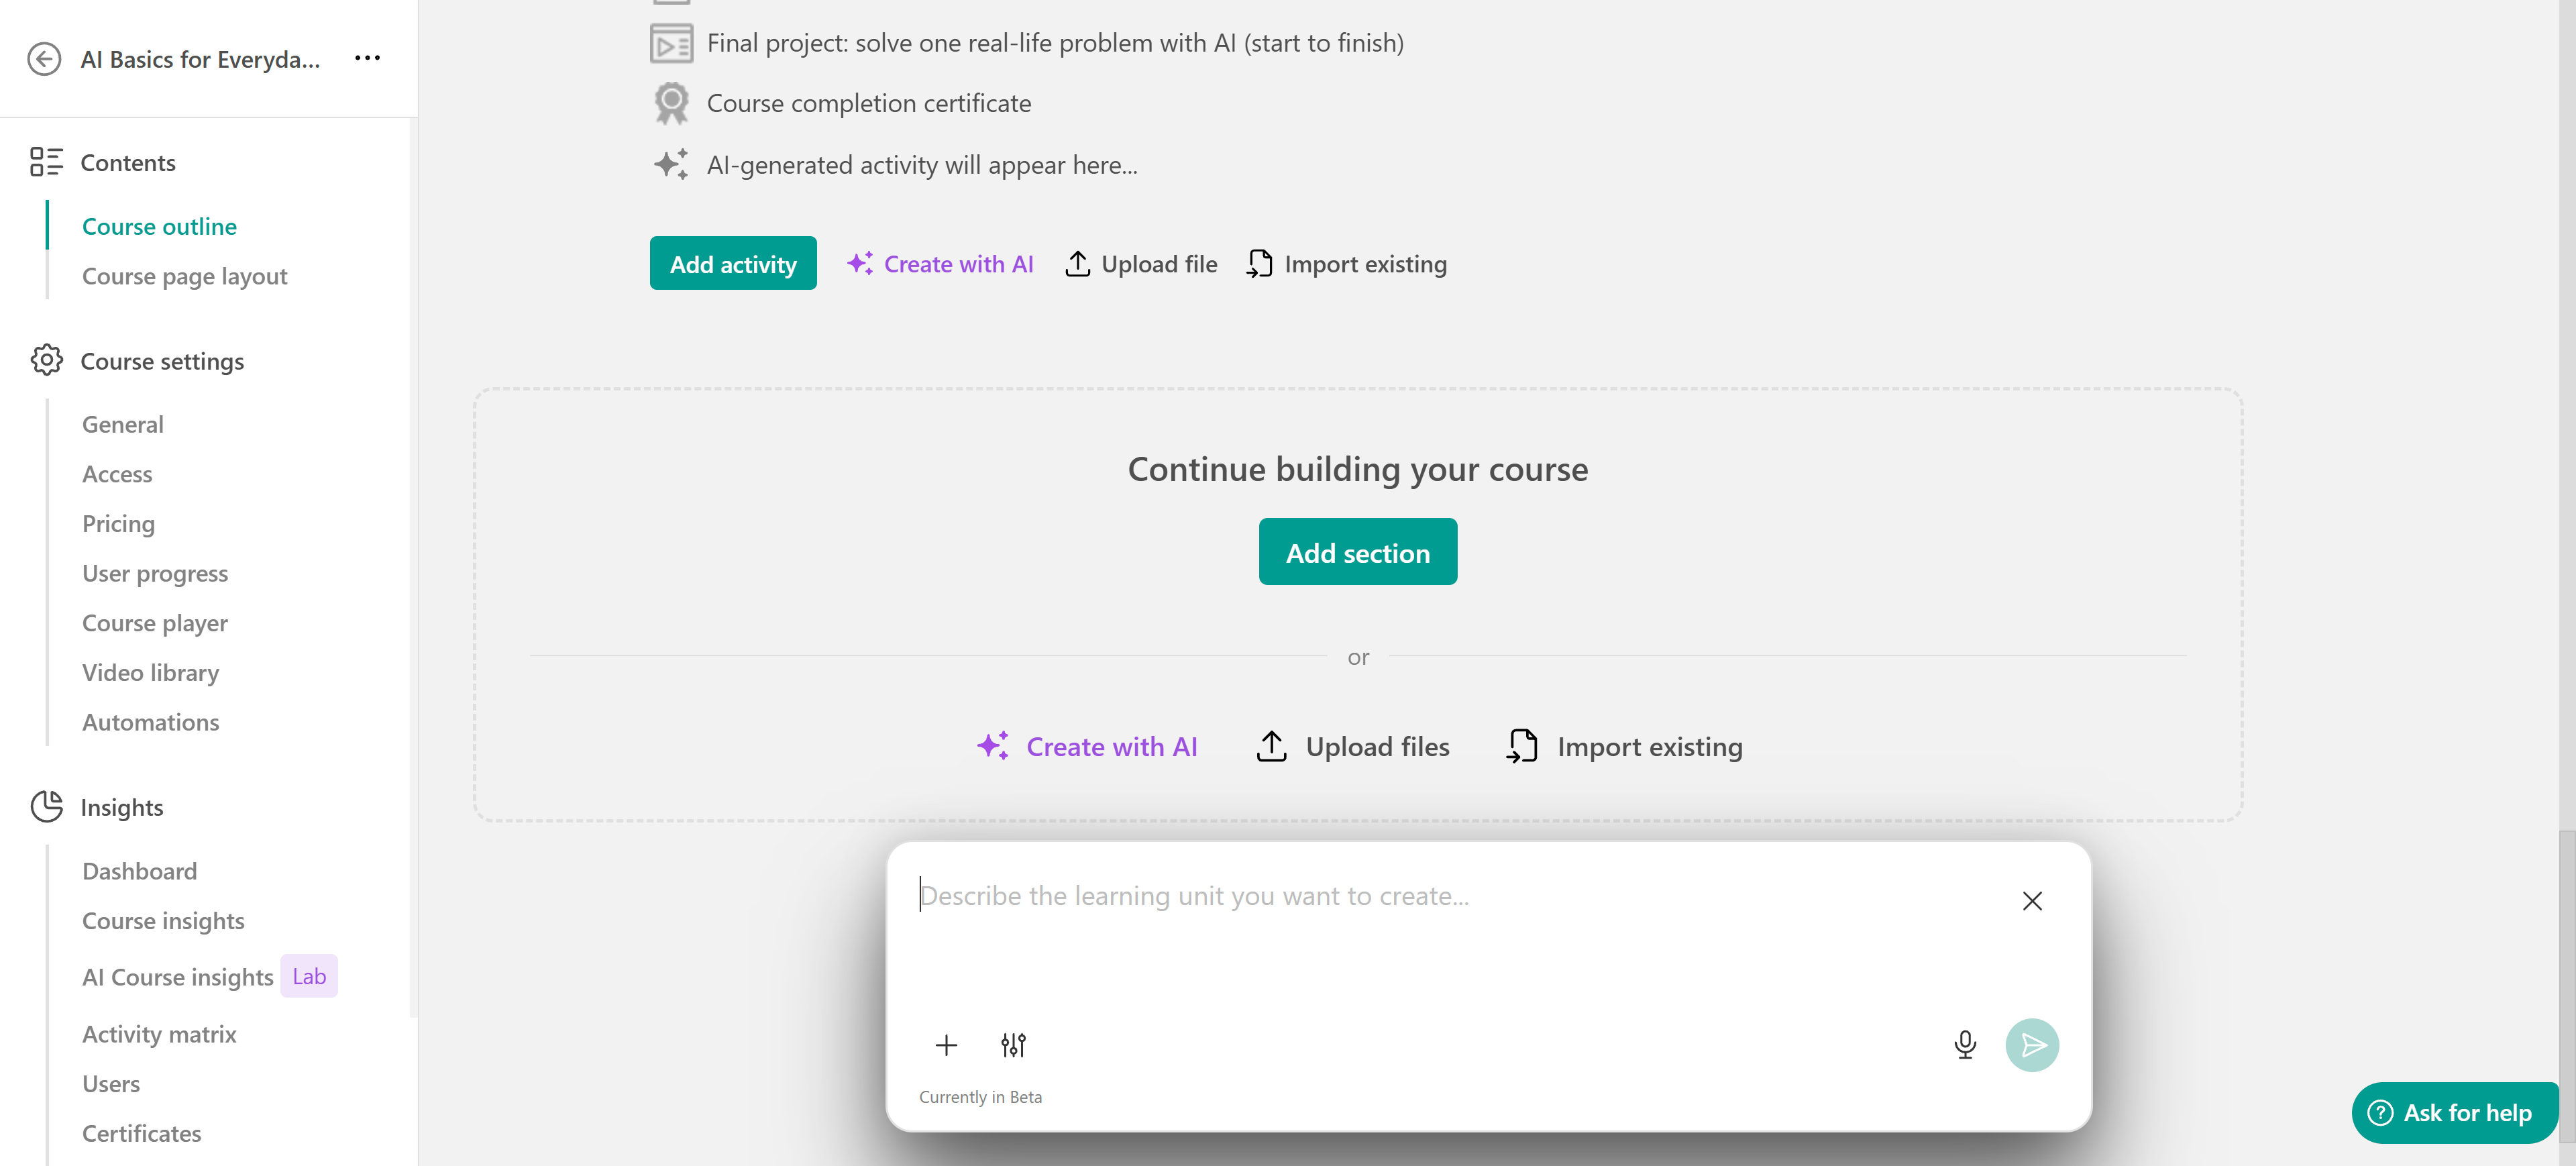 The process follows the same steps described above. Define the type of section you want, what it should include, and its purpose. Add references, text resources, or parameters to tailor the result further.
You can also Suggest more activities for a section.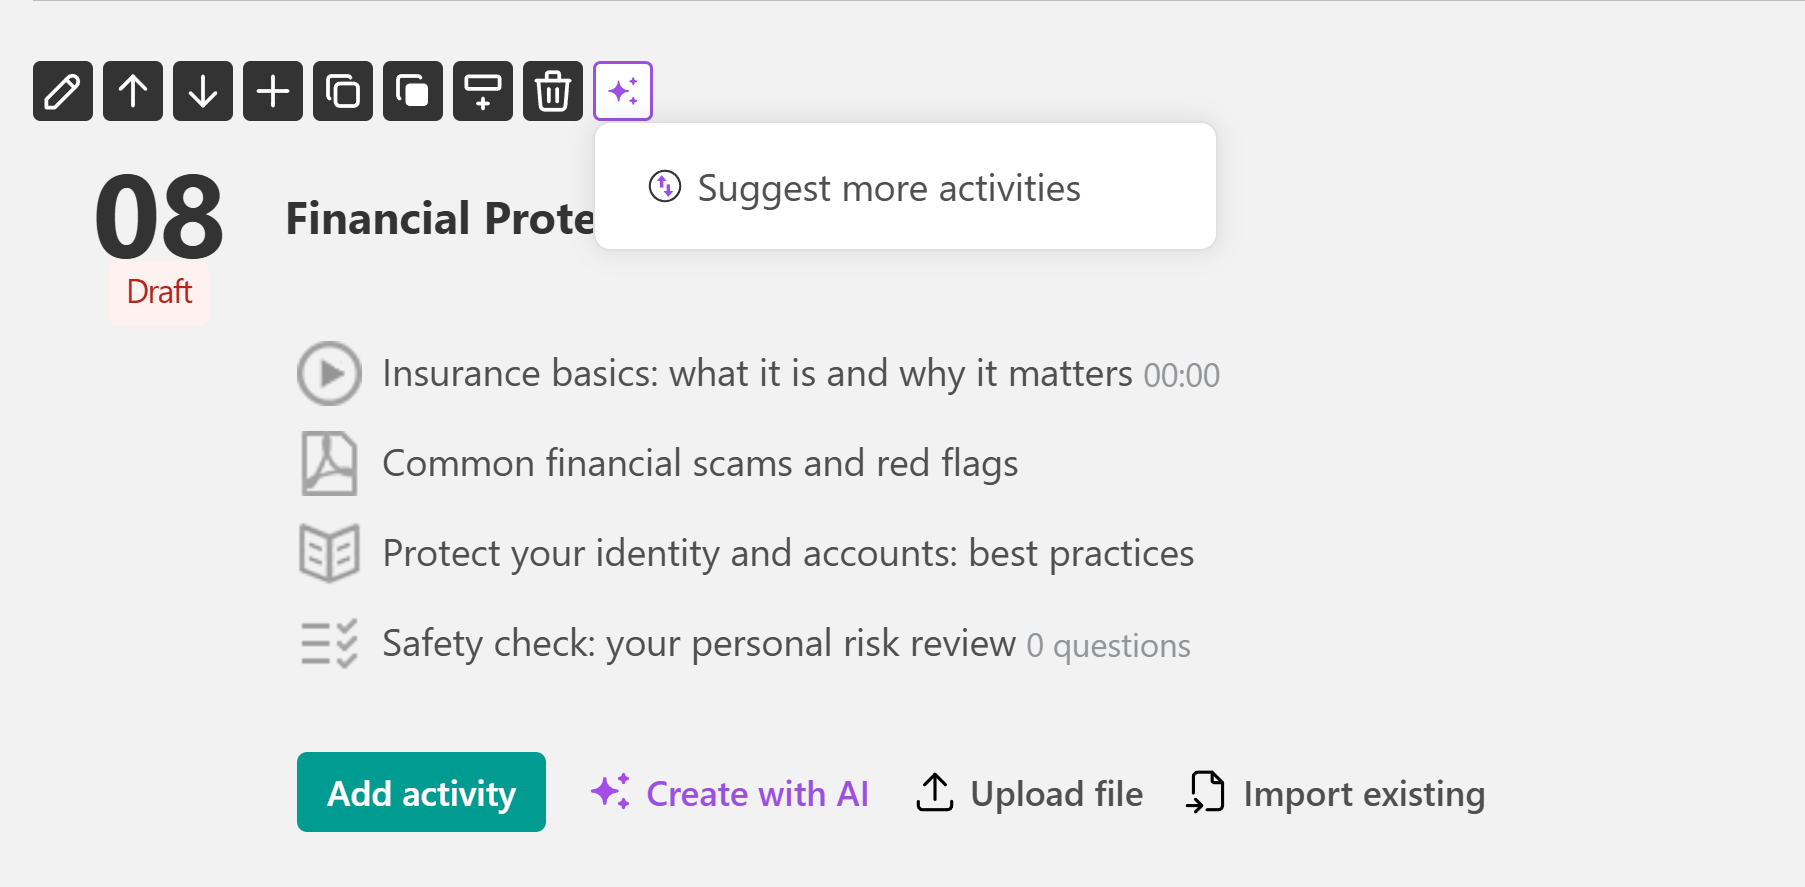
Create or edit learning activities with AI
Another option is to generate individual learning activities with AI. Click Create with AI at the end of any section to open the AI chat, then describe the activity you want to create.
Review the generated suggestion and add it to your course when ready. To make changes, submit a new prompt and continue refining the activity until it matches your needs.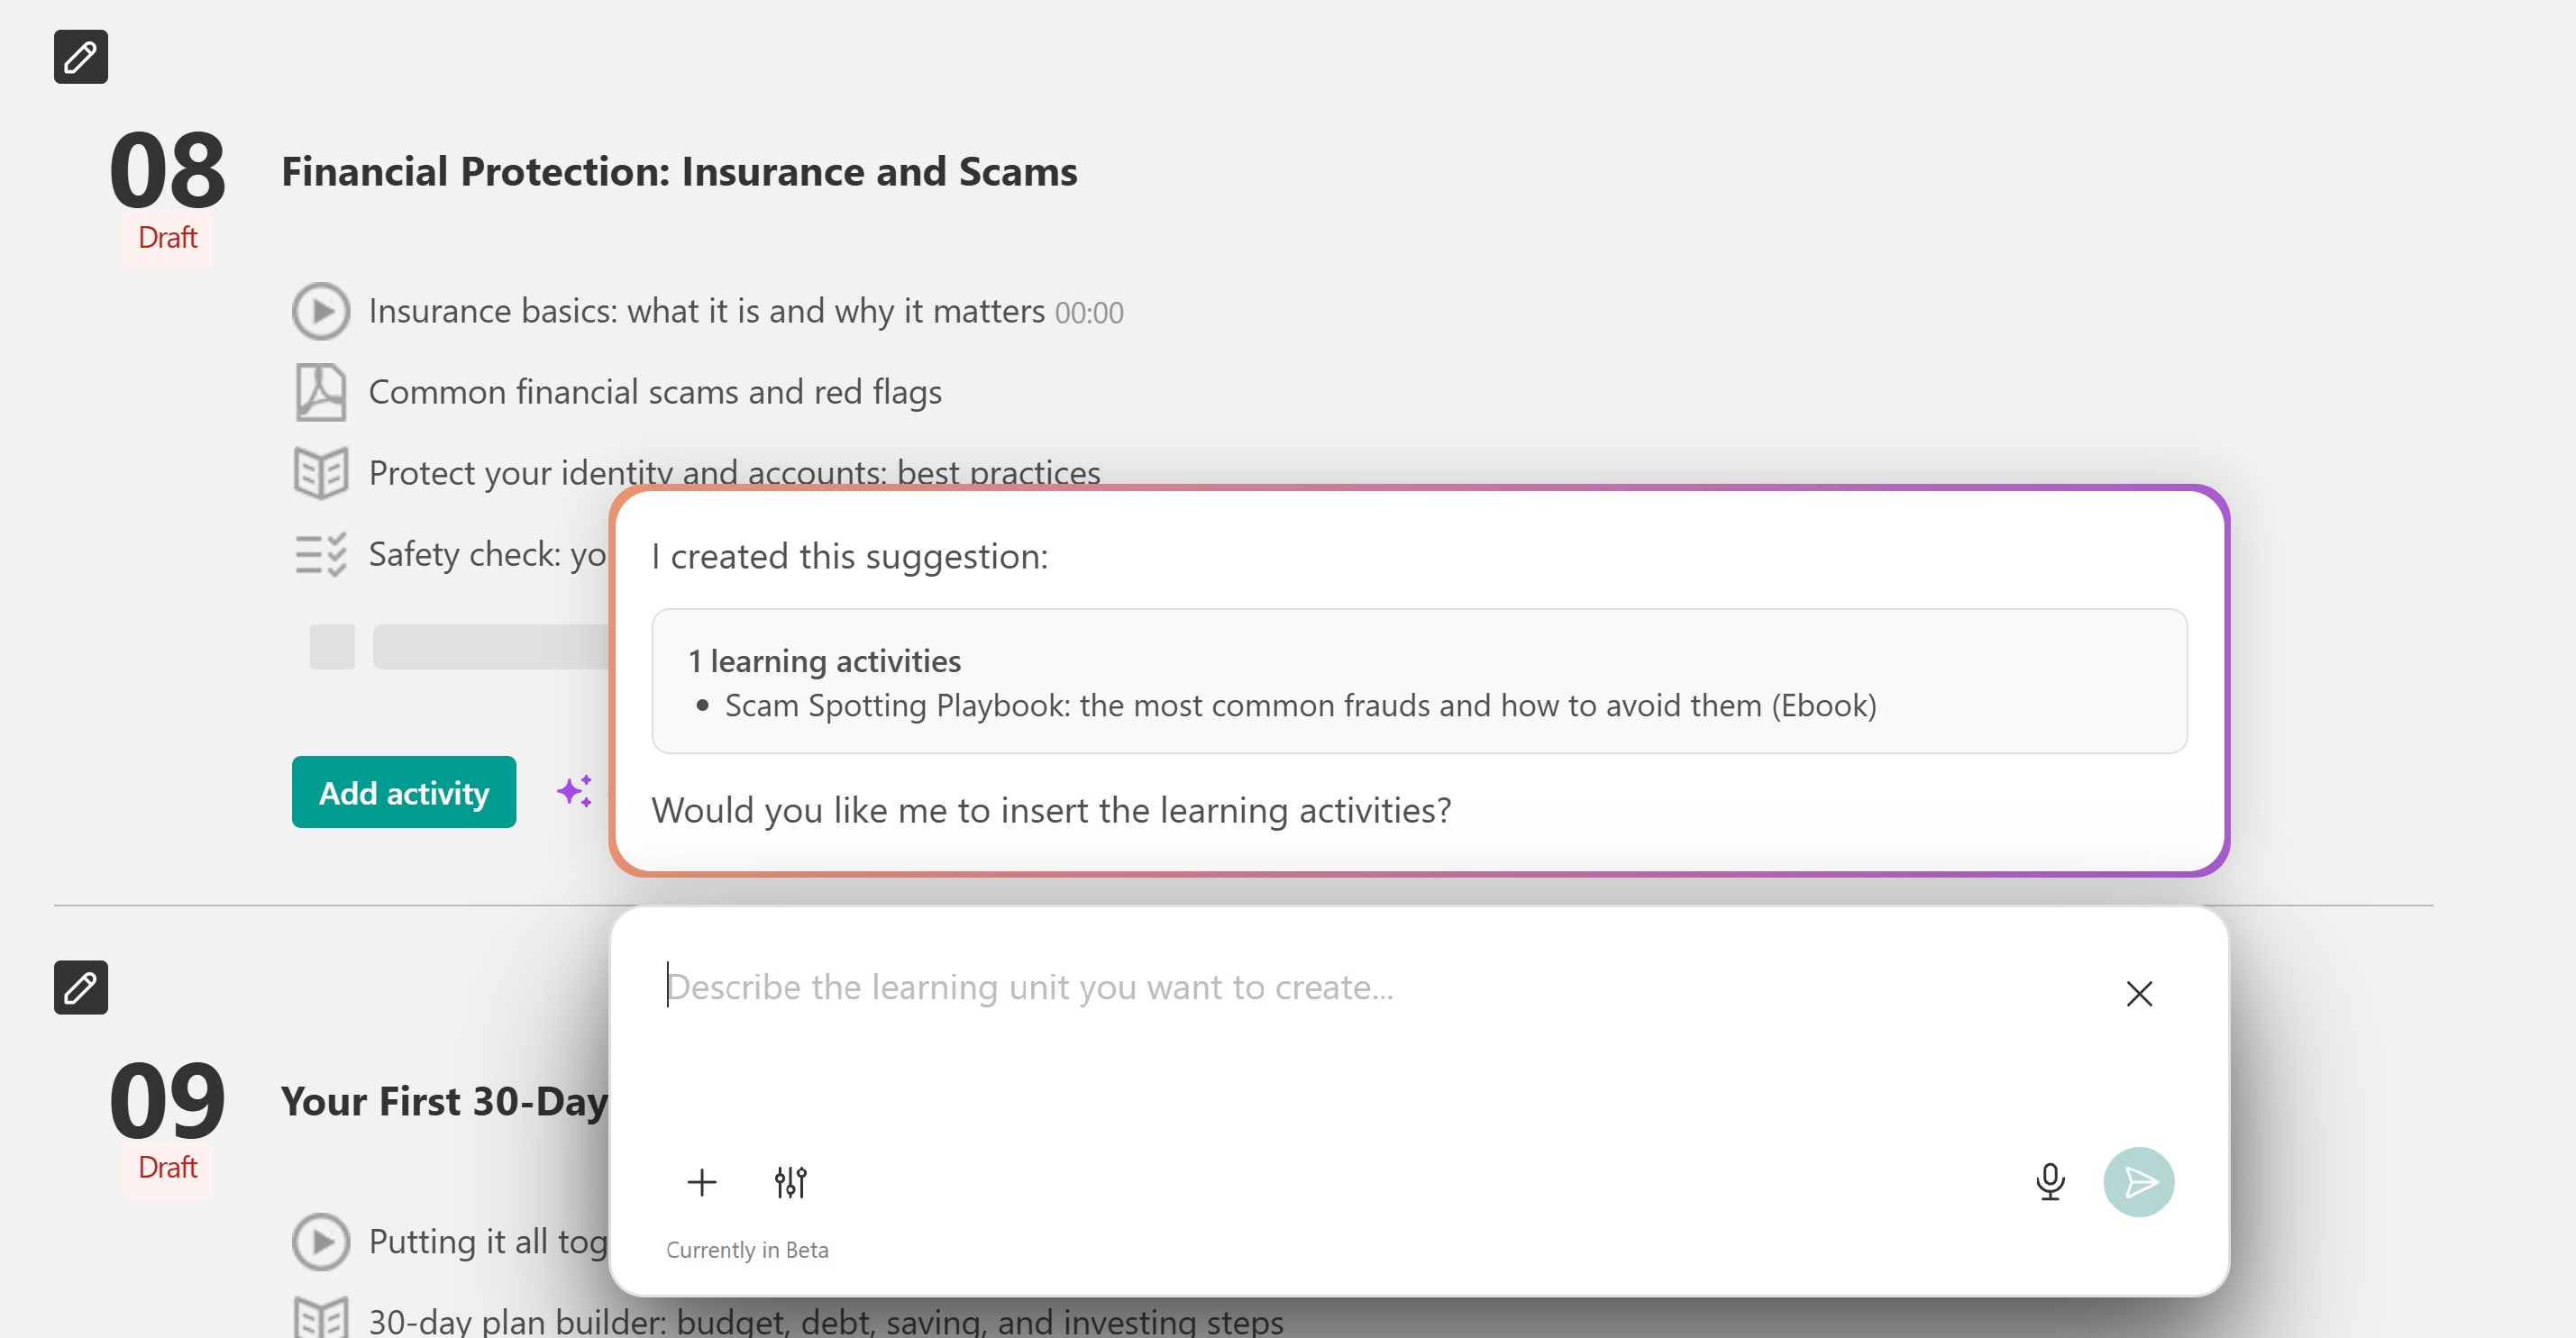
In this case too, you can suggest activities below an existing one.