
Payment plans let learners pay for a course or learning program in scheduled installments instead of making a single payment. LearnWorlds processes these payments through Stripe.
You can create a payment plan when setting up a new course or learning program, or add one later from the product's Pricing page.
In this guide, you'll learn how to create, configure, and manage payment plans for your courses and learning programs.
Create a payment plan
You can create a payment plan in two ways:
- During product creation: Set up a payment plan as the initial pricing option for a new course or learning program
- From the Pricing page: Add a payment plan to an existing course or learning program
 Before you start: Make sure you have connected a Stripe account to your LearnWorlds school to accept installment payments.
Create a payment plan during product creation
When creating a new course or learning program:
- Go to Courses & Programs and start creating a course or learning program.
- Enter the product details and select its access status.
- Under Choose a pricing option, select Payment plan.
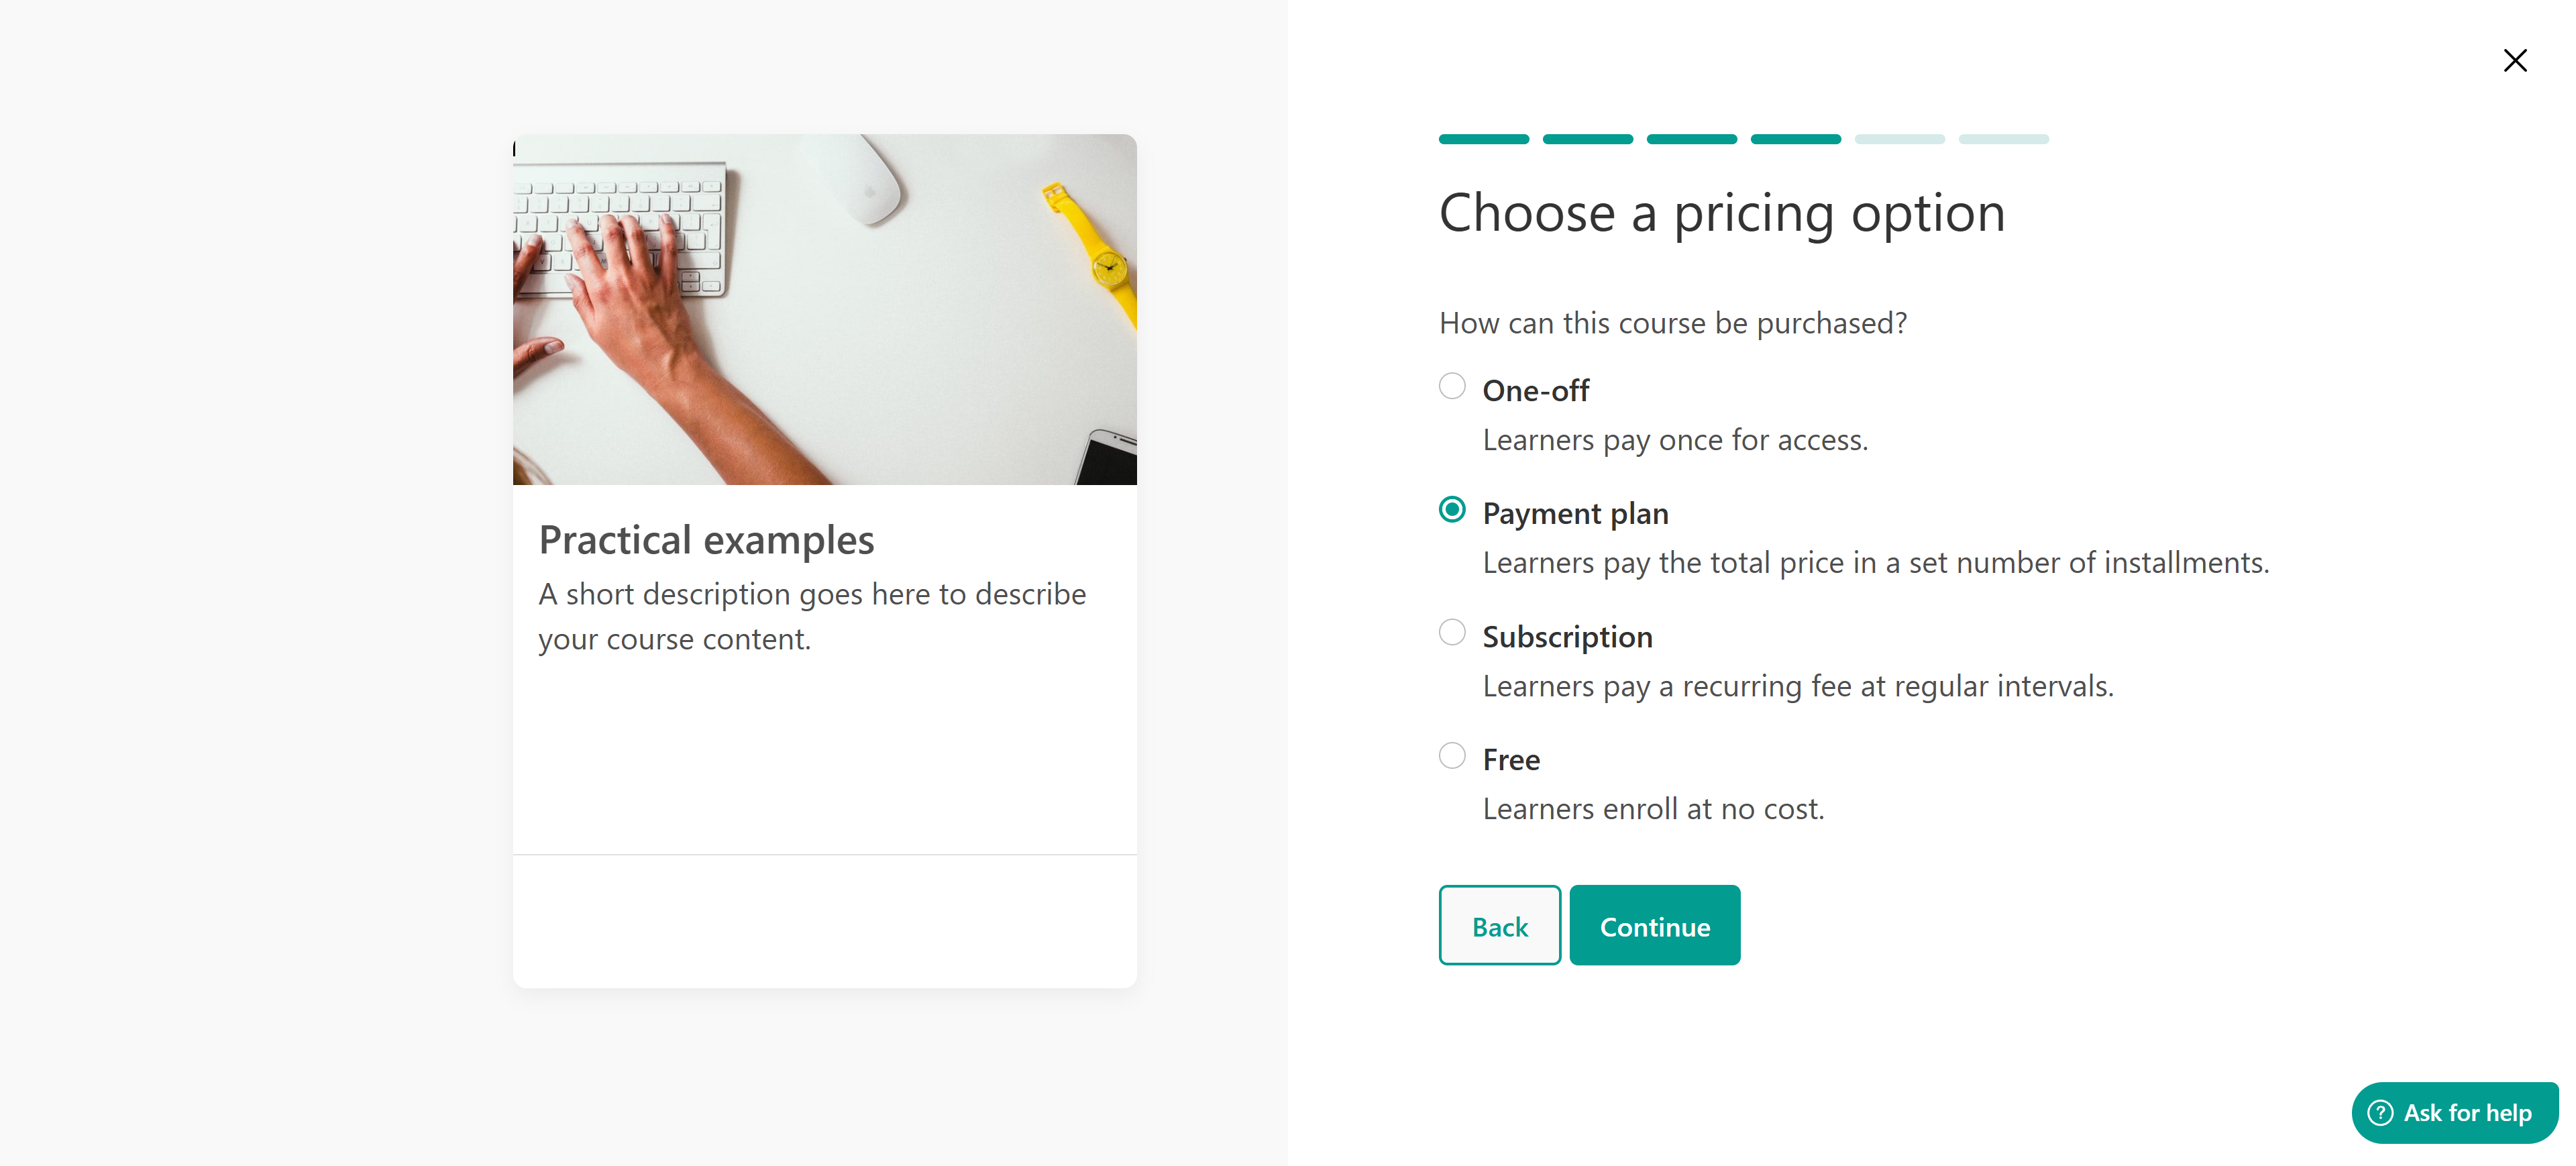
- Click Continue to configure the payment plan.
- Set the number of installments, billing interval, and installment amount.
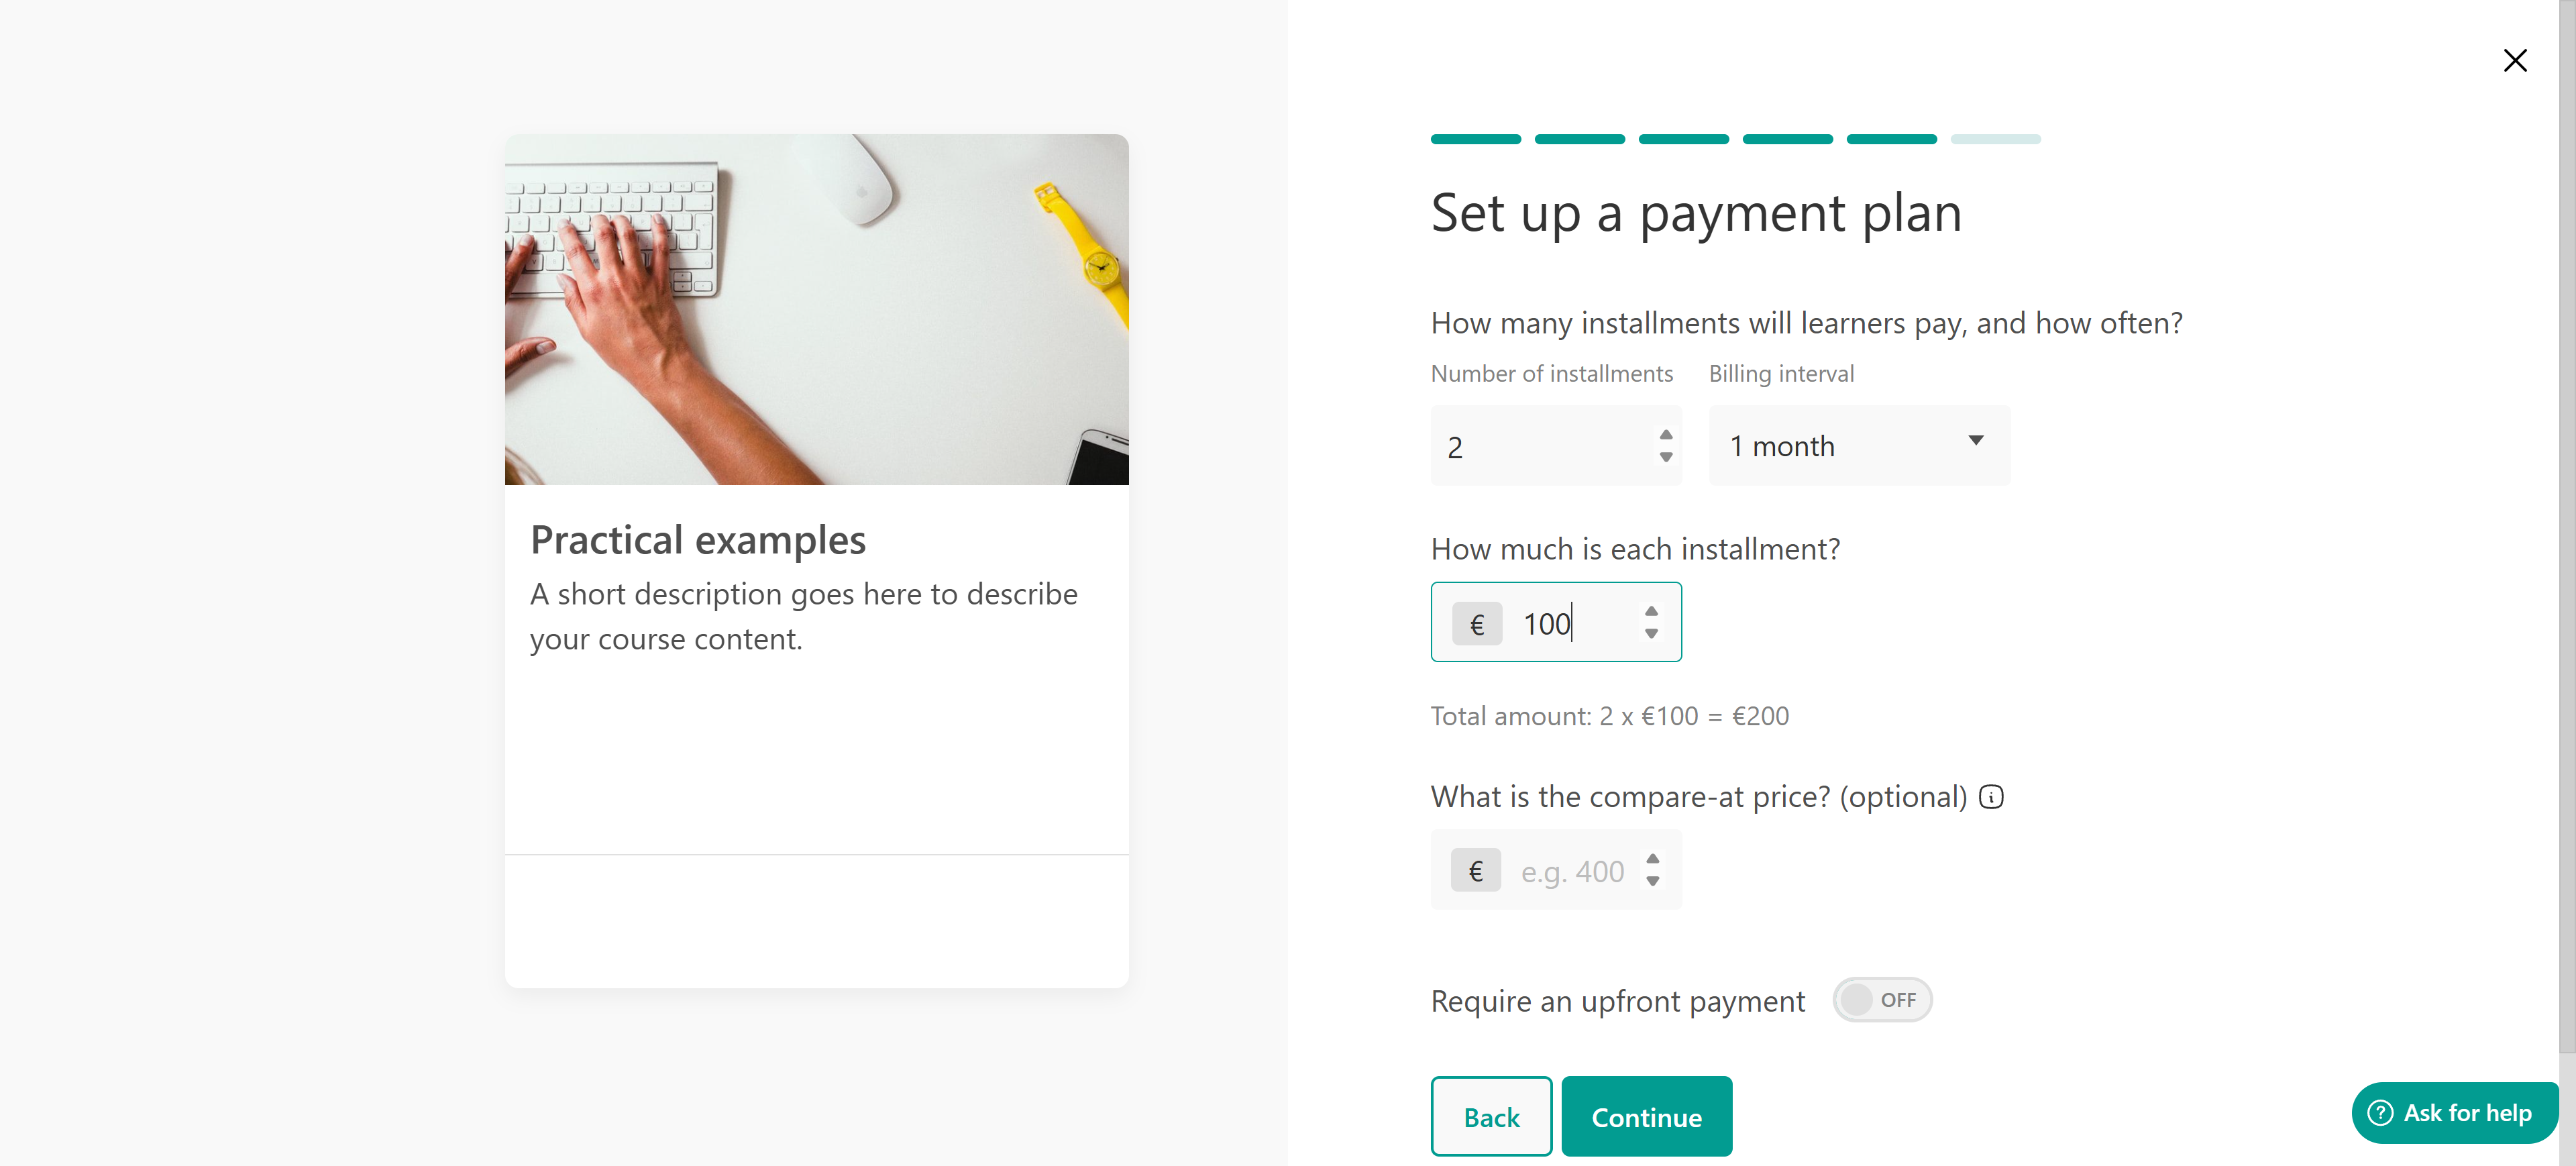
- Optionally, enable Upfront payment to collect an initial amount at checkout.
- Add a Compare-at price, if needed, and continue through the remaining creation steps.
Once the product is created, the payment plan appears as its initial pricing option under Pricing.
Add a payment plan to an existing course or learning program
You can also add a payment plan after creating your product.
- Go to Courses & Programs and open a course or learning program.
- Under Course settings or Program settings, open Pricing
- Click Add pricing option
- Under Pricing option type, select Payment plan
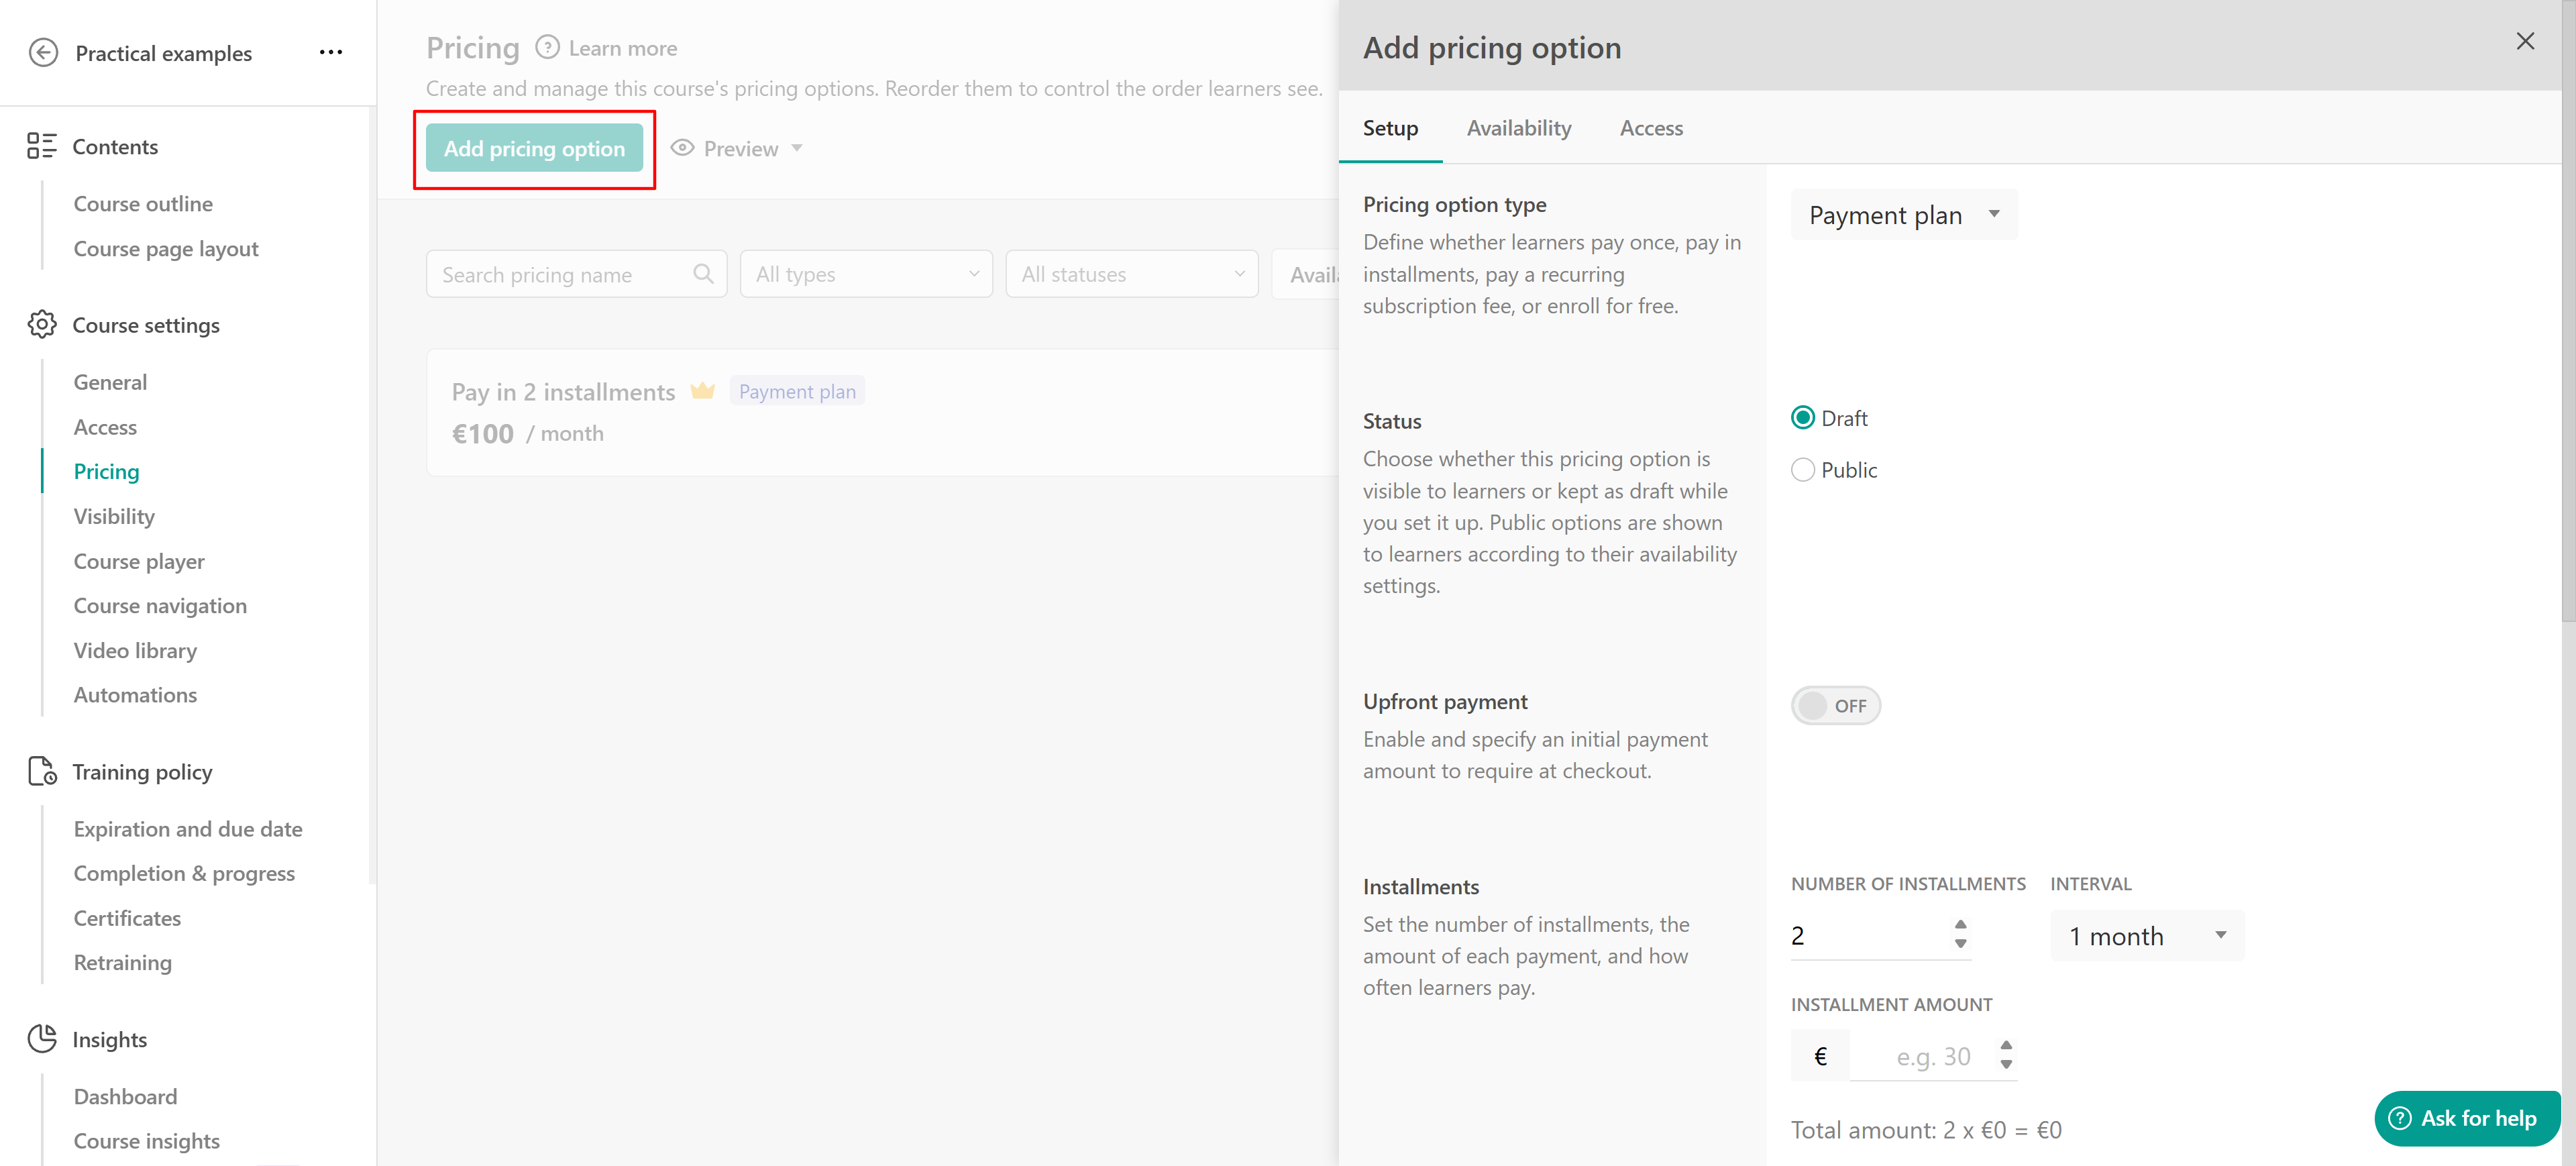
- Configure the payment plan using the Setup, Payment terms, Availability, and Access tabs
- Click Add to create the pricing option
Configure your payment plan settings
When adding a payment plan from the Pricing page, you can customize its settings across four tabs.
1. Setup: Under Setup, configure the payment schedule and basic information for your pricing option.
- Pricing option type: Select Payment plan
- Status: Choose Draft while preparing the payment plan or Public to make it available to eligible learners
- Upfront payment: Enable an initial payment that learners must make at checkout
- Number of installments: Define the number of scheduled installment payments
- Billing interval: Choose how frequently installments are collected
- Installment amount: Set the amount charged for each scheduled installment
- Pricing name: Enter a name learners will see, such as Pay in 3 installments
- Description: Optionally add information about the payment plan that appears in the pricing options section
- Payment plan cancellation: Choose whether learners can cancel their payment plan or must complete all scheduled installments. If cancellation is allowed, learners can cancel their active payment plan from their Account page.
If you leave the pricing name blank, LearnWorlds automatically generates one based on the payment plan settings.How does upfront payment work?
For example, you can offer a €300 course with an upfront payment of €100, followed by two monthly installments of €100 each. The learner pays €100 at checkout and the remaining €200 through the scheduled installments.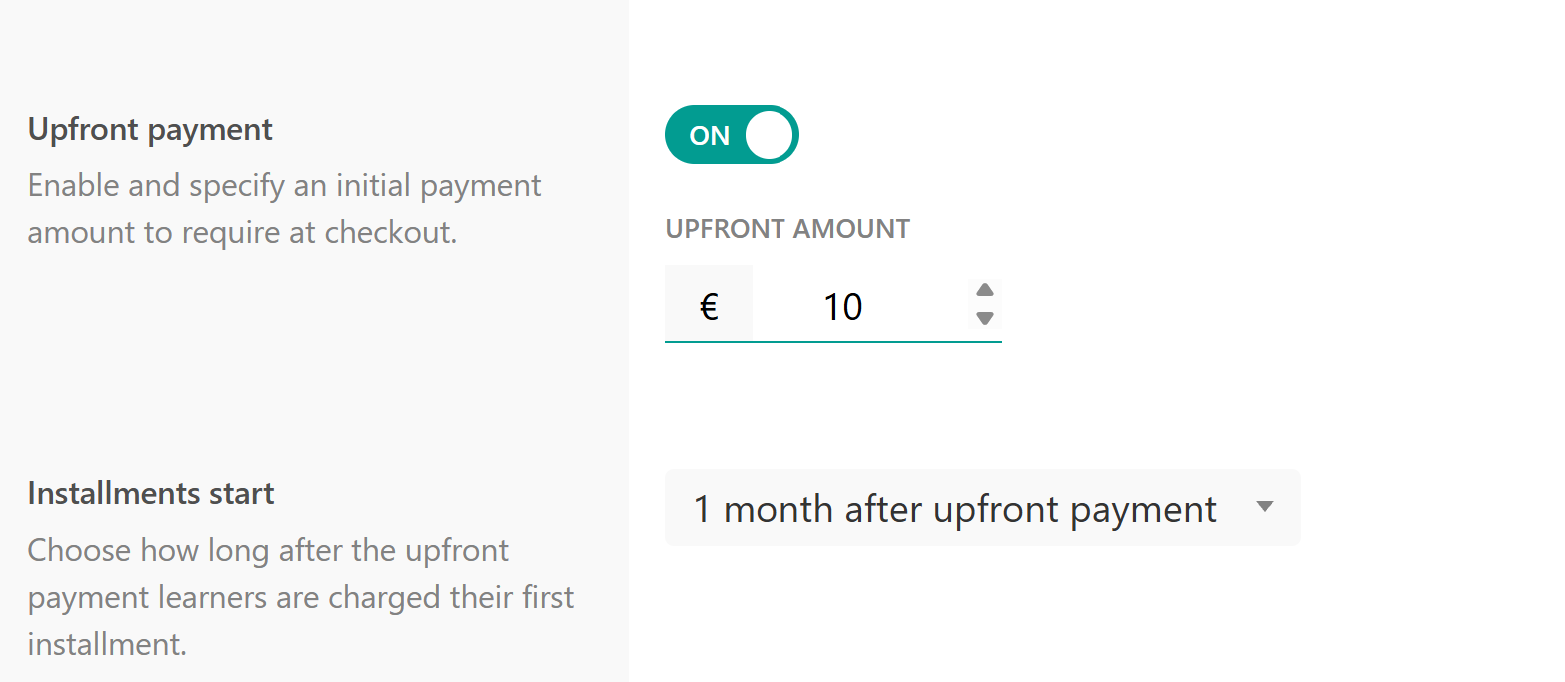
Learners gain access after their initial successful payment.
Availability
Under Availability, define when and to whom your payment plan is offered.
- Availability period: Set an optional start and end date to control when new learners can purchase the payment plan.
- Target audience: Make the payment plan available to everyone or restrict it to users who meet specific criteria.
- Purchase availability: Choose when learners can purchase the payment plan.
- Always: Available for both initial purchases and renewals or retraining
- Initial purchase only: Available only to learners purchasing the product for the first time
- Retraining only: Available only to learners renewing, retraining, or recertifying for the product
For example, you can offer an installment plan only to a selected group of learners or make it available during a limited enrollment period.
Access
Under Access, choose how long learners retain access to the course or learning program after purchasing through this payment plan. You can select:
- Follow product-specific expiration: Use the expiration settings configured for the course or learning program
- Set pricing-specific expiration: Define a separate expiration rule for learners who enroll through this payment plan
Product-specific and pricing-specific expiration settings do not apply when a course is accessed through a learning program.Manage your payment plans
Once you create a payment plan, you can manage it from the product's Pricing page. From this page, you can:
- Search for a payment plan by name or filter pricing options by type, status, or audience
- Edit the payment plan's available settings
- Set a payment plan as the Primary pricing option
- Reorder pricing options to control how they appear to learners
- Archive or delete a payment plan, when available
- Copy its Price ID, checkout URL, or add-to-cart URL, when available
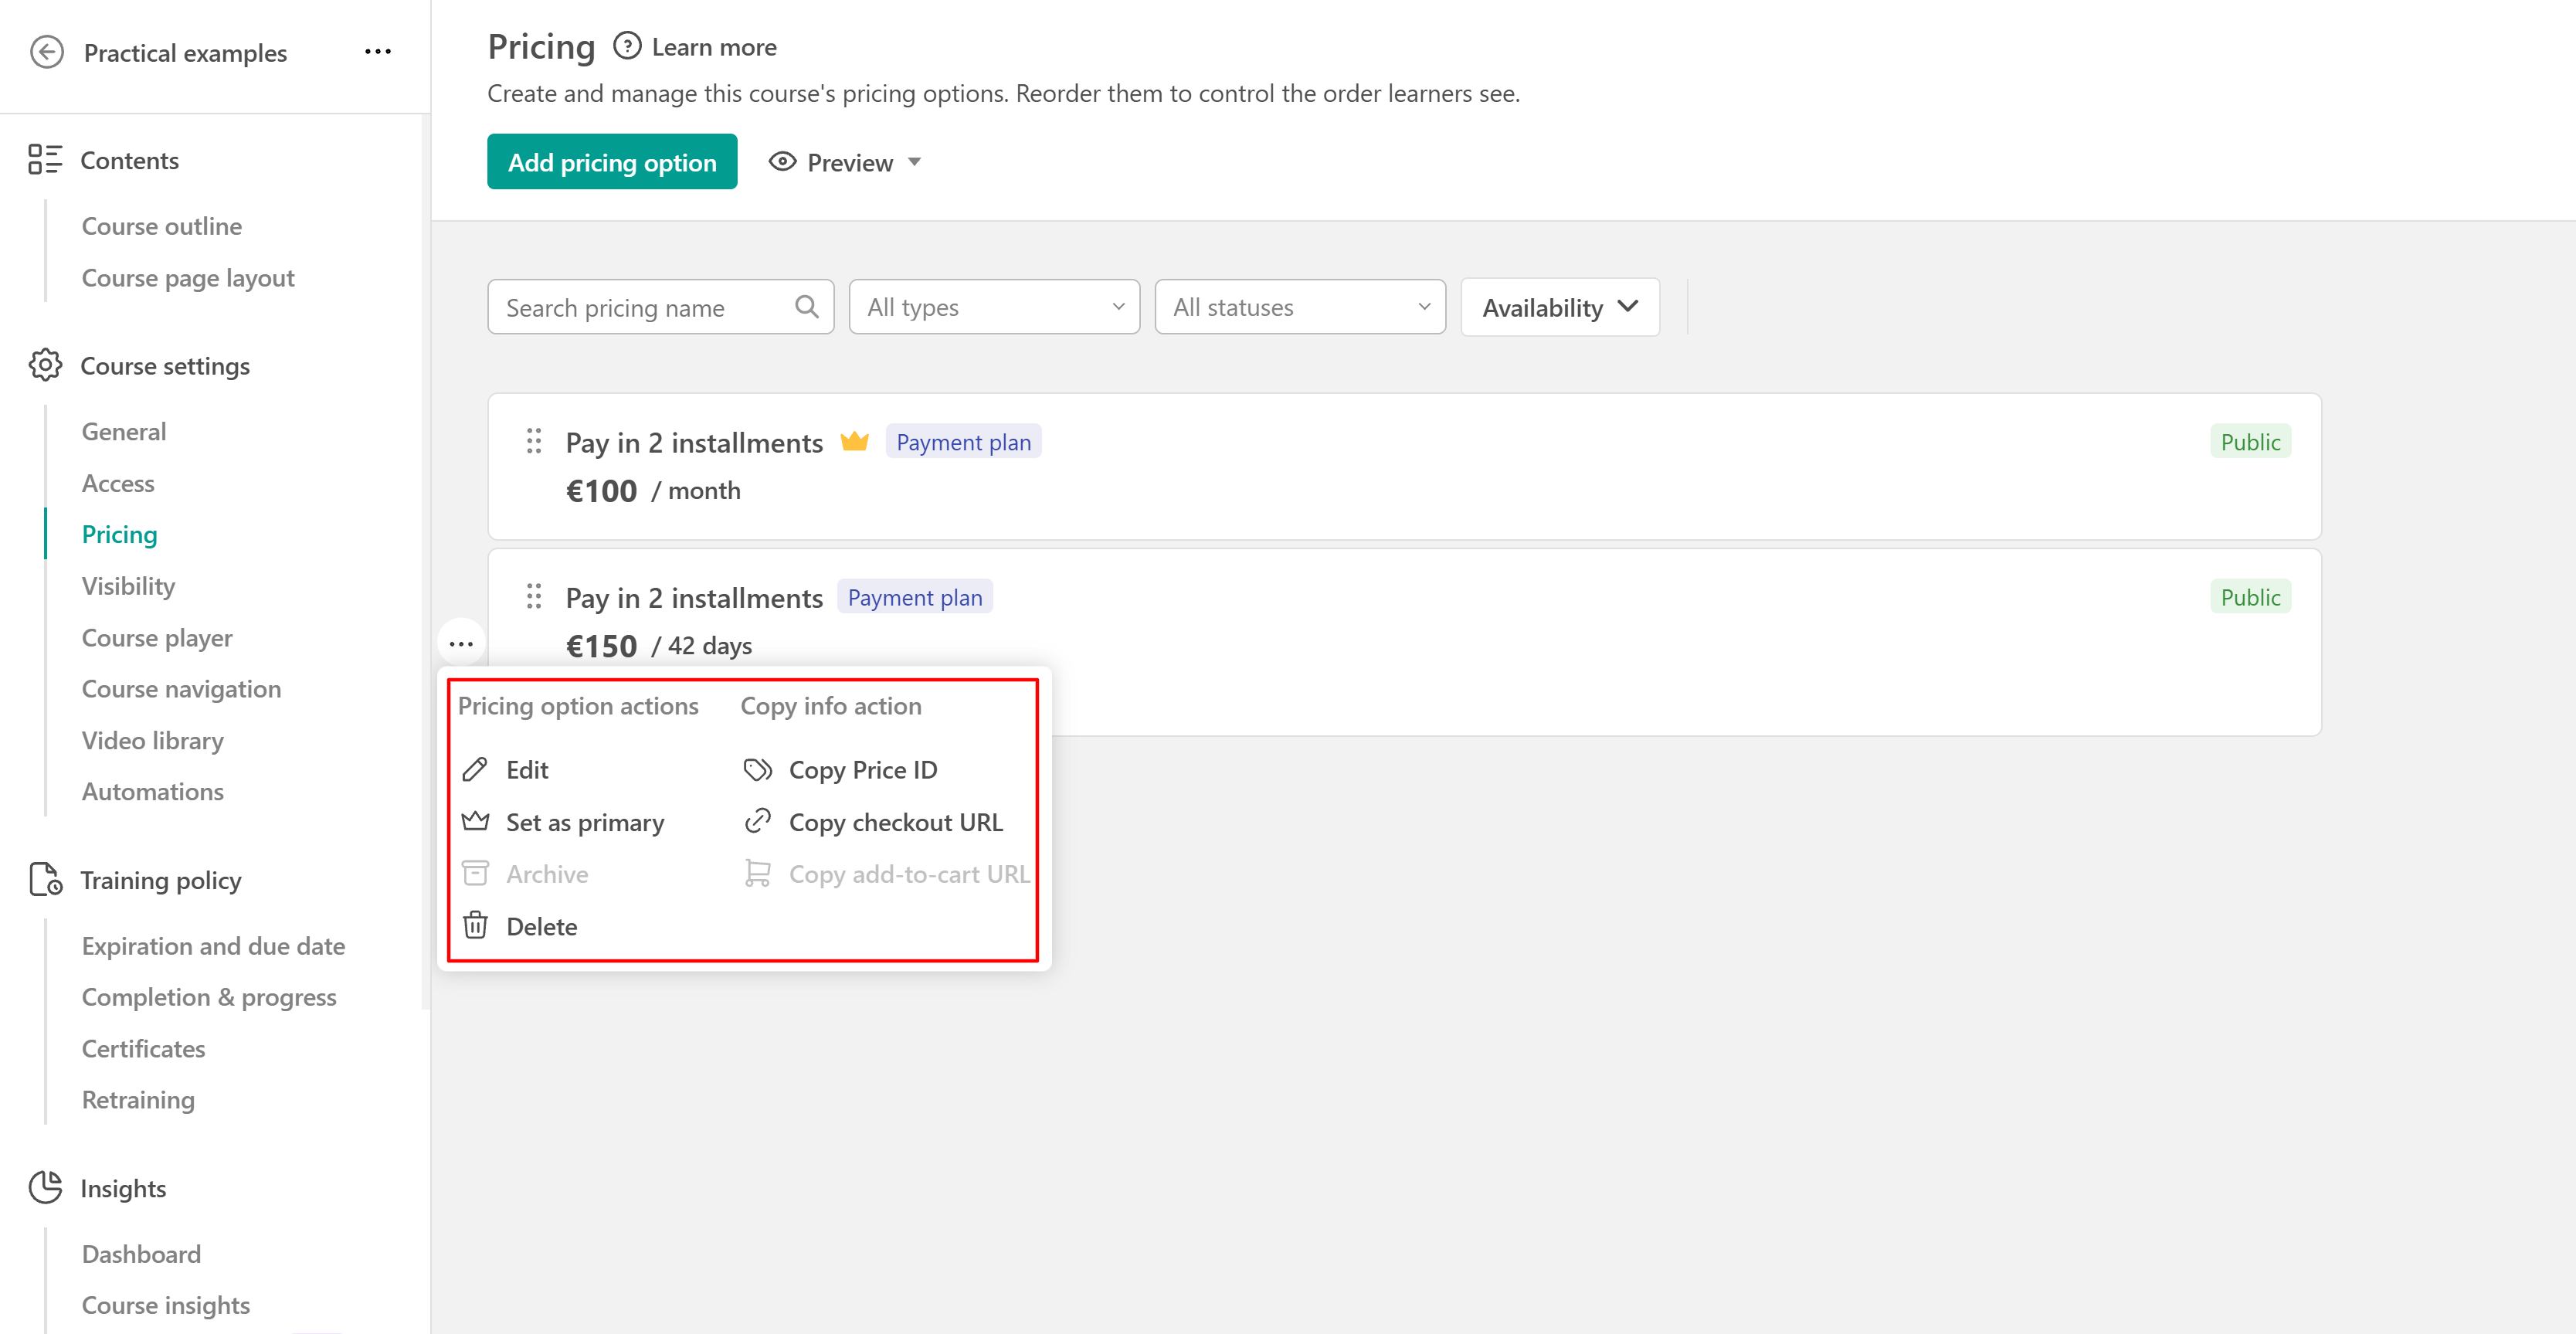
To access these actions, open the actions menu for the relevant pricing option.
Archive or delete a payment plan
Archiving a payment plan prevents new learners from purchasing it. Existing learners retain access according to their purchase terms, and their scheduled installment payments continue.
You can permanently delete a payment plan only if no learners are enrolled in it. If learners are already enrolled, you must archive the payment plan instead
Cancel a learner's payment plan
If you need to manually cancel a user’s installment plan, go to E-commerce → Plans, then locate the user. Hover over the three dots (...) next to their active plan to view available options.
2. Click Cancel Plan.
Important notes
- Once you connect your Stripe account and create your subscriptions and installments, you should not connect to a different Stripe account; otherwise, you will not be able to receive payments from the users who purchased a subscription or installment while you had connected the first account.
- Payment plans in LearnWorlds function like subscriptions in Stripe. When a user buys a product with a payment plan from the school, a new subscription is generated in Stripe with a default duration of "Forever." The subscription will automatically terminate once the final installment is successfully paid. This is the standard functionality of the Stripe integration. It's important not to interfere with this mechanism, as any intervention may disrupt the integration, causing recurring payments to not function as expected.
- When a user cancels an installment plan, they instantly lose access to the installment plan and the relevant course.
- If you set an existing installment plan's status from Public to Draft, it will get archived. This means that the payment plan is not available for purchase anymore for new users, but already enrolled users will keep getting billed.
- You can also delete an installment plan via your Stripe account.
- When you set an expiration date for a course purchased with a payment plan, recurring payments in Stripe will continue to be processed even after the course has expired.
- In the Communication → School emails → Payment Plans, you can find the Payment Plans category, through which you can activate automated emails referring to specific relevant events. These emails can also be tracked on the Emails Log page (Reports → Activity logs → Emails)
- Apple Pay and Google Pay are not compatible with recurring payments like subscriptions or installment plans. Ensure your users are informed and choose a supported payment method when selecting such options.
- You can track the following Installment Events in the Activity History:

Installment Paid: When the payment plan starts and after each interval.
Payment Plan Completed: When the Payment Plan’s cycle is completed (Last Payment).
Installment Payment Failed: When a payment fails for some reason ( i.e., the Card expired).
Payment Plan Canceled: When the payment plan is canceled (Admin manually unenrolls a user, User Cancels the Payment Plan - The payment plan fails due to payment failures).
- In case the installment plan is canceled, it is not feasible to reinstate the recurring payments via the LearnWorlds platform. You will need to check the feasibility via your Stripe Account.
- If a user is in the process of updating their billing info, you can control when to recollect the payment from your Stripe settings here: https://dashboard.stripe.com/settings/billing/automatic.

- The users can cancel their installment plan by visiting the Account page and clicking on the Cancel button.