Exams are essential for validating knowledge and ensuring that learners meet course objectives. Unlike self-assessments, exams are graded and can contribute to certifications or course completion. LearnWorlds allows you to create structured exams with various question types, scoring options, and customization settings.
In this article, you'll find a detailed, step-by-step walkthrough on creating exams (graded assessments).
How to create an exam
To create Graded Assessments:
1. Navigate to the course outline tab of your course.
2. Click on Add an Activity under a course section.
3. Choose Exam, then select from these options:
- Start from Scratch – Create a new blank exam.
- Graded SCORM – Upload SCORM-based assessment content. You can find out more on Graded SCORMs in this article.
- GradedLTI- Integrate an external learning activity using LTI.
- Open-ended Templates – Use templates for text, file, video, or audio-based assignments.
4. Click on Save or Save & Edit. If you click on Save, you must hover over the activity and select Edit questions to add your assessment questions.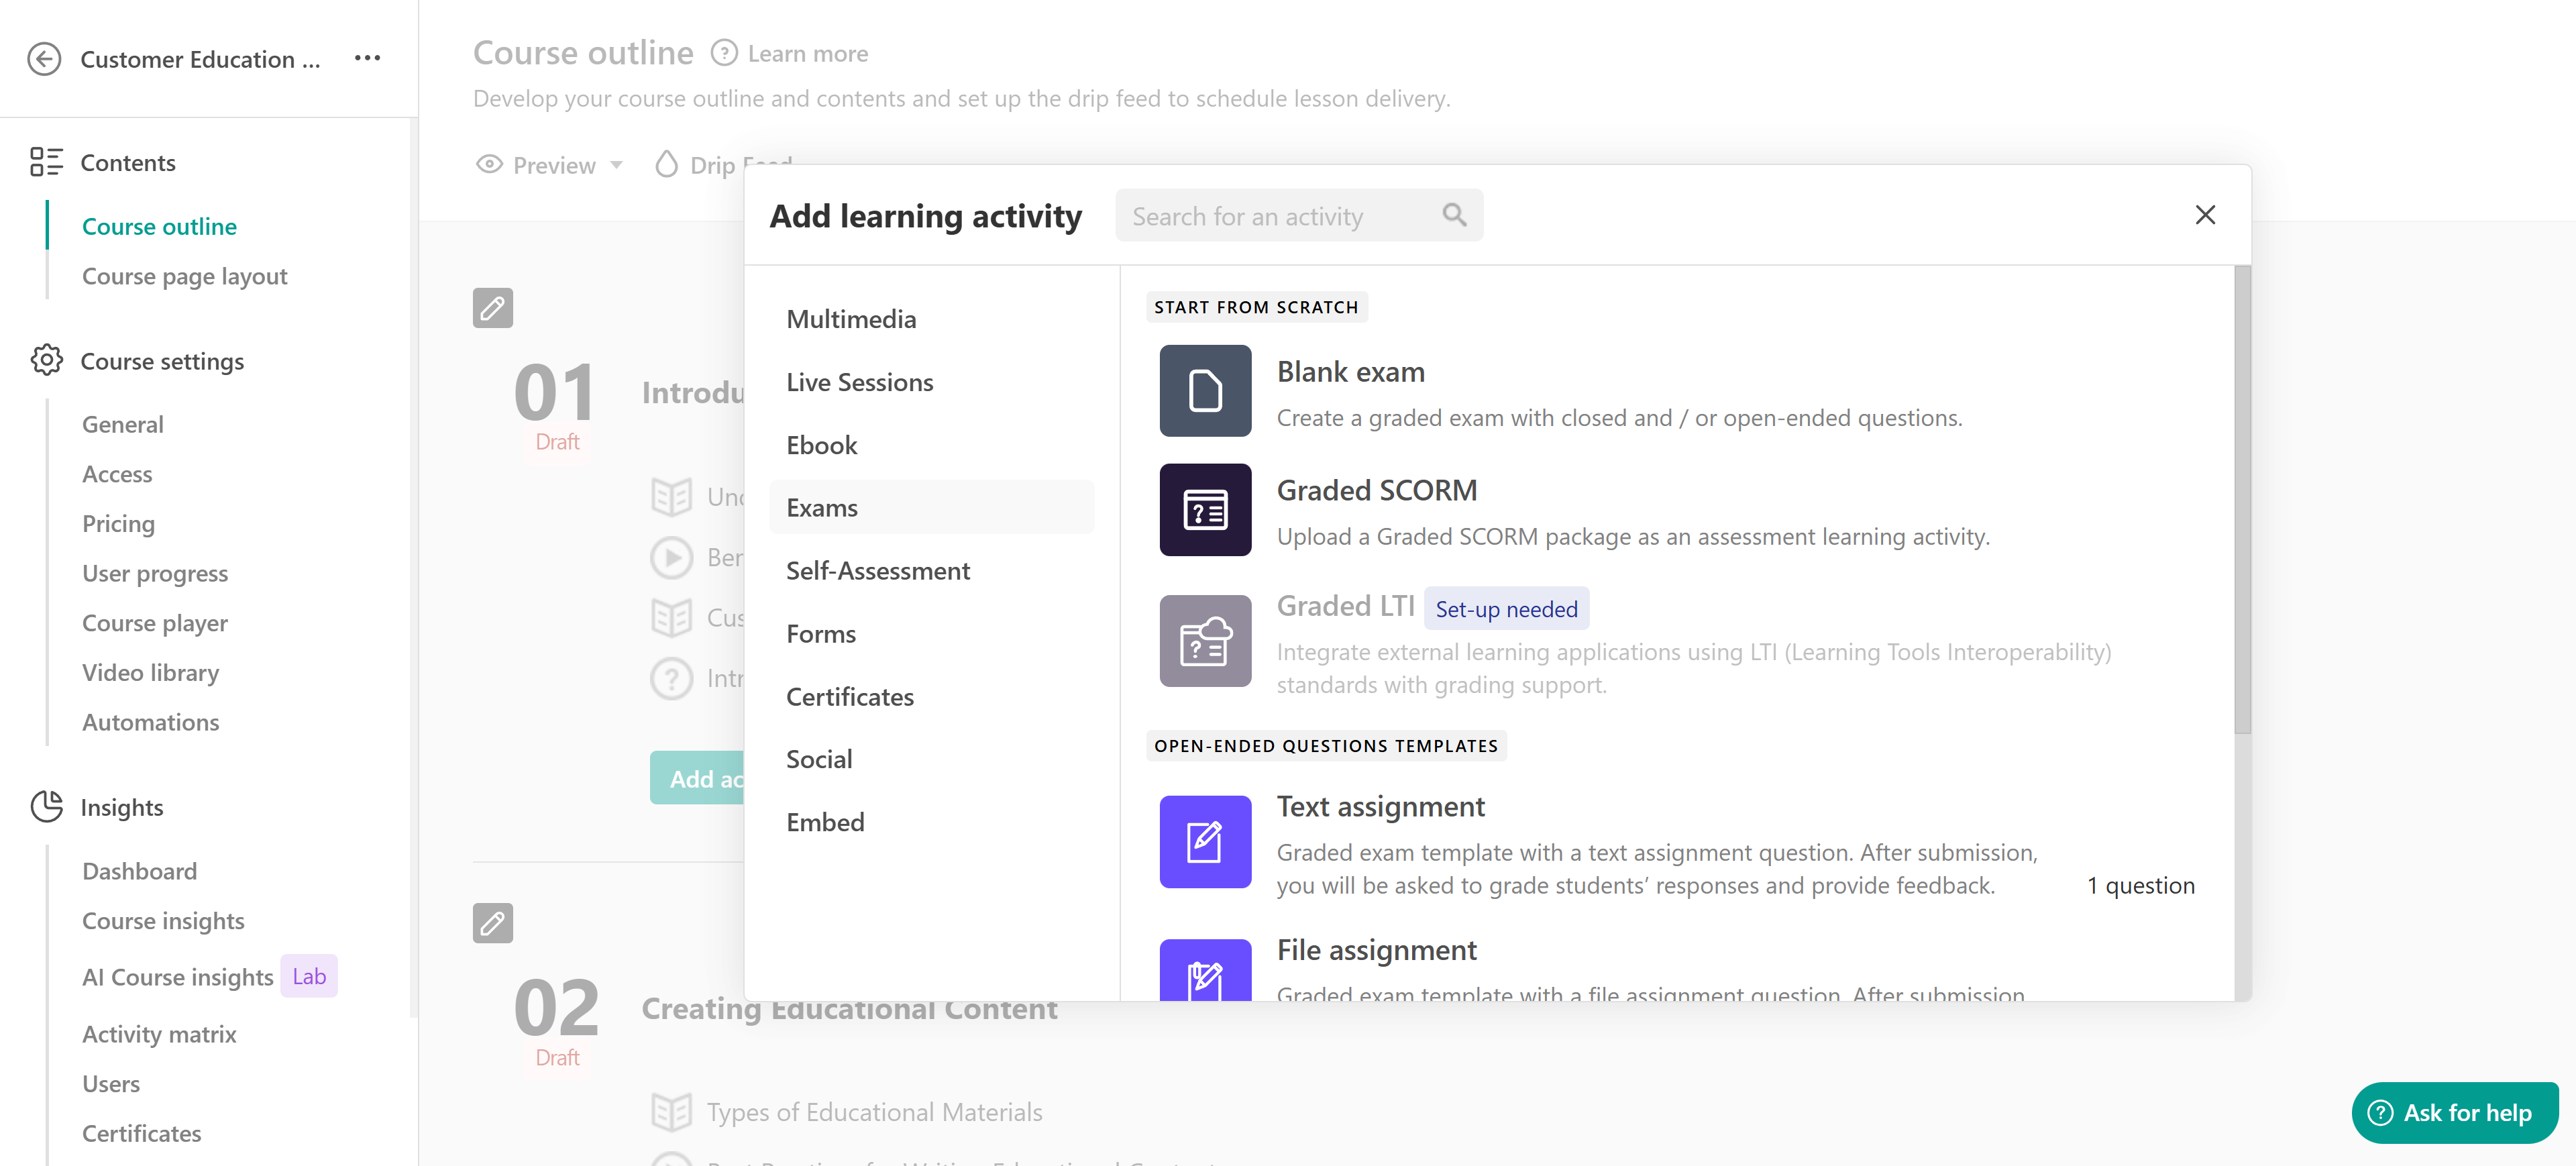
Graded assessment structure
Your graded assessment has the following structure:
1. Starting screen: This optional introductory screen lets instructors welcome learners and provide an overview of the exam. It does not count toward the exam time and is fully customizable using widgets.
2. Organized sections with questions: For short quizzes, one section may be enough. For longer exams, organizing questions into multiple sections improves clarity and flow.
To add a new section:
- Hover over the three dots in the default section.
- Click "Add Section"
You can enable the respective settings under Settings → Randomize to randomize and shuffle the questions in each section. Additionally, you can alter the name of the section if needed.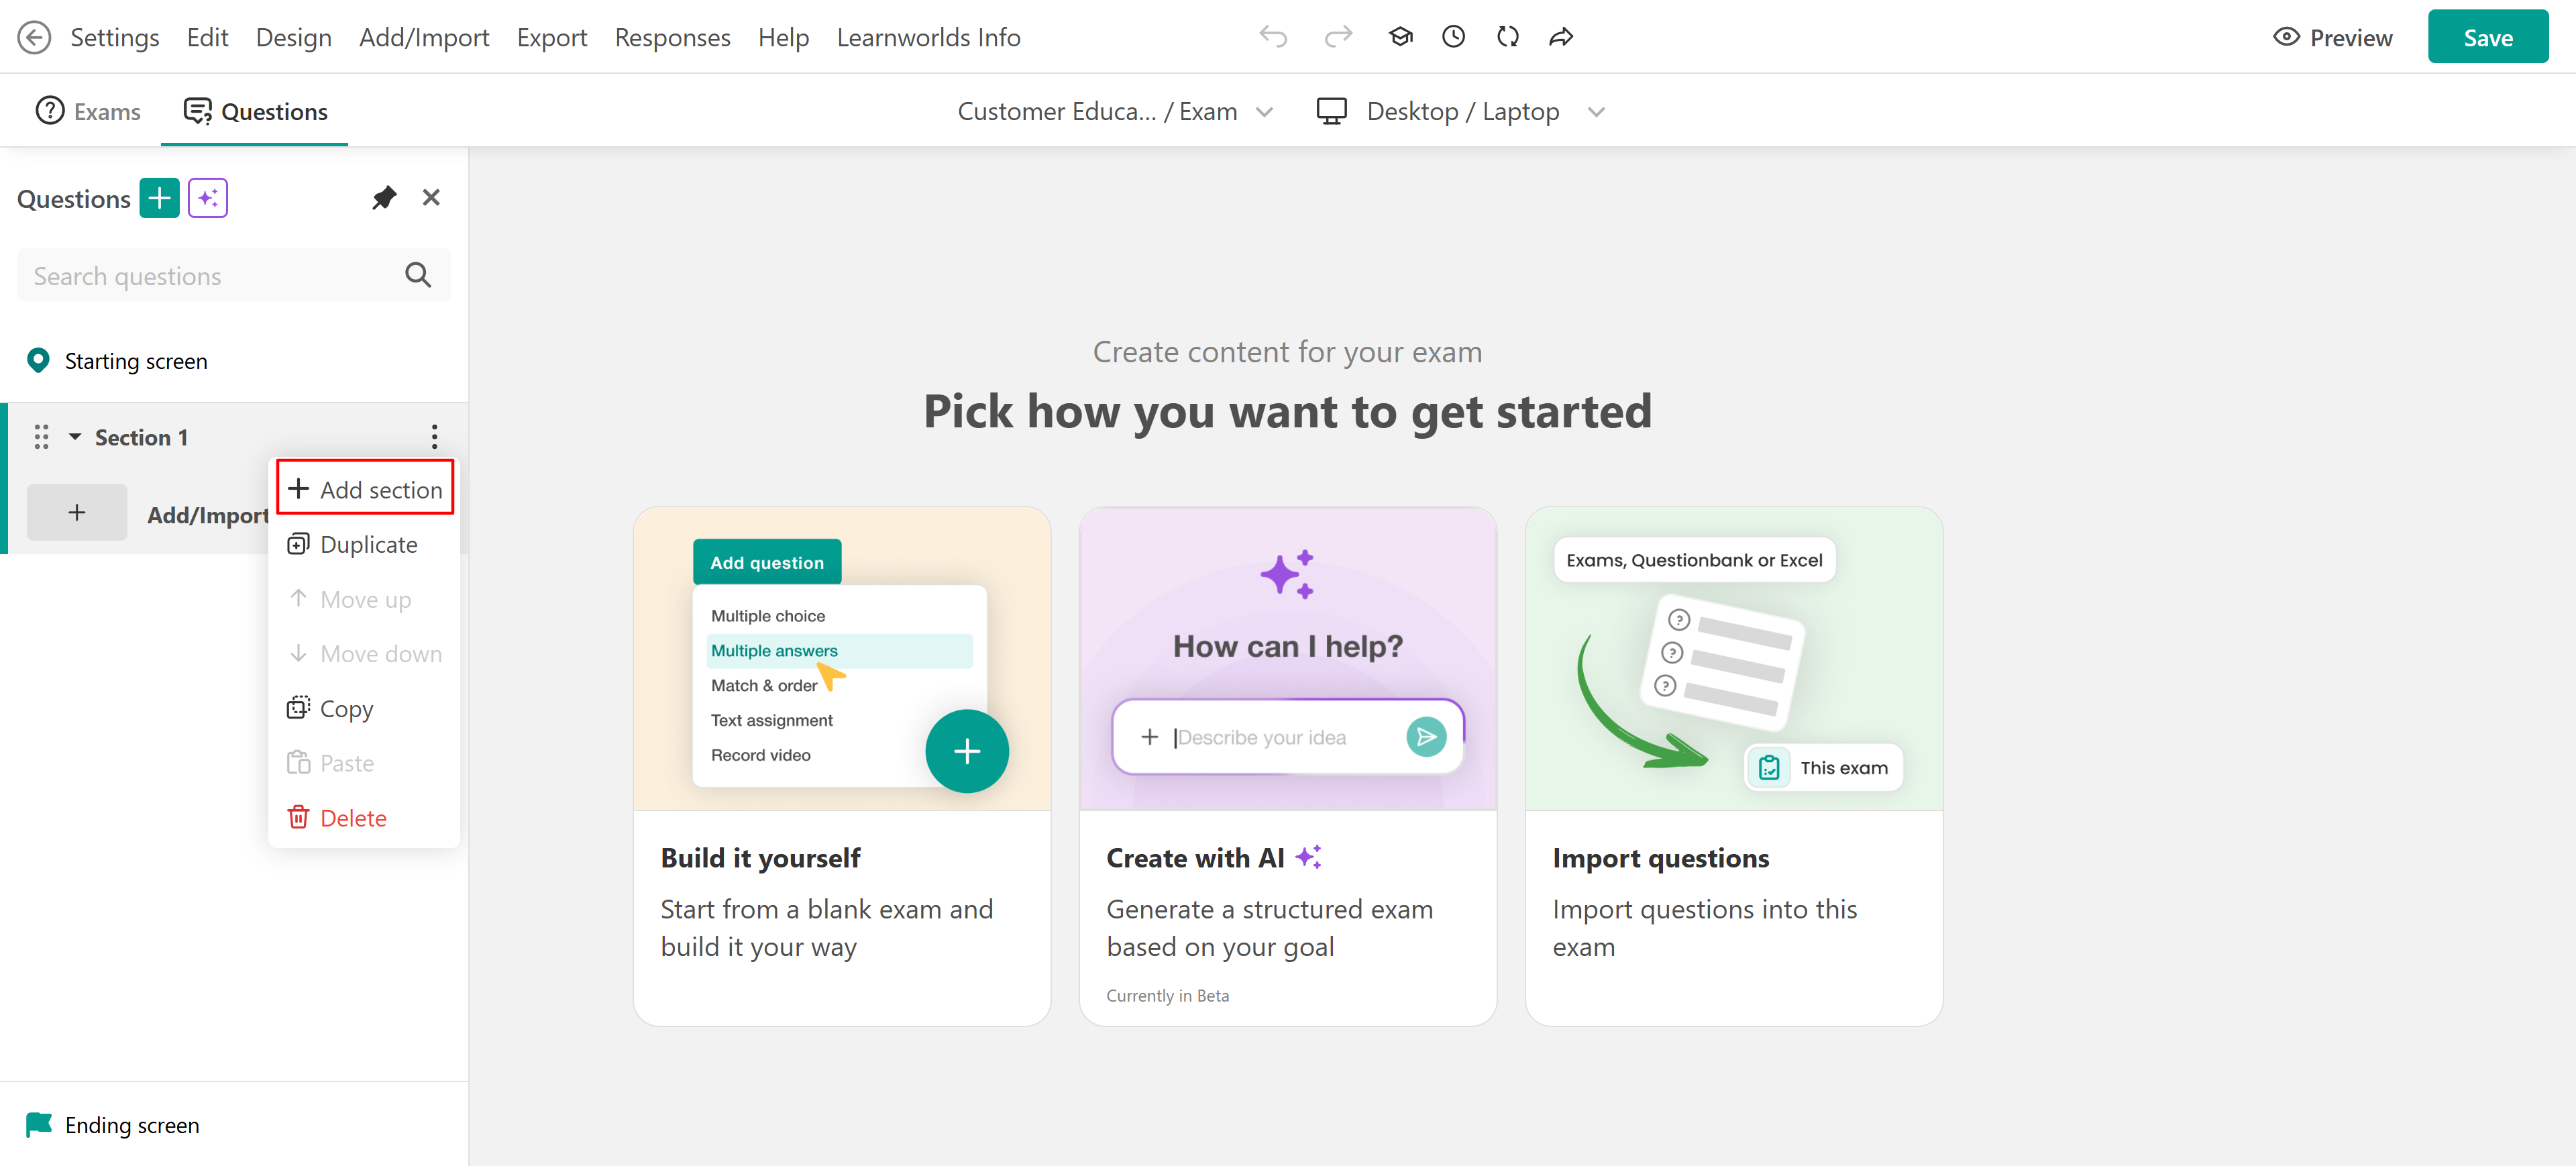
You can build questions:
- Manually, by clicking on the + icon or by clicking on Add/Import → New question. You can find out more in this article.
- Use the AI Assistant to help with writing, research, and editing. You can find out more in this article.
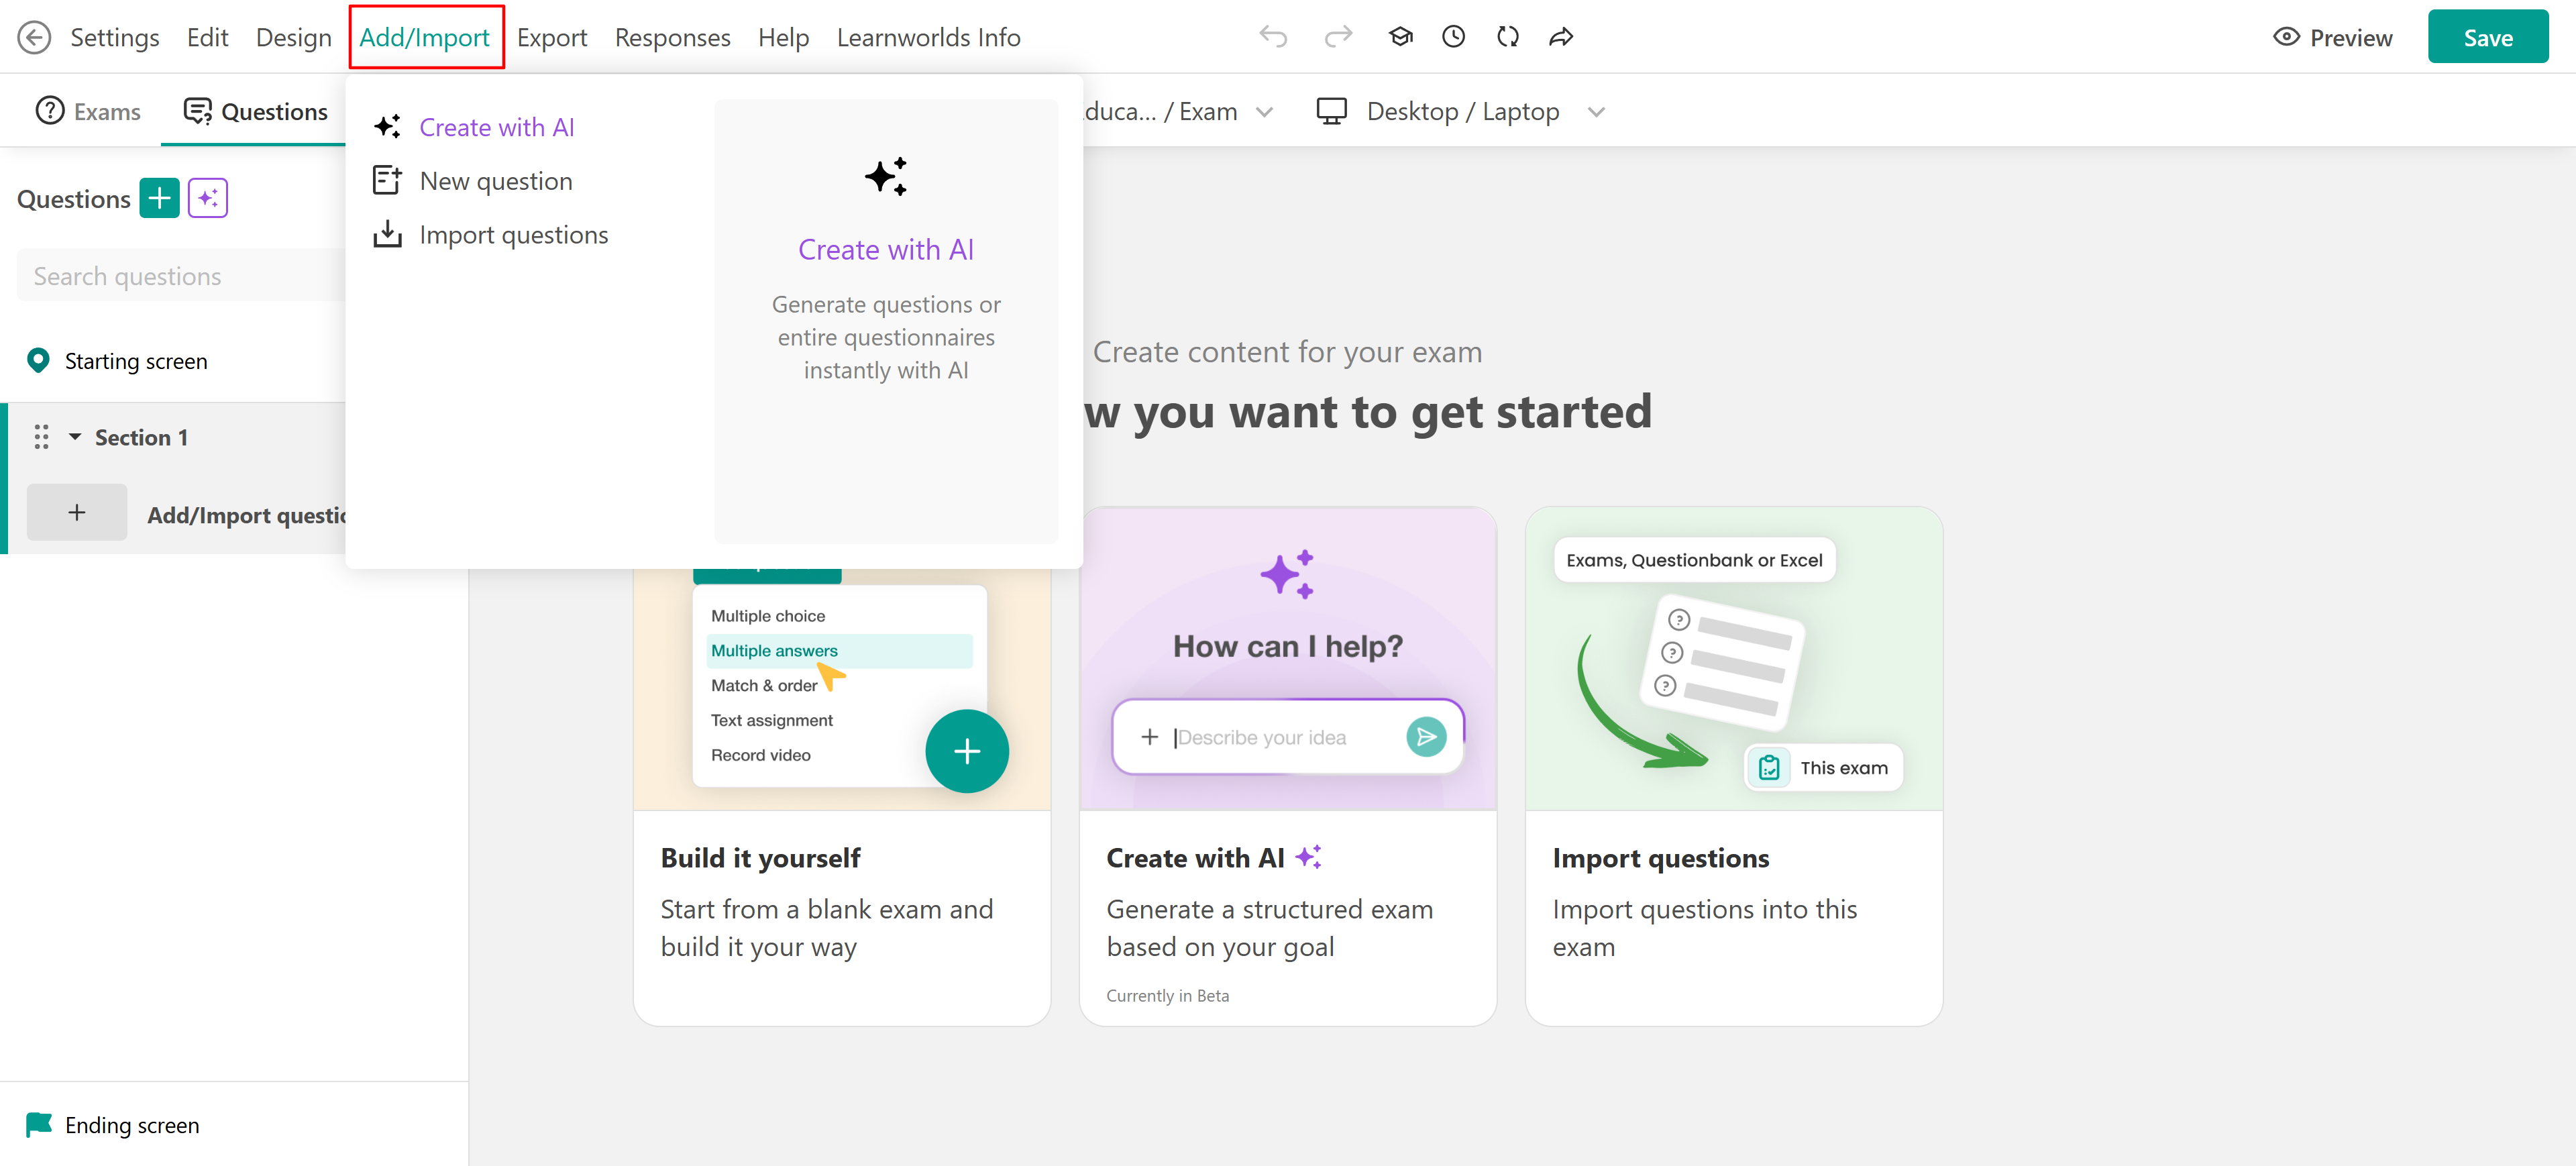
A window will open, displaying all the available types of questions:
- Multiple Choice Questions (Text, Image, Video)
- True/False Questions
- Dropdown Questions
- Multiple Answers Questions (Text, Image, Video)
- Match & Ordering Questions
- Short Text
- Fill in the Blanks
- Open-ended Assignments (Text, File, Video, Audio assignments)
For more information on adding and customizing your assessment questions, check this article.
3. Ending screen: Displayed after submission, this screen shows the final score, feedback, or a pending status if manual grading is required. You can customize the message based on the outcome:
Pass
Fail
Pending (awaiting grading)
Like the starting screen, the ending screen is built with widgets for full customization. If you want to know more about the starting and ending screens, visit this article.
Adding a score to the exam questions
After adding questions to graded assessments, you will need to set up the scoring. The Score tab offers two available options:
- Basic score: Set a specific score on both correct and/or incorrect answers.
To set the basic scoring, click on the questions and click on Edit question. Go to the Score tab and set the points for correct and/or incorrect answers.
- Advanced score: Set specific points for each answer choice.
To enable the Advanced Score, hover over the desired question template and click on Edit question. Go to the Score tab and activate the Advanced Score on the provided options, where you can set a specific point per choice.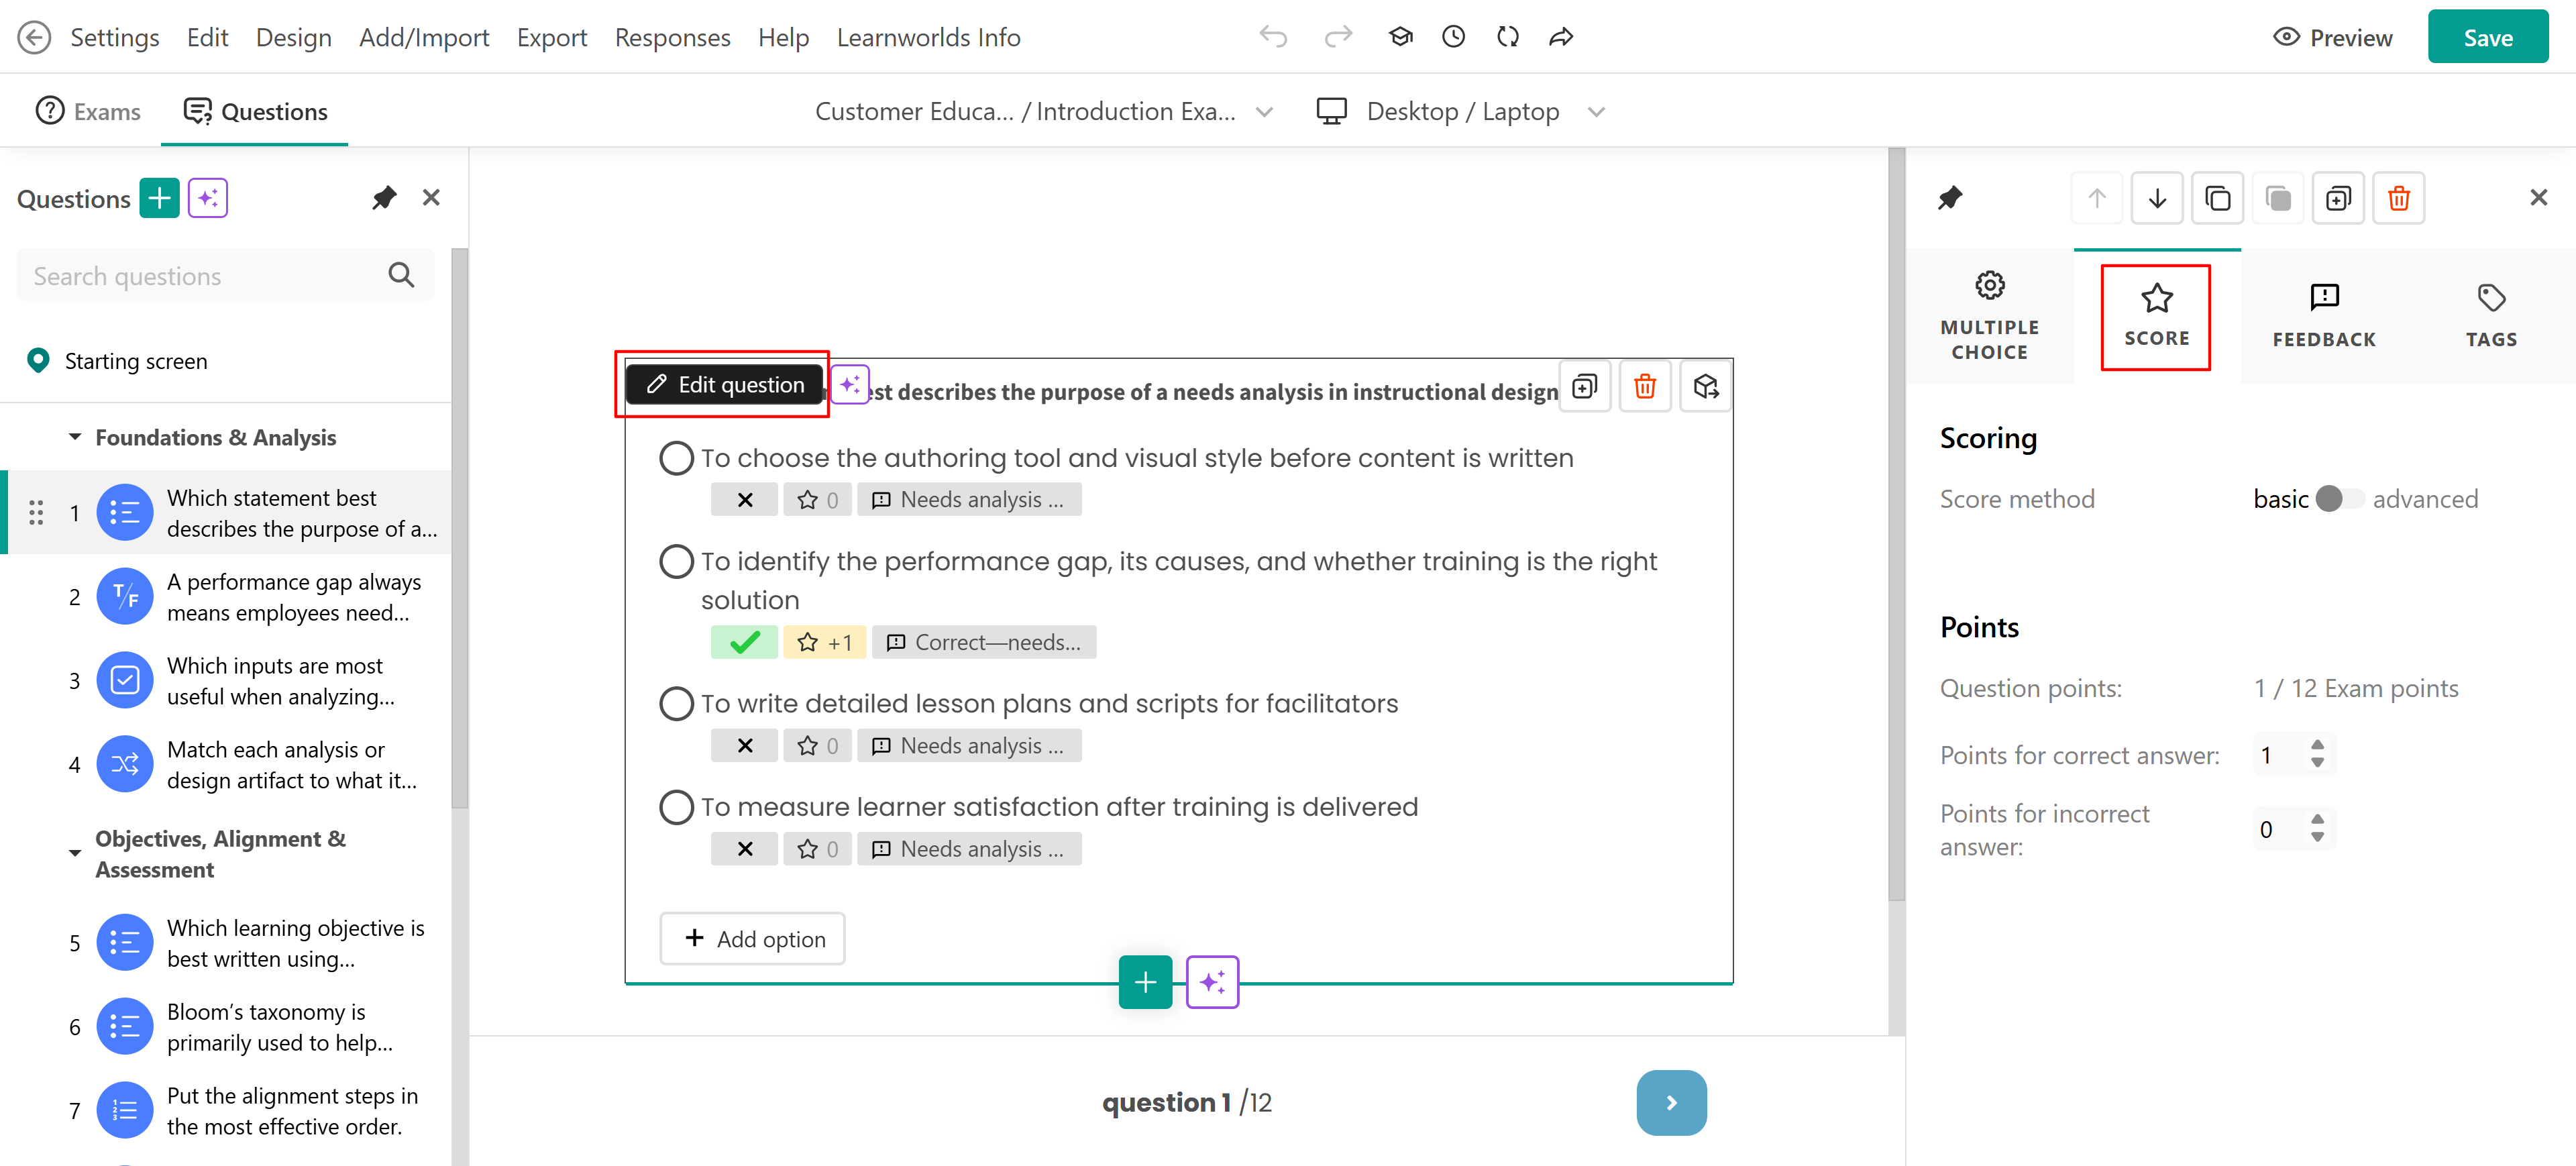
Advanced scoring in different question types
- Multiple Choice and Multiple Choice Multiple Answers: Points can be assigned per option.
- True False/Dropdown: Basic Scoring - Select the correct answer and allocate scores accordingly.
- Fill in the blanks: You need to click on the answers box to view the advanced scoring options.
- Text/File/Video/Audio Assignments: Manual review and grading required.
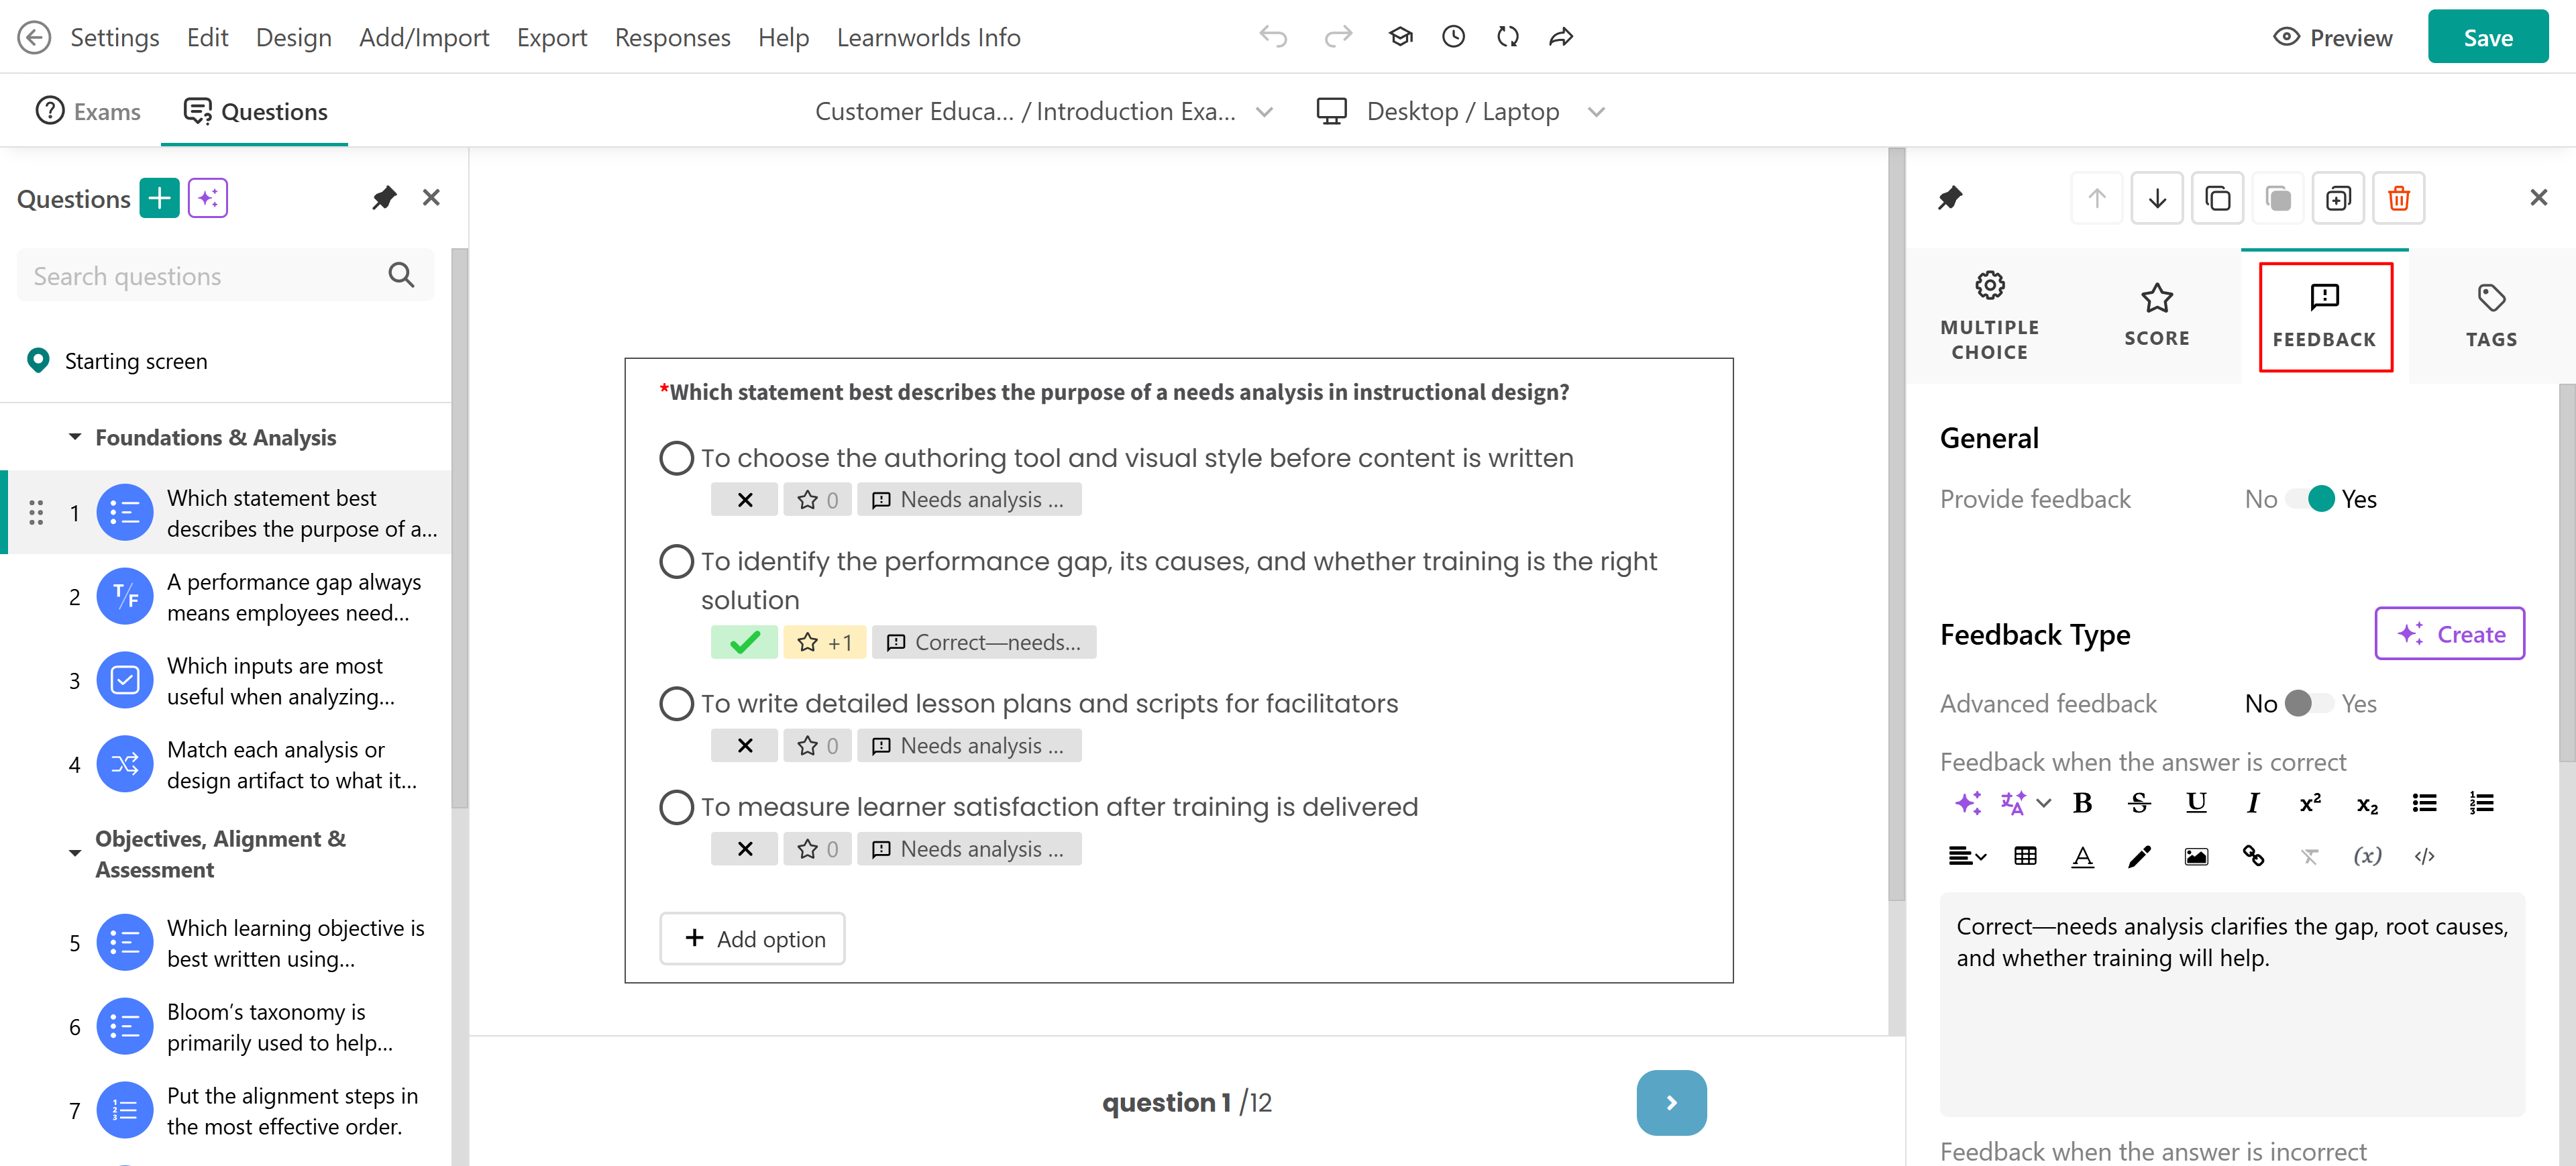
Providing feedback on users' answers
If you want to provide feedback to users after they submit their assessment, you can use the general feedback option or the advanced one. Let's see how to Add Feedback:
1. Select the question you want to edit and click on Feedback.
2. There you can find the following options:
- Enable/Disable Feedback: Turn the feedback feature on or off.
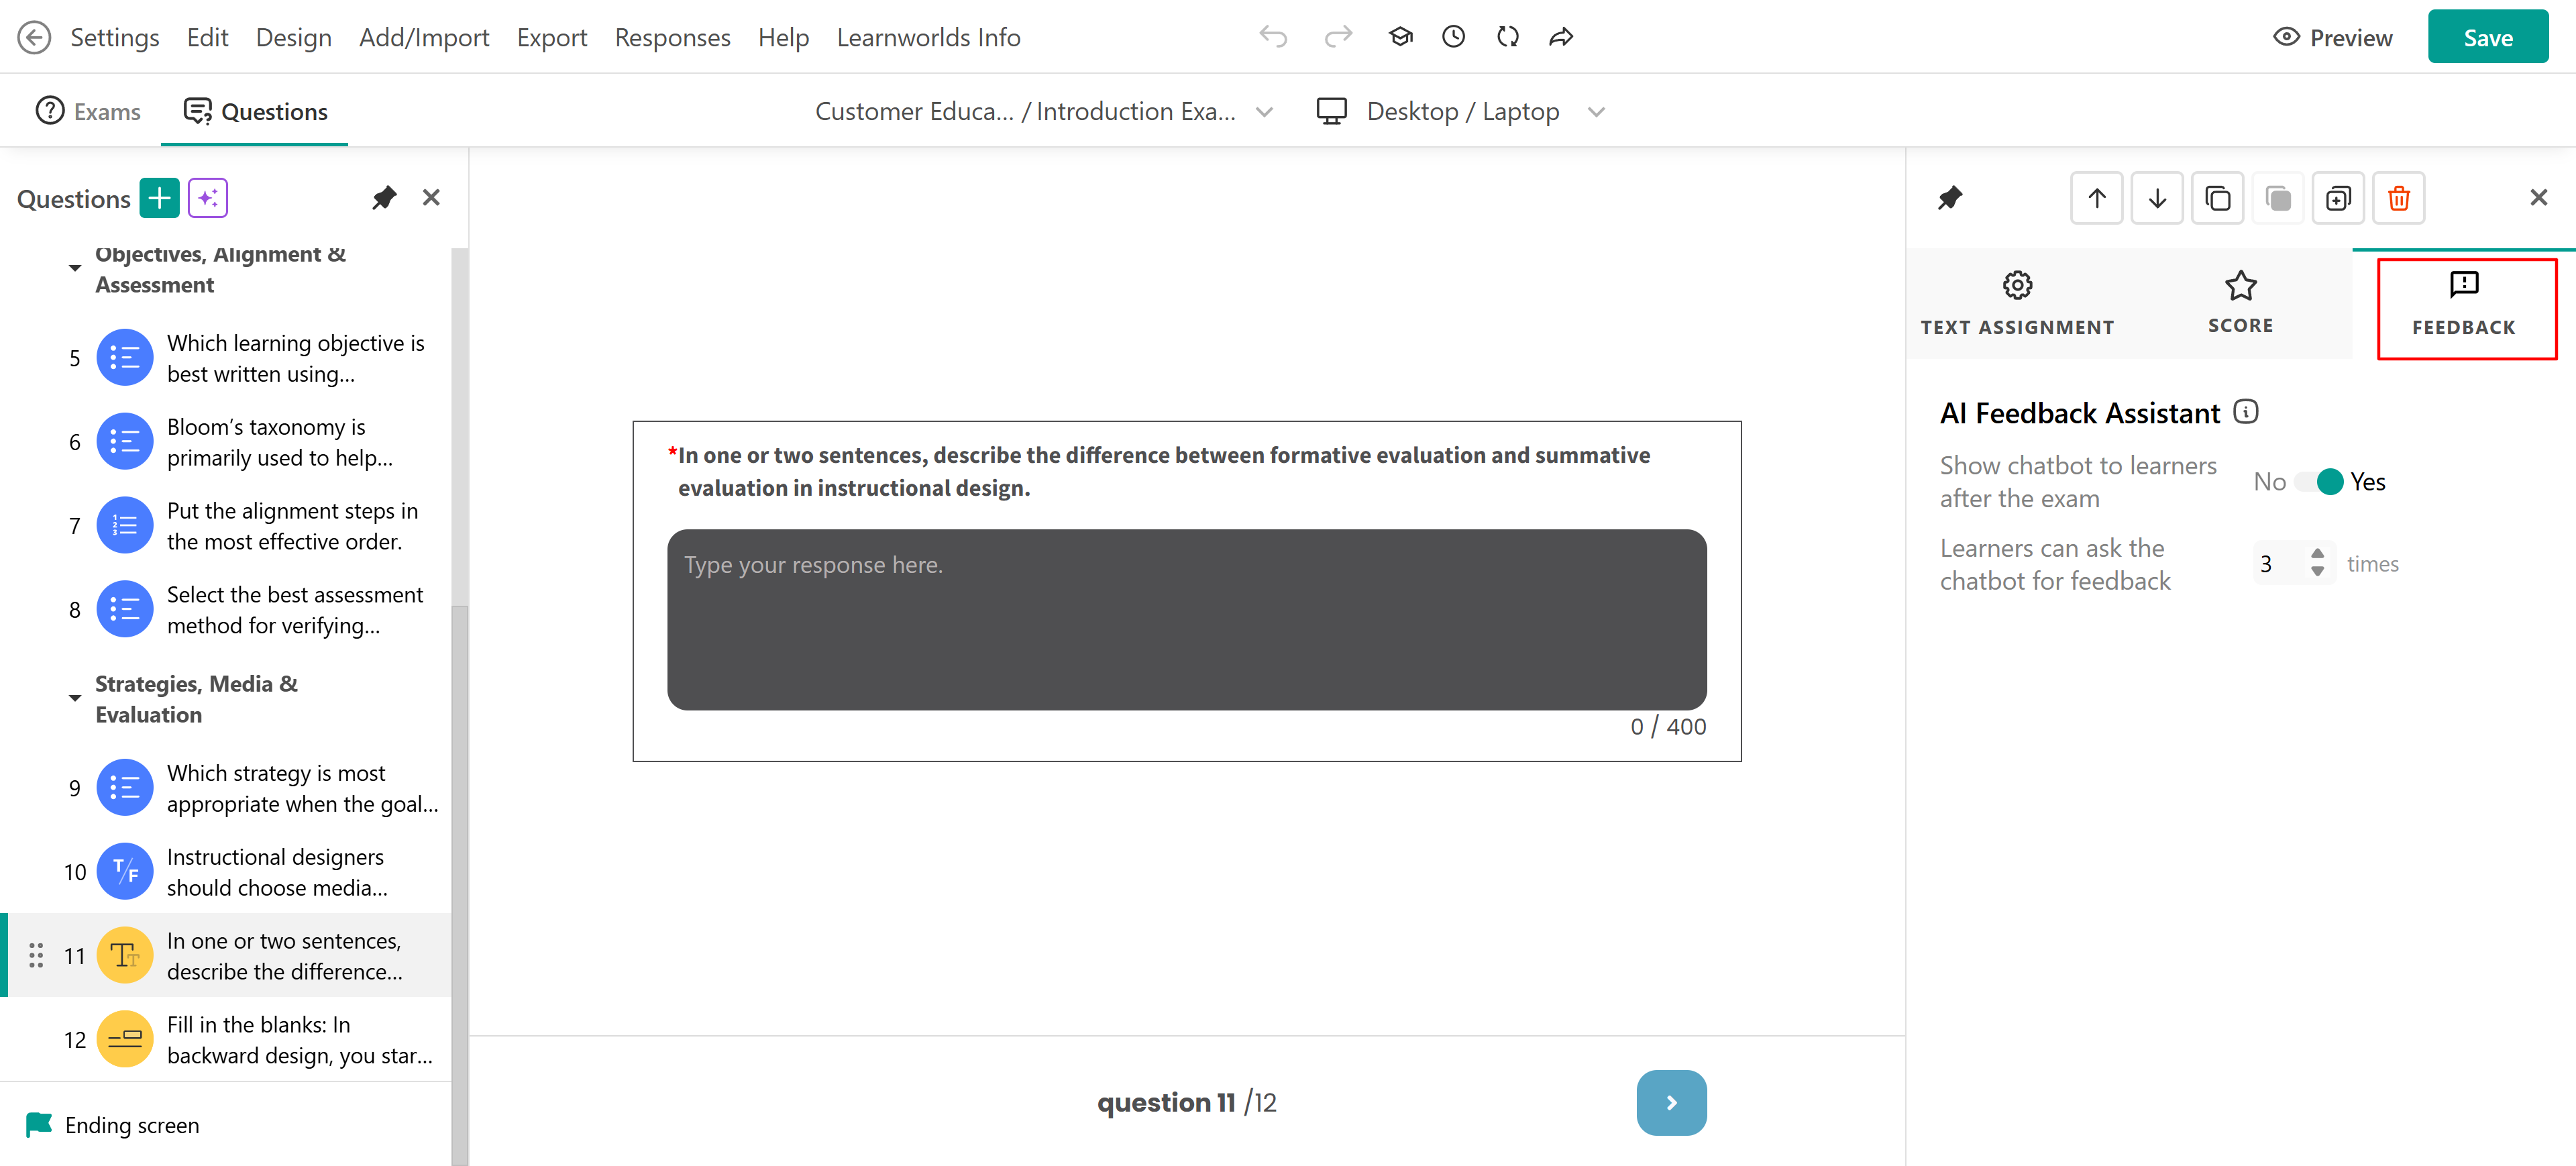
- AI Feedback Assistant: This is a chat included in your feedback report and functions as an interactive chat that helps learners understand why their answers were right or wrong, offering explanations and learning guidance based on their responses.
- Feedback Type: Here you can enable advanced feedback to offer feedback tailored to each possible answer, correct or incorrect. If deactivated, only basic feedback is displayed: one response for correct answers and another for incorrect ones.
While editing your feedback type, you can use the AI Assistant to help you generate the feedback text. Simply click the Use AI Assistant button, fill in the necessary details, and let it create the feedback for you.

- The Feedback tab is not available to File/Video/Audio Assignments since manual review and grading are required.
- For Text assignment questions, only the AI Feedback Assistant option is available.
- If you choose to add an image to your feedback, make sure to change the image's dimensions as follows:

- In order to use the AI Feedback Assistant, make sure to visit Settings → Feedback and enable the respective option.
Adding tags
You can also add tags to users who give particular responses. Tags enhance personalization and improve question relevance. They also help in tracking performance and providing targeted feedback.
To set up the tags option:
- Go to the Tags tab.
- Type the tag to the users who give specific responses and press Enter to save.
The Tag tab is not available for Text/File/Video/Audio Assignments.Configuring exam settings and design
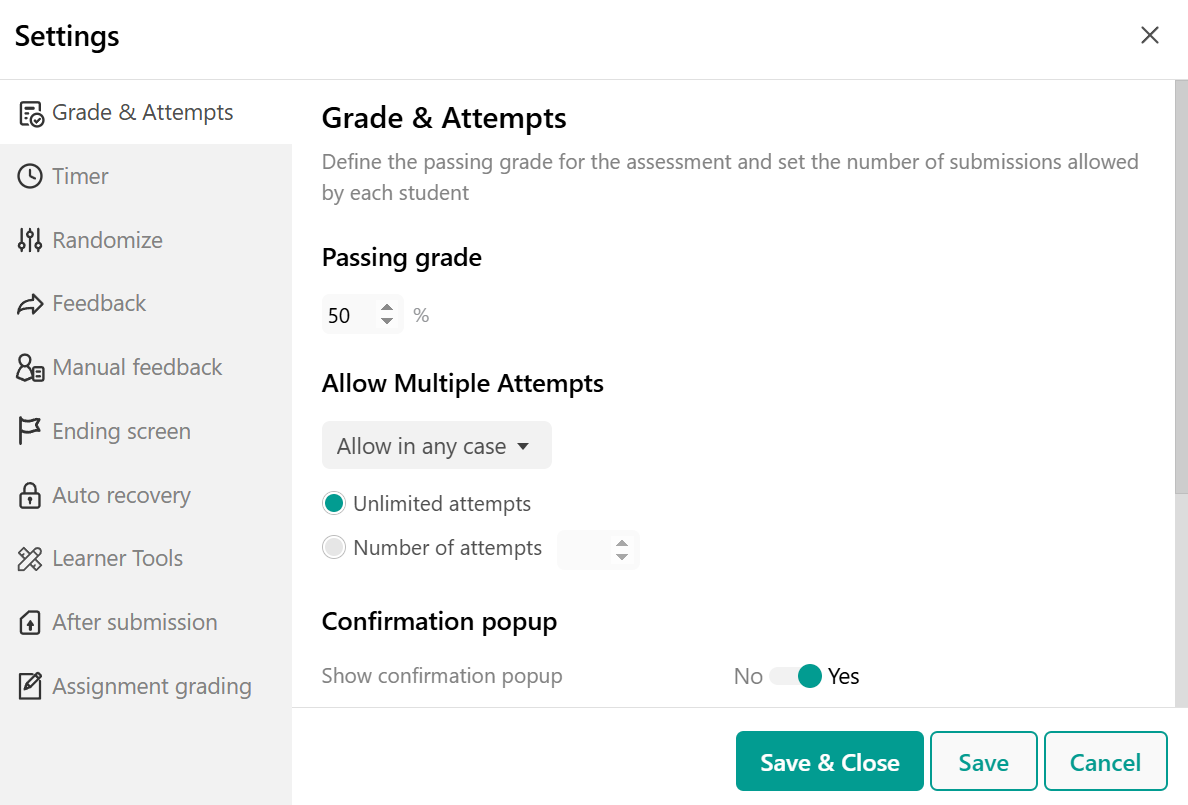
After your questions are added and set up, you will need to configure the exam settings like:
- Grade & Attempts: Set the passing grade for your exam.
- Timer: Apply a time limit on your exam.
- Randomize: Choose whether to shuffle the questions’ order.
- Feedback: Choose whether to offer a feedback report to the student.
- Manual Feedback: Push exams with close-ended questions to the Review Center.
- Ending Screen: Customize your ending screen
- Auto recovery: Allow students to navigate away and return to the assessment within a time window without losing their answers.
- Learner tools: Show a sidebar presenting all available questions concisely.
- After submission: Enable a submission confirmation pop-up and tag users after submission.
- Assignment grading: Set the passing grade for assignments (open-ended questions).
- Navigation: Configure how users will navigate through the exam’s questions.
- Language: Change the language of the UI text.
You can find out more here: How to Configure the Assessment Settings.
You will also need to customize your exam's design. With the Assessment Builder, you can fully customize the design and appearance of your assessments to align with your academy’s & course’s theme and enhance the user experience, with options like changing colors, typography, navigation, and assessment viewer. You can find out more on how to design your assessments here.
After submission - Ending screen
Once a learner submits an exam, they are presented with an ending screen. In exams, the ending screen offers three views for when the:
- Learner passes (Pass screen)
- Learner fails (Fail screen)
- Results are pending (Pending screen). If Text Assignments, File Assignments, or Record Video/Audio types of questions are added to an Exam Learning activity, the Assessments will be moved to the Review Center for grading. The users will see the Pending status ending screen until the Assessment has been graded.
You can click on the assessment container in the ending screen to customize each screen. 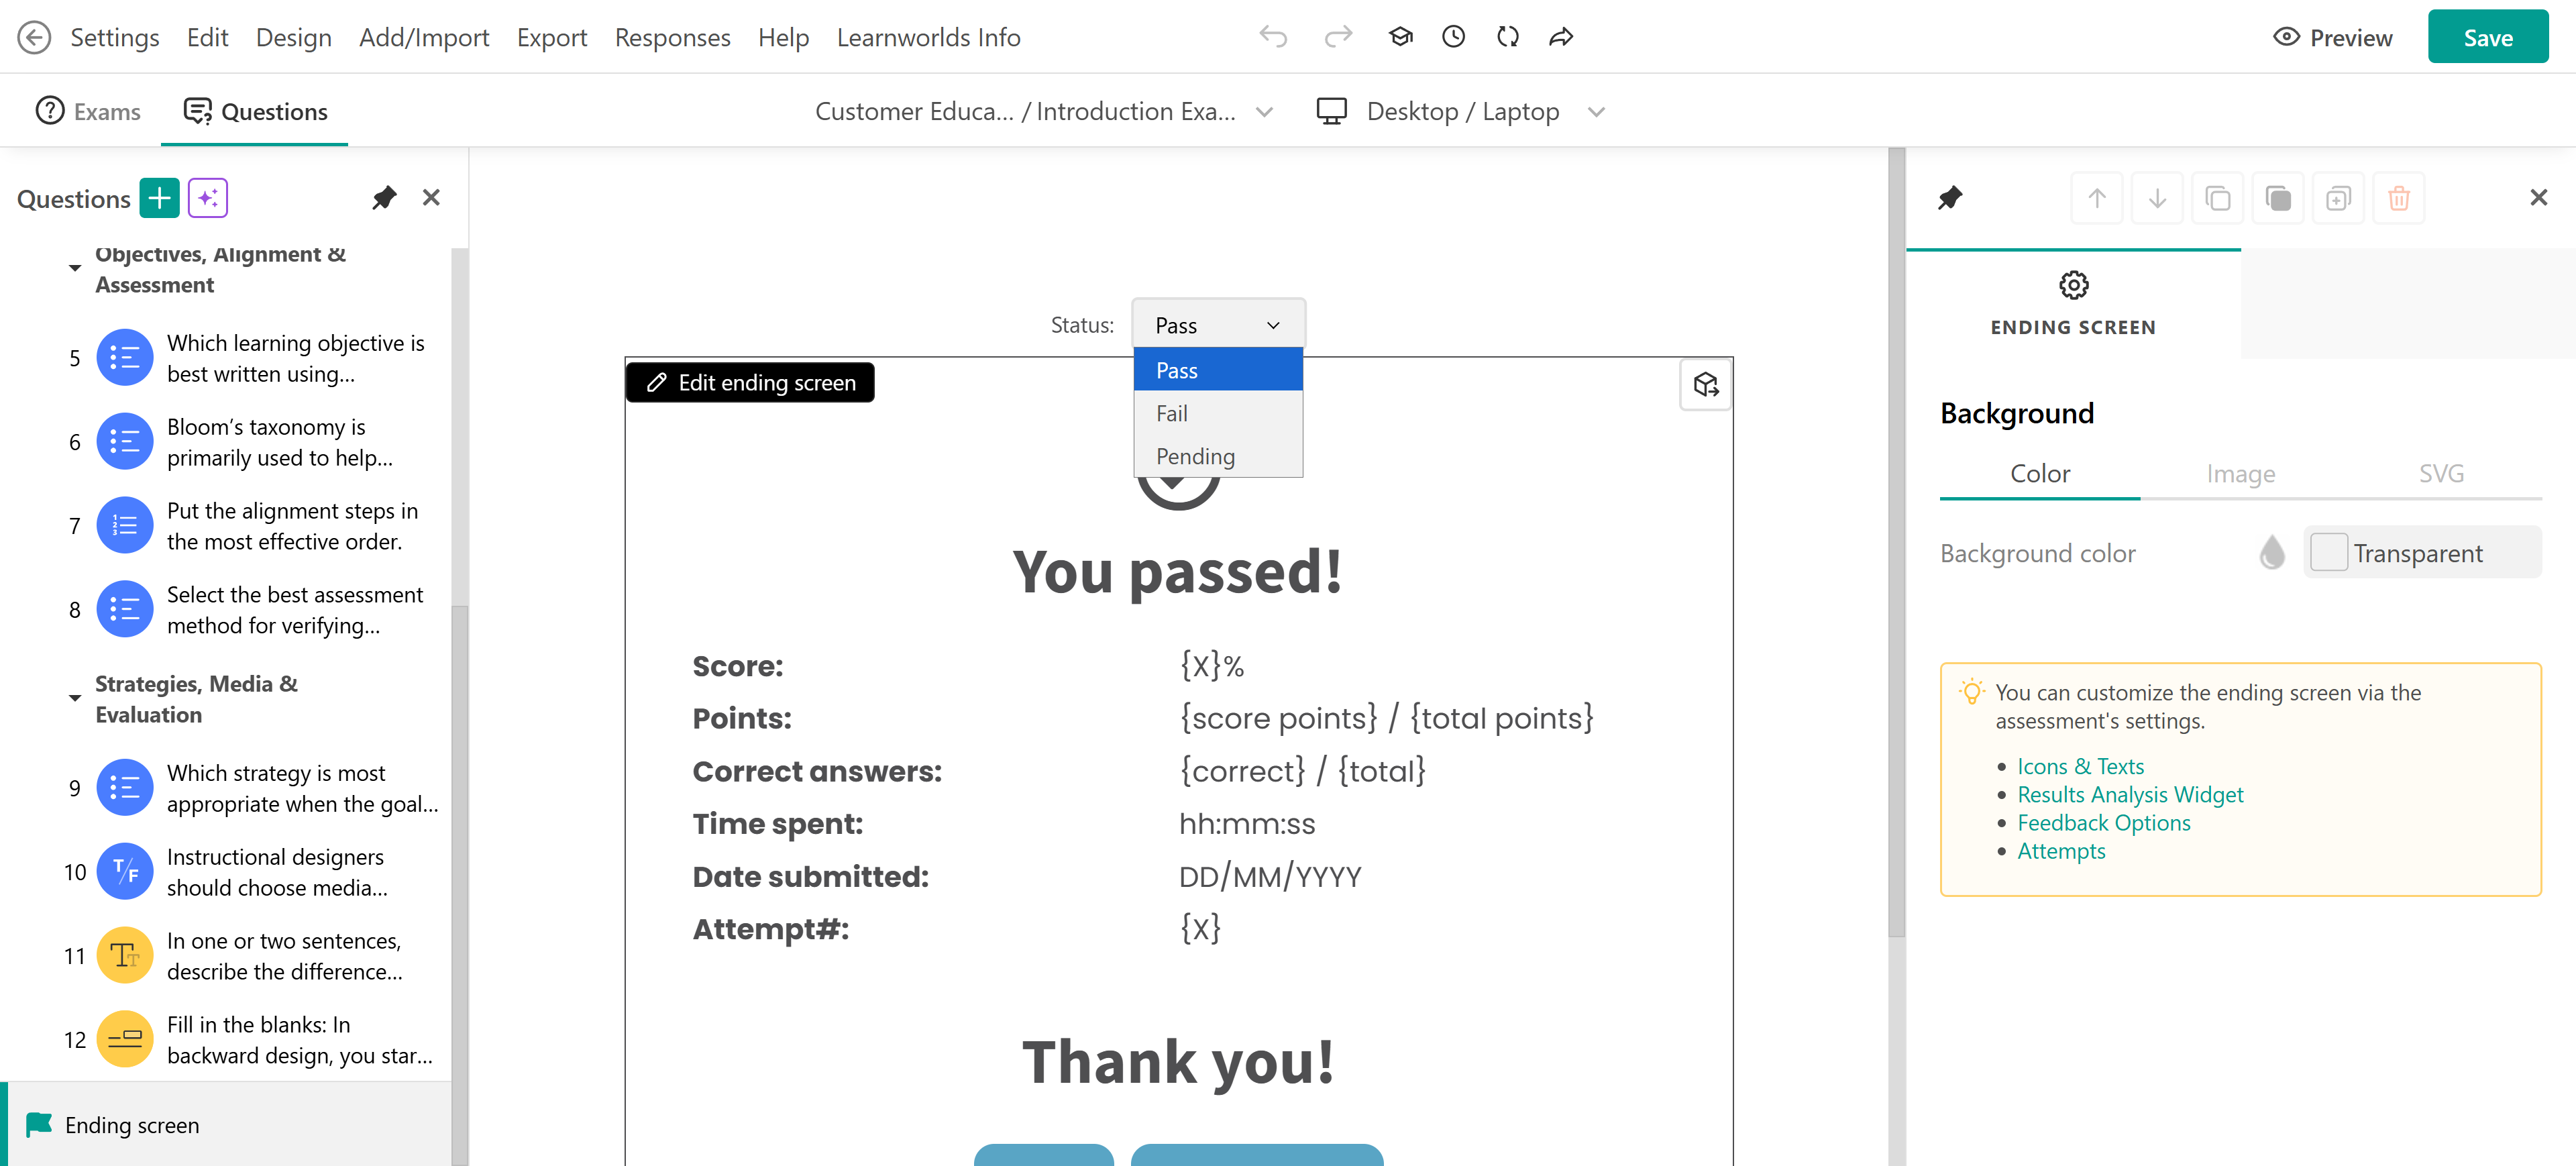
To alter the ending screen's text, you will need to click on the Assessment container. The Design form will be opened, and then you can select the Assessment Viewer tab and change the text. Alternatively, you can go to the Language option from Settings.
LearnWorlds allows admins to customize the widgets displayed on this screen, ensuring learners receive relevant feedback and insights. To configure the ending screen, go to Settings → Ending Screen and choose what to include. You can add:
- Results Analysis Widget: This widget provides learners with key performance metrics. Admins can customize it to include elements such as icons, titles, scores, points, correct answers, time spent, date of submission, and the number of attempts.
- Pending Manual Grading: If the exam includes open-ended questions that require manual grading, admins can decide whether learners will see correct answers and feedback immediately or only after grading is completed.
After the learner submits their assessment, they will see one of the available Pass/Fail or Pending screens. If manual review is needed, after the review is completed, the assigned grade is automatically shown inside the Gradebook, too. Learners receive a notification once their submission has been reviewed. They can then return to their assessment to view the provided feedback and check their results. Based on their performance, they will see either a 'Pass' or 'Fail' screen.
Reviewing and grading responses
All learners’ responses to an exam are stored under the Responses tab, where you can view, edit, and export submissions. You can find out more on reviewing learner responses in this article. 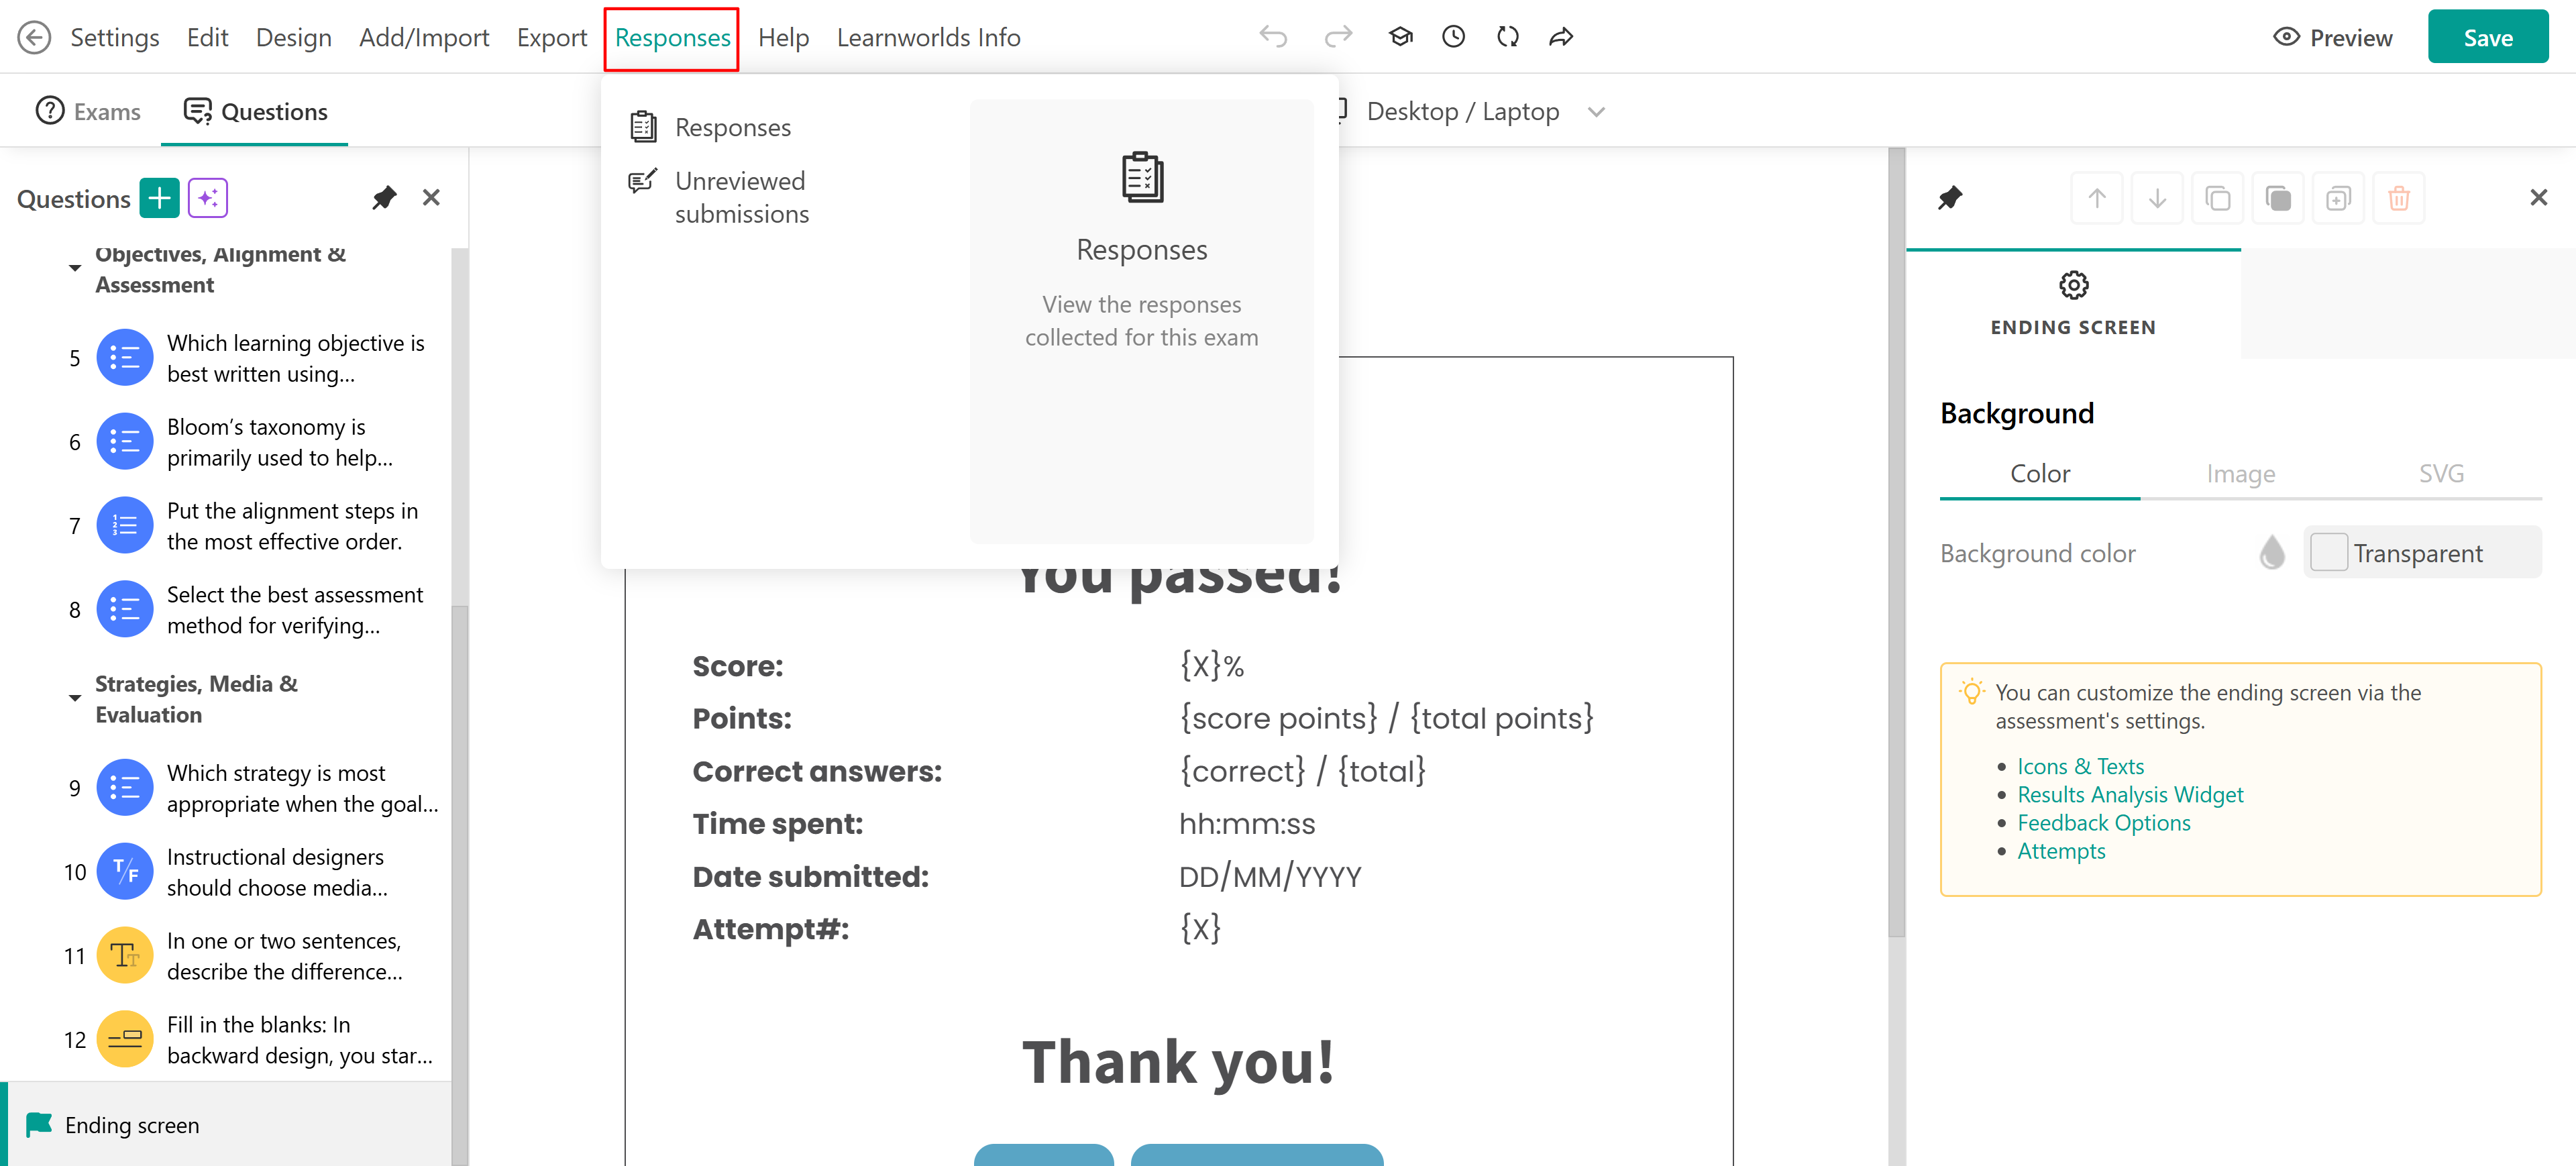
If you add a Text Assignment, File assignment, or Record Video type of question in your assessment learning activity, users will view the Pending status on the Ending screen once they submit the assessment. You will need to grade those types of submissions for the assessment to be considered Passed or Failed.
The grade will be available only in the Review Center section within your school and not in the Gradebook (Courses → Review Center). When you grade the assignment, it is automatically transferred to the Gradebook.
The Review Center is where admins review, grade, and provide feedback on submitted assessments. It allows:
- Viewing ungraded submissions
- Assigning scores and feedback.
- Tracking graded assessments for future reference
The Gradebook is a centralized tool for managing learner grades. It enables:
- Viewing and exporting grades
- Editing scores and resetting attempts
- Identifying incomplete or failed submissions
You can find out more in our respective article.
- The Undo/Redo option can be used within the editing mode of the type of questions and not for the assessment settings, design, responses, etc.
- The Undo/Redo option can also be utilized after saving a Page or Assessment/Form if you do not leave the page you are editing.