Starting and Ending Screens are important components of the assessment experience in LearnWorlds. They help create a smooth flow for learners by offering context before an assessment begins and delivering meaningful feedback or follow-up actions after submission.
The Starting Screen serves as an introduction, allowing you to welcome users, explain the purpose of the activity, and share any important instructions. It appears before the assessment starts and does not count toward the assessment time.
The Ending Screen is shown after the user submits their responses. Depending on the type of assessment, it can display a simple confirmation message, the learner’s score, feedback, pass/fail status, or instructions for the next steps (such as awaiting manual review or retaking the exam).
In this guide, we’ll walk you through how to customize the Starting and Ending Screens across different types of assessments—including exams, forms, self-assessments, and certificates—to enhance the learner experience and ensure clarity throughout the process.
In this article, we will walk you through how to customize these screens depending on the type of assessment you’re using.
Exams
Understanding Starting and Ending Screens in Exams
| Feature | Starting Screen | Ending Screen |
|---|---|---|
| Purpose | Introduces the exam, and provides instructions. | Displays final score, feedback, and status. |
| Timing | Appears before the exam starts. | Appears after the exam/form is submitted. |
| Impact on Exam Duration | Does not count toward exam time. | Does not affect exam duration. |
| Customization Options | ✅ Template, text, widgets ❌ Cannot show results | ✅ Text, widgets, score & status display |
| Deletion | ✅ Can be removed | ❌ Cannot be removed |
| Result Display | ❌ No | ✅ Yes |
| Status Options | ❌ None | ✅ Pass / Fail / Pending |
| Feedback & Retakes | ❌ Not available | ✅ Feedback & retake options available |
Graded Assessments (Exam) Starting Screen
The Starting Screen acts as a welcome or instruction page before the assessment begins. To edit it:
1. Click on the Starting Screen in the assessment editor.
2. Select a template, by hovering over the screen and clicking the replace icon to choose a new layout.

3. Customize the content:
- Edit the text by clicking on the text widget.

- Add widgets, by clicking on the plus icon, such as buttons, images, or logos.

4. Remove the screen (optional):
- Click the bin icon to delete the Starting Screen if you prefer to launch the exam immediately.

 The Starting Screen does not affect the exam timer.
Graded Assessments (Exam) Ending Screen
The Ending Screen appears after submission and provides feedback, score, and status options. This screen cannot be removed.
To customize the Ending Screen:
1. Select the Assessment Container in the builder, and choose one of the available views:
- Pass
- Fail
- Pending (for manually graded exams)

2. Edit the screen’s content:
- Text: Edit the text by clicking on the text widget.
- Widgets: Click on the plus icon and add navigation buttons, images, and more.
3. Go to Design → Assessment Viewer to update icons and messages depending on the outcome shown on this screen.

Configure Ending Screen Display Options:
Navigate to Settings → Ending Screen to enable/disable the following elements:
- Show results analysis widget
- Ending screen icons
- Ending screen title texts
- Score (%)
- Points
- Correct answers
- Time spent
- Date submitted
- Attempt number
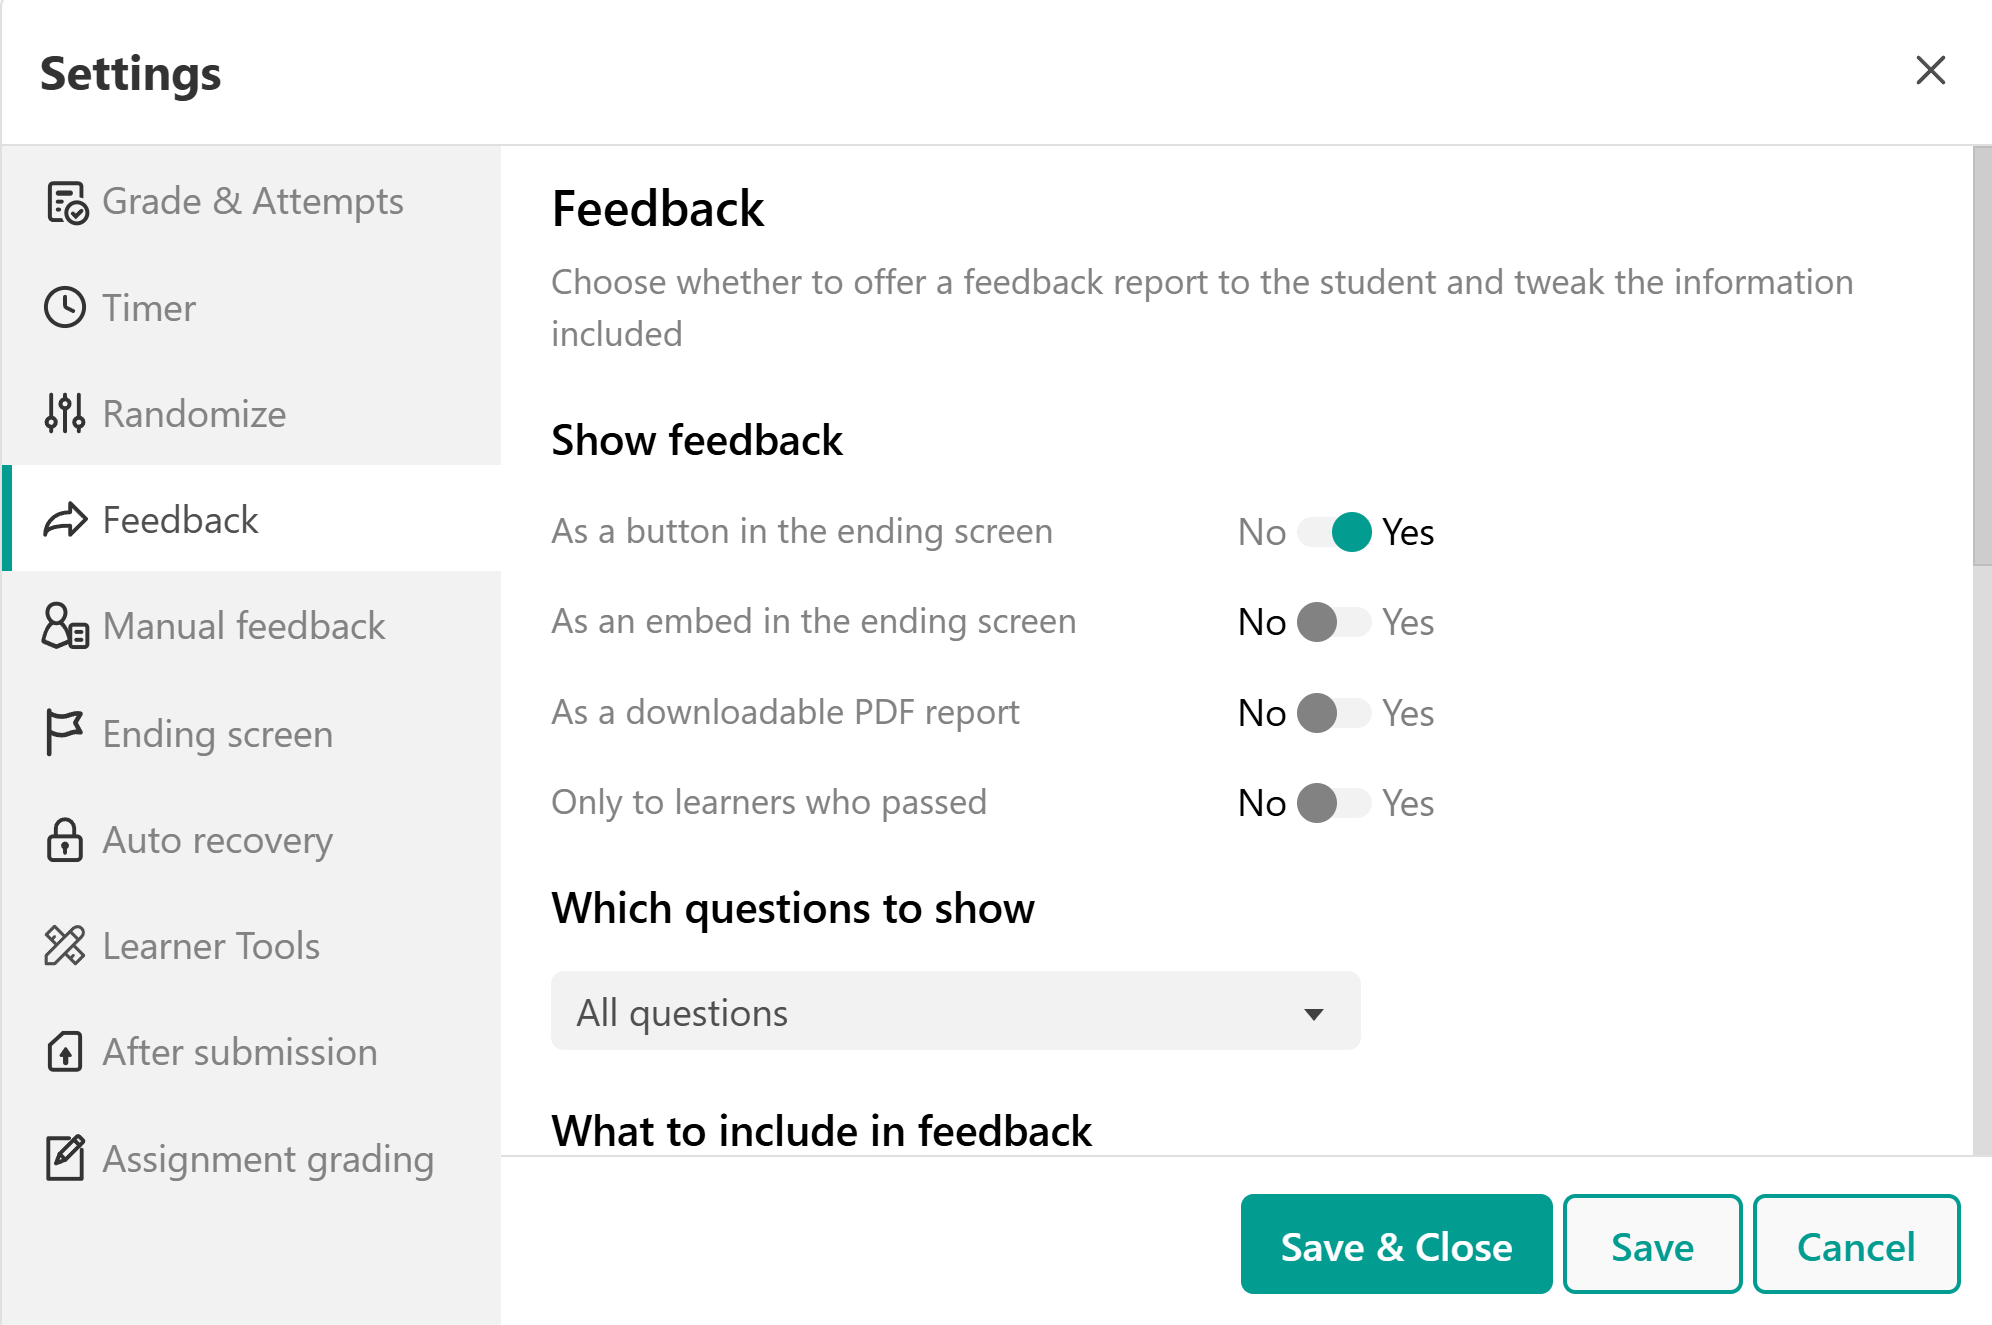
Enable Feedback Report:
To provide detailed feedback to learners, go to Settings → Feedback, and choose how to display feedback:
- As a button learners can click.
- Embedded directly on the Ending Screen.
Allow Retakes:
To allow learners to retake the exam:
- Go to Settings → Grade & Attempts.
- Enable the Retake Button, by allowing multiple attempts.

Forms
Starting Screen (Forms)
The Starting Screen in Forms is optional and can be used to display a welcome message or a brief introduction. By default, course forms do not include a Starting Screen, but you can easily add one by clicking + Add Starting Screen and selecting a template from the available options.

To customize the starting screen:
1. Click on the Starting Screen.
2. Use the plus (+) icon to add elements such as:
- Text
- Images
- Buttons
- Icons, and more!
You can replace the default message and fully personalize it to guide the user.
Ending Screen (Form)
This ending screen in forms is used to confirm submission.
- Contains a simple “Thank you” message.
- Only one default view (no pass/fail/pending options).
- Can be customized with:
- Editing the Text
- Adding Widgets (e.g., buttons or images)
Self-Assessments
Starting Screen (Self Assessments)
The Starting Screen works the same as in exams (graded assessments). See the Exam → Starting Screen section above for full instructions.
Ending Screen (Self-Assessment)
This screen helps learners reflect on their performance rather than showing scores.
Status Options:
- Completed – Indicates the user has submitted the assessment.
- Pending – If feedback is required, the learner will see this status until it's reviewed.

Customize the Ending Screen:
1. Select the Assessment Container.
2. Choose the view (Completed or Pending).
3. Edit the content:
- Display a completion message
- Show a Review Center Status. You can also configure the widgets presented in the ending screen (e.g. results analysis widget) under Settings → Ending screen.
- Add a feedback summary (if enabled under Settings → Feedback)
- Allow Retake option (if permitted under Settings → Grade & Attempts)
As mentioned, the ending screen text and icons are customizable under Settings → Assessment Viewer.
Certifications
Starting / Welcome Screen
The Starting Screen in Certifications is optional and can be used to display a welcome message or a brief introduction. By default, certifications do not include a Starting Screen, but you can easily add one by clicking + Add Starting Screen and selecting a template from the available options.
Ending Screen (Certificate of Knowledge)
The Ending Screen functions similarly to the one used in exams but includes certificate-specific features. One key element is the Download Button (once the assessment is passed), which allows learners to download their certificate upon completion.
Status Options:
- Pass – The user has met the passing criteria.
- Fail – User didn’t meet the requirements.
- Pending – Awaiting manual review.
Once reviewed, users will see either Passed or Failed, depending on their results.

Customize the Ending Screen:
Navigate to Settings → Ending Screen to enable/disable the following elements:
- Show results analysis widget
- Ending screen icons
- Ending screen title texts
- Score (%)
- Points
- Correct answers
- Time spent
- Date submitted
- Attempt number
Add or remove the::
- Feedback Button/Embed option – To show the feedback report under Settings → Feedback.
- Social Media Share Button – Enable/disable under Settings → Certificate Sharing for LinkedIn, X, or Facebook.
As mentioned, the ending screen text and icons are customizable under Settings → Assessment Viewer.
Customizing the Starting and Ending Screens allows you to create a seamless and personalized learning experience. Whether you're introducing an exam, acknowledging form submissions, offering reflective feedback in self-assessments, or celebrating achievement with certificates, these screens provide flexibility and functionality tailored to your course goals.