
You can personalize your app's design using our Mobile App Builder, allowing you to design it according to your preferences. You can:
- Edit your mobile app theme explorer, color palette, and typography.
- Customize your mobile screens by adding sections and widgets, or use AI to quickly generate and refine their content (Profile and Community screens are for preview only).
- Create onboarding screens to introduce your app features and functionality.
In this article, we will guide you through the process of customizing your mobile app design, focusing on sections, and widgets within your mobile screens, and the development of onboarding screens.
To locate the Mobile App Builder, navigate to Mobile App → Design → Edit mobile app.
Mobile app builder overview
Create and customize your screens by adding sections and widgets, adjusting colors, fonts, layouts, and more. You can also use AI to generate new content or refine existing text throughout the Mobile App Builder.
Feel free to create and edit as many screens as necessary. While you can customize the More option, note that the Profile screen and the Community screen are for preview only.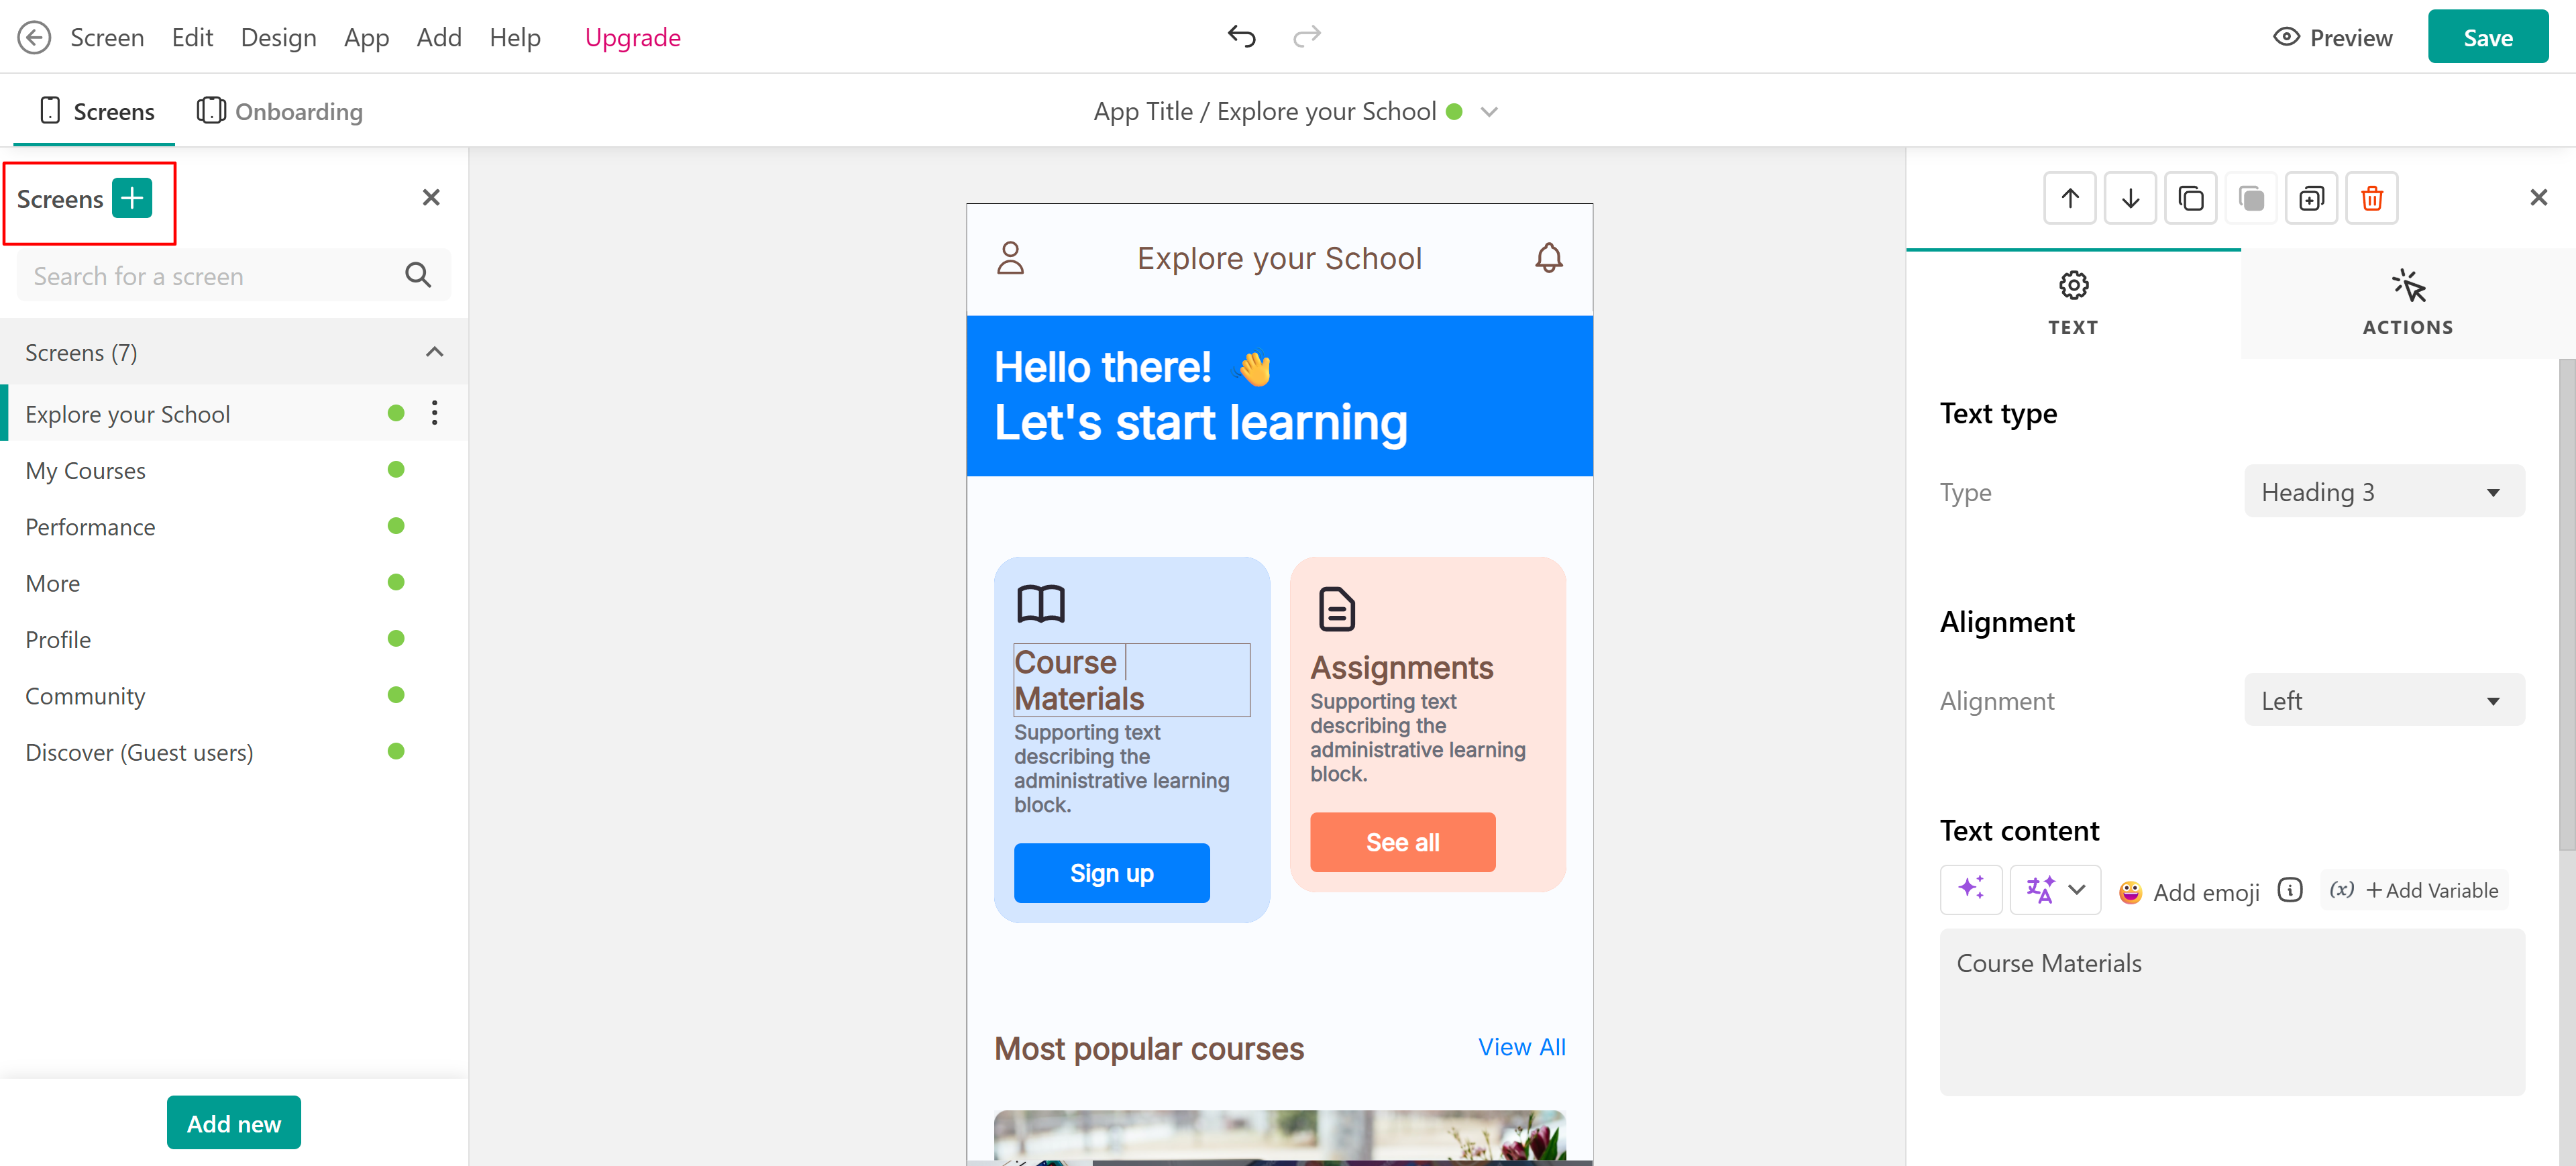
1. Screen tab: You can change the name of the screen by clicking on the Screen Properties.
2. Edit tab: You can:
- Undo changes.
- Redo changes.
- Copy all sections of the current editing screen.
- Paste all sections that were previously copied on the current editing screen.
- Clear content (all the widgets) on the screen.
3. Design tab: Here, you can edit the theme explorer, colors, typography, and screen layout.

Find more information on the mobile app theme explorer in our dedicated article.
4. App tab: You can:
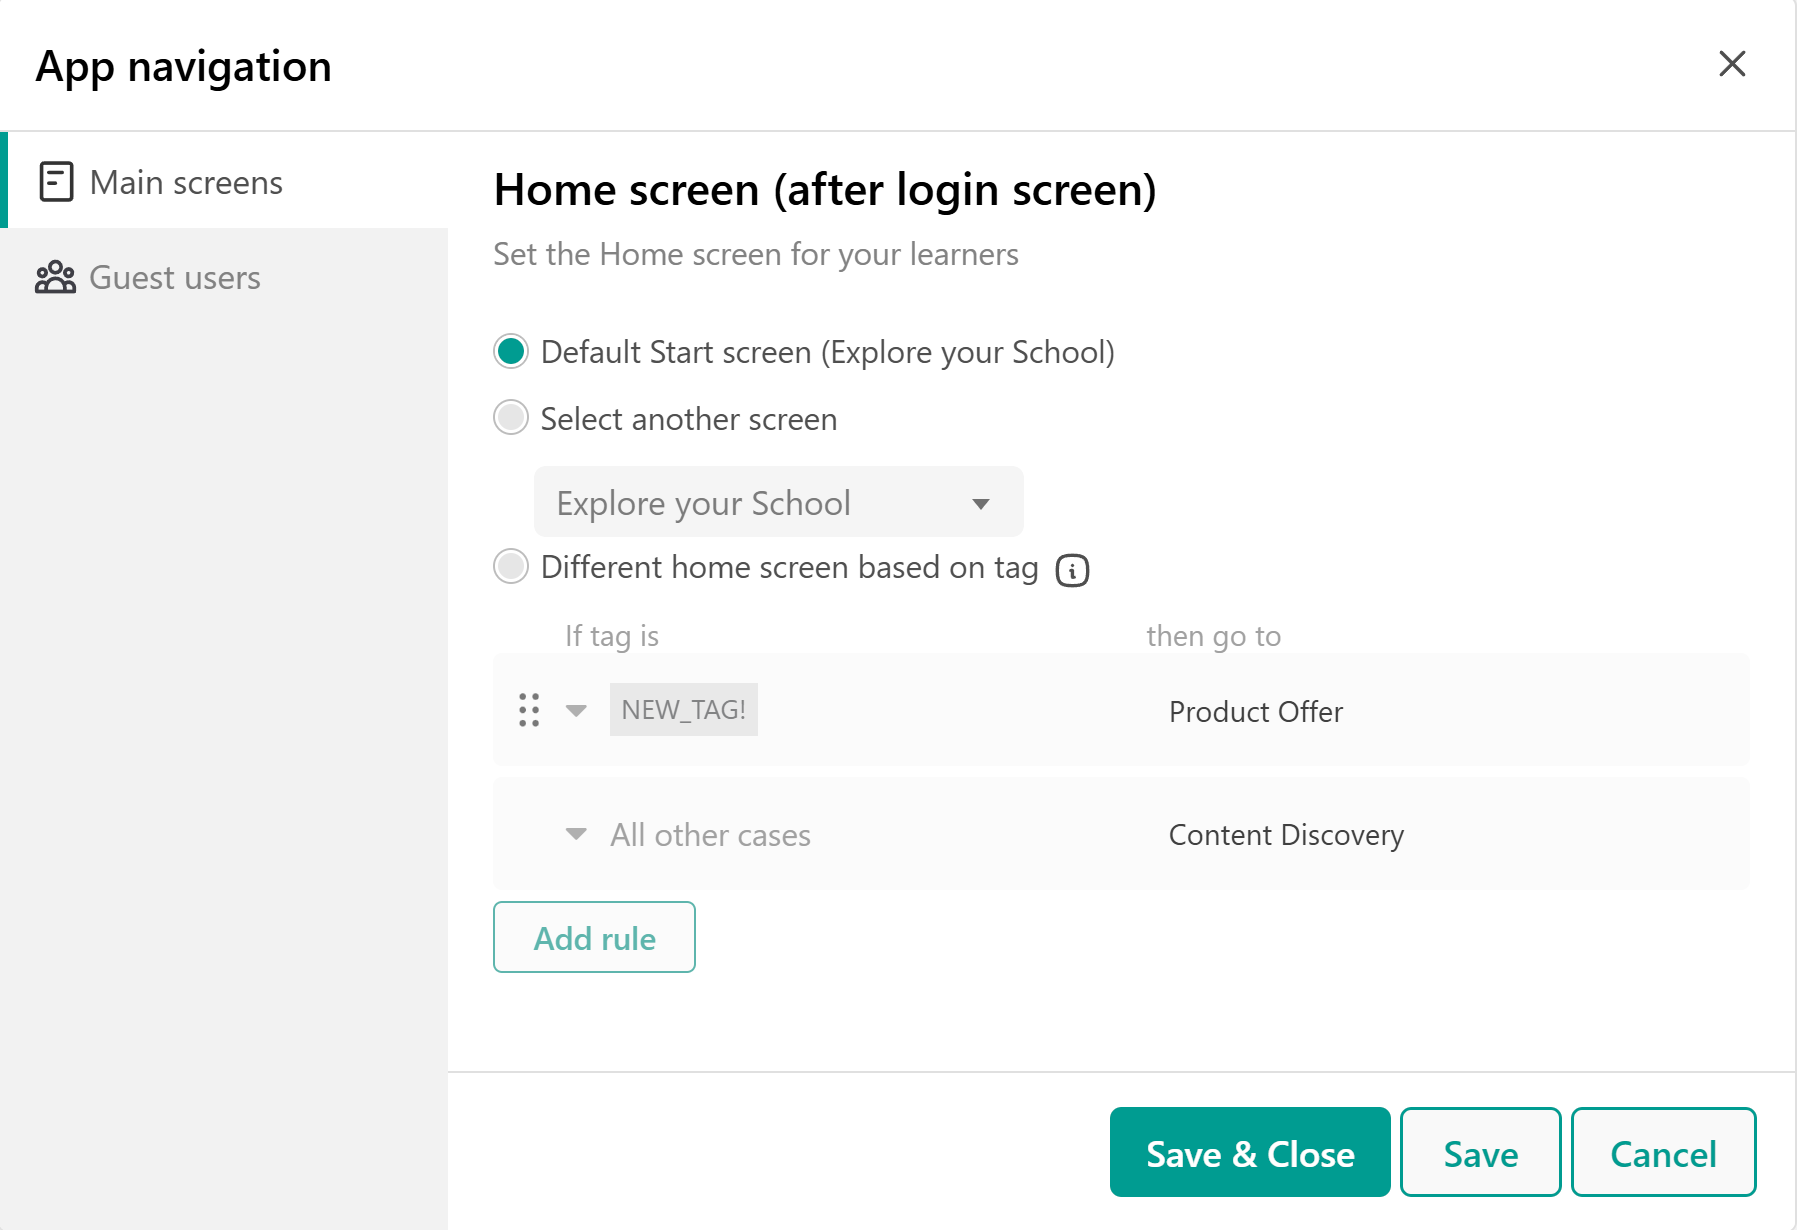
- Configure your app's navigation by choosing App Navigation.
- Under Main screens, you can select the Home screen for your learners, or you can use different home screens based on user tags to create unique home screens tailored to their needs.
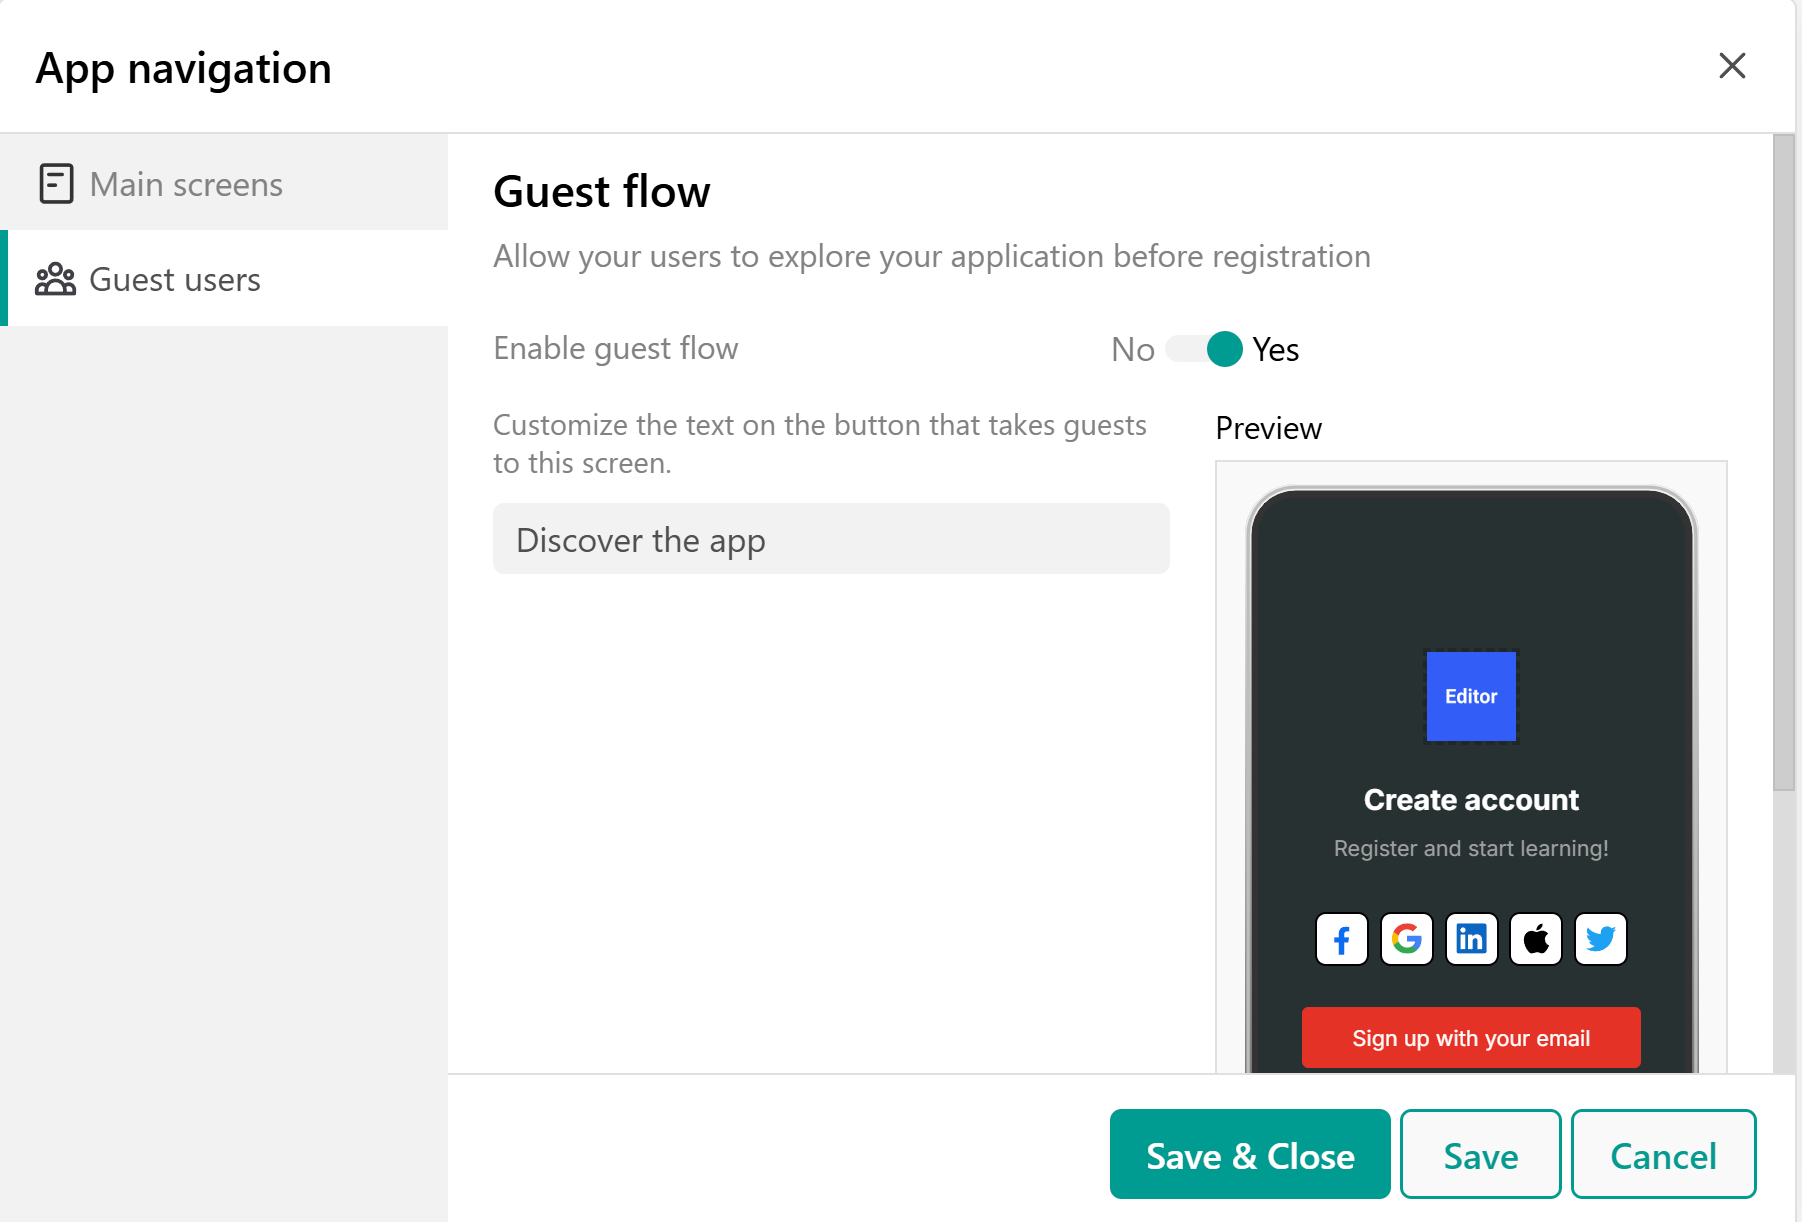
- Under Guest Users, you enable or disable the guest flow and customize the text on the button that takes guests to this screen.
- Edit the app language by selecting App language. You can select your app's locale if you wish to auto-translate system messages that do not appear on the list.

- Exit the Mobile App Builder.
5. Add tab: You will be able to add a new screen.
6. Help tab: You can find helpful resources such as how to build your branded mobile app and contact Support.
You can also Preview the changes you are making in real time. The changes, after saving, will take place in the mobile app immediately. The end-users who have already downloaded and installed the app need to restart the app to see the applied changes.
Create and edit content with AI
You can also create an entire mobile app screen with AI.
1. Click the + icon and choose Generate with AI.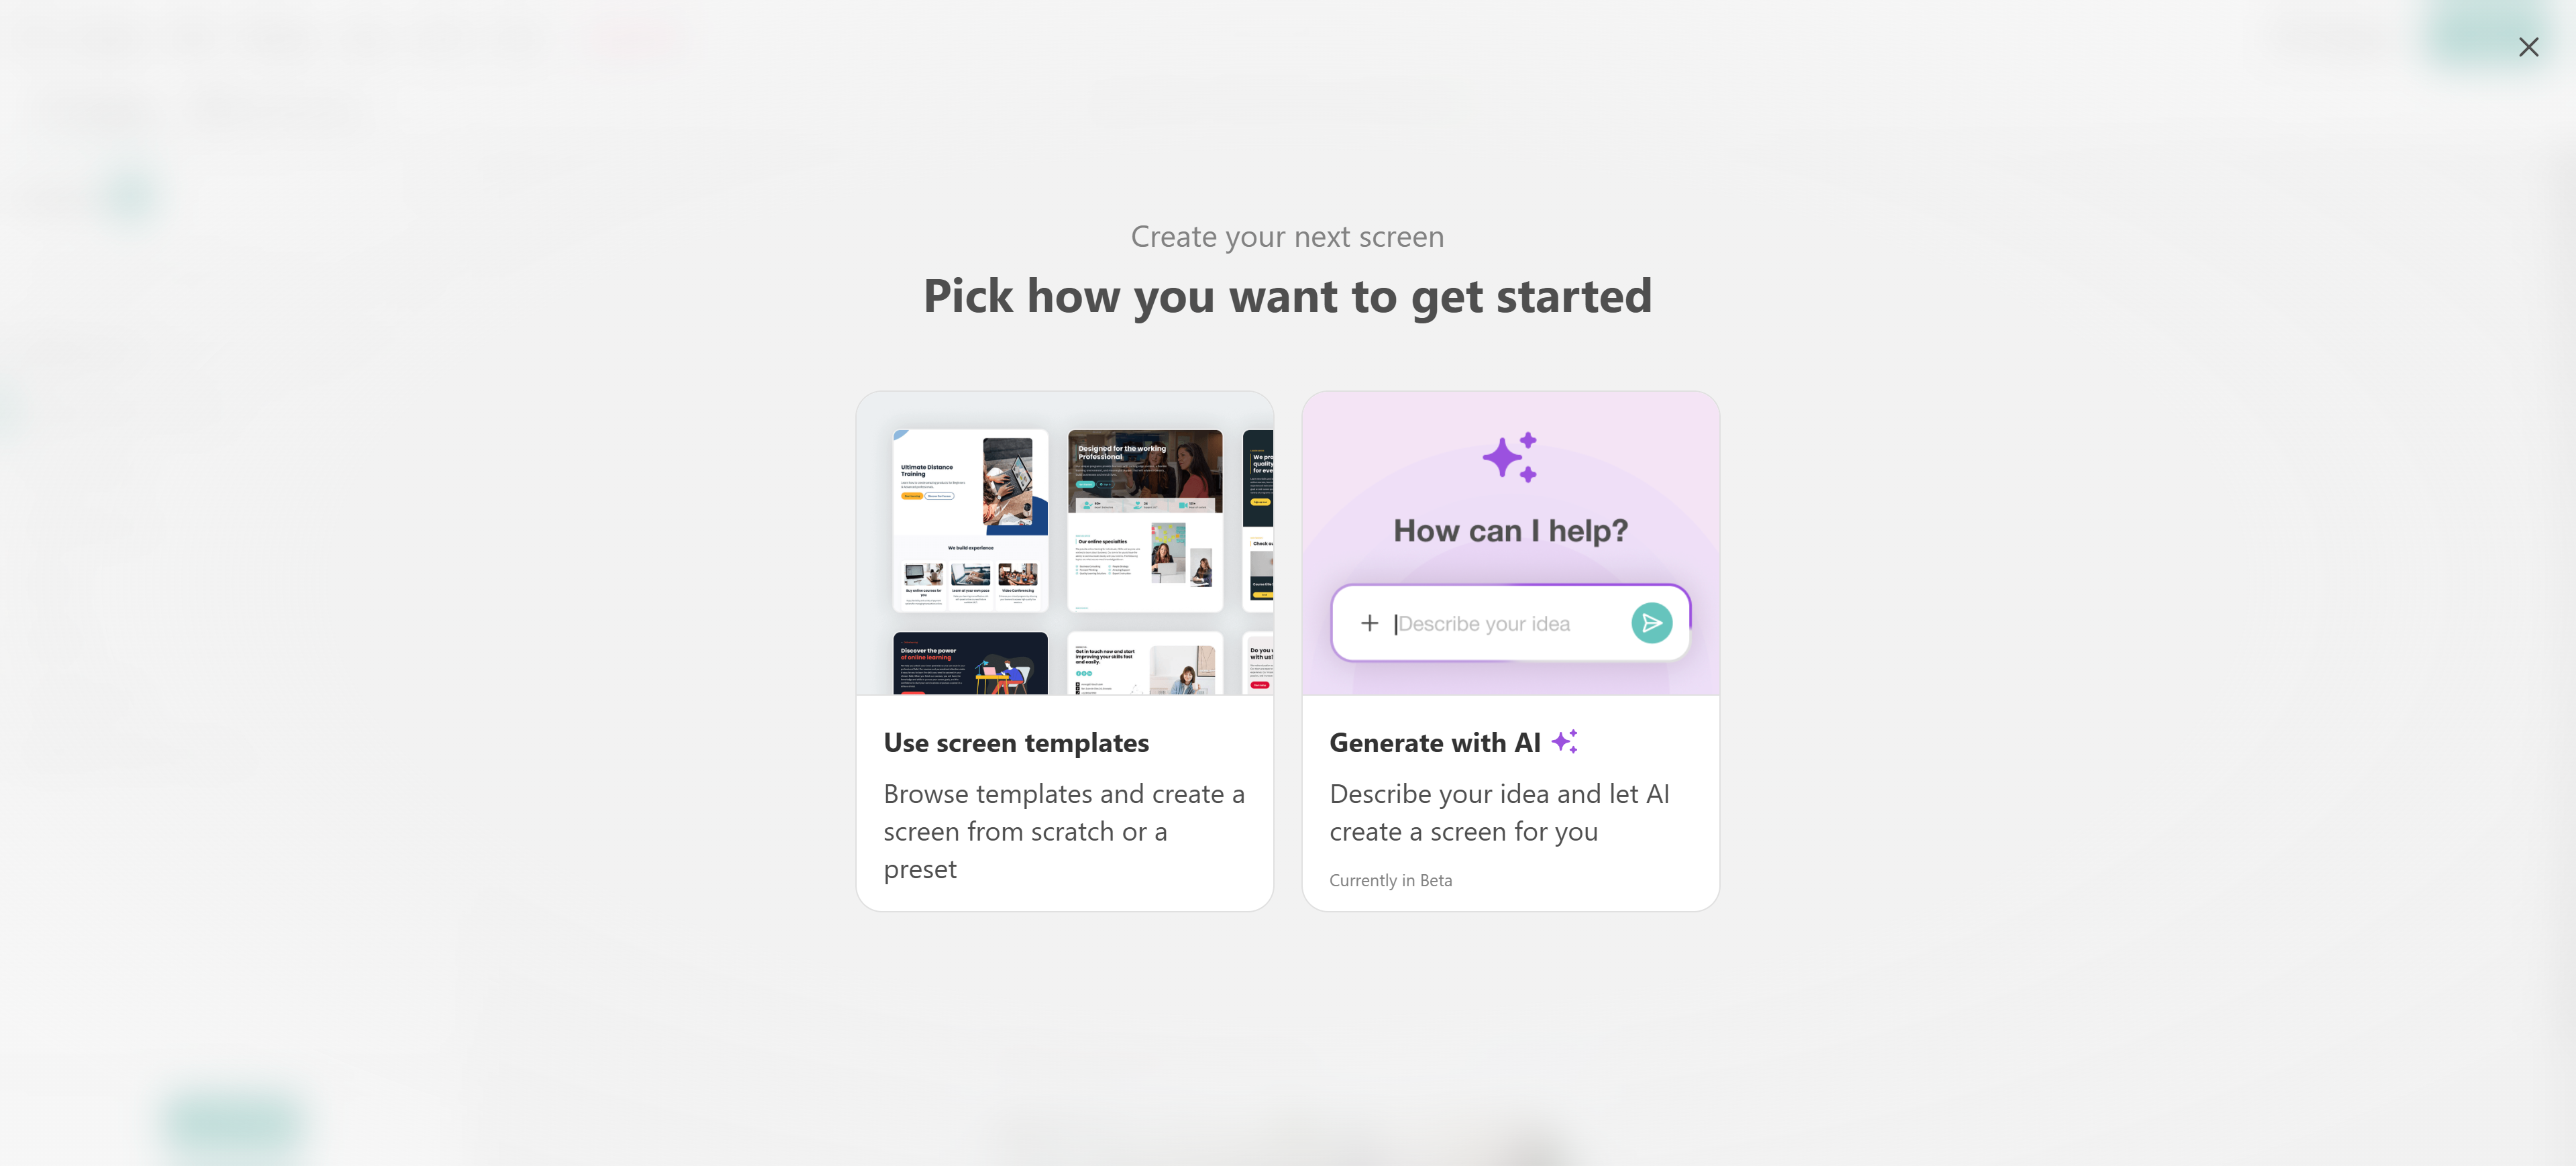
2. Describe what you'd like the screen to include. You can also attach resources, paste text, add references, or use parameters to guide the AI.
3. Press Enter to generate your screen.
AI will create a draft version of the screen, including its content and images. You can then review the result, rearrange sections, edit the generated content, or continue refining it by interacting with the AI chat.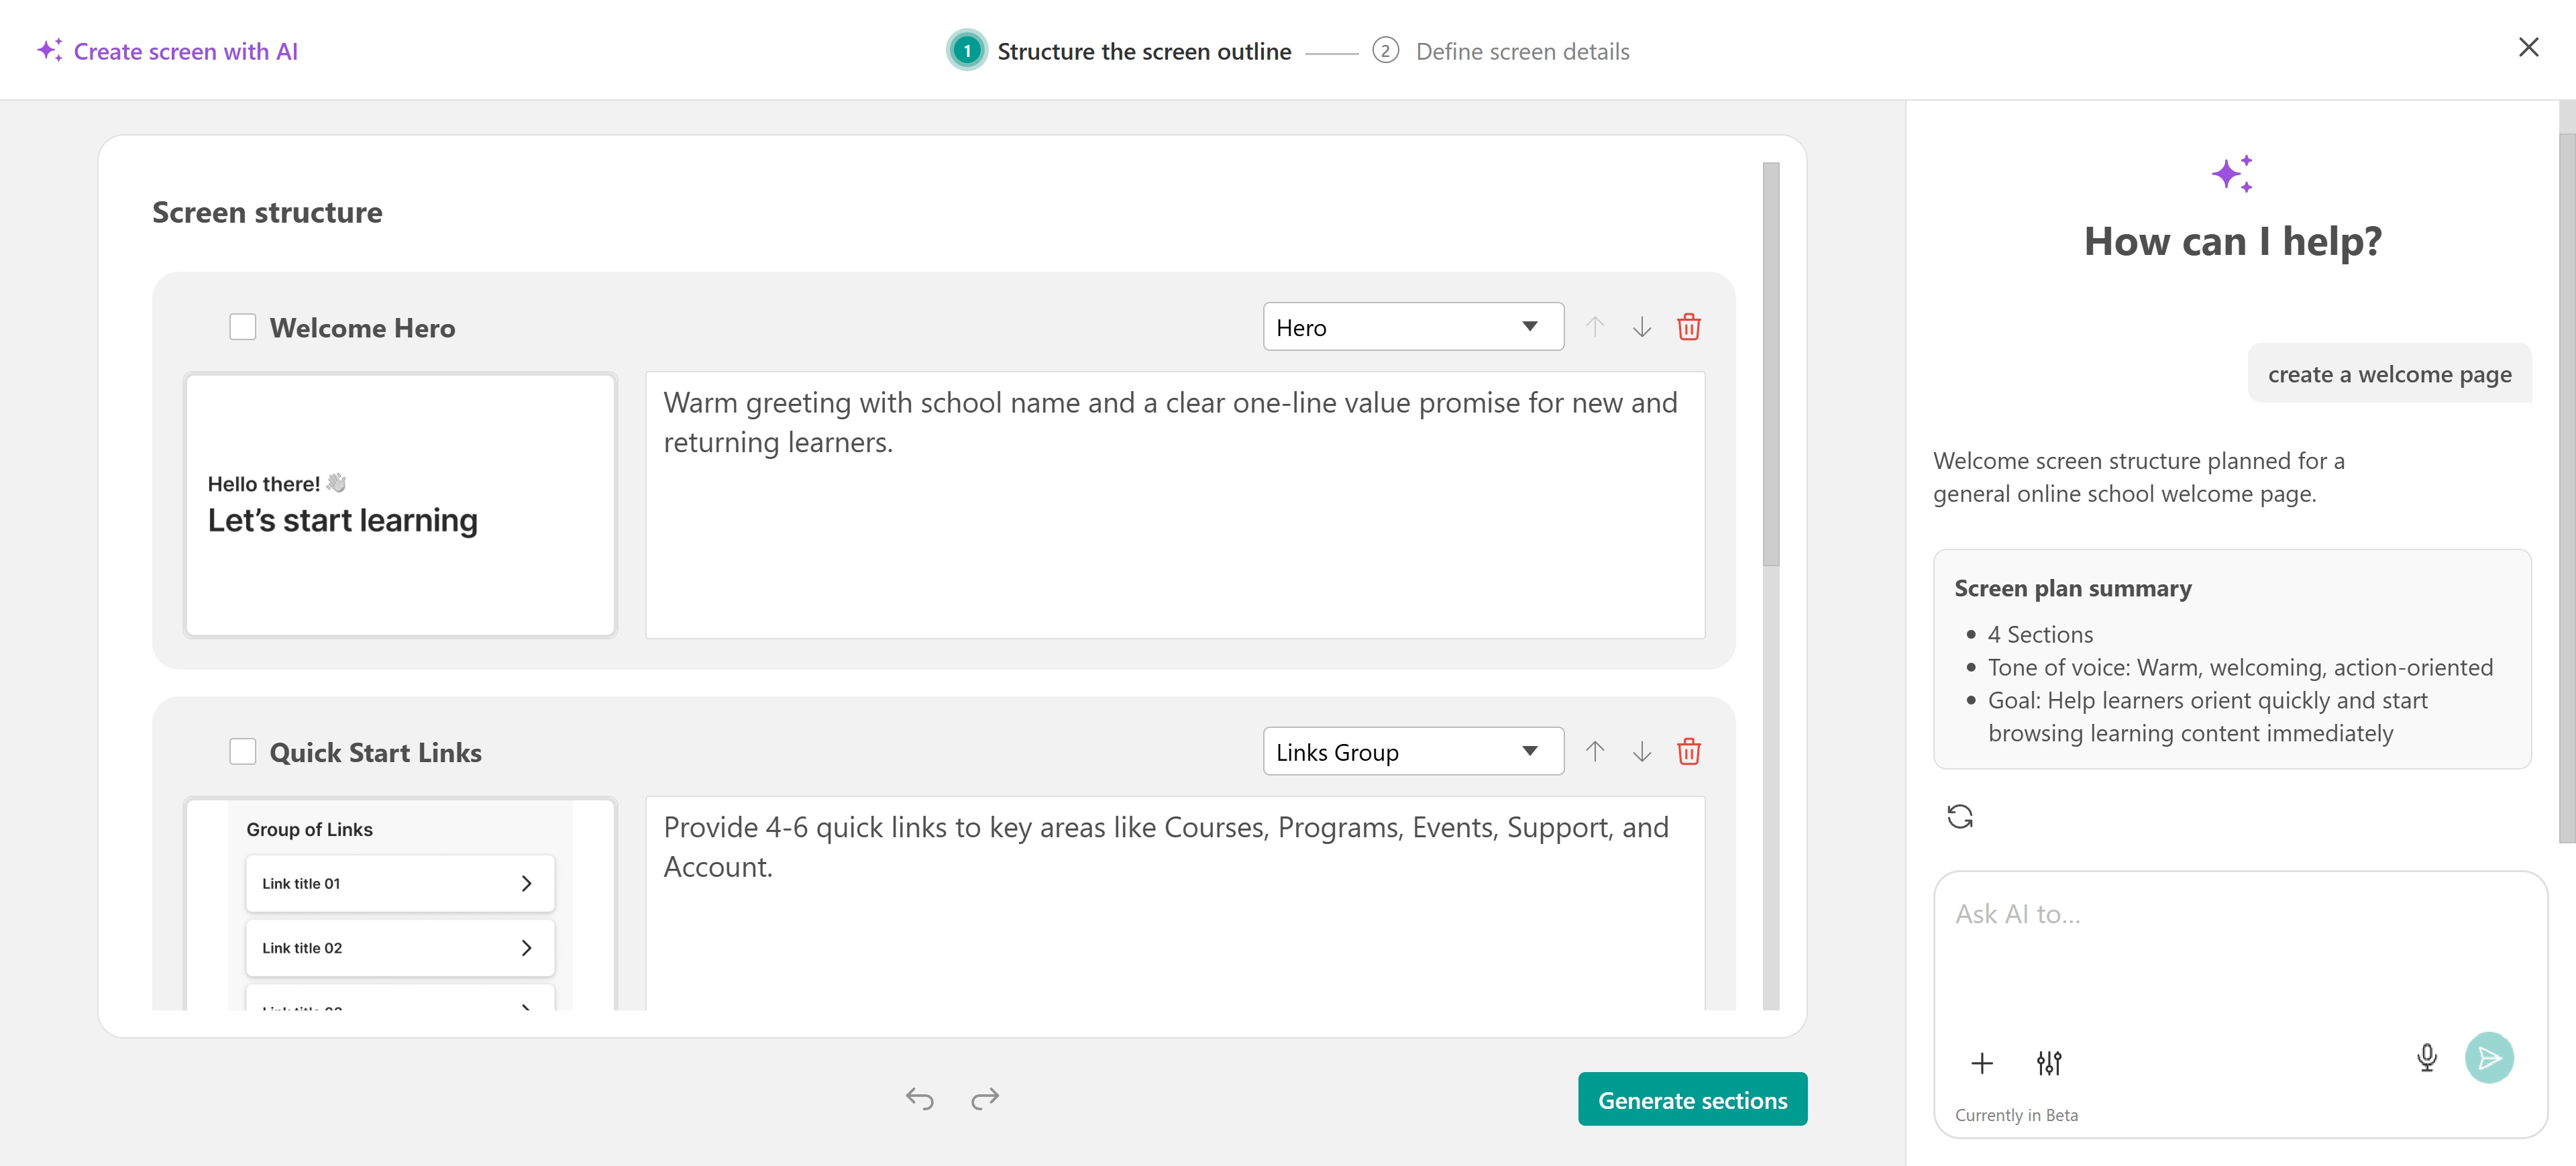
Once you're happy with the result, click Generate sections. The new screen will be created as a Draft, allowing you to continue editing it before publishing.
After the screen has been created, you can customize it just like any other screen by adding new sections or widgets. You can also click the AI button on a section to generate additional content or refine existing ones.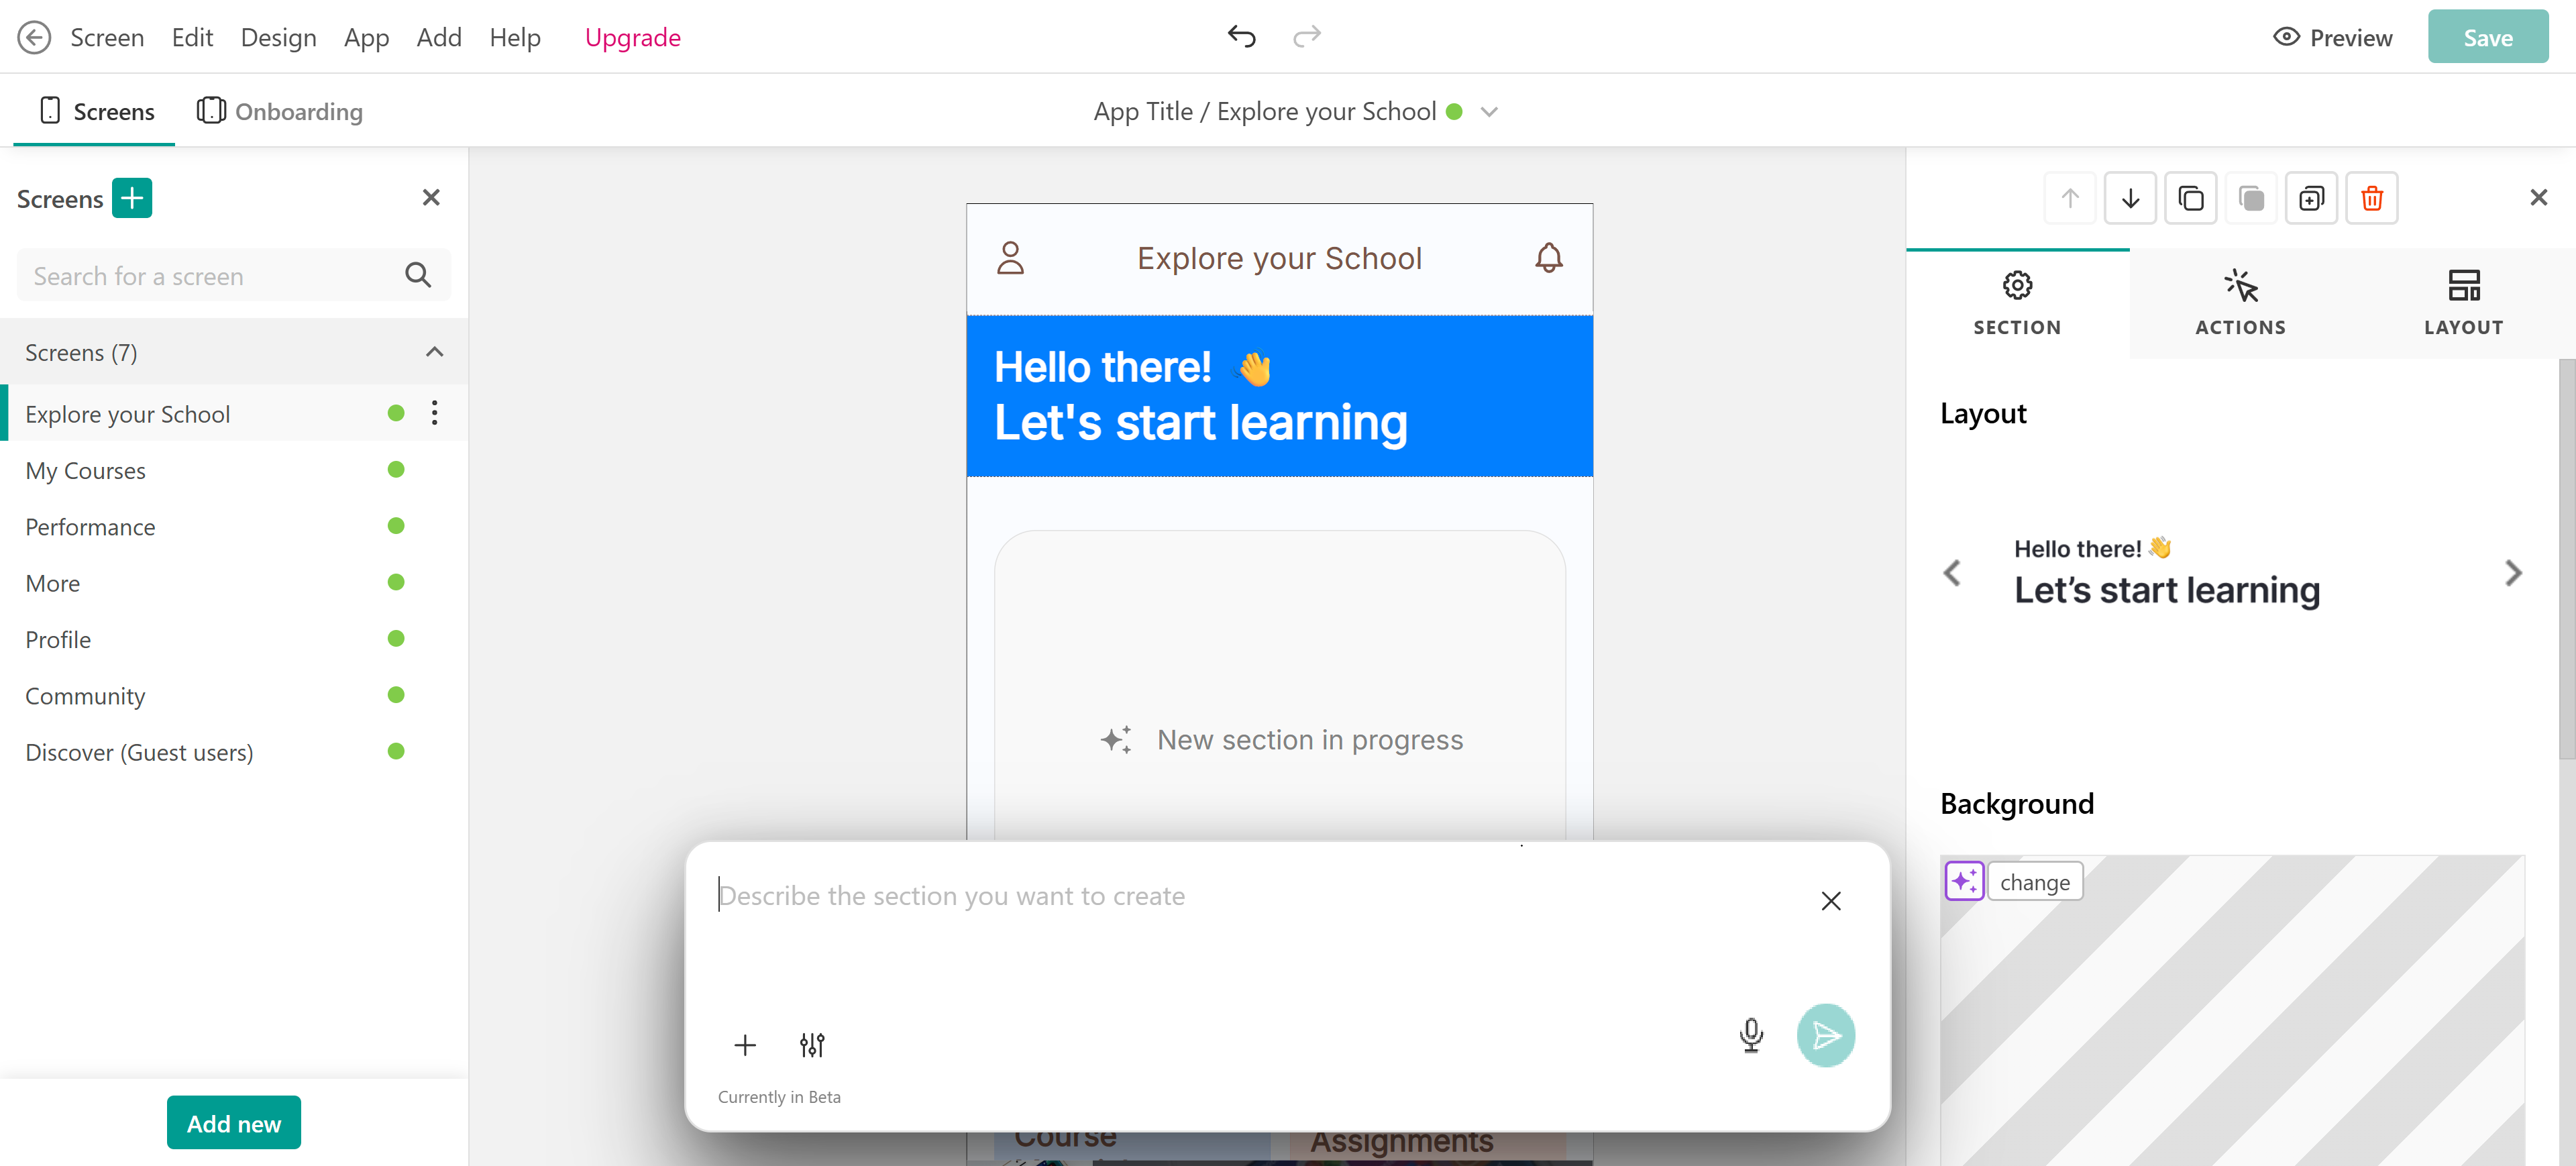
AI can also generate new images or update existing ones.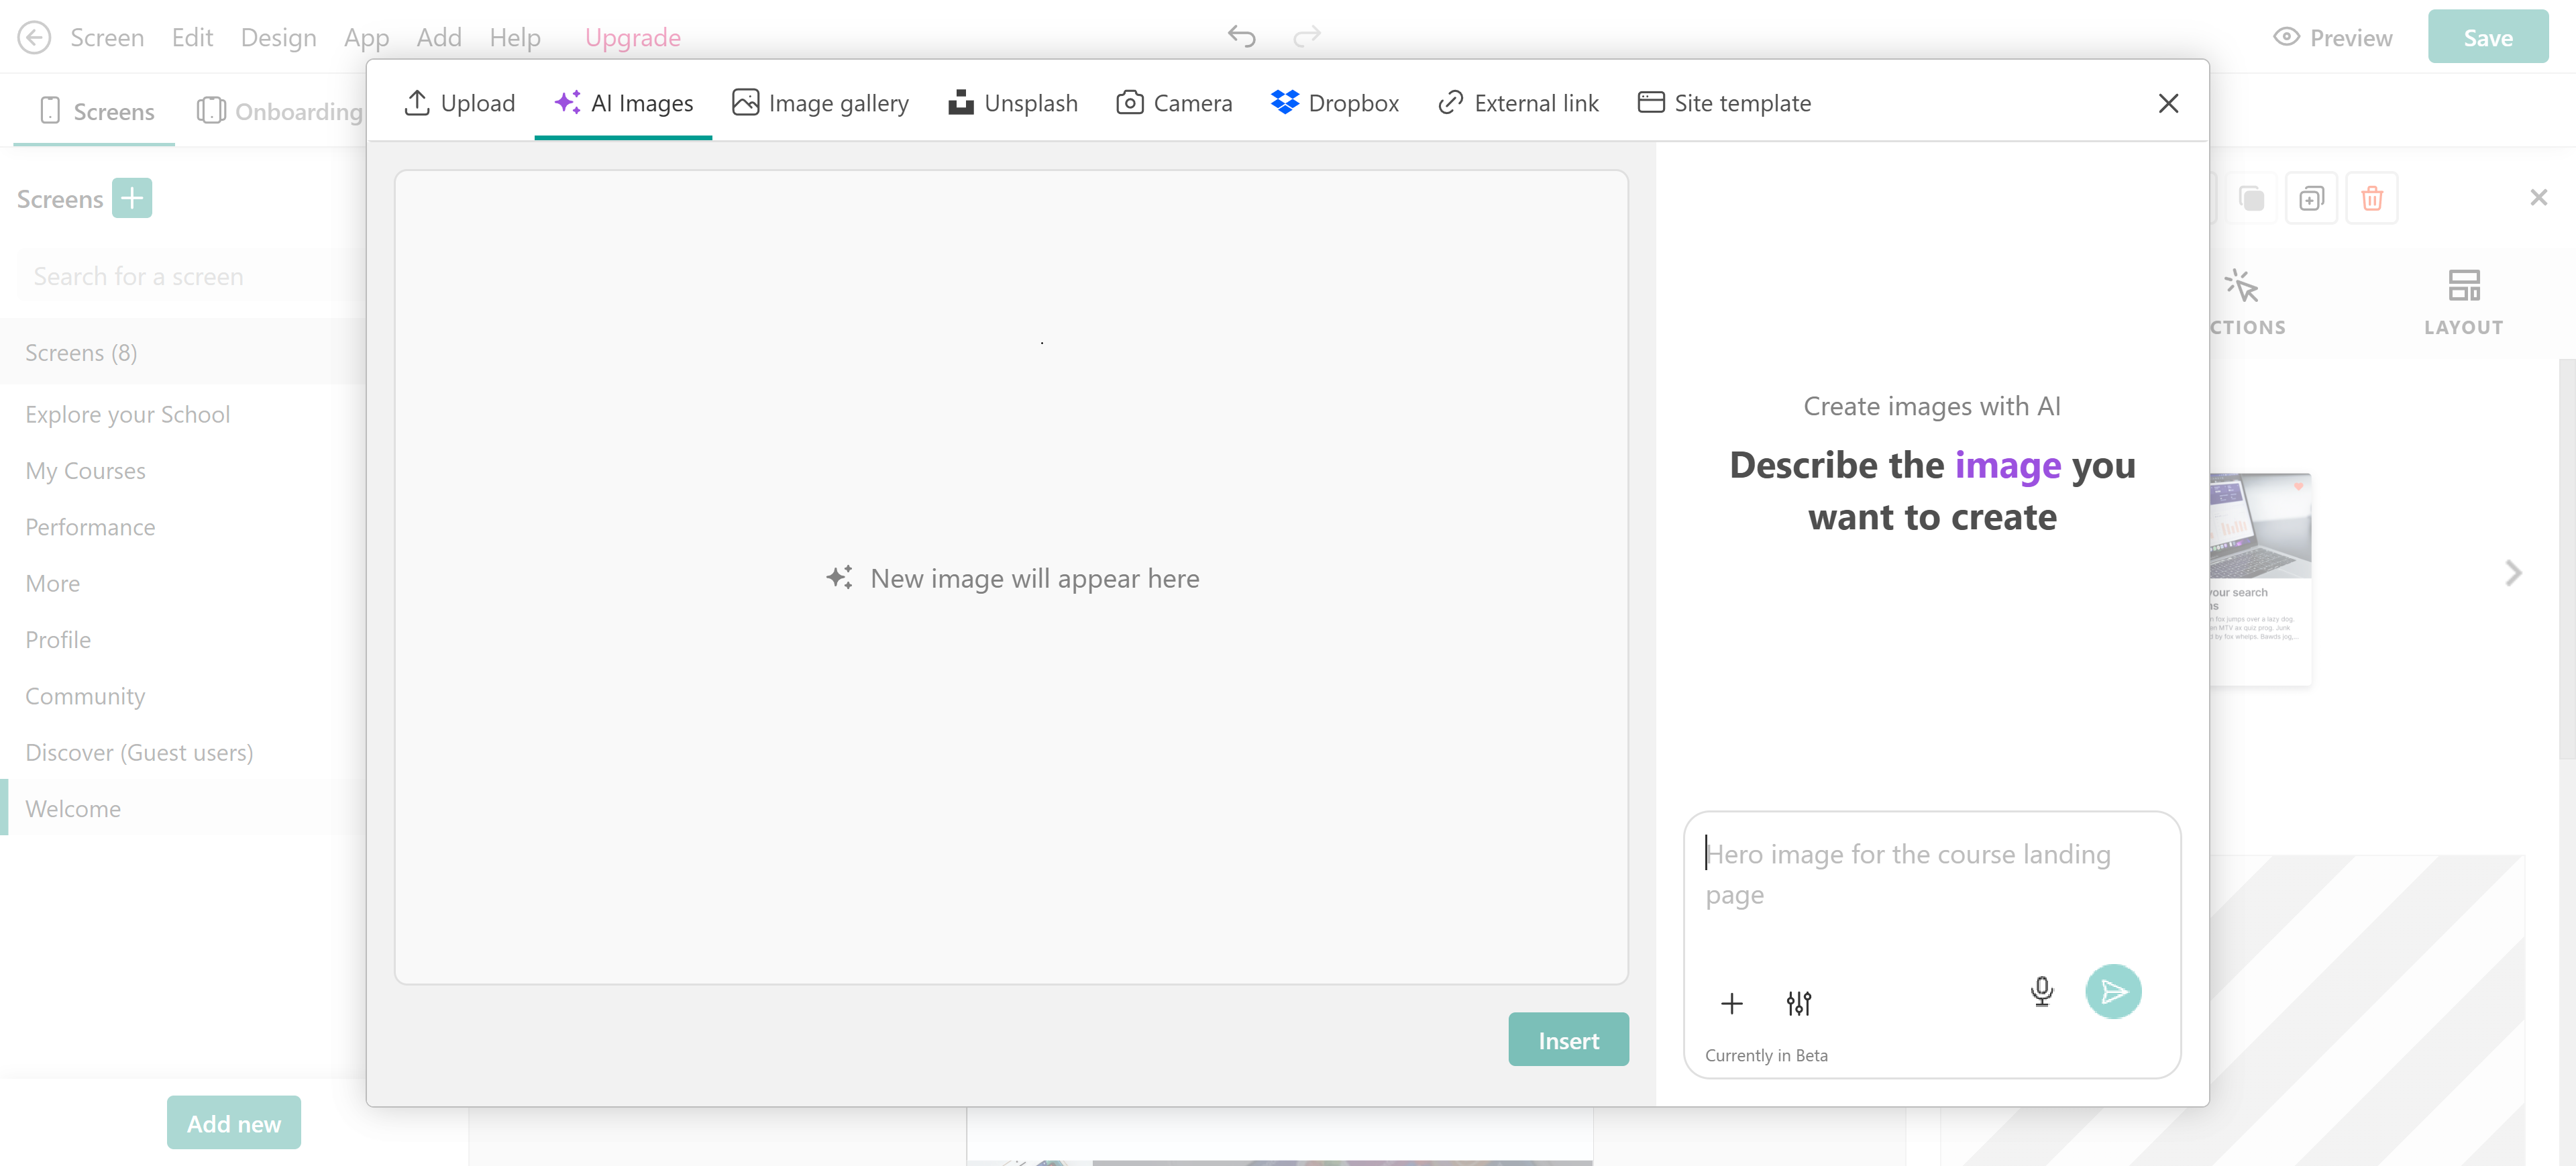
Mobile app sections
Screens are customizable by adding sections and widgets similar to our website builder. When adding a new section, you can either insert it as-is or choose Fill with AIto automatically generate content based on the selected template.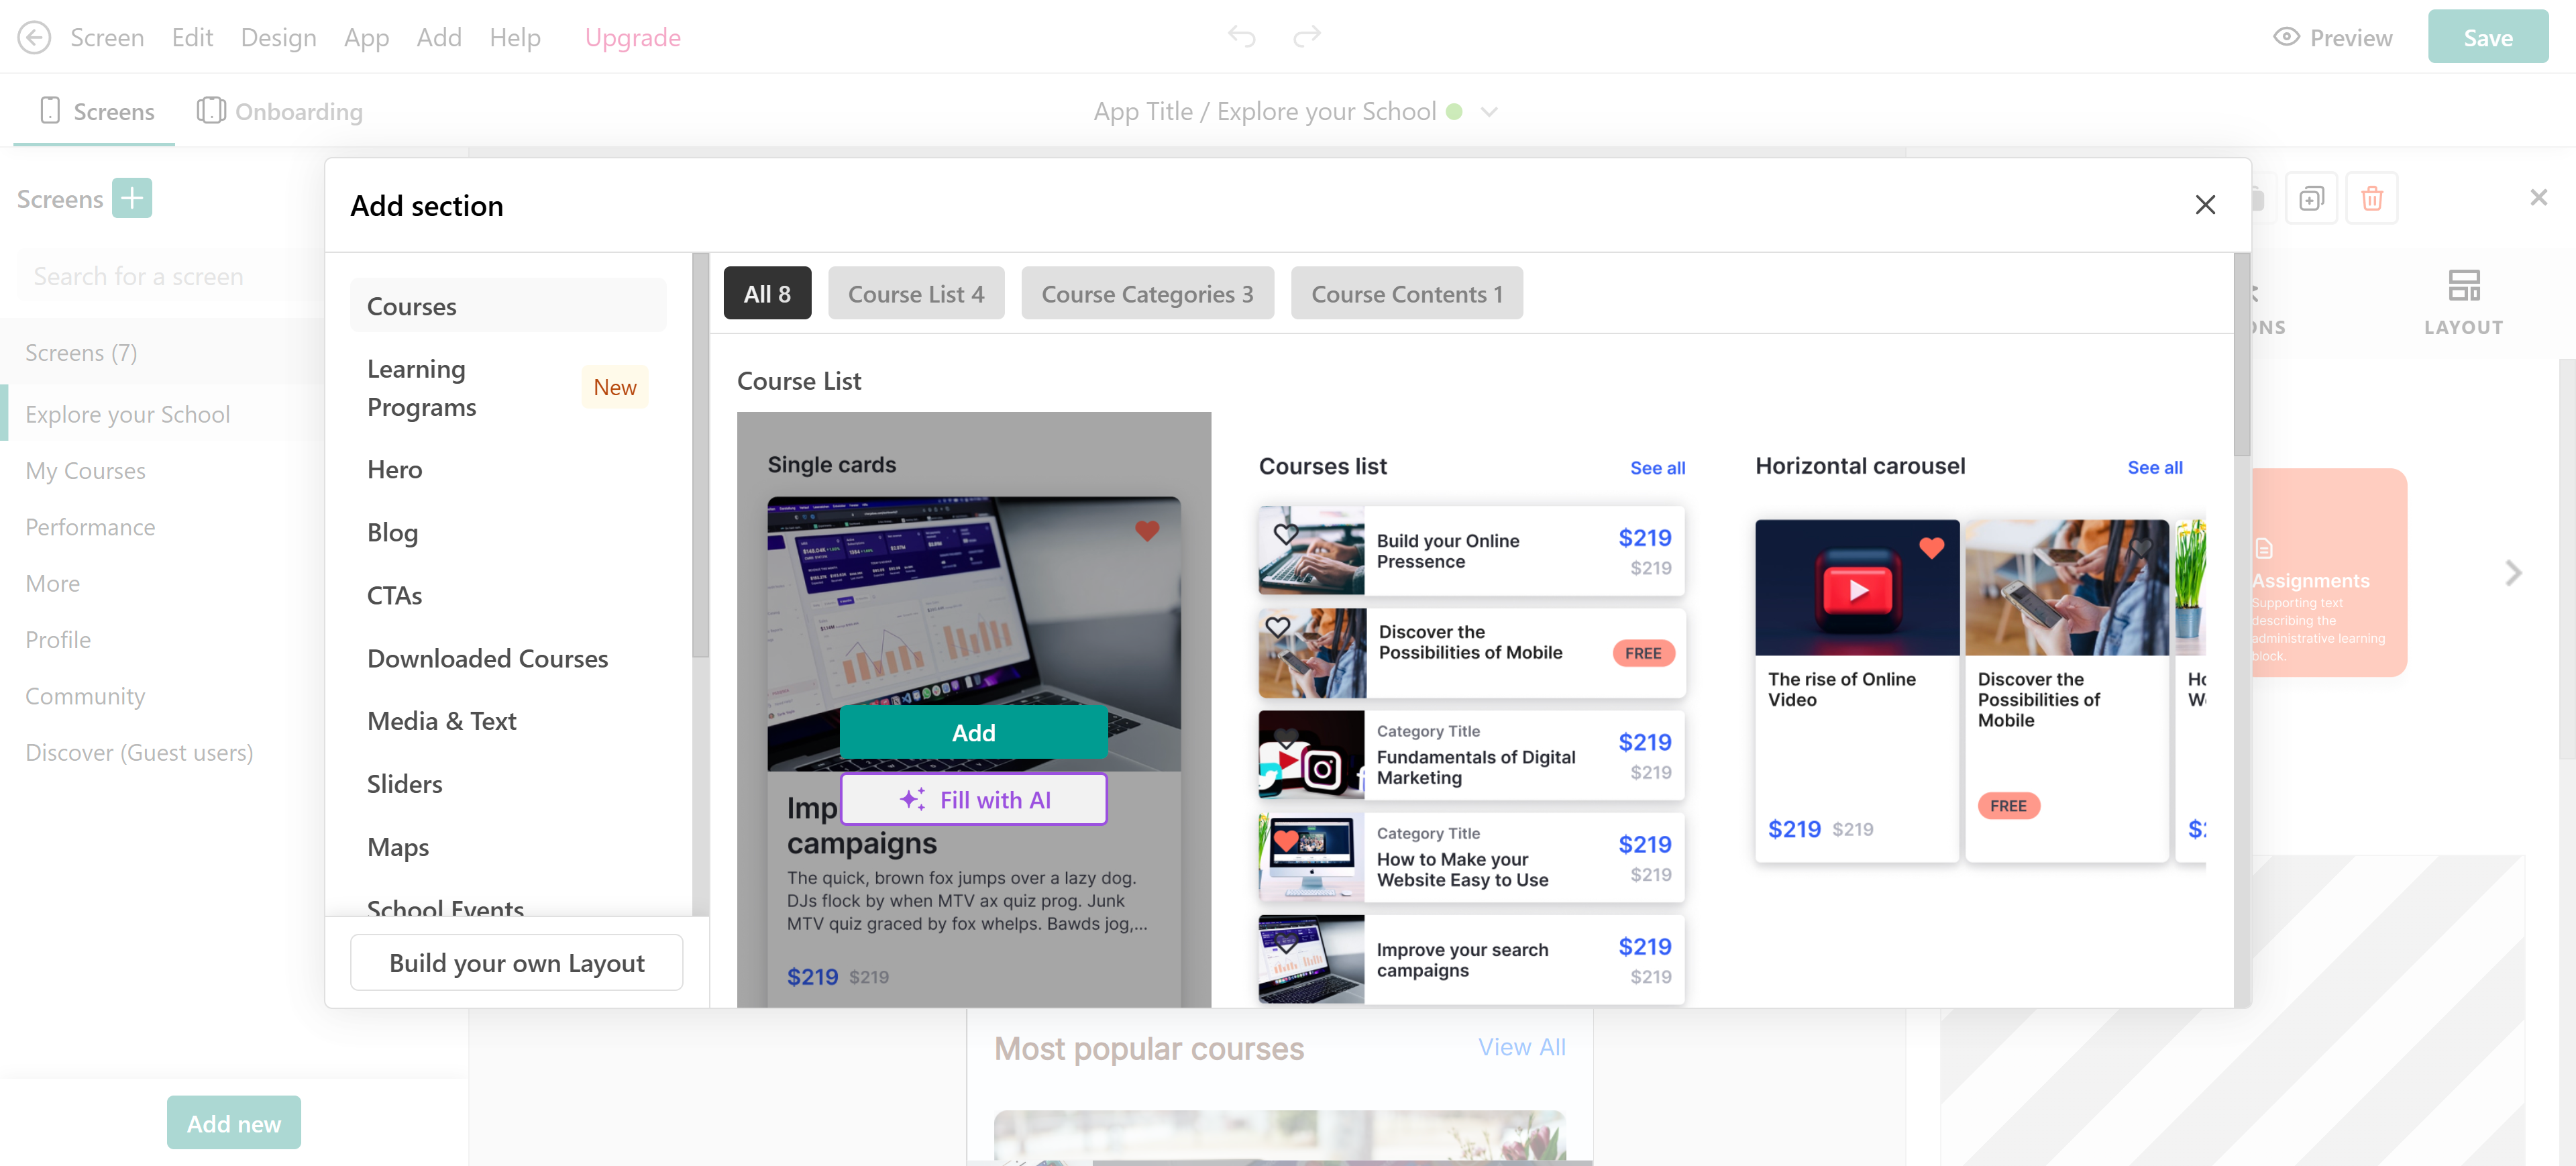
To ensure that products are displayed in your mobile apps, the products must be added as in-app purchases. However, note that your users will be able to access the products they are already enrolled in without being required to be added as in-app purchases.Course list & Learning program catalogue section
After adding the Course List section, hover over and click on Edit course cards. 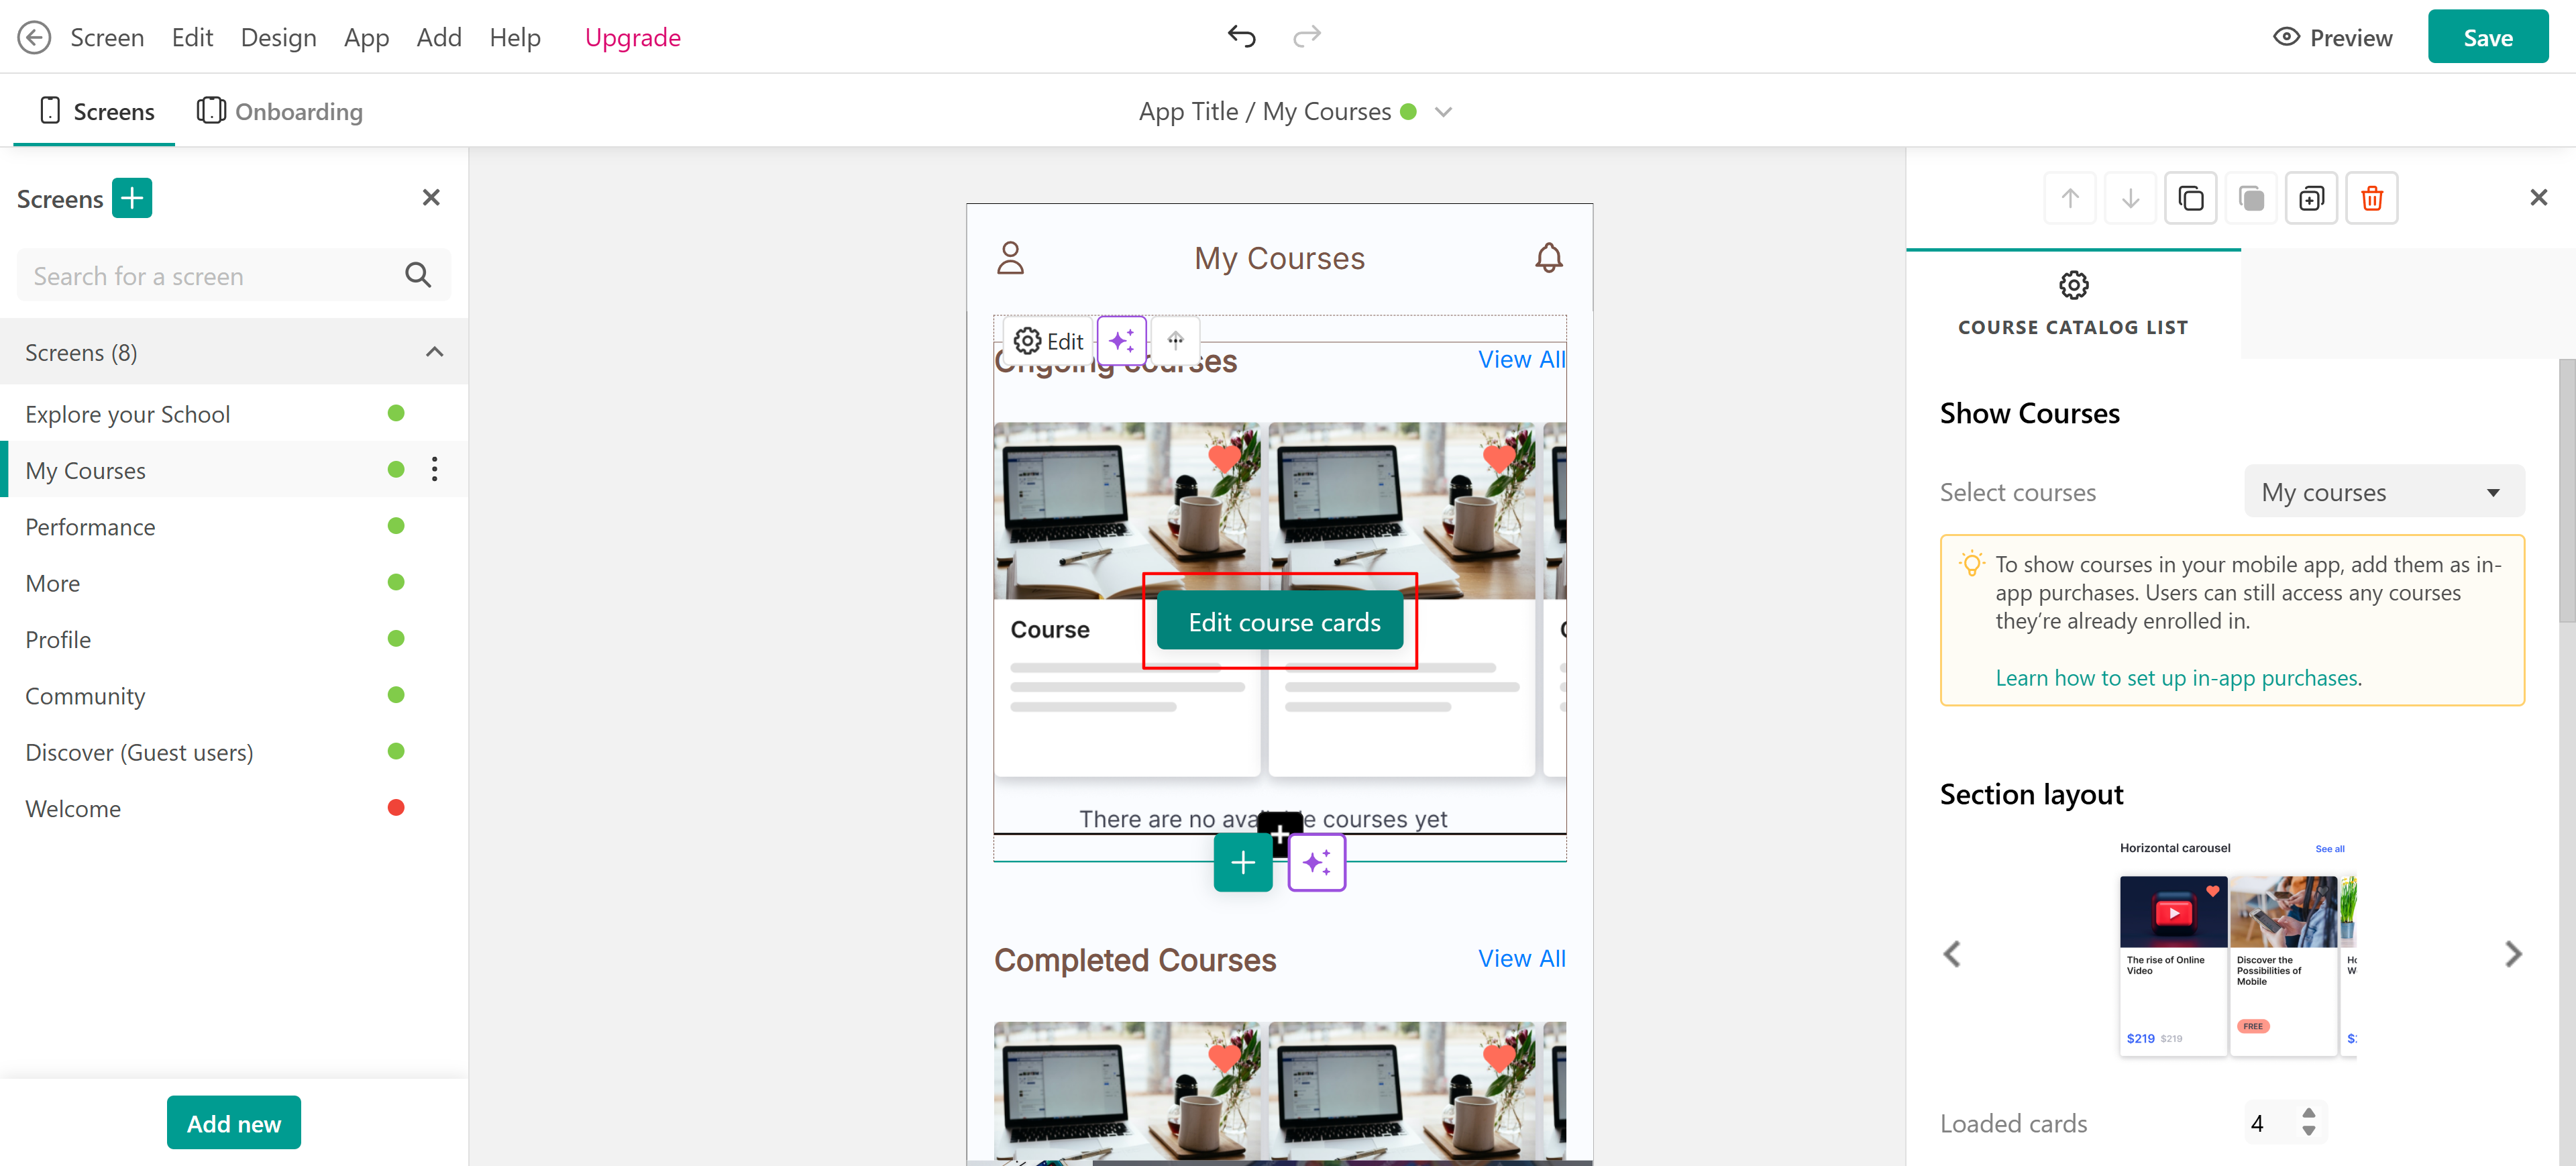 The editing side form will appear. In the side form that appears you can edit a variety of settings:
→ Show courses: Initially, you can select which courses to show on your Course Cards:
→ Section Layout: You can change the layout and choose the number of displayed cards.
→ When Tapped: You can send users to the course overview or to the course player page
→ View All: You can enable this button for all the courses to be displayed.
→ Load More: You can enable this button for more courses to be displayed.
→ Load More Appearance: You can edit the design of this specific button.
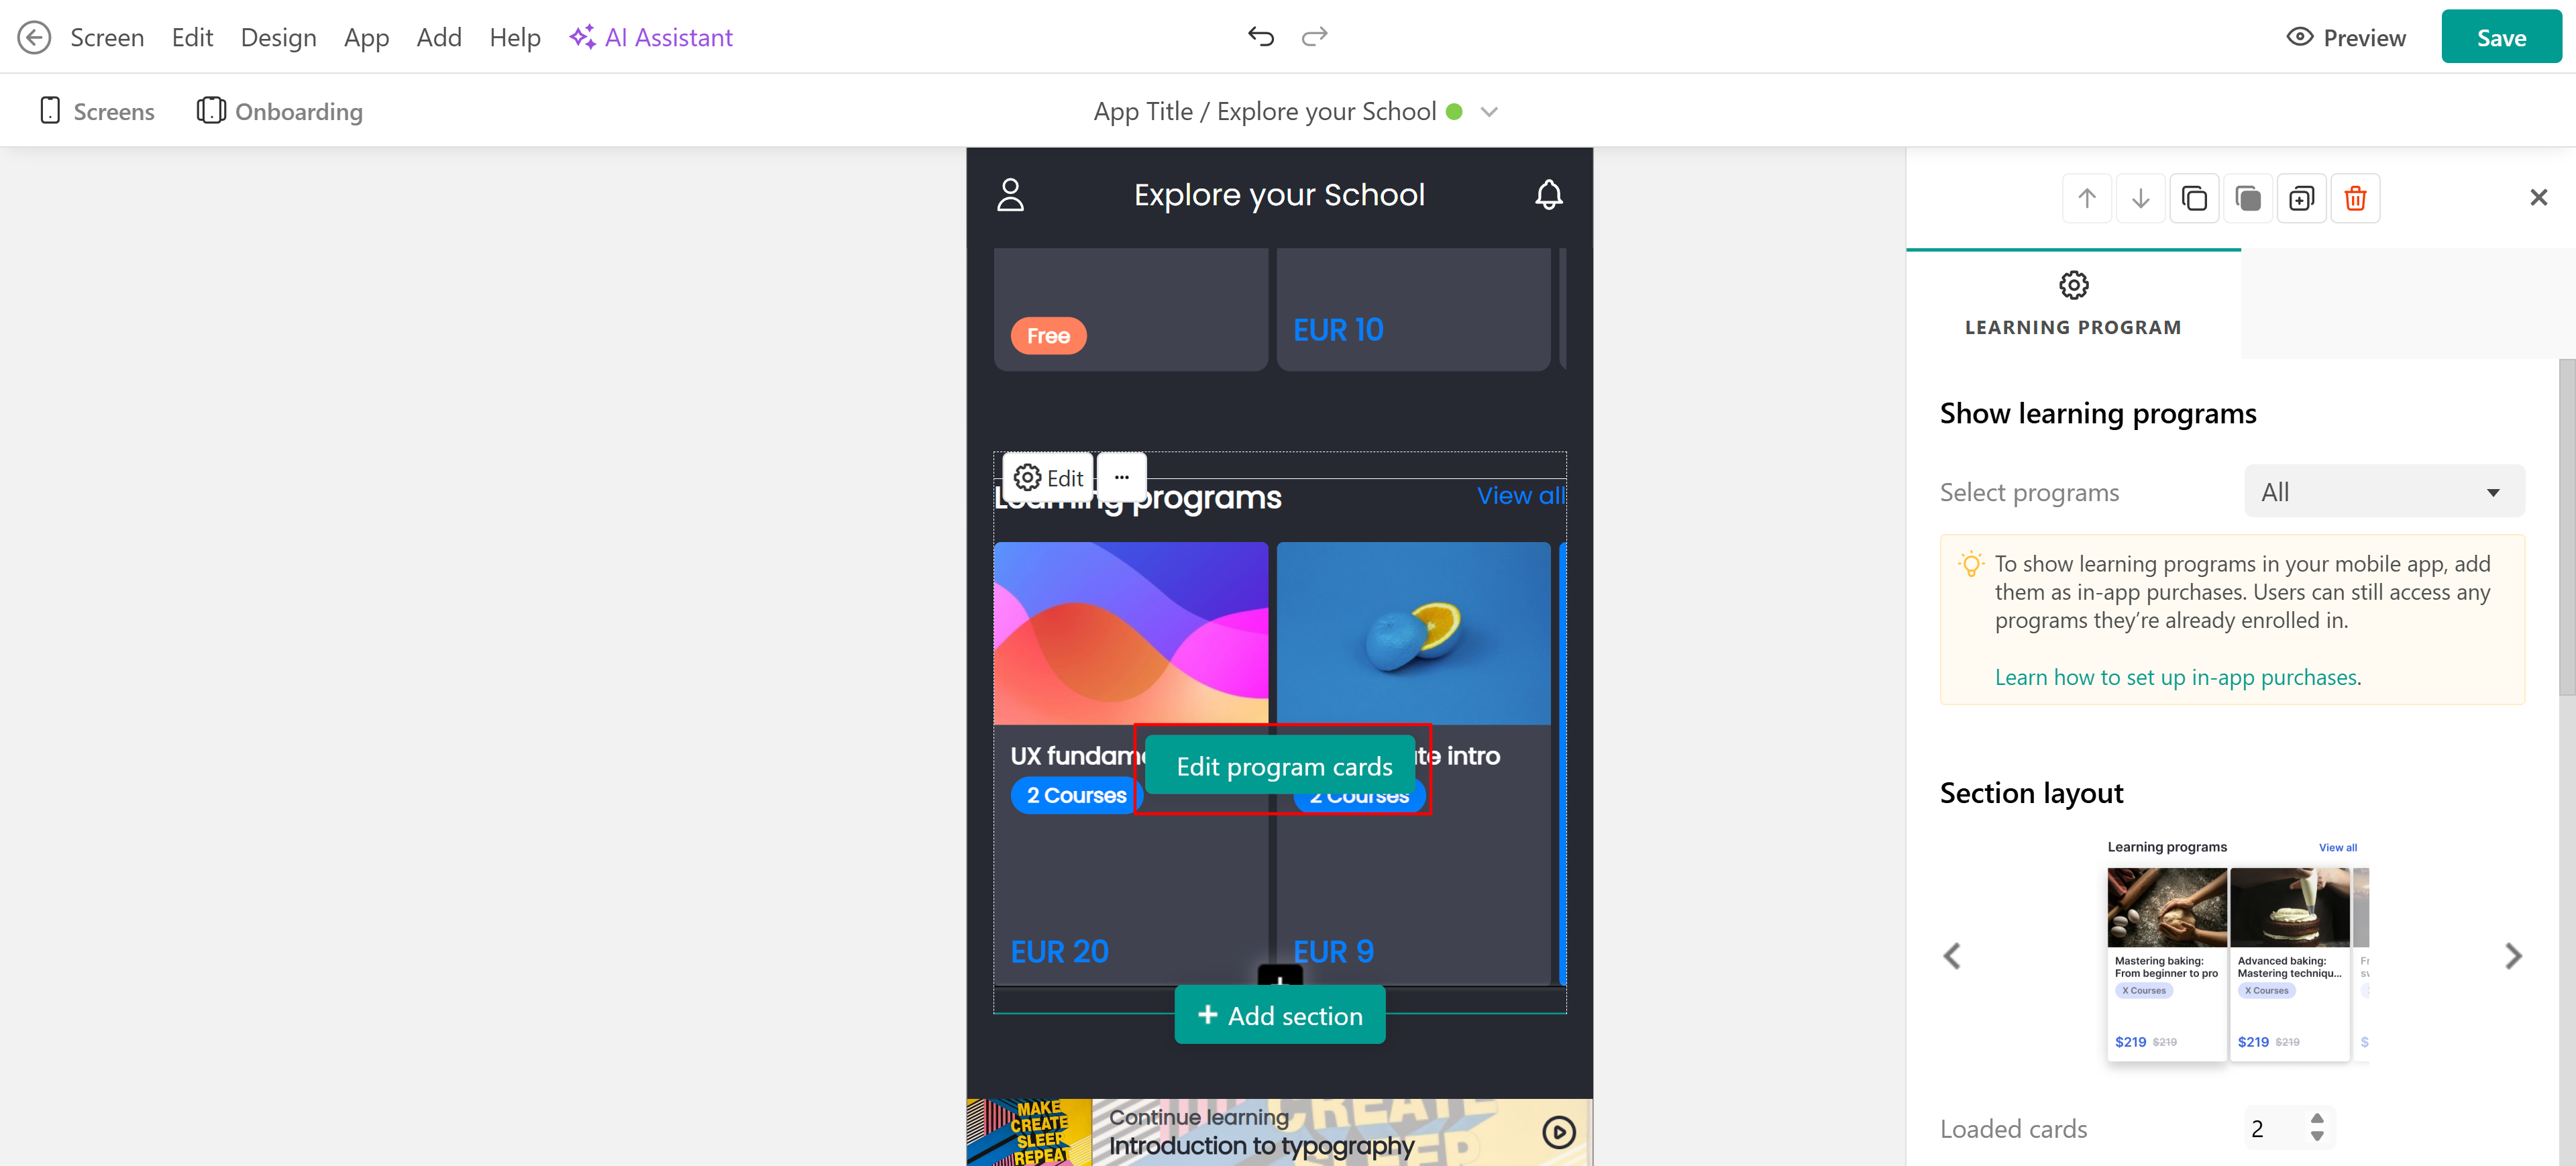
The same settings apply to Learning Programs. Add a learning program list section and click Edit program cards to open the side panel.
Favorite courses
There is also an option for a user to add a course to their favorite by clicking on the heart icon. The favorites will appear under Favorite Courses in the Profile screen.

Section visibility
You can customize the visibility of each section, choosing to make it accessible to everyone, specific tagged users, or even hidden entirely. Additionally, there is an option to show or hide content specifically for iOS users in the U.S. App Store. This unique setting allows admins to direct users to an external page for purchases, bypassing Apple’s fees in this marketplace. You can learn more about tags in this article. 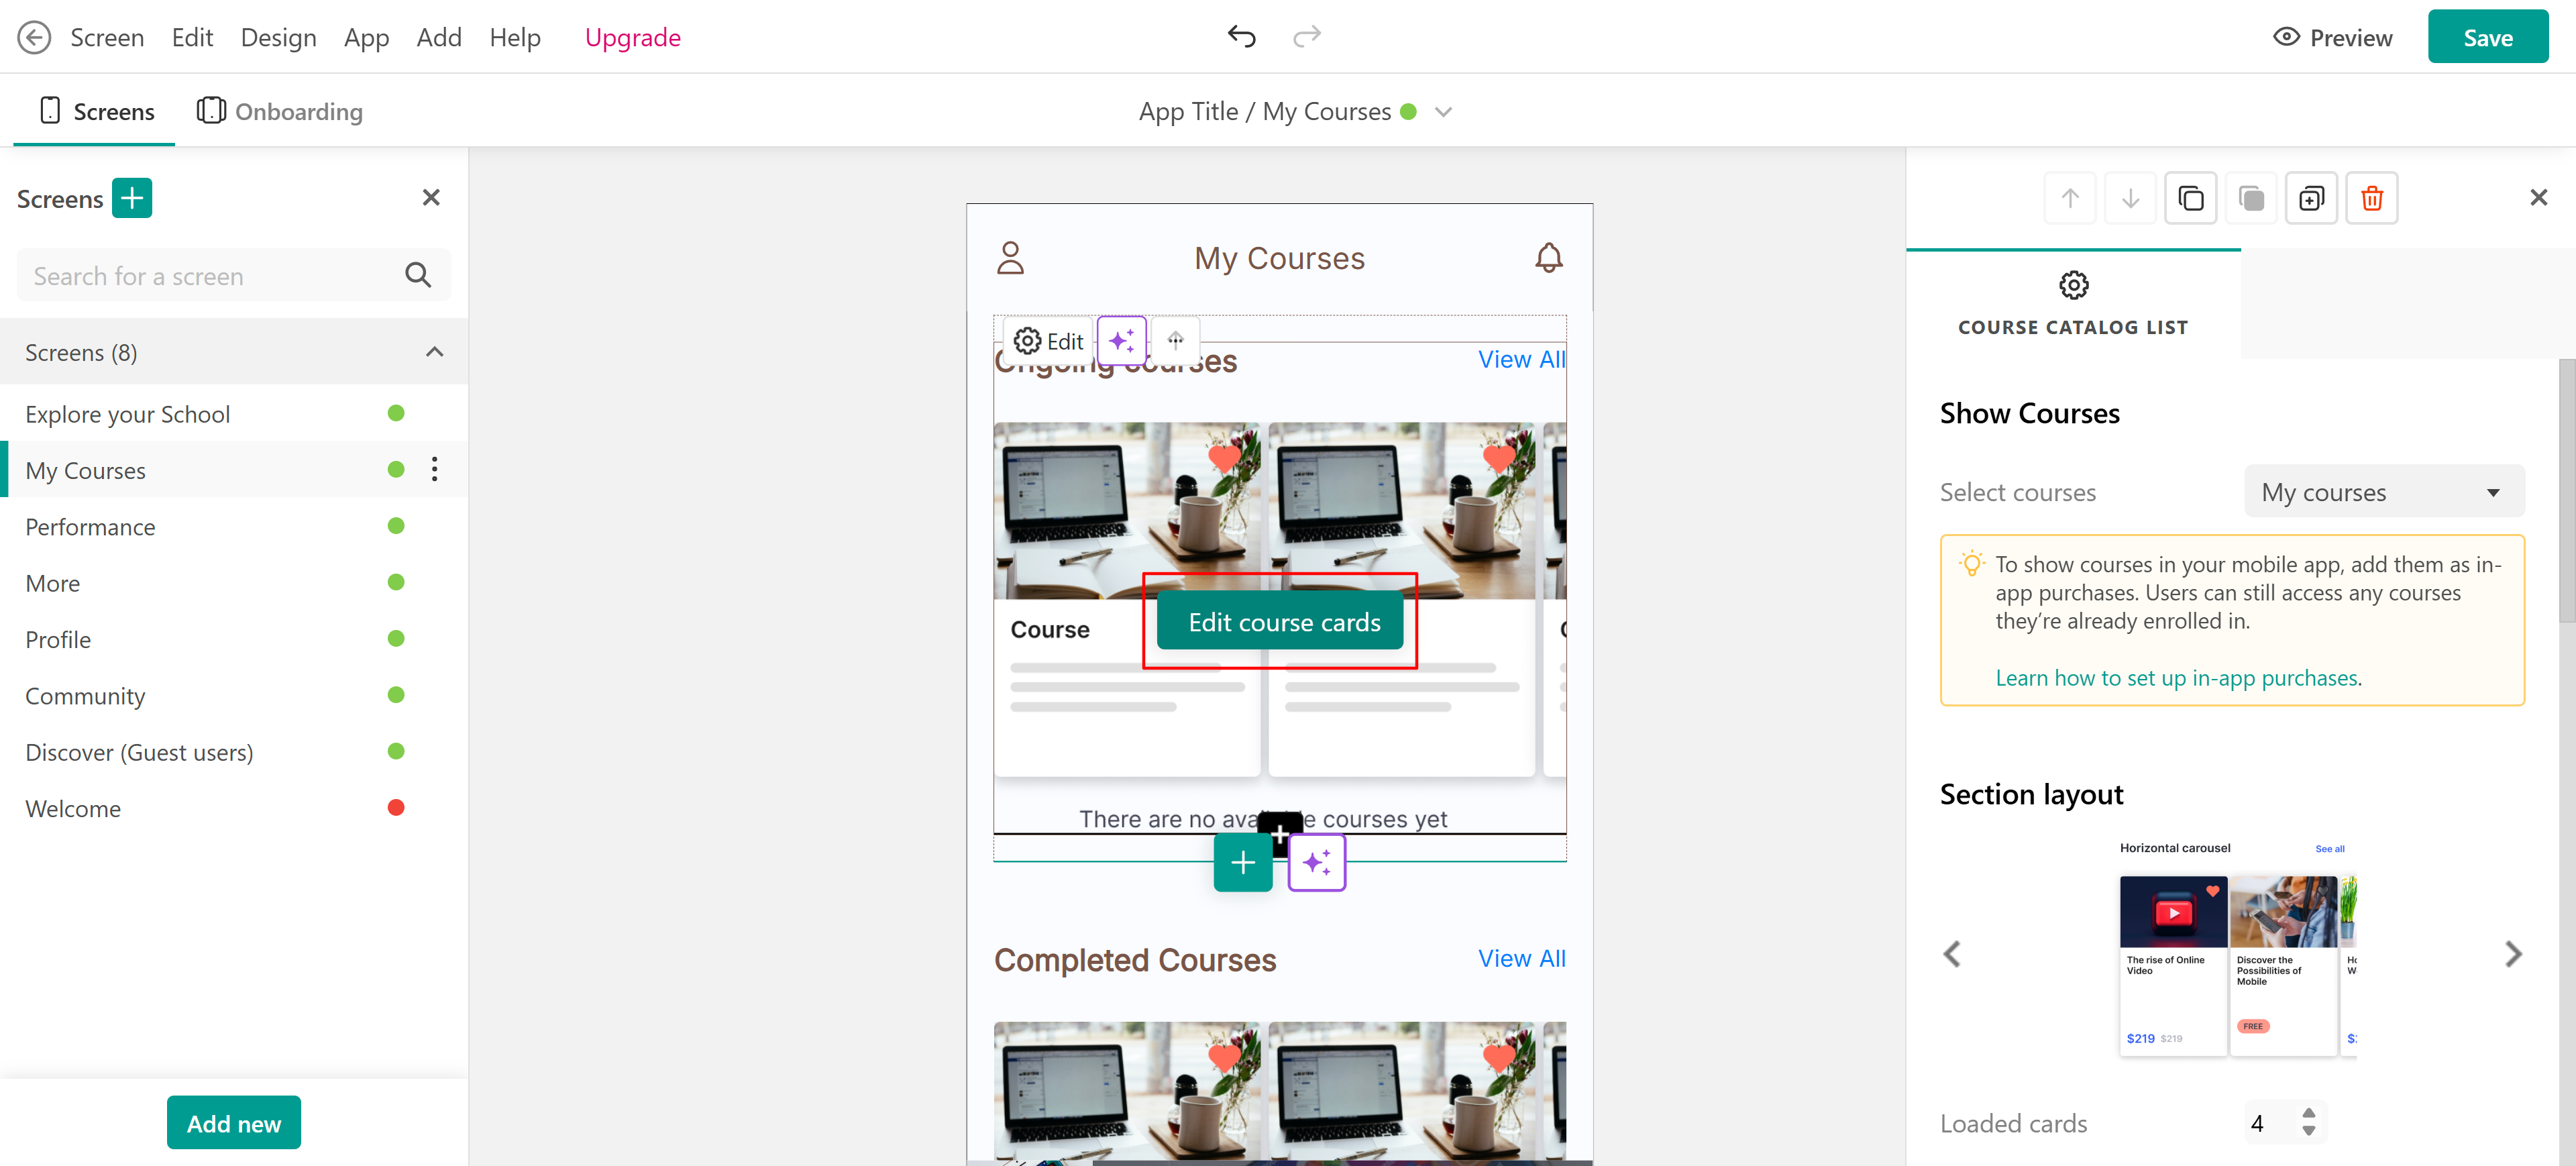
Mobile app widgets
You can add widgets such as text, labels, buttons, images, maps, and more. 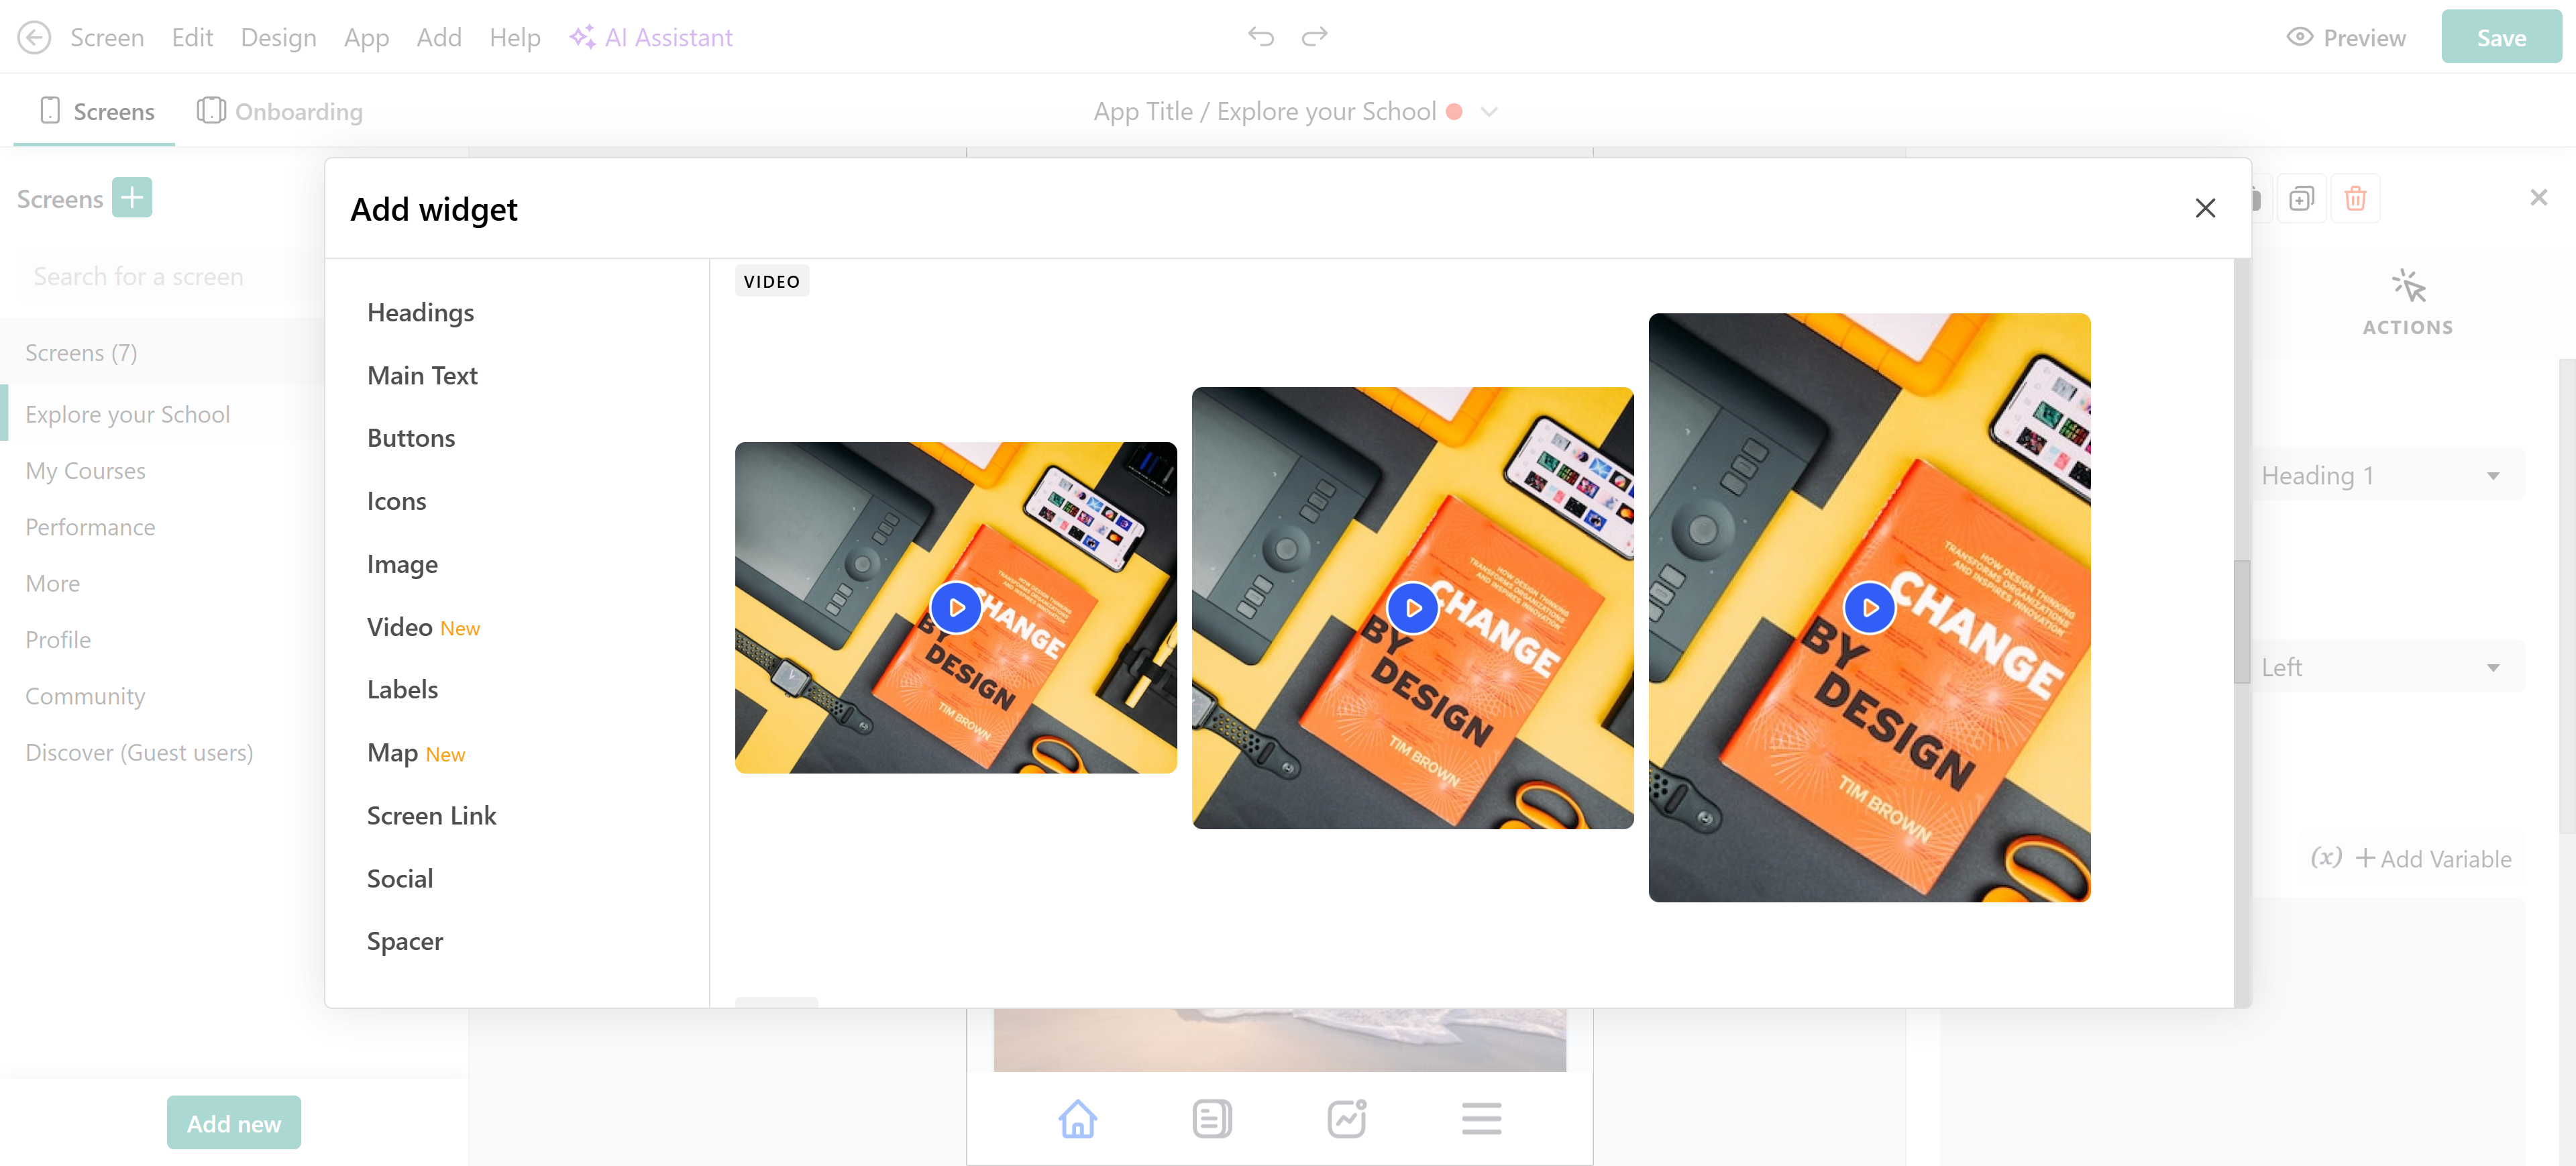
Text widgets also support AI editing, allowing you to rewrite, improve, shorten, expand, or translate their content with a single prompt.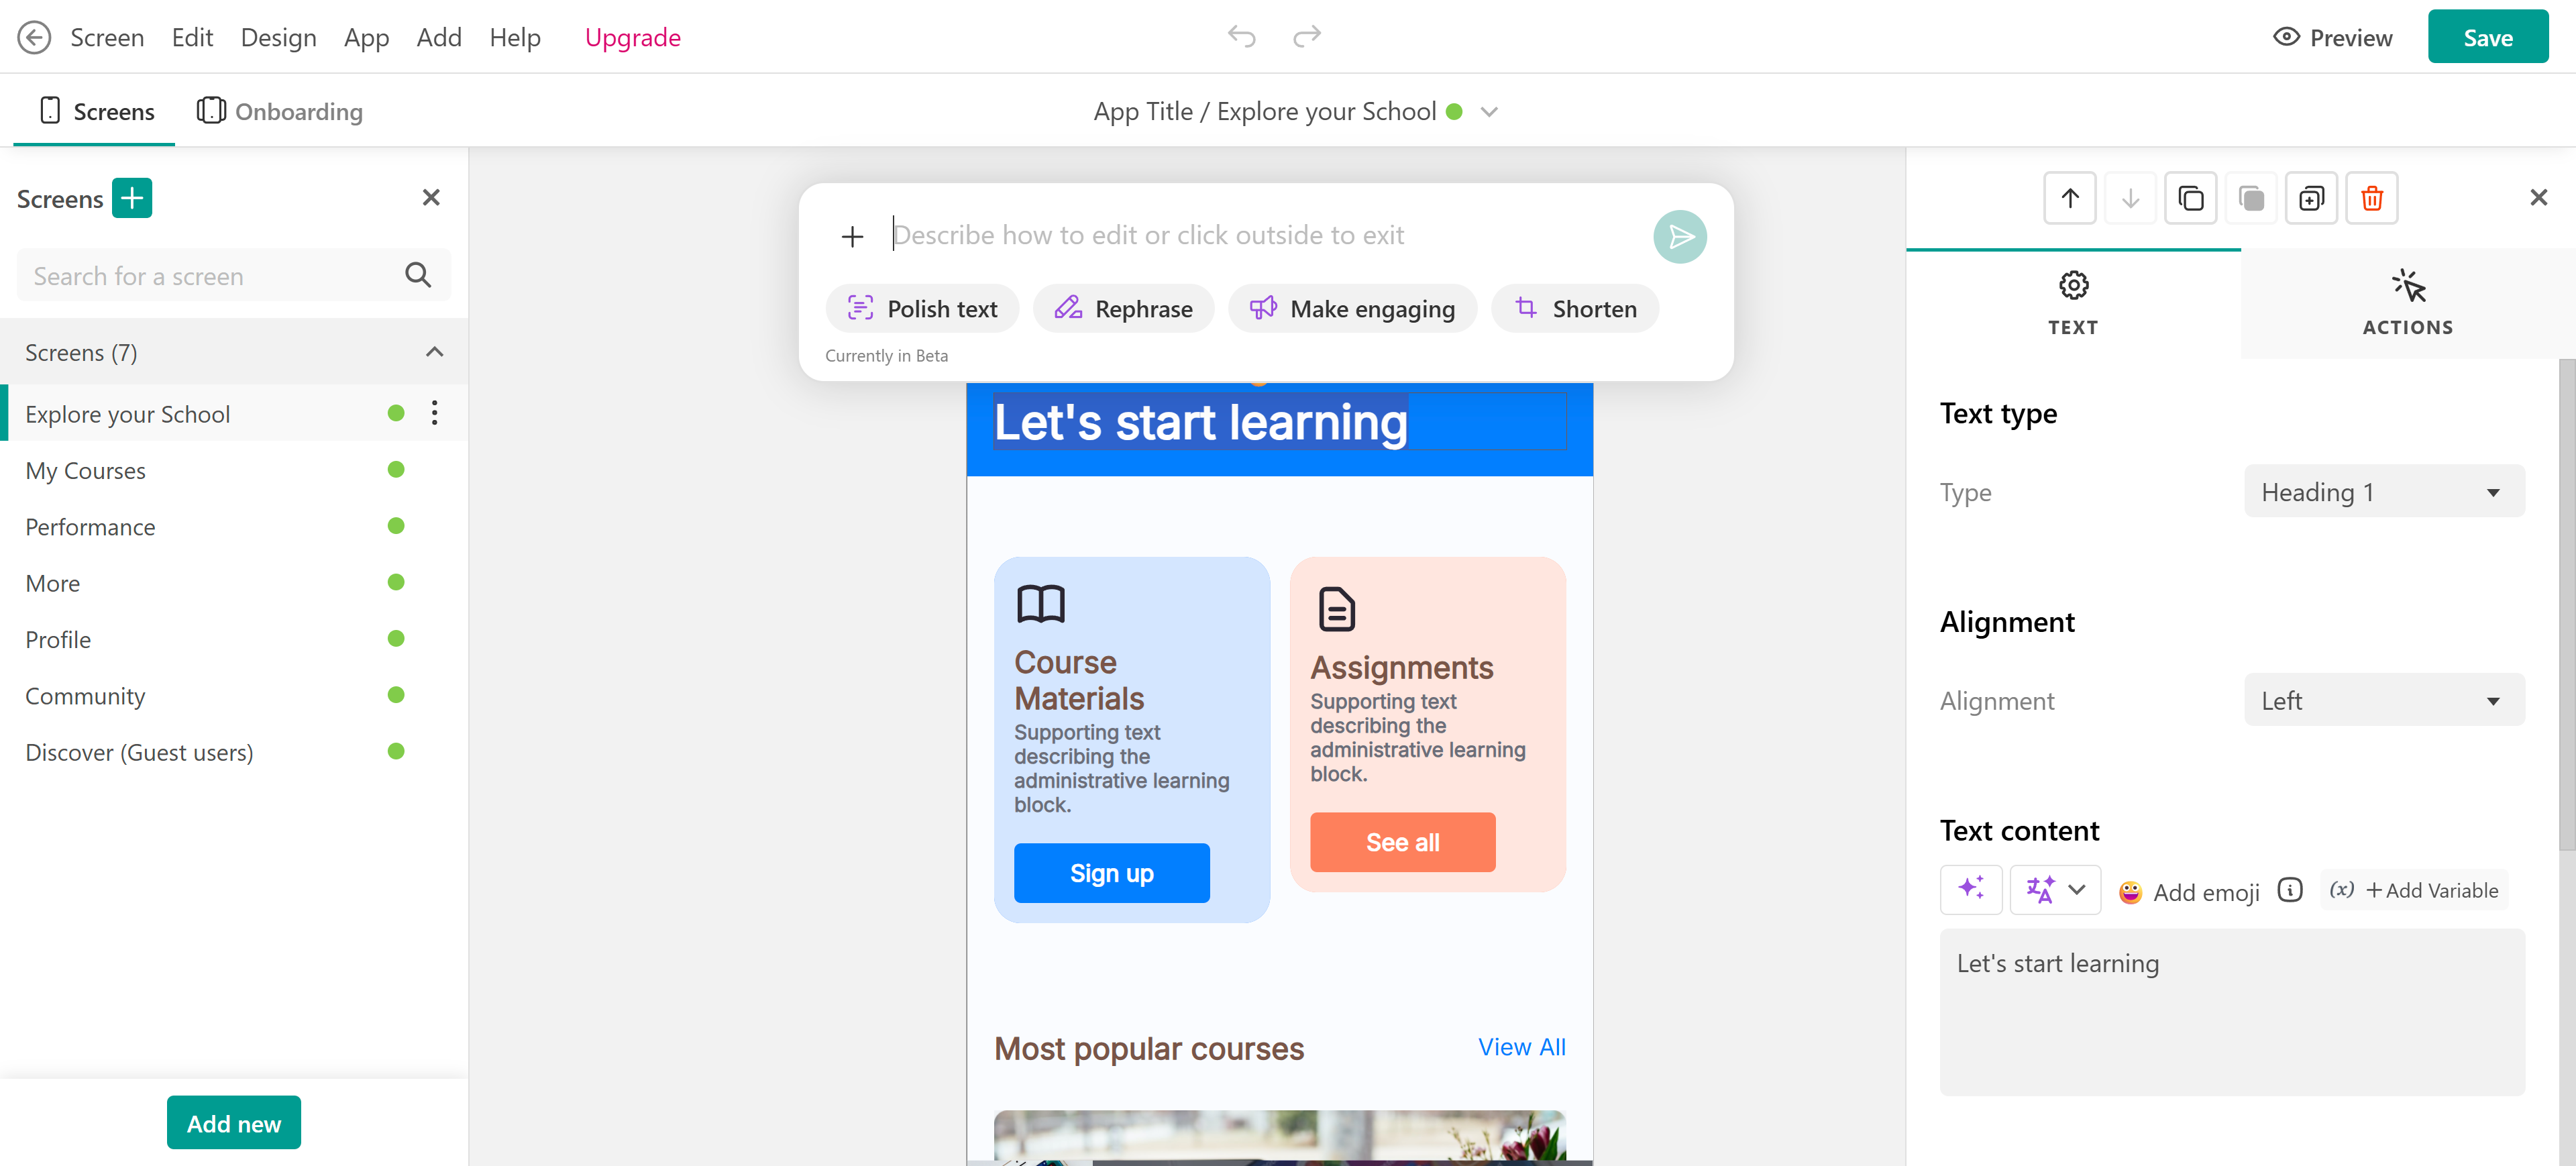
Variables in sections and widgets
You also have the option to incorporate variables into your pages, allowing for customized views tailored to each user. For instance, you can modify the initial screen to display text containing variables that dynamically incorporate the user's name.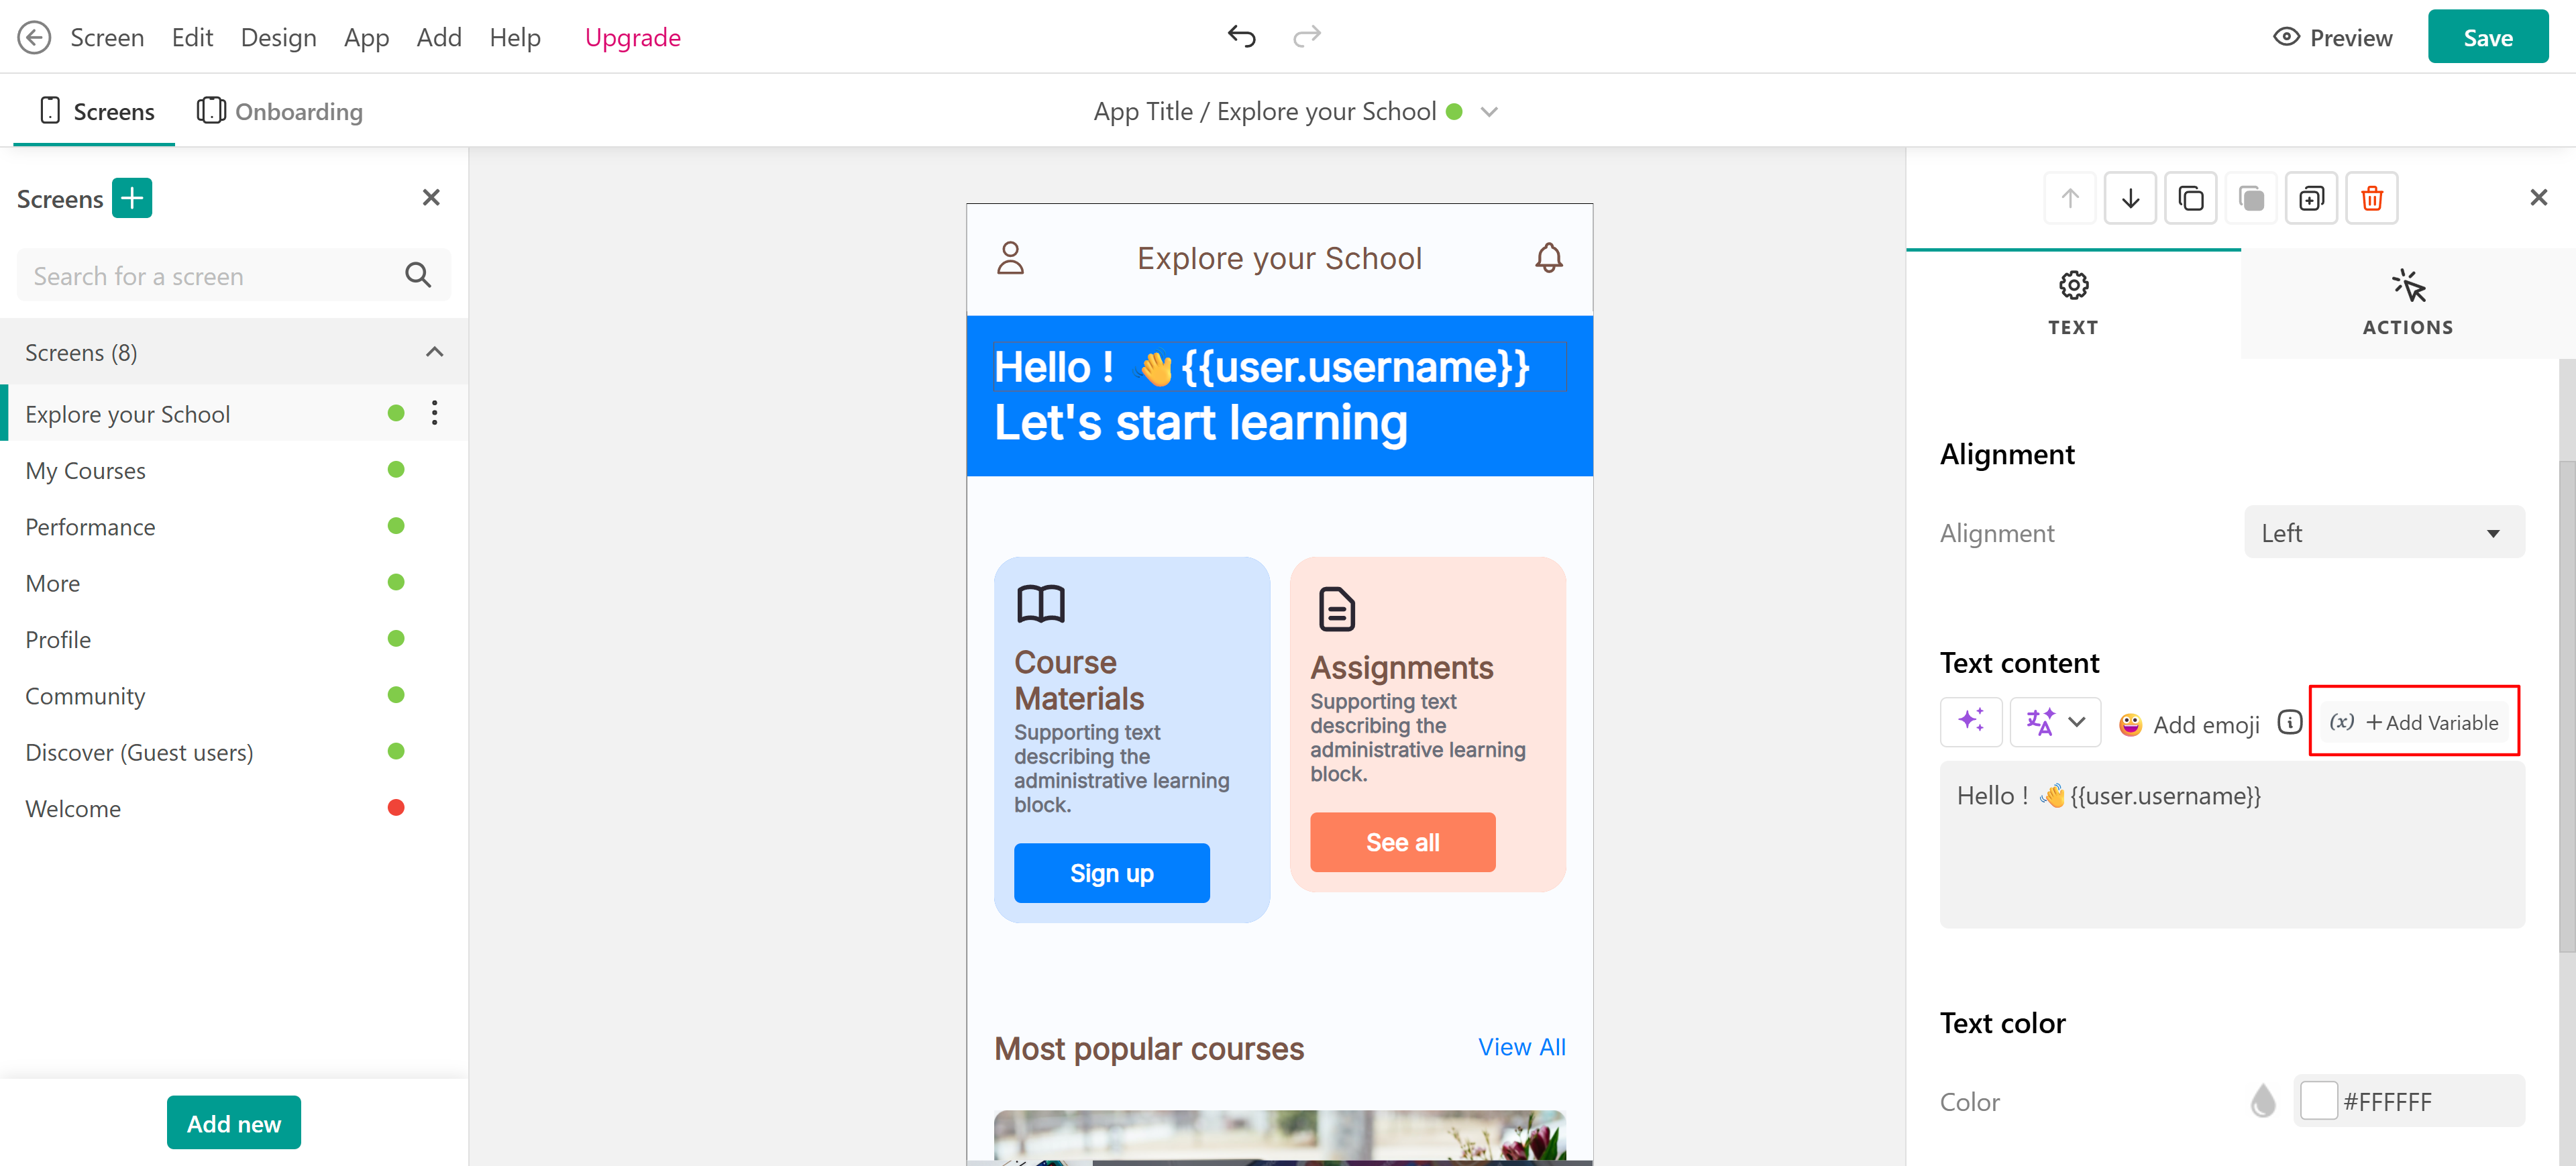
Onboarding screens
You can incorporate slides in the Onboarding section to acquaint users with your app's features and functionalities. It is recommended that you use the Onboarding screens, as they help users better understand your content.
Hover over the three dots on the Onboarding screen and click on Onboarding settings to start editing (you can also duplicate or delete a screen). 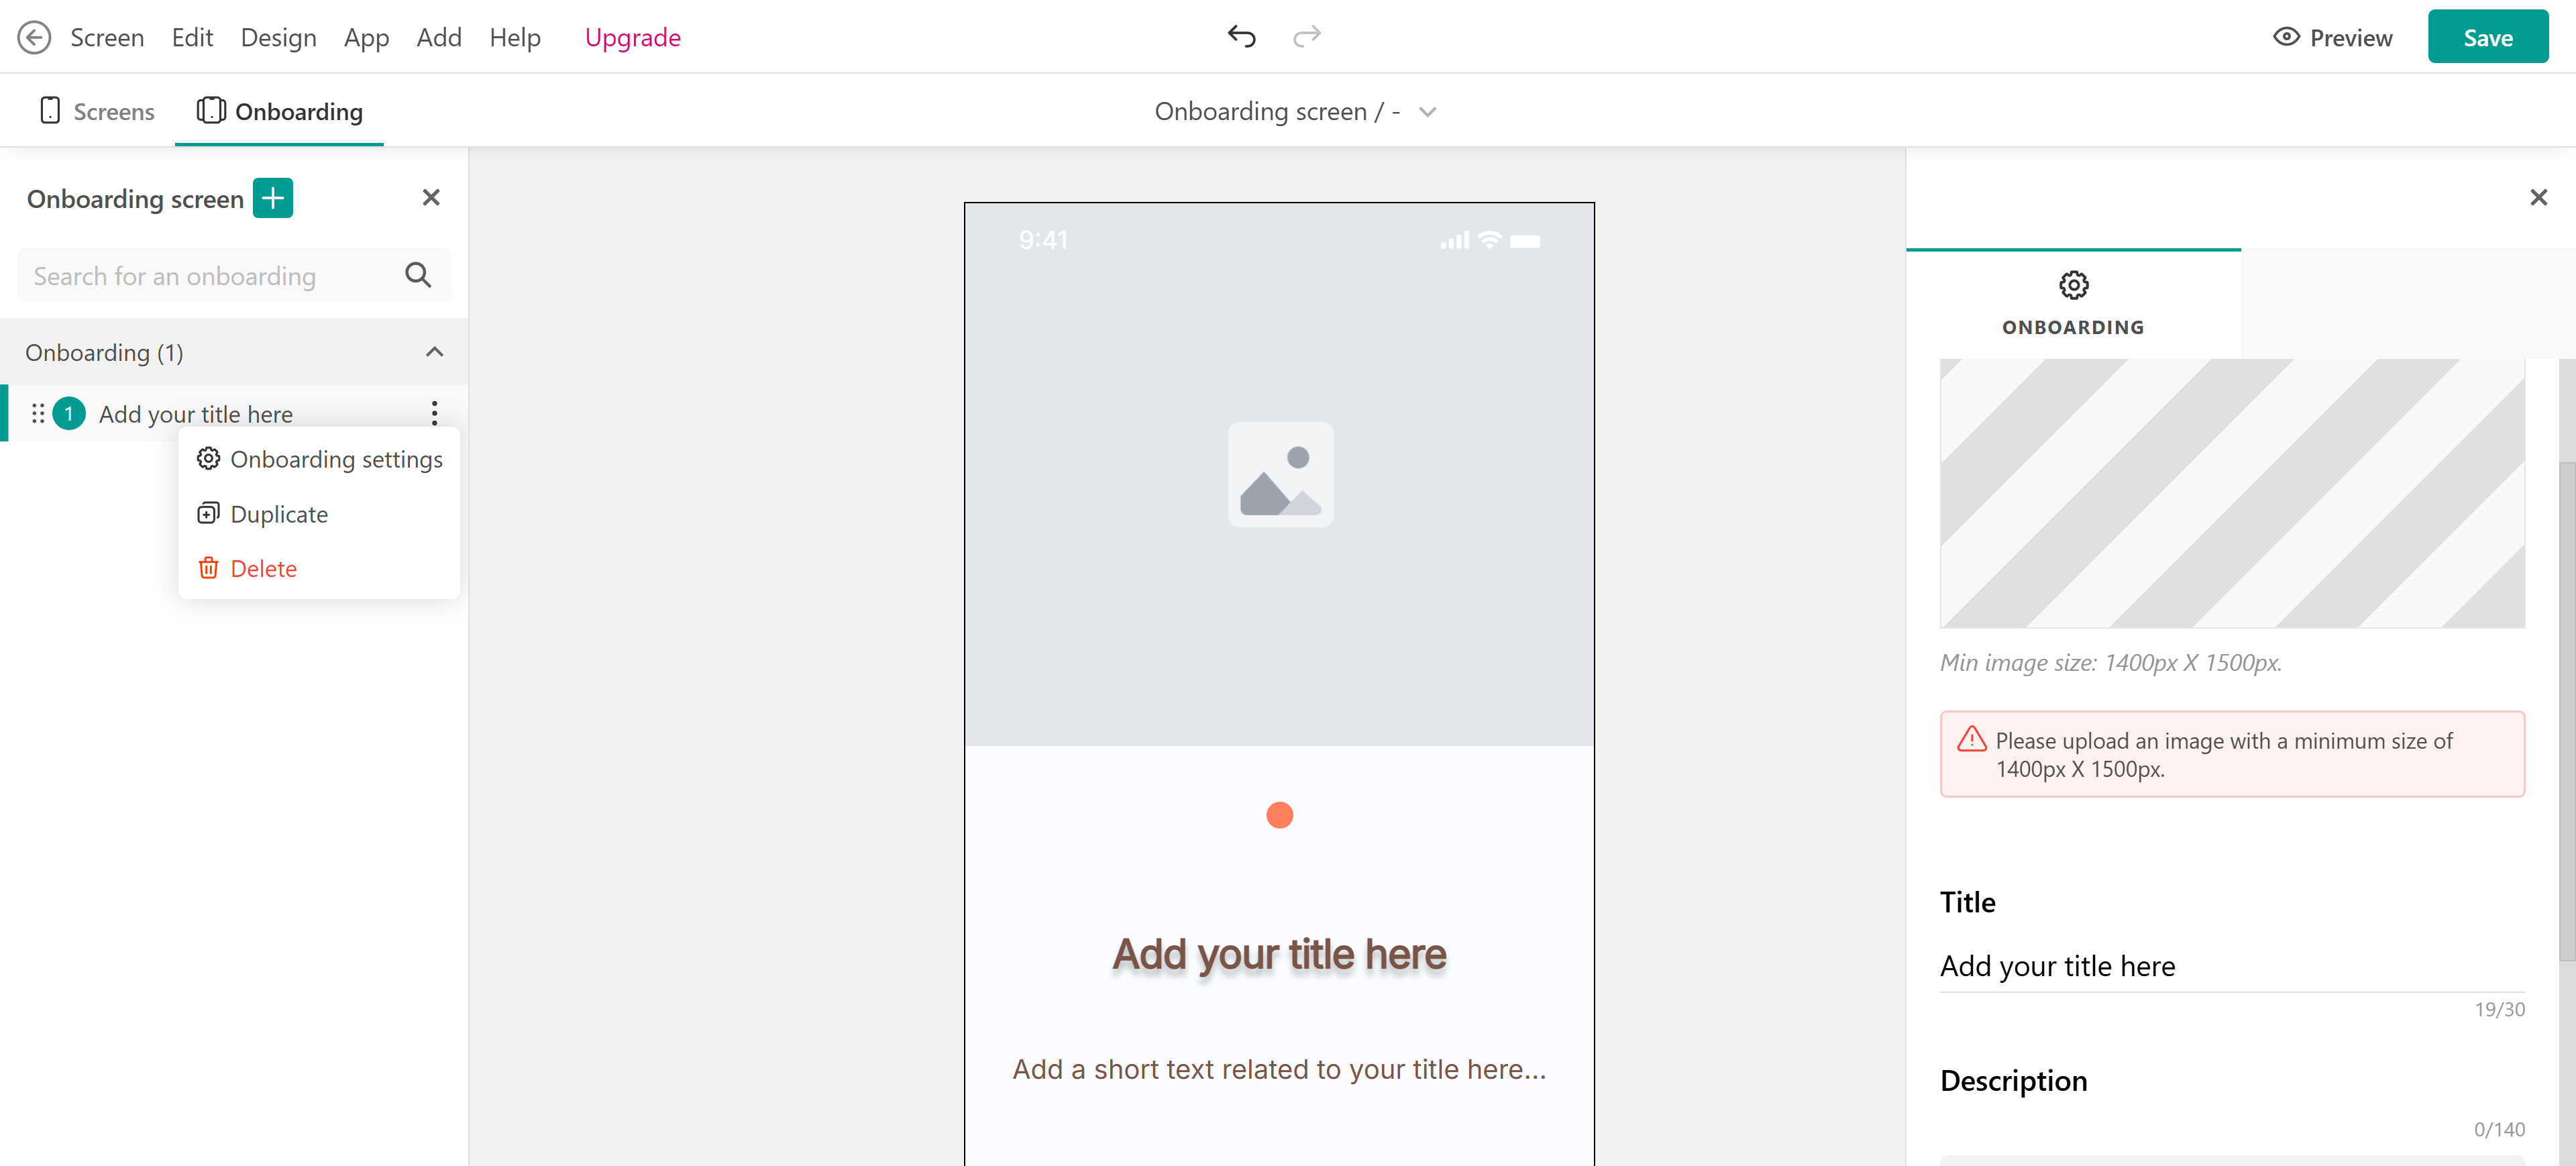
You can also find the Onboarding screen settings by hovering over the authoring toolbar under the title of the Onboarding screen in the middle of your screen: 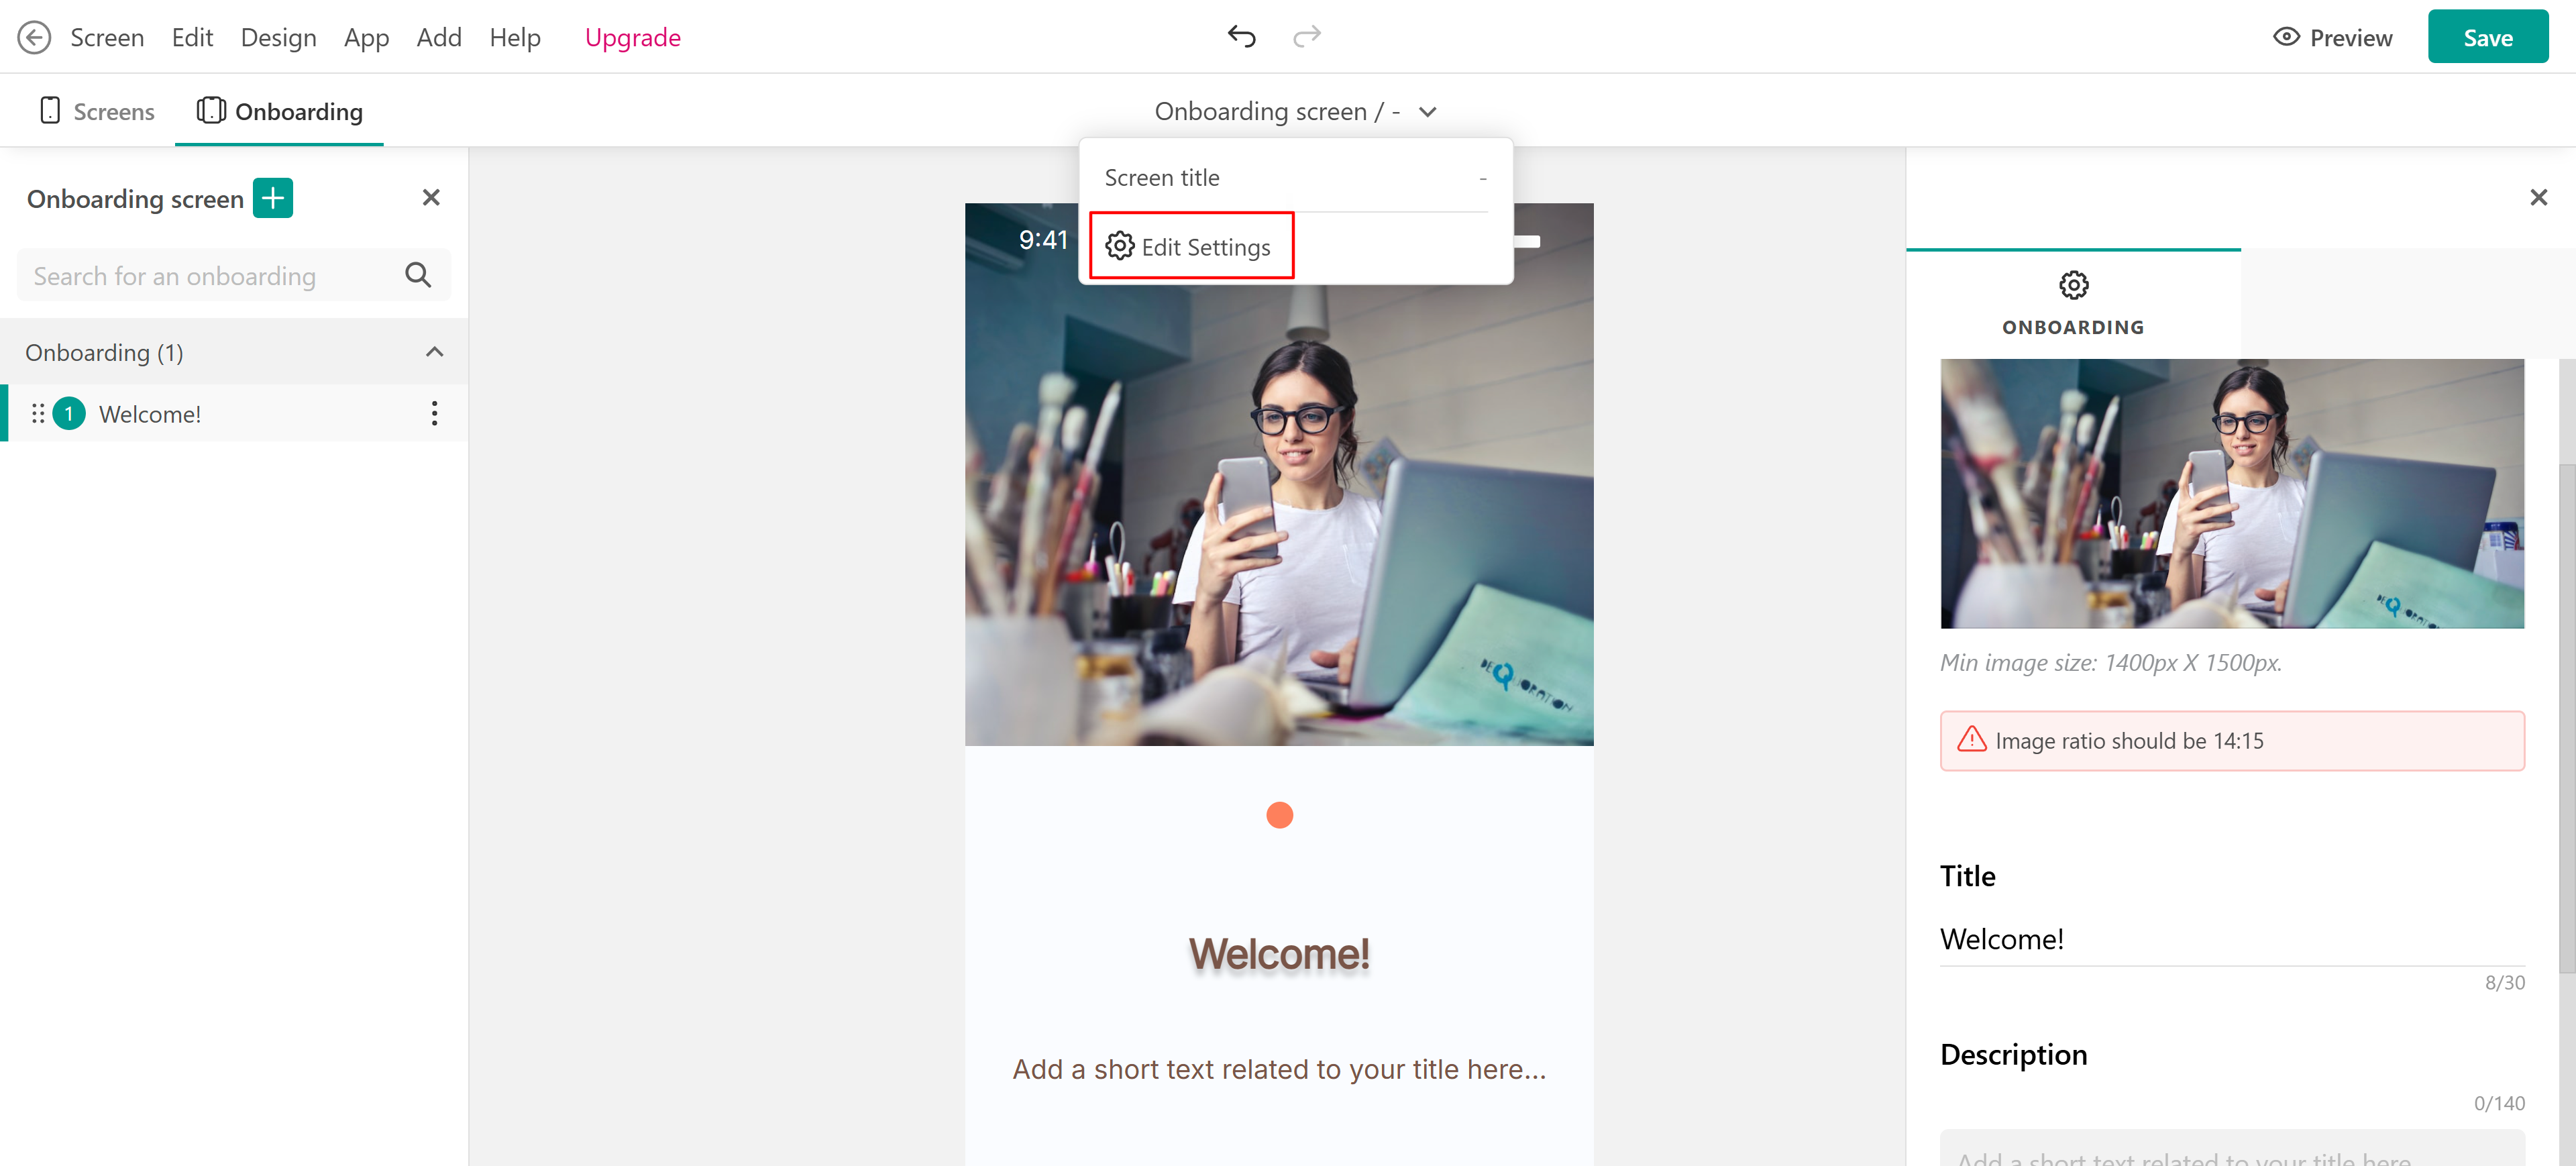
You can enable:
→ Onboarding screens to be visible to your users.
→ Skip button for the onboarding screens (Note: If you decide to enable the skip button, your users will be able to continue directly to your app without checking out your onboarding slides).
→ Visibility for already logged-in users.
→ Navigation to sign up or login page after completing the onboarding.

In addition, you can add and rearrange onboarding screens on the left sidebar. After choosing an onboarding screen, you can then change the image, title, and description.
Useful Tips!
- Always be clear and precise!
- Make sure that you use the image of each slide to the fullest.
- Attract your users' attention to the visuals of the onboarding screen.
- Provide information about your app's functionality and/or purpose.
Preview
You can Preview the changes you are making in real-time. After saving, the changes will take effect in the mobile app immediately. End-users who have already downloaded and installed the app need to restart the app to see the applied changes.
