What are automations?
Automations allow you to create workflows that run automatically when specific events occur in your school, such as a learner enrolling in a course, completing a lesson, or becoming inactive. You define the workflow once, and the system handles the rest automatically, such as sending emails, tagging users, enrolling learners in products, and more.
Automations can be as simple or as advanced as you need. You can build multi-step workflows that guide learners over time and adapt to their behavior.
With automations, you can:
- Use wait steps to delay actions until a specific amount of time passes or until a date is reached.
- Use branches to send learners down different paths depending on conditions they meet.
- Use exit conditions to stop the workflow as soon as a goal is achieved.
- Use multiple triggers to start the same workflow from different events.
How do automations work?
Each automation runs as a step-by-step flow. The system executes one step at a time, it does not look ahead — each step is evaluated only when reached.
Automations follow a simple logic:
- Trigger (When): What starts the automation
- Condition (Only if): Optional filters
- Action (Then): What happens next
But you can also use advanced workflow features:
- Wait steps: Pause the flow for a specific time or until a date.
- If/Else branches: Create different paths based on user behavior or conditions.
- Exit conditions: Stop the automation immediately when a goal is achieved.
- Multiple triggers: Start the same automation from different events.

- Automations apply only to future events, not past ones.
- Conditions are evaluated at the moment the learner reaches them.
- Automations work only for registered users, not leads or visitors.
Automations are triggered by events that happen after the automation is created and activated. They do not process users who already meet the condition at the moment you create the automation.
For example:
If you create an "Inactivity for 2 days" automation, users who were already inactive for more than 2 days when the automation is created will not be affected. The automation will only be triggered for users who become inactive for 2 days after it is set up.
Similarly, if you set an automation like "When user gets tag X, enroll them in a course," it will only apply to users who receive tag X after the automation is activated. If a user already had tag X before, the automation will not trigger unless the tag is removed and added again.
This behavior applies to all automation triggers and ensures actions only happen for new qualifying events, not for pre-existing conditions.
User Automations are designed to operate exclusively for registered users of your school, not for leads or unregistered visitors. While certain triggers, such as "Form is Submitted", may appear to apply to leads, automations will only execute when the action is performed by a registered user with an active account in your LearnWorlds school.Common use cases
- Onboarding sequences: Guide new learners with timed emails and tips.
- Inactivity re-engagement: Automatically follow up with inactive users.
- Certification reminders: Send reminders before certificates expire.
- Upsell flows: Promote advanced courses after completion.
Find more use cases here.
Create an automation
1. Navigate to Users → Automations.
2. Click create automation or choose one of the available templates.
3. Choose if you want to build it manually or create it with AI.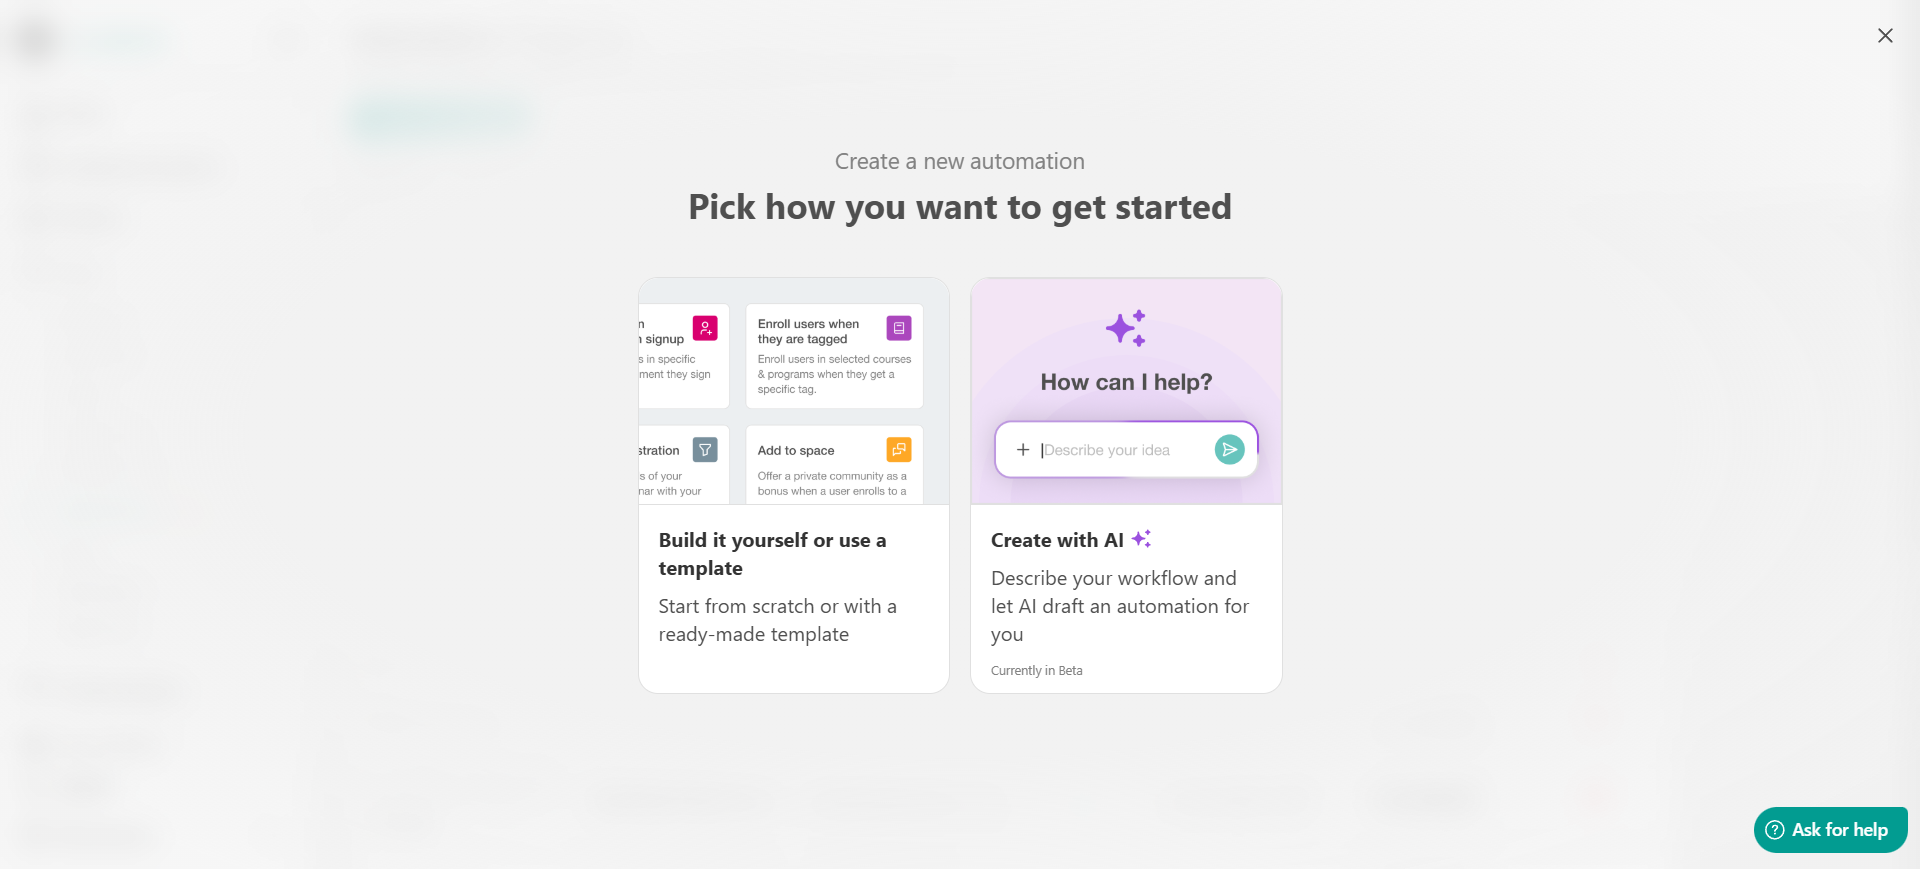
Create an automation with AI
If you choose AI, a prompt box will appear where you can describe the automation you want to create. For example: "When a new user signs up, send them a welcome email and add the New User tag."
AI will generate the complete automation, including the necessary triggers, conditions, actions, delays, branches, and exit conditions where applicable.
The generated automation opens in the builder, where you can review and edit it before saving. AI-generated automations are created inactive by default, so you'll need to activate them once you're ready.
Create an automation manually
If you choose to create the automation manually, the automation builder opens with an empty canvas where you can build your workflow from scratch.
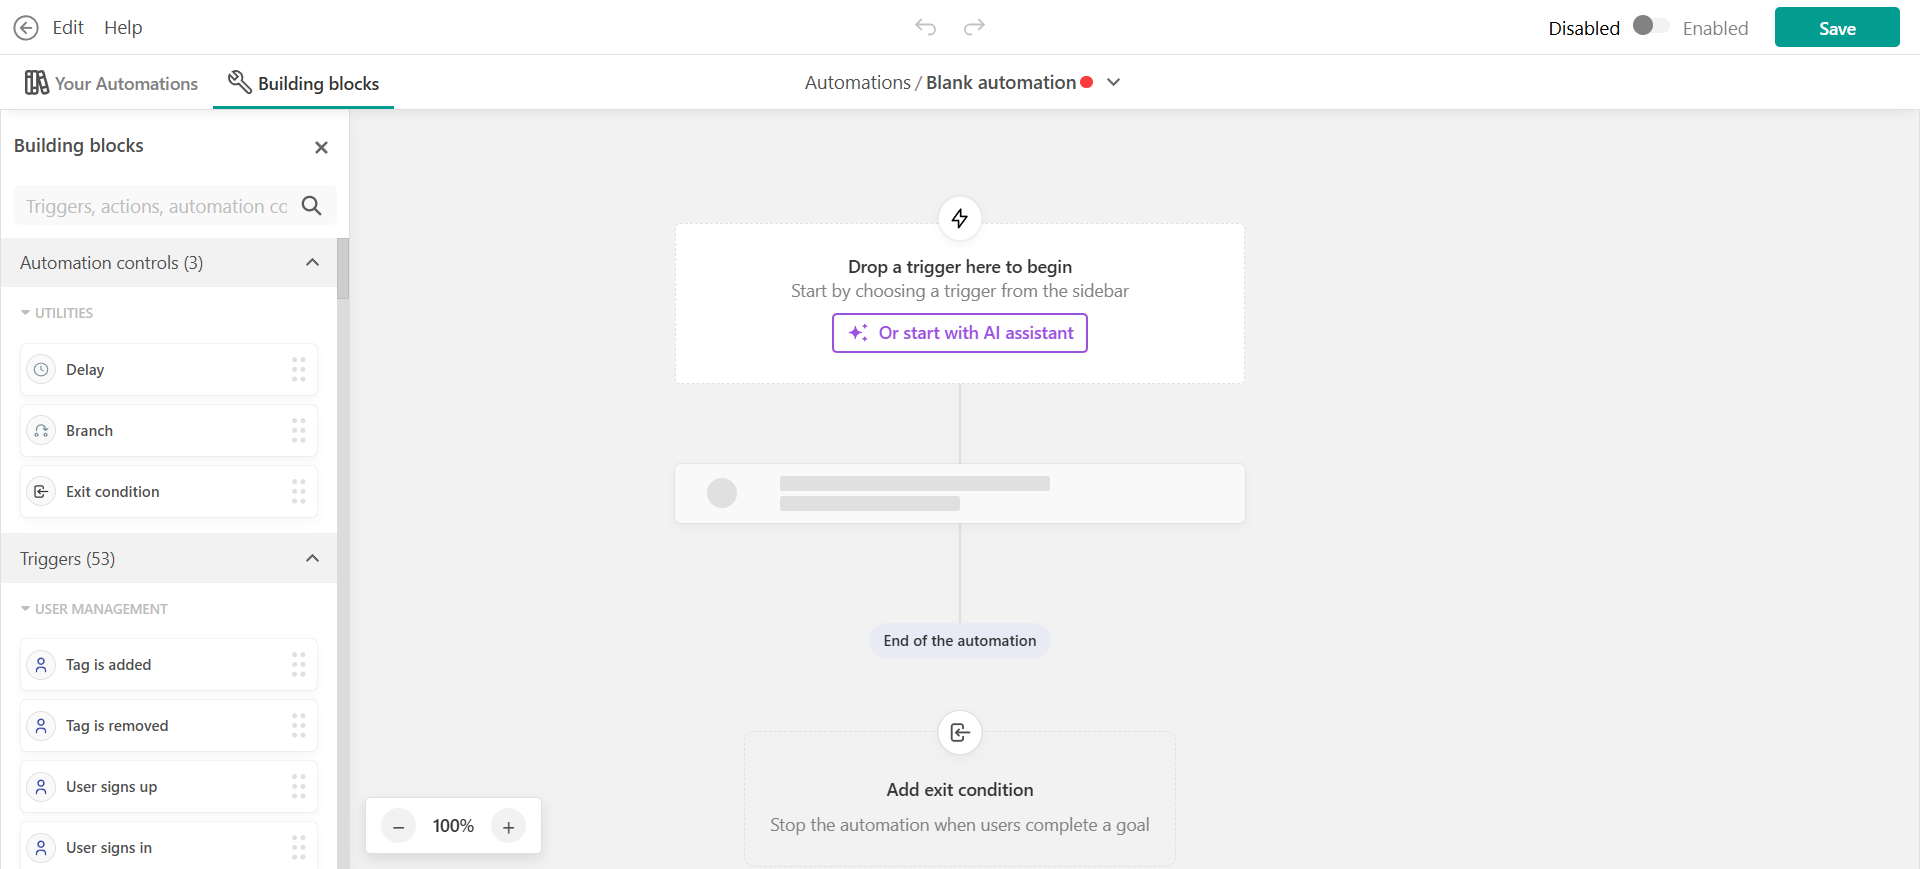
Triggers
Every automation starts with a trigger, the event that kicks off the flow for a learner.
1. Click the Drop a trigger here to begin or drag and drop a trigger from the list on your left.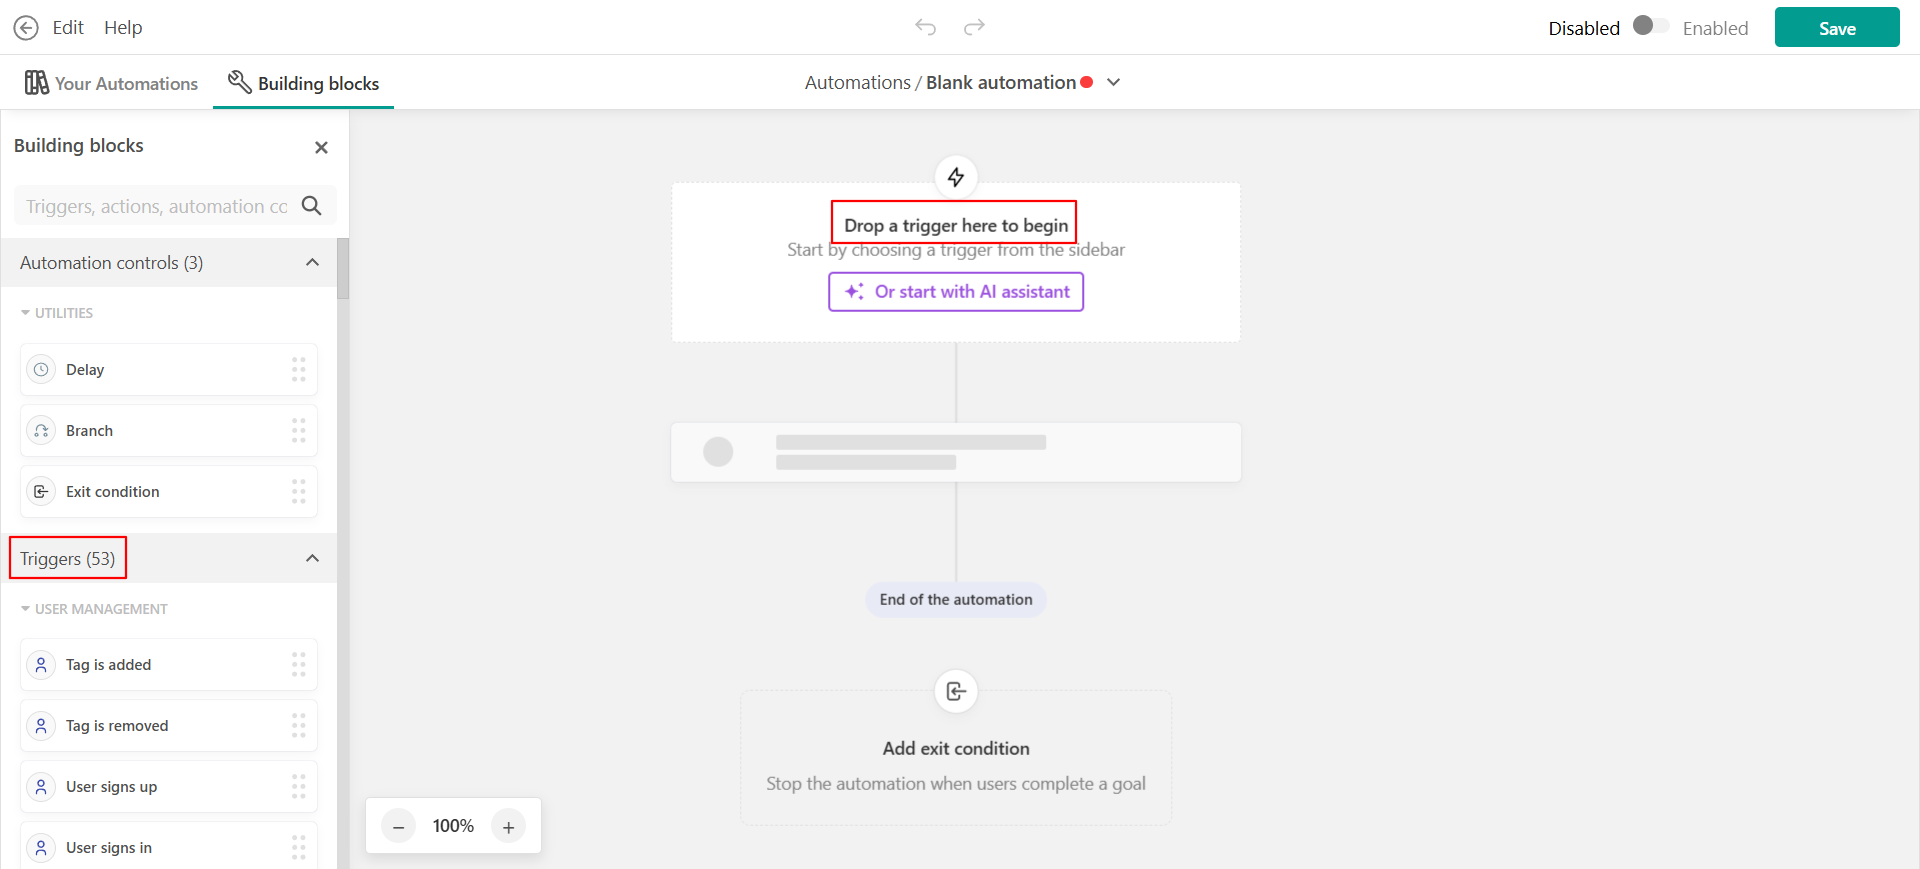
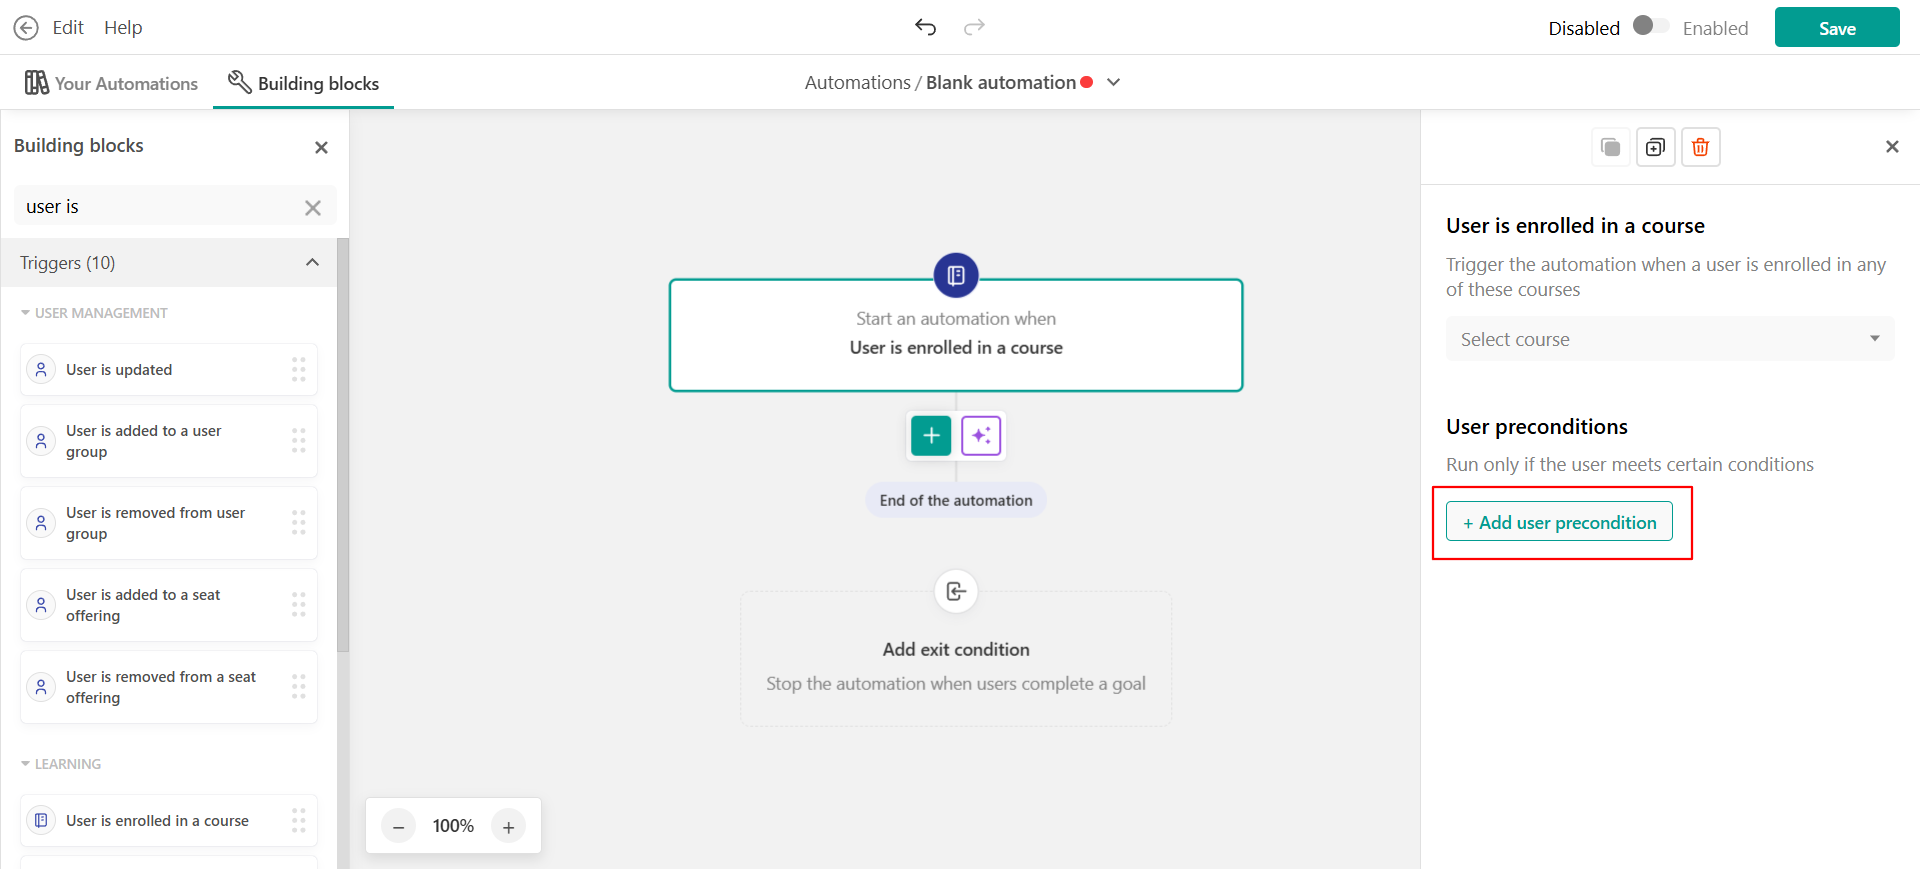
2. Select the event that should start the automation (e.g. "Learner enrolls in course"). If you want you can also,
- Add preconditions to narrow down when the trigger fires (e.g. "only if the learner has tag X"). You can add up to 10 preconditions per trigger.
- Add more triggers if you want multiple events to start the same flow (up to 10). All triggers must connect to the same first step.
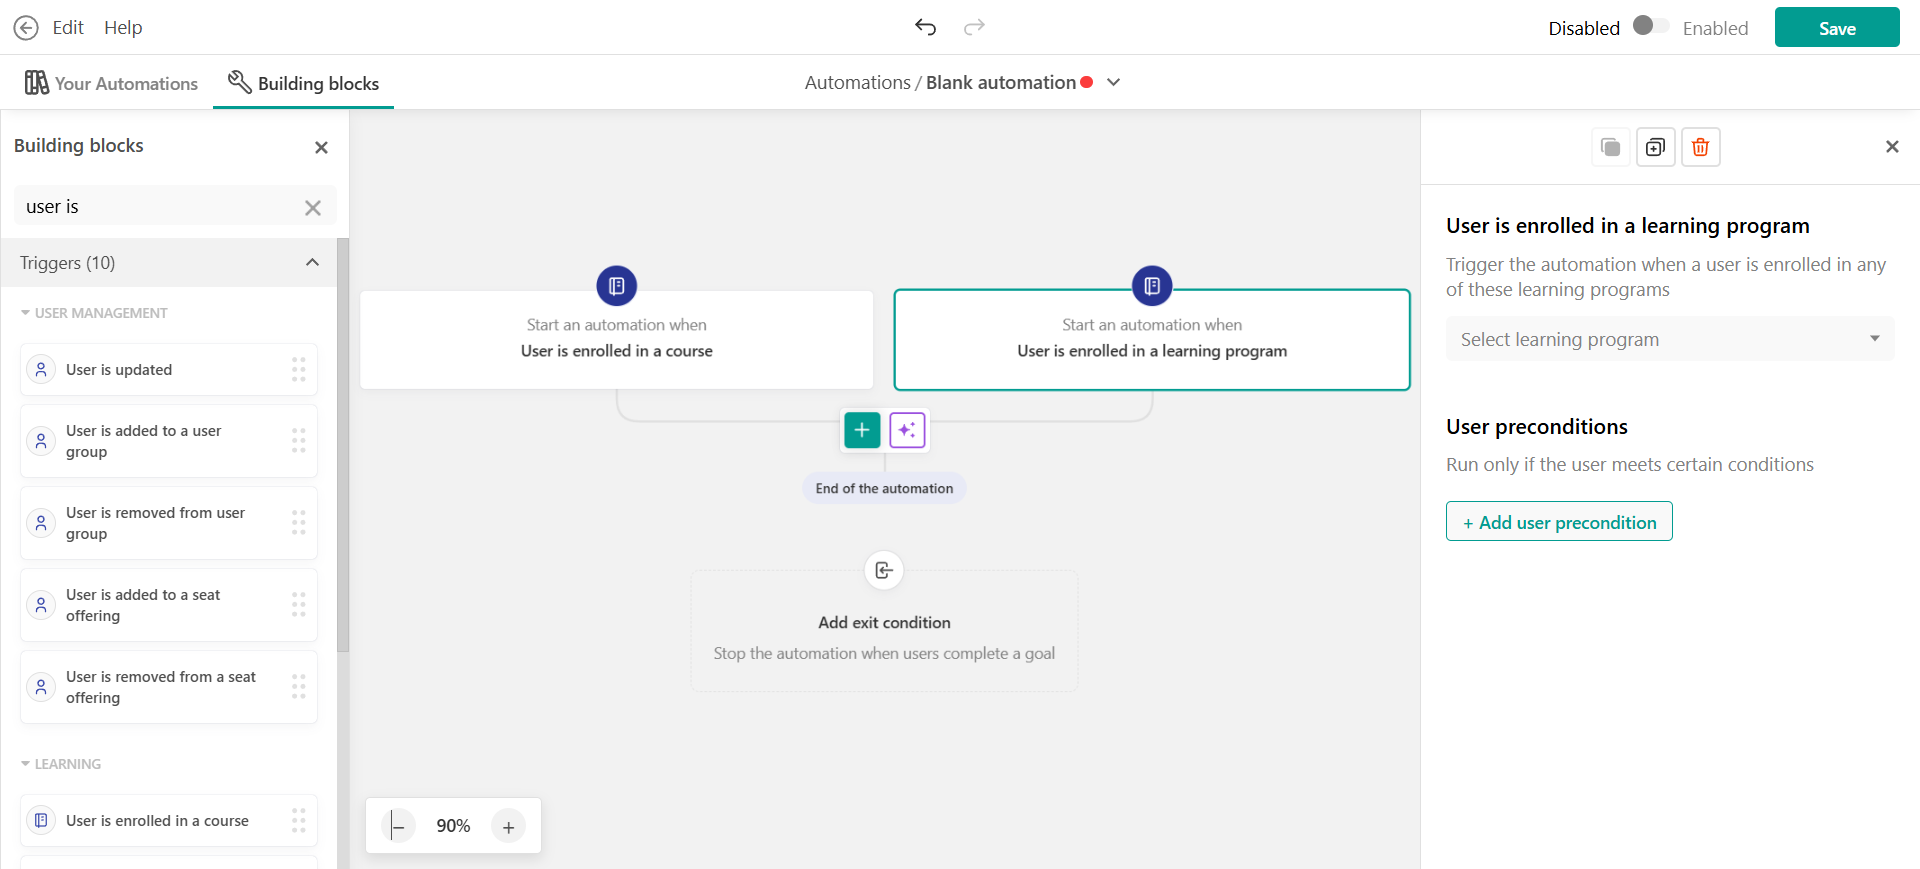
Two triggers with the exact same type and configuration are not allowed. If you need the same event to start the flow under different preconditions, add one trigger and use conditions to differentiate.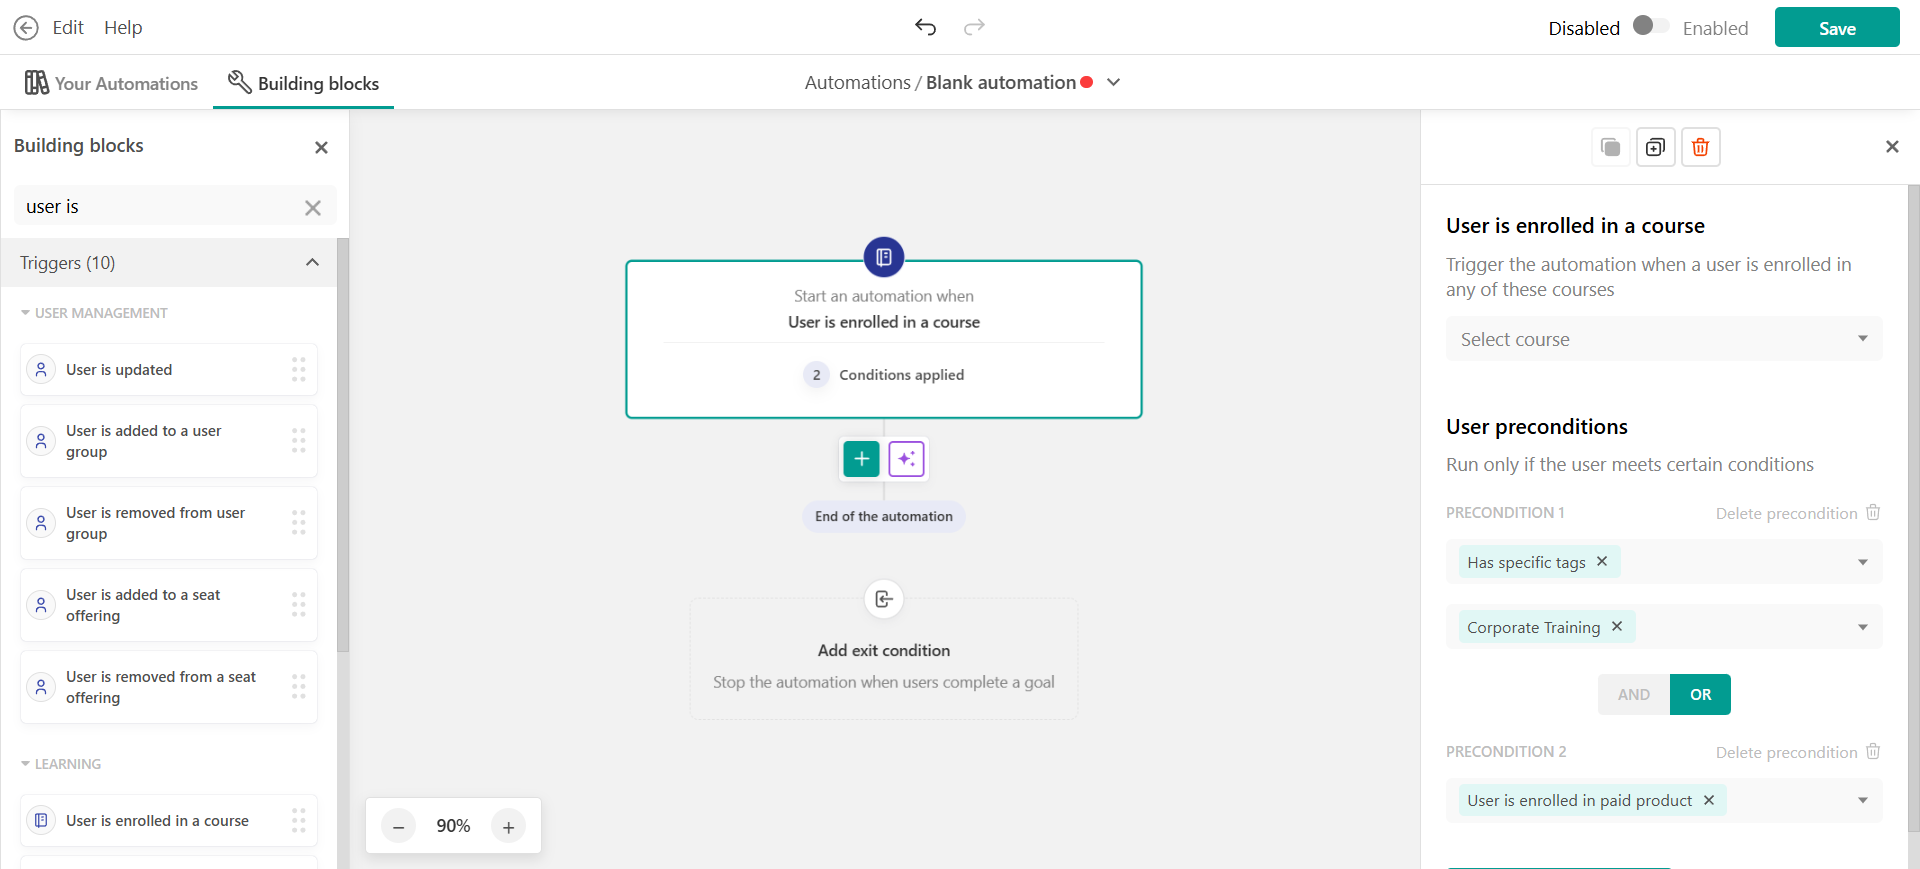

Actions
Then it's time to add your actions.
1. Click the + button below the trigger (or below any existing step).
2. Select the action you want (e.g. Send email, Add tag, Enroll in course).
3. Configure the action in the settings panel on the right.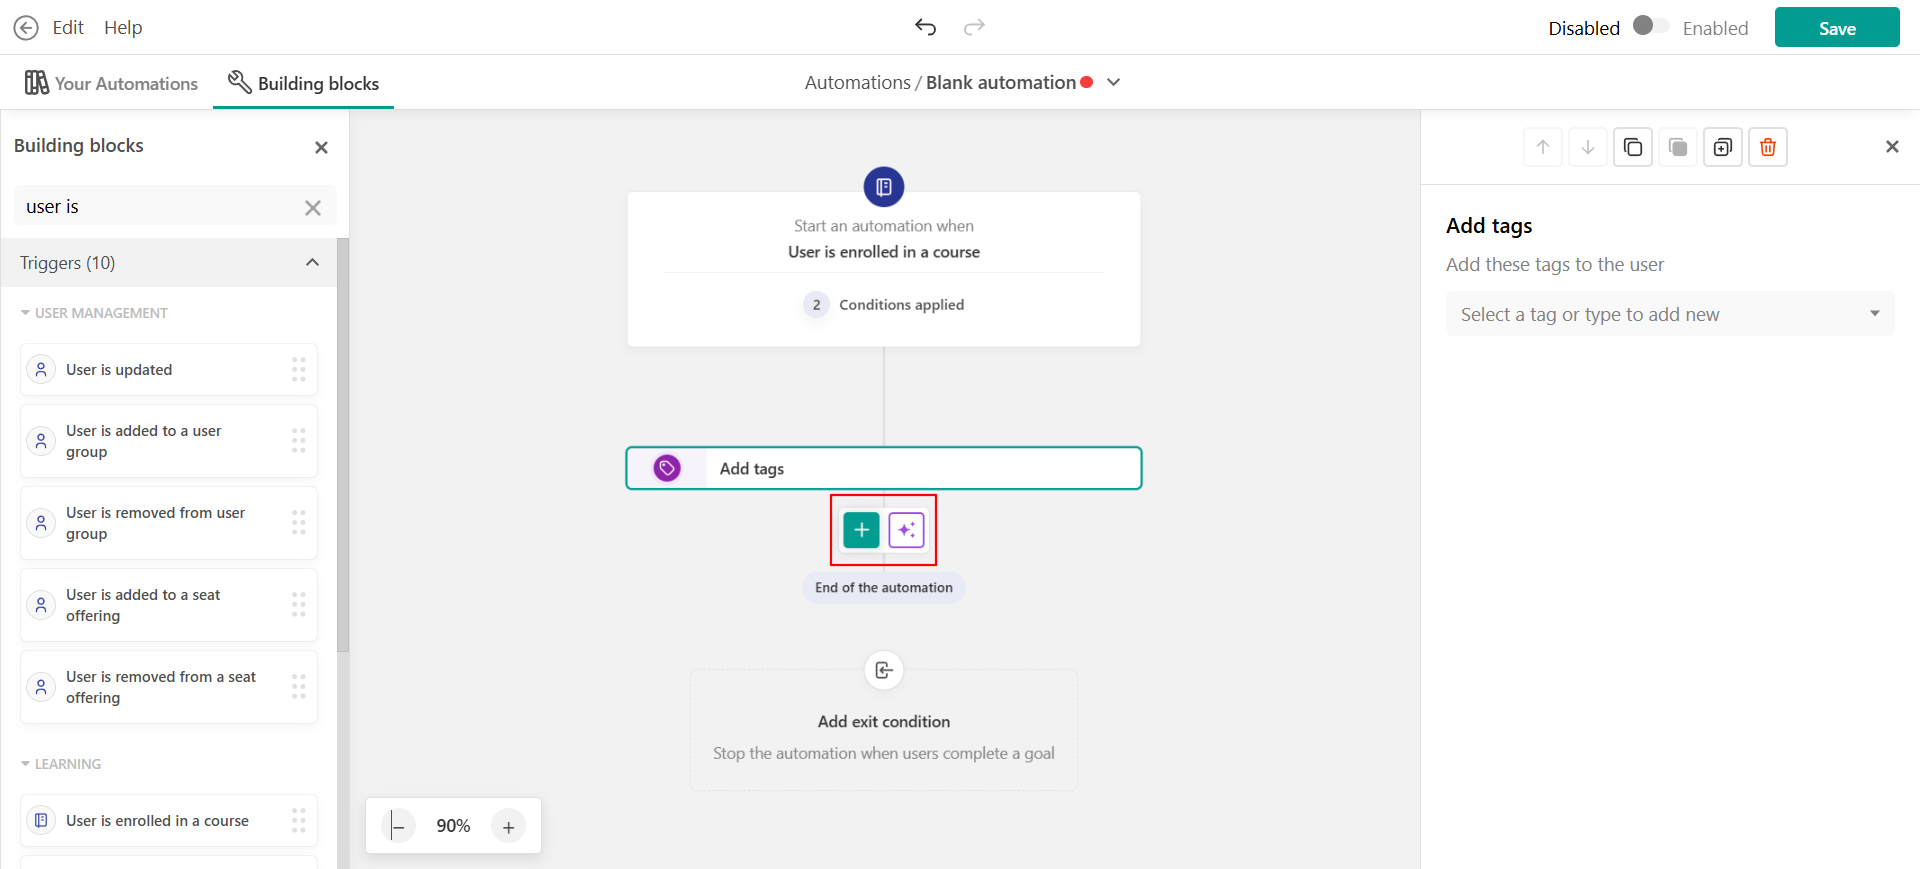
You can add up to 30 action steps per automation.Delays
Wait steps pause the automation for a learner until a specific point in time. Click the + button and select Delay.
There are six types to choose from:
- Wait for a duration, pause for a fixed amount of time (e.g. "wait 3 days"). Minimum: 5 minutes. Maximum: 365 days.
- Wait until a specific date/time, pause until an exact date and time you enter.
- Wait until time of day, pause until a specific time today, or tomorrow if that time has already passed.
- Wait until day of the week, pause until the next occurrence of a specific day and time. If today is that day but the time has passed, it waits until next week.
- Wait for a duration from a user field, read a number from the learner's profile and wait that many minutes, hours, or days.
- Wait until a date from a user field, read a date from the learner's profile and wait until that date.

Once you choose your delay, configure the wait in the settings panel.
For date-based waits ("wait until a specific date/time" and "wait until a date from a user field"), choose what should happen if the date has already passed when the learner reaches this step:
- Continue immediately: Skip the wait and move straight to the next step.
- End the automation: Stop the automation for this learner (marked as completed, not failed).
- Wait until next occurrence (user-field dates only): Ignore the year and wait until the next time that day and month come around. Useful for recurring dates like birthdays.

For "wait until a date from a user field," you can optionally enable "Run before the moment" to trigger the next step a set time before the date (e.g. 3 days before the learner's renewal date). The offset can be set in minutes, hours, days, or weeks.
Set the timezone for the wait step. If you don't select one, it defaults to UTC. The wait fires at the exact time in the timezone you choose, regardless of where the learner is located.
- Two wait steps cannot be placed directly one after another. There must be at least one action step between any two waits.
- Minimum wait duration is 5 minutes and maximum 365 days.
Branches
A branch checks conditions and sends the learner down one of two paths:
- Yes (preconditions met) or
- No (preconditions not met).
1. Click the + button and select Branch.
2. Add one or more conditions (e.g. "Learner is enrolled to a learning program").
3. Choose how preconditions are combined:
- All preconditions must match (AND), the learner takes the Yes path only if every precondition is true. This is the default.
- Any precondition must match (OR)
The learner takes the Yes path if at least one condition is true.
Add steps to the Yes path and the No path as needed. Both paths can contain actions, waits, and even nested branches.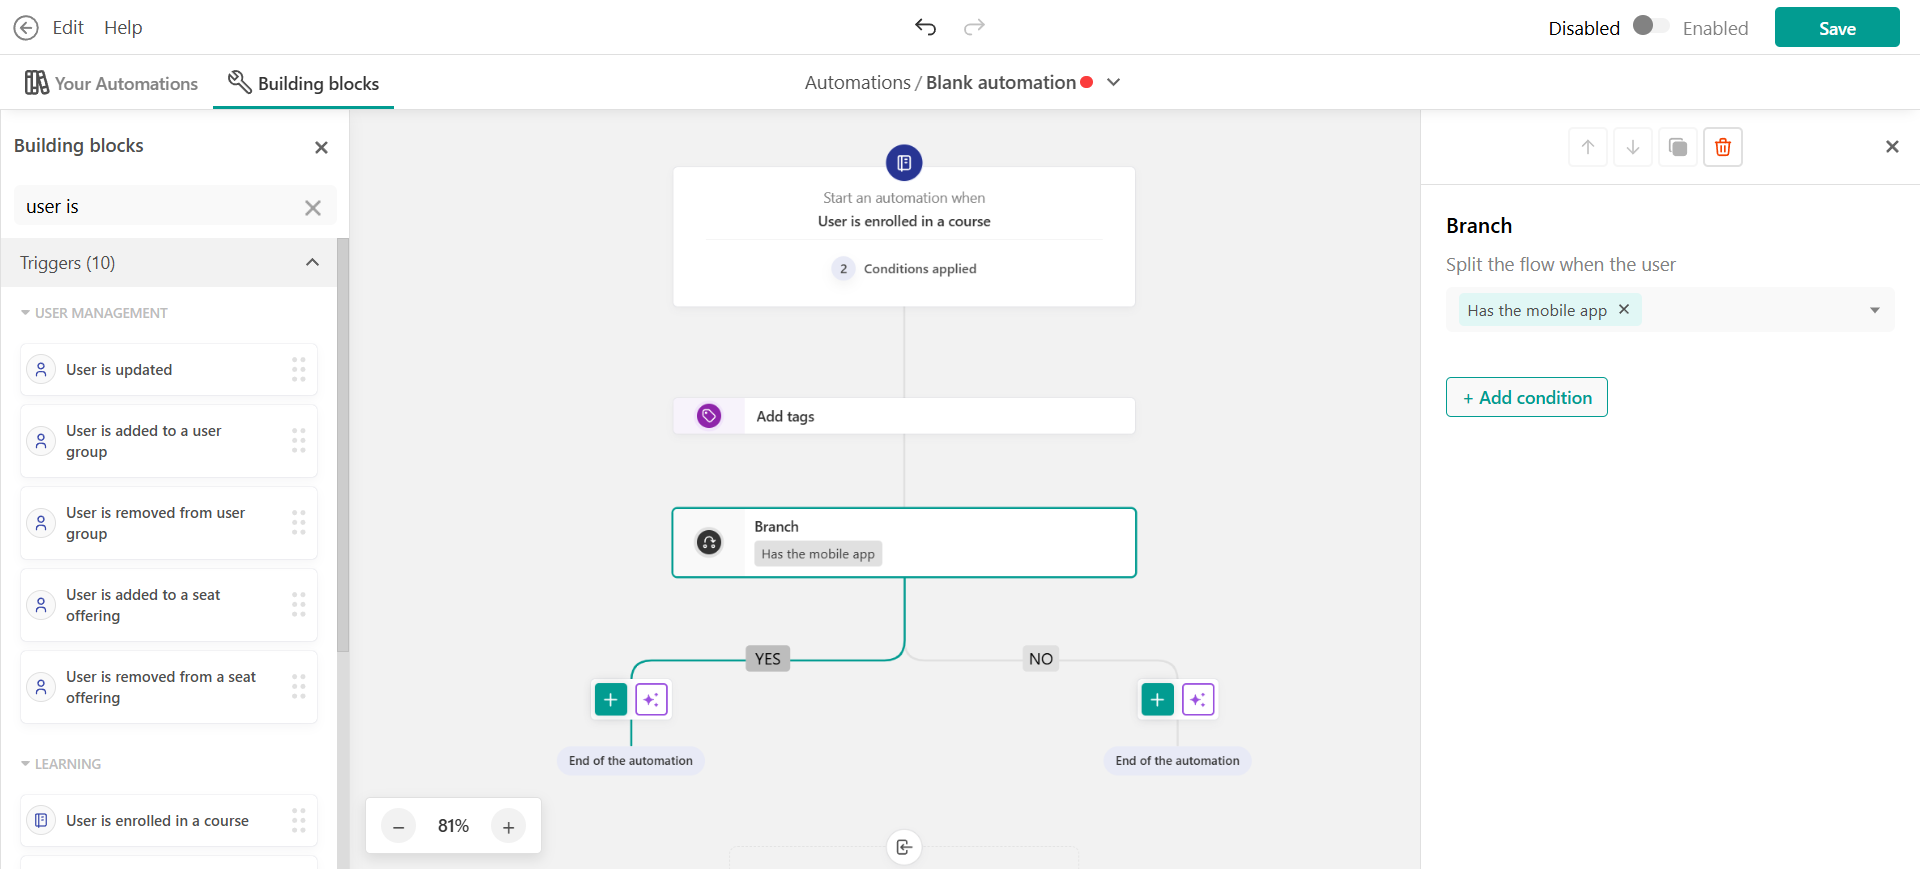
-Branches can only be added at the end of the current flow or branch path, not in the middle. Every branch must have at least one condition. Exit preconditions
Exit preconditions stop the automation for a learner when a specific goal is reached, regardless of where they are in the flow. They run in the background, always watching.
1. Click Add exit condition in the exit conditions panel (outside the main flow).
2. Select the event that should stop the automation (e.g. "Learner completes Course A").
- Add filter conditions to narrow it down (e.g. "only if the learner has tag X"). The same AND/OR logic from branches applies here. You can add up to 10 exit conditions per automation, each with up to 20 filter conditions.
- If you have multiple exit conditions, they work as OR, any one of them firing is enough to exit the learner. The learner's run is marked as Completed via exit condition and any remaining scheduled steps are cancelled.
- Exit conditions cannot be copied or duplicated.
Save and activate
Once your automation is ready, click Save. There is no auto-save, all changes require a manual save. However, saving is not enough for the automation to work, you need to activate it.
To activate the automation, toggle it to Active. The automation will start processing new learners when the trigger fires.
If there are validation errors (e.g. a branch without preconditions, a wait duration outside the allowed range, too many steps), you'll see an error message pointing to the issue. The automation cannot be activated until all errors are resolved.
Automations Page
On the automation page, you can see:
- A search bar to search for your created automations.
- A list of your available automations.
- No. of times the automation was executed.
- The date that the automation was last edited.
- The status of the automation (Active-Inactive).
- The actions of the Automation:
→ Edit
→ Duplicate
→ Export
→ Delete
Edit an active automation
You can edit an active automation at any time. While on the automations tab, locate the one you want to edit and hit the edit button.
Inside the builder, you can edit the automation properties from Edit → Automation properties. There you can edit:
- Automation's name
- Status
- Groups and
- Select whether the automation runs immediately when the trigger occurs, or in the background.
Synchronous : Actions run immediately, blocking the user's journey until all steps complete. Use only when the next step depends on the automation result (e.g. enrolling a user in a course before redirecting them). May cause slower page transitions.
Asynchronous: Actions run in the background without affecting the user's experience. Best for most automations.
Use synchronous only if the automation's outcome is required for the learner's next step, like unlocking a course right after signup. Otherwise, go asynchronous to keep the experience faster.
If you are using delays in your automation, you can't choose the Synchronous option.You can also cler created content, clone or delete the automation. Note that an automation that has never been saved cannot be cloned or deleted. 
Changes take effect for future steps only:
- Learners who are already past a step you changed are not affected.
- Learners who have not yet reached the changed step will see the updated version when they get there.
- Preconditions in branches are always checked at the moment the learner arrives at the branch -- not when the automation was built or when the learner entered the flow.
In other words, the automation does not "look ahead." Each step's configuration is read only when the learner reaches it.
Synchronous automation
With the Synchronous automation option, you can choose whether the automation will be executed when the event occurs. Use synchronous execution only when the automation needs to affect what the user sees or experiences right away, during their current visit.
For instance, consider an automation that adds tags to users based on their responses on the signup form. Based on that tag, you send them to a different page after login. In this scenario, you need to run the automation synchronously. This ensures that when the user chooses their option, they receive the tag and are directed to the correct after-login page. If you don't run it synchronously, there will be a delay before the tag is added, and the user won't see the correct page on the first try.
However, if your scenario involves enrolling a user in a course based on their signup option, you don't have to run it synchronously. The automation will be completed once the user visits the page after login. Asynchronous automations only take a few extra seconds to complete.
Deactivate an automation
If you want to deactivate an automation, click the edit button and inside the builder, toggle to Disable automation.
If learners are currently in progress, a confirmation message appears: "X learners are currently in progress. They will complete their remaining steps, but no new learners will be enrolled." Confirm to proceed. Learners already inside the flow will finish their path. Only new learners are blocked from entering.Delete an automation
If you want to remove an automation completely, click the delete option for the automation.
If learners are currently in progress, you'll be asked to choose:
- Allow learners to complete it: The automation enters a Finishing state. No new learners enter, but everyone already inside continues to completion. The automation is fully removed once the last learner finishes. While in this state, the builder is read-only.
- Remove learners and delete immediately: All learners are removed from the automation and their pending steps are cancelled. The automation is deleted right away.
Confirm with the "cannot be undone" checkbox.
Treat as a regular expression
When creating an automation, you can include conditions to make the automation more specific. If you choose the "user email is" option, you will see an additional option, Treat as regular expression. By enabling this setting, you can use regular expressions to specify the conditions further.
For example, if you want to include all users that have email addresses like kate@gmail.com, kathreine@gmail.com, or katerina@gmail.com, you can activate that setting and add that regex ^(kate|kathreine|katerina)@gmail\.com$
This regular expression will match email addresses that start with "kate", "kathreine", or "katerina", followed by "@gmail.com"
Learner run statuses
Every time the automation runs for a learner, a record is created with a status you can see in the activity view:
| Status | What it means |
Pending | The learner is in the flow -- could be mid-wait or between steps. |
| Executing | A step is actively running right now (usually brief). |
| Fulfilled | All steps completed successfully. |
| Completed via exit condition | The run ended early because an exit condition was met. This is a successful outcome. |
| Failed | Something went wrong. An error message is attached to the record. |
Pending, Fulfilled, and Failed runs can be replayed from the activity view. You can check the status from the automation page → My automations → Times executed.
Best practices
- Start simple. Build a basic flow first (trigger > action), test it, then layer in waits and branches once you're confident the basics work.
- Use exit preconditions for goal-based automations. If the purpose of the automation is to get the learner to do something (complete a course, enroll in a program), add an exit condition so the automation stops the moment they do it. This avoids sending irrelevant follow-ups.
- Space out your emails. Use wait steps to avoid sending multiple emails in quick succession. A 2-3 day gap between messages is a good starting point for most sequences.
- Double-check your timezones. Wait steps that involve a specific time of day use the timezone you set in the step configuration. If you don't select one, it defaults to UTC -- which may not match your learners' expectations.
- Make sure user fields are populated before using them in waits. If a wait step reads a date or number from a learner's profile and the field is empty or invalid, the learner's run will fail at that step. Verify that the fields you reference are reliably filled in.
- Test with a small group first. Activate the automation and monitor the first few learners in the activity view before rolling it out to your full audience.
- Use the activity view to troubleshoot. Every learner's run has a status and a history. If something looks wrong, check the learner's run record -- it shows which steps ran, which exit condition fired (if any), and any error messages.
FAQs
- I turned off my automation, but learners are still getting emails.
That's expected. Deactivating an automation stops new learners from entering, but anyone already inside continues through their remaining steps until their path ends. This is by design -- it prevents learners from being abruptly cut off mid-flow.
- A learner "skipped" a wait step and jumped straight to the next action.
Check the wait step's "if the date has passed" setting. If it's set to Continue immediately and the target date was already in the past when the learner reached the step, the wait is skipped. This is the intended behavior for that setting.
- A learner's run shows "Failed" at a wait step.
This typically means the wait step reads a value from a user field and one of the following happened:
- The field was empty or missing.
- The field contained an invalid value (e.g. text instead of a number, or an unparseable date).
- The resolved date was more than 12 months in the future (exceeding the 365-day maximum).
Check the learner's profile to see what value was in the field at the time.
-A learner's run shows "Completed via exit condition" but they didn't finish the whole flow.
That's by design. An exit condition fired for this learner, meaning they achieved the goal you set (e.g. completed a course, enrolled in a program). The automation stopped early because the goal was reached. This is a successful outcome, not a failure.
- I have two triggers that could both match the same event. Which one fires?
The system evaluates triggers in order. The first one whose conditions are satisfied becomes the firing trigger for that run. The remaining triggers are not checked.
- Can a learner go through the same automation twice?
Yes, but not within 60 seconds of each other. The system has a built-in protection that silently skips a duplicate run if the same automation already started for the same learner within the last 60 seconds. This prevents accidental double-runs from triggers that fire in quick succession.
- I deleted a wait step that had learners inside it. What happened to them?
When you delete a wait step with learners waiting in it, a confirmation dialog asks you to confirm that all waiting learners will be advanced to the next step immediately. If you confirmed, they were moved forward. If the operation failed, the deletion was aborted and the step stayed in place.
- Can I advance learners stuck in a wait step without deleting it?
Yes. In the automation builder, when learners are waiting in a delay step you will see an icon next to it. When you hover on it you have the option to can advance immediately all learners waiting in this step to the next step. The wait step itself stays in place and continues to work normally for future learners.
- What does "Finishing" mean?
Finishing is a transitional state that appears when you delete an automation but choose to let current learners complete their path. No new learners enter, but everyone already inside finishes their remaining steps. The automation is fully removed once the last learner completes. While in this state, the builder is read-only.
- What's the difference between "Failed" and "Failed silently"?
Failed means something went wrong and the error is visible on the learner's run record -- you can investigate the cause and potentially replay the run. Failed silently is a low-severity background failure that typically doesn't require any action from you.