 Our Knowledge Base Center articles are being updated for our new platform design. Need assistance? Reach out to support@learnworlds.com
MailChimp is a complete email marketing solution that allows users to complete transparency of campaigns, email tracking, view success and click-through rates, generate custom reports, manage subscribers, and un-subscribers. Integrating LearnWorlds with MailChimp following a few easy steps allows you to easily create lists for your school's students and target them with your email campaigns.
Set up your Mailchimp Account
1. Login to your MailChimp account, or sign up, if you are new to MailChimp.
Learnworlds lets you sync to MailChimp, two distinct LearnWorlds groups: registered Users and Leads. For that reason, it allows you to sync them to different MailChimp audiences.
Note: Mailchimp Free plan allows you to create only one Audience, so you can create one list. You can find out more about Mailchimp Pricing plans here.
If you wish to further personalize your email campaigns with Users’ / Leads’ dynamic content, you can go ahead and add audience fields to your audiences. You can find out more below:
A. User Custom Fields: Υou can sync with Mailchimp the following rich user information stored in LearnWorlds:
- General custom fields are populated as a result of the user’s activity.
- Custom sign-up fields are collected upon the user’s registration.
- UTM parameters.

B. Leads Custom Fields: LearnWorlds allows syncing the information set for each lead with Mailchimp. This information is a mix of activity and systemic fields, populated as a result of the lead’s activity while subscribing from within email grabbers and UTM fields.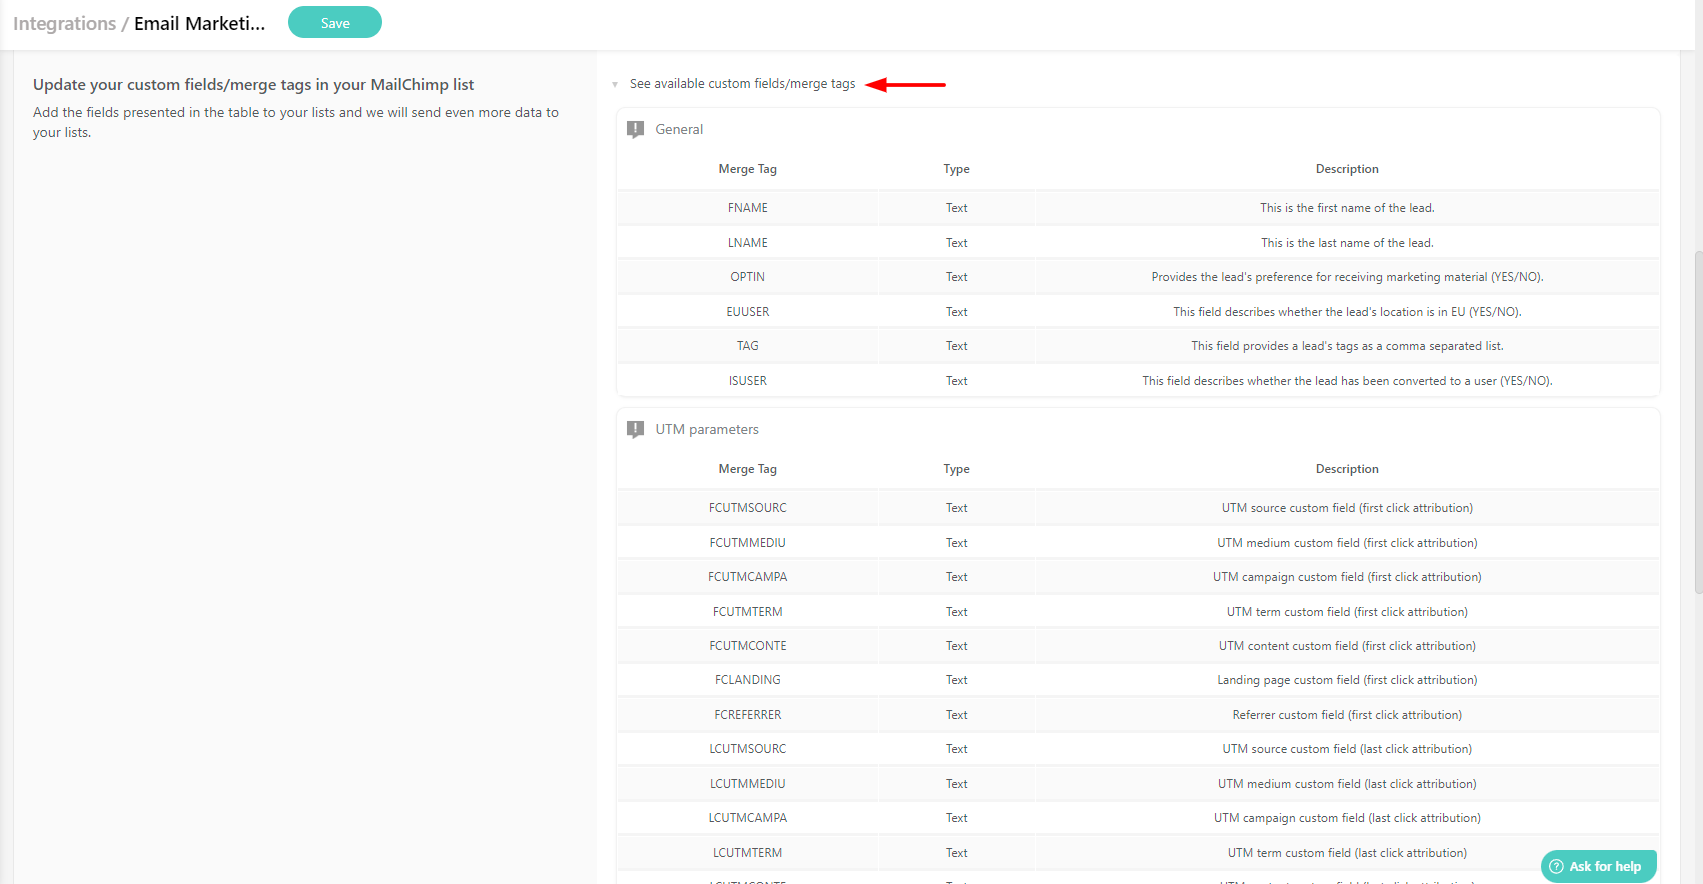
Notes:
- To sync any of these fields, you must first create the audience fields in the audience you have selected for your users and leads in MailChimp.
- The fields in MailChimp should be in text format, and they should NOT be set to required.
- New custom fields/Merge tags will appear after creating Custom Sign up fields and tags created from a Newsletter section (email grabber section).
Connect your Mailchimp Account
1. Click on Settings → Integrations → Email integrations.
2. Click on the MailChimp tab and check the Activate box.
3. Click on Connect to MailChimp:
4. You will be redirected to a new page where you should insert your Mailchimp account credentials.

Select your MailChimp lists
You can select the Mailchimp lists created for your users and leads captured on your pages (through email grabbers sections).

Sync your contacts with Mailchimp
As soon as you have selected your lists, all you need to do is click on Sync your contacts with Mailchimp. Use the Sync your contacts to MailChimp button every time you select a new Audience to sync your school’s Users and/or Leads with.

Use the Update Lists button every time you need to make available the latest Audience changes in LearnWorlds.

Note: Your users and the changes in their data are synchronized automatically in real-time. However, if you add tags after a mass import of users to your online school, the user tags will not be synced with your MailChimp accounts.
Auto-tagging
When a user (or you, on behalf of the user) performs an action in LearnWorlds, the latter will automatically apply an action-specific tag to that user in MailChimp.
Auto-tagging is available for the following actions:
- User enrolls to a product: A product can be any course (paid, free, or with a payment plan), bundle, or subscription. The action will also be triggered by manual enrollments.
- User previews a free section of a paid course.
- User is awarded a certificate.
- User completes a course.
- User is a paying customer: The lw-paying-customer tag is applied to any user who has purchased at least one course.
- When a tag is added to the user

Note: Each and every user synced from your Learnworlds school will bear the Subscribed badge on their contact. If you have enabled the GDPR Toolkit, note that this does not mean that the user has opted-in to receive communication from you. To filter your contacts based on whether they opted-in for communication, you will need to sync the OPTIN merge tag (the OPTIN merge tag should be added to the created audience) and then contact the users who chose YES.


Glossary
According to MailChimp's glossary:
Audience: a collection of contacts, along with their profile details, preferences, and other data.
Audience field: a place where specific contact details are stored, like a cell in a spreadsheet.
Merge tag: a merge tag is a unique, text-based identifier corresponding to the data in an audience field.
Dynamic content: the personalized or otherwise unique content that's inserted into a campaign by a merge tag.
You can integrate with more than one email marketing platform if you have different forms and campaigns on each one of them!